
Control Resonant Trophy Roadmap
- Estimated trophy difficulty: 4/10 (without Assist Mode), 3/10 (with Assist Mode = Godmode)
- Approximate amount of time to platinum: 40-50 hours (without Assist Mode), 30-40 hours (with Assist Mode)
- Offline Trophies: 50 (1
 , 1
, 1 , 16
, 16 , 32
, 32 )
) - Online Trophies: 0
- Number of missable trophies: 1 semi-missable Be What You Want to Be (game keeps permanent save after each main quest so you can still get it via save reload)
- Glitched trophies: 0
- Does difficulty affect trophies?: No, can do everything with Assist Mode enabled (godmode, 1-hit kills, infinite health etc)
- Hardest Trophy: Graffiti Artist (defeating all Resonants and finishing story)
- Minimum Playthroughs: 1
- PS4/PS5 Autopop, Save Transfer, Crossbuy: No, game doesn’t have a PS4 version
- Free-Roam / Level Select after Story?: Yes on both, there is free-roam after the story, can clean up everything after. The game also keeps a permanent save after each main quest which acts as a sort of “mission select”.
- New Game+ Mode?: Yes, but not needed for trophies
- Supports Manual Saves?: No, only Autosaves, but there are 5 “profile save slots” and you can duplicate your profile save in the title screen which works like a manual backup save. The game automatically keeps a permanent save after every main quest.
- Release Date: September 22, 2026 (Deluxe Edition) / September 24, 2026 (Standard Edition)
 , 1
, 1 , 16
, 16Introduction
Welcome to the Control: Resonant Trophy Guide! This is Remedy’s second instalment in the Control franchise, and this time the narrative spotlight shifts to Dylan, Jesse’s brother from the first game, who takes over as protagonist in a story set against the backdrop of a paranormal Manhattan. The game introduces a fresh set of traversal abilities alongside a formidable new arsenal of weapons, representing a substantial leap forward from the combat system of the original. To reach Platinum, you’ll need to complete the story, take down every Resonant Boss, work through a fair number of collectible-related side quests, and unlock a range of combat-related trophies. Nothing is missable, and everything can be mopped up at your own pace – either during your playthrough or in free-roam after the story.
Step 1: Play through the Story [20-30 Hours]
Focus on finishing the main story, this will gain you access to all regions and traversal abilities, which will allow you to reach all collectibles and side quests. Feel free to work on any side content along the way, or clean it up after the story.
Some quests can be tricky or lack objective markers, if you get stuck refer to the Control Resonant Walkthrough.
The story has 3 main questlines:
- Contain the Crisis – this is the primary “story”. To advance these quests you will often have to do the Jesse quests and defeat Resonants.
- Search for Jesse – these quests unlock new traversal abilities (walking up walls, using grappling points), which is mandatory to advance other main quests.
- Defeating Resonants – these are the main bosses, one per Zone (except Evacuation Zone). Each gives a trophy and some of them are required to advance the story. You will need to defeat all of them to repair the Mural in the Gap.
Things to look out for:
- Be What You Want to Be – this is semi-missable, has to be done during Side Quest: The Party Won’t Stop (starts in West Incursion Zone). During this quest you will sing karaoke and have to pick the correct choices to save everyone. If you’ve missed this, the game keeps a permanent save after each main quest so you can simply reload the nearest save and redo it.
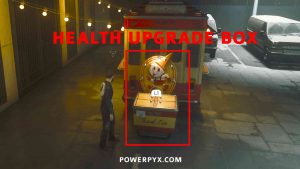
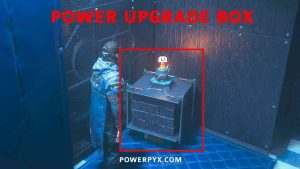
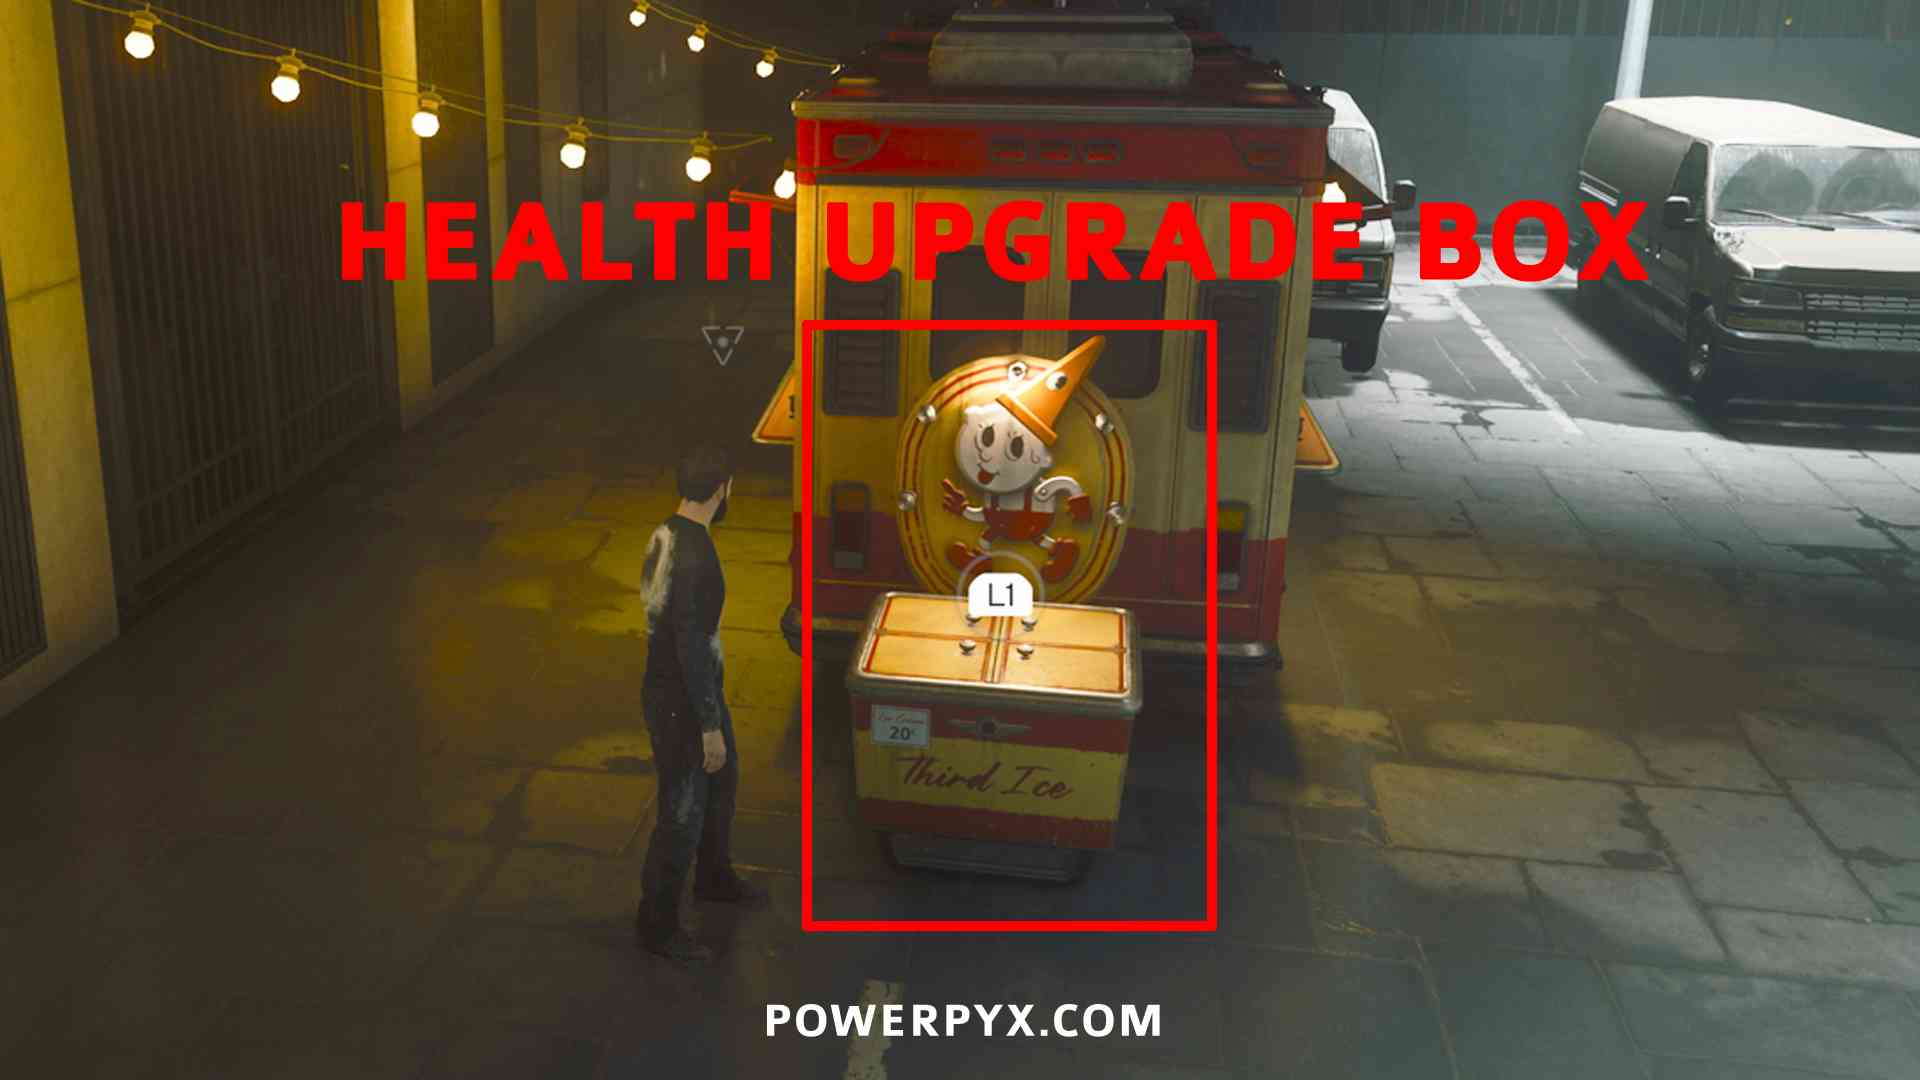
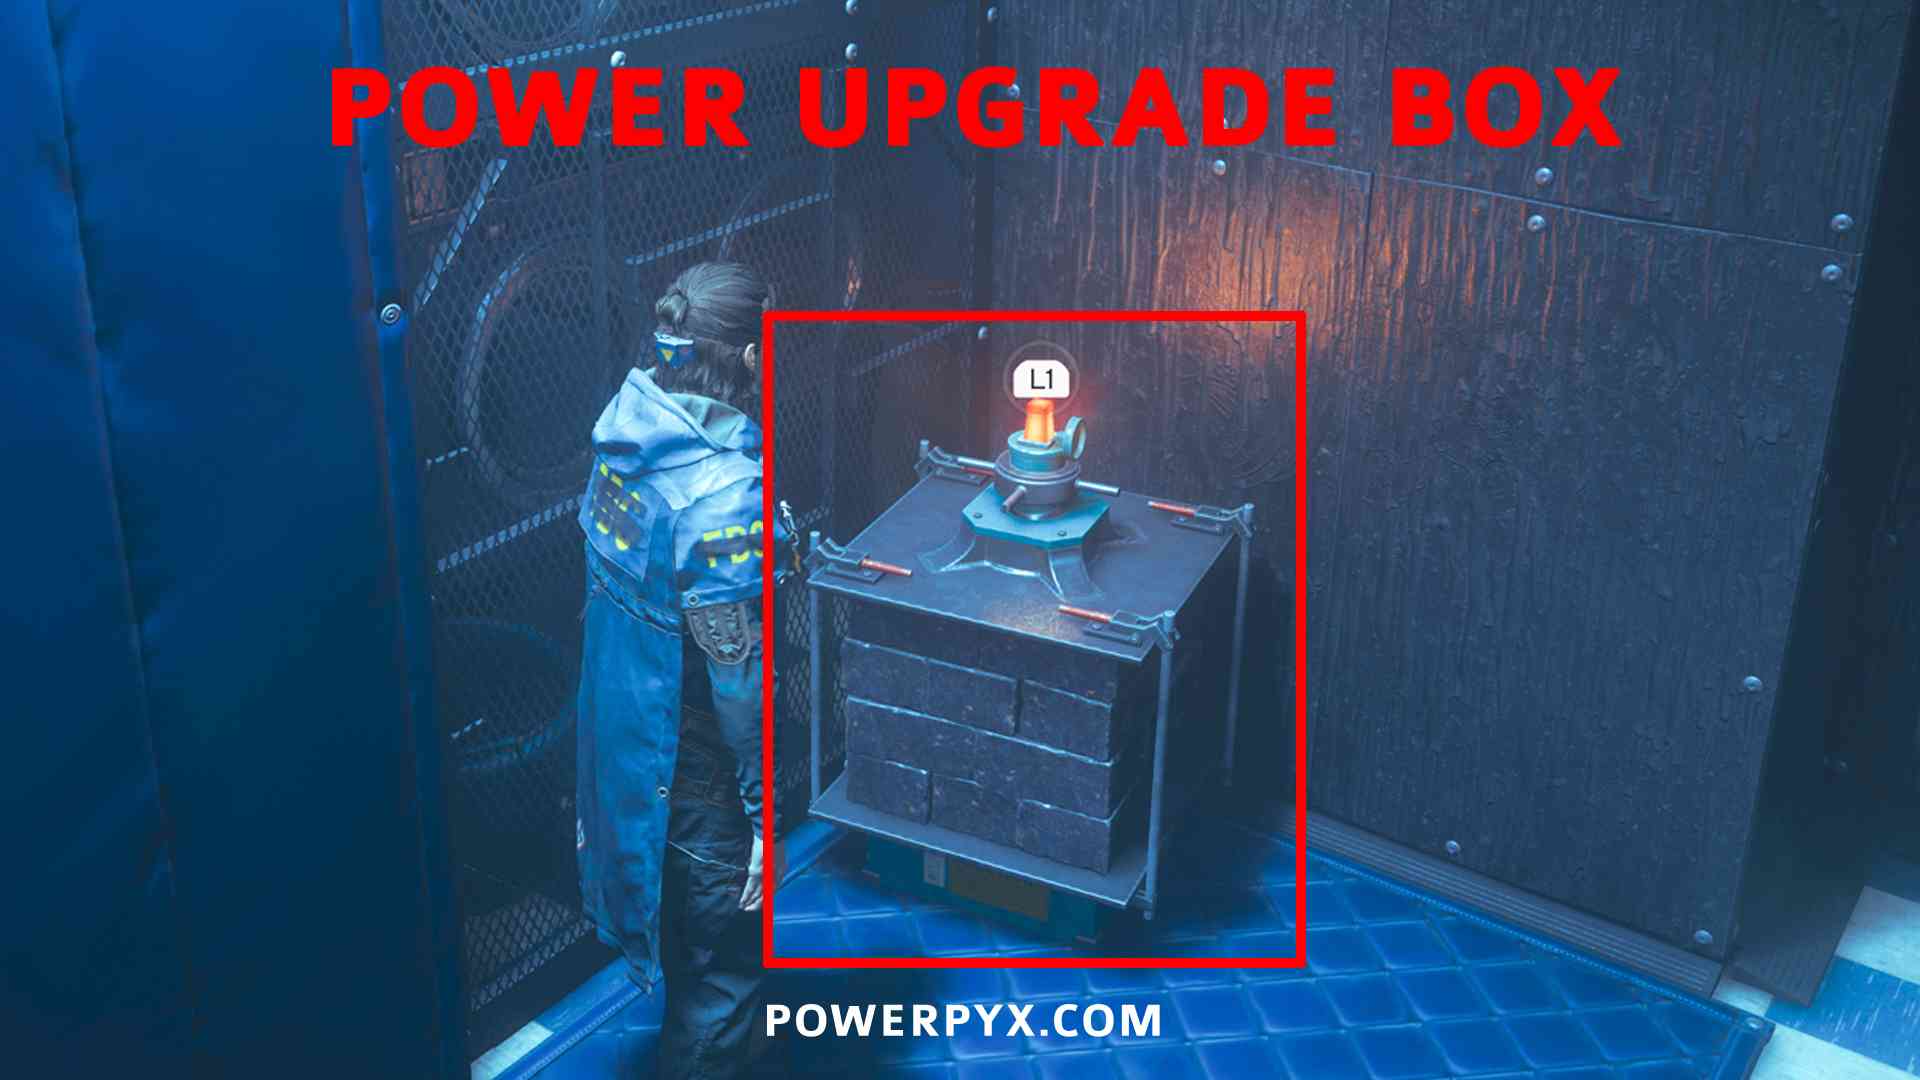
- Open all Chests/Containers you find. They give materials. Especially for Personal Development you need 12 Health Upgrades, and for Astral you need 12 Power Upgrades. There are more than needed, if you just grab what’s on the main path during quests you will get enough and don’t have to clean it up later. The Health Upgrades look like a “Clown Box” and the Power Upgrades look like a “Metal Box”.
Gameplay Tips:
- Assist Mode: after starting the playthrough you can go to Settings > Options > Assist Mode and enable Immortality, One-Hit Kills etc. This trivializes the combat and is only recommended if you struggle playing the game normally. It’s a godmode cheat and doesn’t disable any trophies. Because you kill all enemies in 1 hit it would speed up the platinum, comes down to personal preference if you want to use this or not.
- Enable “Automatic Rush” in Gameplay Options, this makes you sprint automatically when pressing
 once instead of holding it. This makes traversal more enjoyable.
 - For Starting Weapon the “Glaive” is recommended, you’ll often deal with groups of enemies and it can hit multiple in one swing. For Secondary Weapon the “Crush” deals lots of damage against stronger enemies.
- The “Gap” is the hub area where you level up, you can hold
 to enter and exit the Gap whenever you want to change weapons/active abilities or buy new talents and artifacts.
Step 2: Side Quests, Collectibles, FBC Tasks, Cleanup [20 Hours]
This step is about mopping up whatever side content you skipped during the story. Completing Side Quests in particular is essential, since it unlocks new Artifacts and makes them available for purchase. You don’t need the documents/audio recordings that are listed under Archive menu > Collectibles (except Dylan’s Drawings). It’s most efficient to collect everything region by region to reduce the amount of backtracking – refer to Control Resonant Collectible Guide. Then clean up any side quests afterward.
Trophy-related Side Quests:
- 8 Pope’s Research Balloons: Side Quest – Pope’s Research ( Budding Analyst)
- 8 Dogs: Side Quest – Every Dog Has Her Day ( Dog’s Best Friend)
- 13 Thresholds (6 Testing Facilities & 7 Taxis): 3 Side Quests – Unsupervised Science, The Last Taxi, Crossing the Threshold ( Threshold Researcher)
- Major Mold Incidents: 4 Side Quests – New Growth, Carbon Copy Part I, Carbon Copy Part II, Carbon Copy Part III ( Budding Mycologist)
- Altered Items: 6 Side Quests – Freeze Frame, The Party Won’t Stop, The Complete Set, A New Directive, Into The Valley Of Death, Panopticon Service Request (together these unlock Panopticon Intern)
Six of these – Pope’s Research, Every Dog Has Her Day, Unsupervised Science, The Last Taxi, Freeze Frame, The Complete Set – require you to track down collectibles scattered across Manhattan.
Pope’s Research: interact with the 8 balloons in The Unknown zone and they’ll drop antennas. Place the antennas in the red circles near the balloon in correct order. This creates Gravity Wells that let you travel between the islands in The Unknown zone.
Every Dog Has Her Day: find all 8 dogs, one per zone, and return the blue plush dragon toy always lying near it. Once you’ve found 7 dogs, the last one is waiting in the Gap.
Unsupervised Science: locate all 6 Testing Facilities and complete the experiments inside. These sit underground – usually in the sewers – and are marked on the map, though their entrances tend to be near construction sites or wherever the map say “Testing Facility Reade.”
The Last Taxi: locate all 7 Taxis, enter them to be taken to another area. Then interact with the correct taxis to return to Manhattan.
Freeze Frame: find 14 Freeze Frame cameras. You must get behind each camera without it seeing you. If it spots you, walk away until you hear a clicking noise to make it respawn. Once you’ve interacted with a camera from behind, pick up the photo it drops – it points you to the Zone and location of the next one.
The Complete Set: contain 4 rogue speakers and 1 subwoofer. These are marked on the map.
Dylan’s Drawings and Secret Hideouts:
- 11 Dylan’s Sketchbooks ( Work-Life Balance)
- 6 Secret Hideouts ( Backroom Espionage)
Both get marked on the map with a “?” icon but only when you get close enough. Secret Hideouts go a step further – each is a self-contained puzzle that, once solved, unlocks an underground room with a power or health upgrade waiting inside.
FBC Tasks:
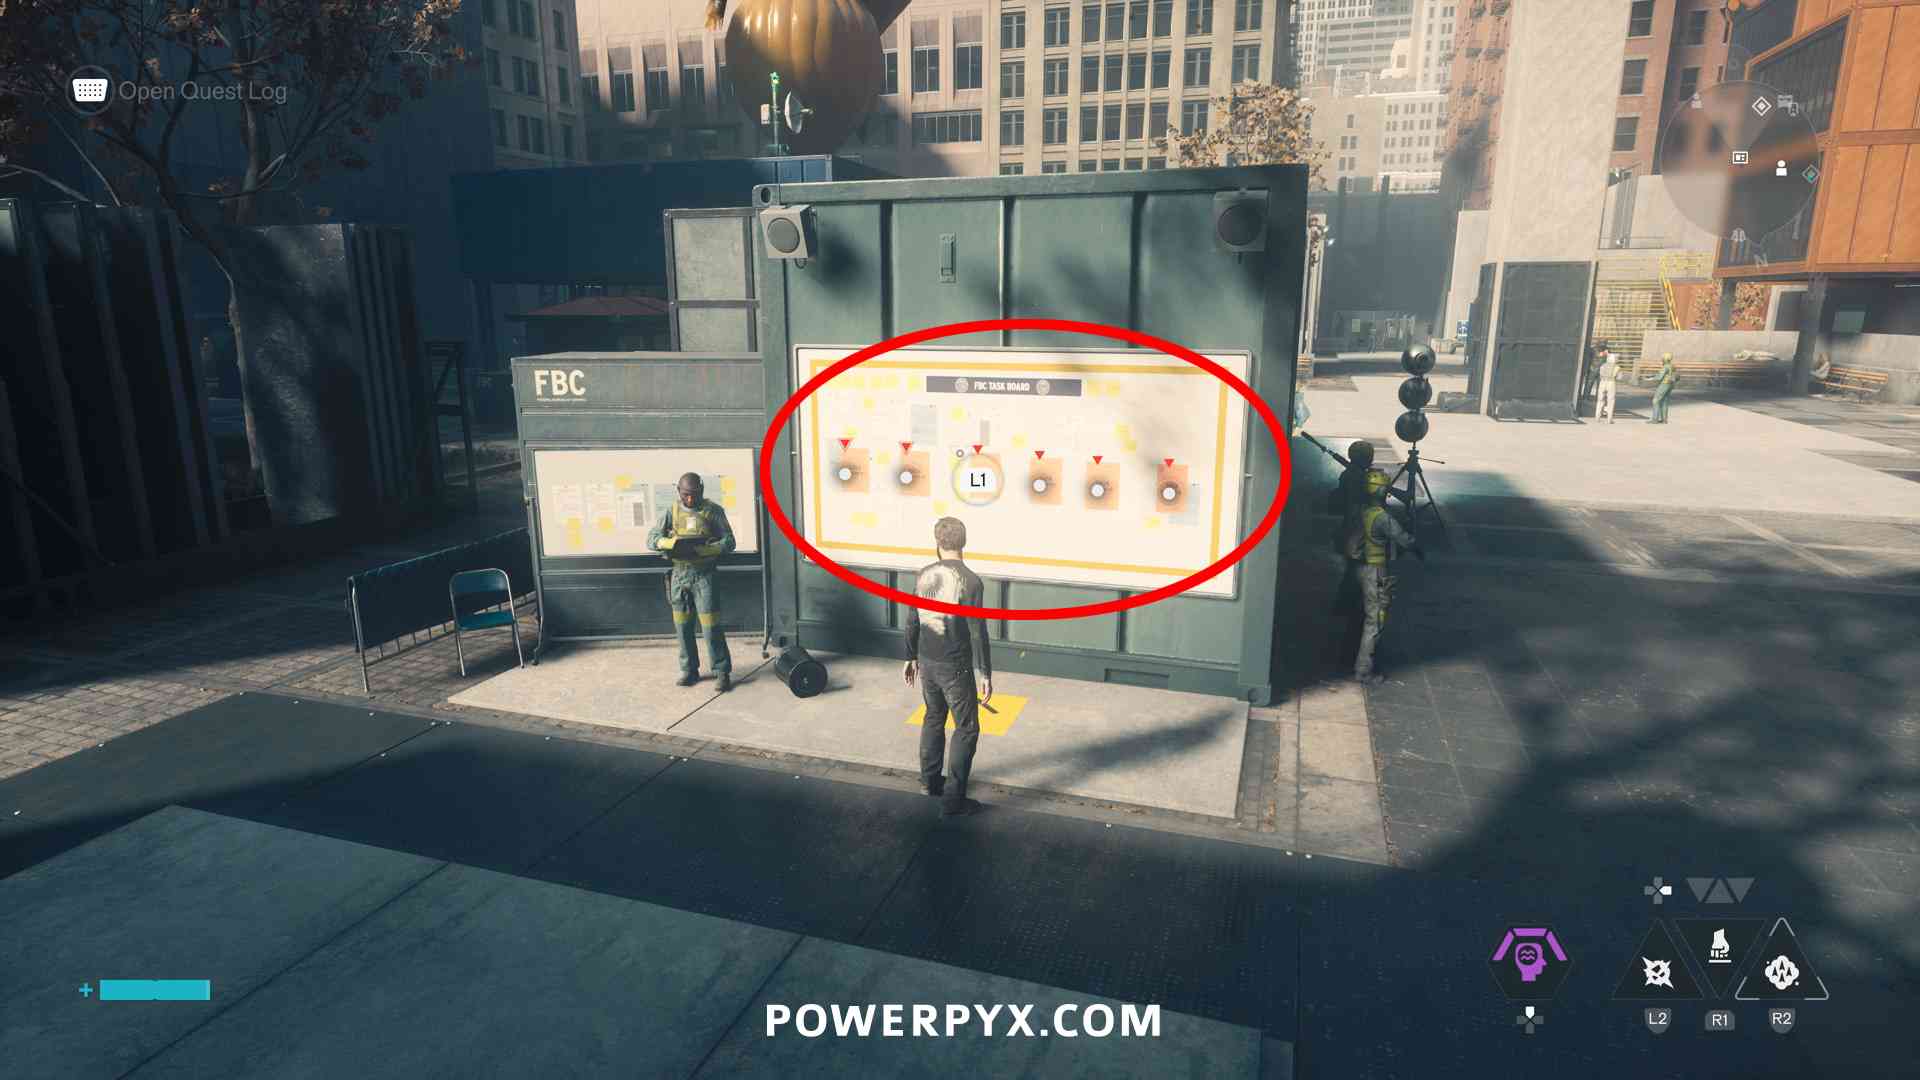
Next, clear out any remaining FBC Tasks – short, self-contained jobs picked up from noticeboards in each FBC safe zone. See FBC Task Locations.
Combat Trophies – Intense Precision and Psychic Domination:
Two combat trophies you may not have picked up by the end of the story are  Intense Precision and Psychic Domination. Complete these now if you don’t have them yet.
Artifacts and Aberrant Strength:
By the time you’ve worked through all of the above, you should have more than enough materials to craft your remaining Artifacts up to 30, and to reach Aberrant Strength 100 – which comes from acquiring new Primary and Secondary Weapon Forms skills.
Useful Tips, Tricks and Guides:
- Control Resonant Walkthrough – All Quests
- Control Resonant Collectible Guide
- Fast Travel Door Locations
- Freeze Frame Camera Locations
- Pope’s Research Locations
- FBC Taskboard Locations (All FBC Tasks)
- Dylan’s Sketchbook Locations
- Dog Locations
- Secret Hideout Locations
- Testing Facility Locations
- Taxi Locations
Control Resonant Trophy Guide
 |
Interdimensional Protector Earn all other trophies. |
 |
| Earn all other trophies in Control Resonant to unlock Platinum (no DLC required). | ||
 |
Graffiti Artist Complete the Mural in the Gap. |
 |
For this you must defeat all 6 Resonants and also defeat the Hedron at the end of the story. If you’ve already killed all Resonants before reaching the ending, then this trophy will unlock together with  Repeating, Refracting upon finishing the story. If not, you can still kill the Resonants after the story and the trophy will unlock when you defeat the last one. Repeating, Refracting upon finishing the story. If not, you can still kill the Resonants after the story and the trophy will unlock when you defeat the last one. |
||
 |
Repeating, Refracting Kill the Hedron. |
 |
| Automatic story-related trophy, cannot be missed. Unlocks after Main Story: Defeat the Hedron – Main Quest: Fight the Core. | ||
 |
Stop it at the Source Sever all the Hedron Links. |
 |
| Automatic story-related trophy, cannot be missed. Unlocks after Main Story: Defeat the Hedron – Main Quest: Sever the Hedron Links. It’s the main quest in the final area called “The Unknown”. To navigate through this area you must also do Side Quest: Pope’s Research by destroying Pope’s Research Balloons and placing their antennas in the red circles near the balloon, this creates Gravity Wells to travel through the final region. | ||
 |
The First Link Sever the first Pattern Link. |
|
| Automatic story-related trophy, cannot be missed. Unlocks after Main Story: Protect the Dimension – Main Quest: The Hedron Link. | ||
 |
Sibling Reunion Complete all Fault Rituals. |
|
| Automatic story-related trophy, cannot be missed. Unlocks after Main Story: Contain the Crisis – Main Quest: The House in Distress. | ||
 |
Enemy of My Enemy Help with the CFD. |
|
| Automatic story-related trophy, cannot be missed. Unlocks after Main Story: Contain the Crisis – Main Quest: Enemy of My Enemy. | ||
 |
Rescue Mission Rescue Arish. |
|
| Automatic story-related trophy, cannot be missed. Unlocks after Main Story: Contain the Crisis – Main Quest: Evacuation Procedures. | ||
 |
Honorable Discharge Kill the Resonant in the Unknown. |
|

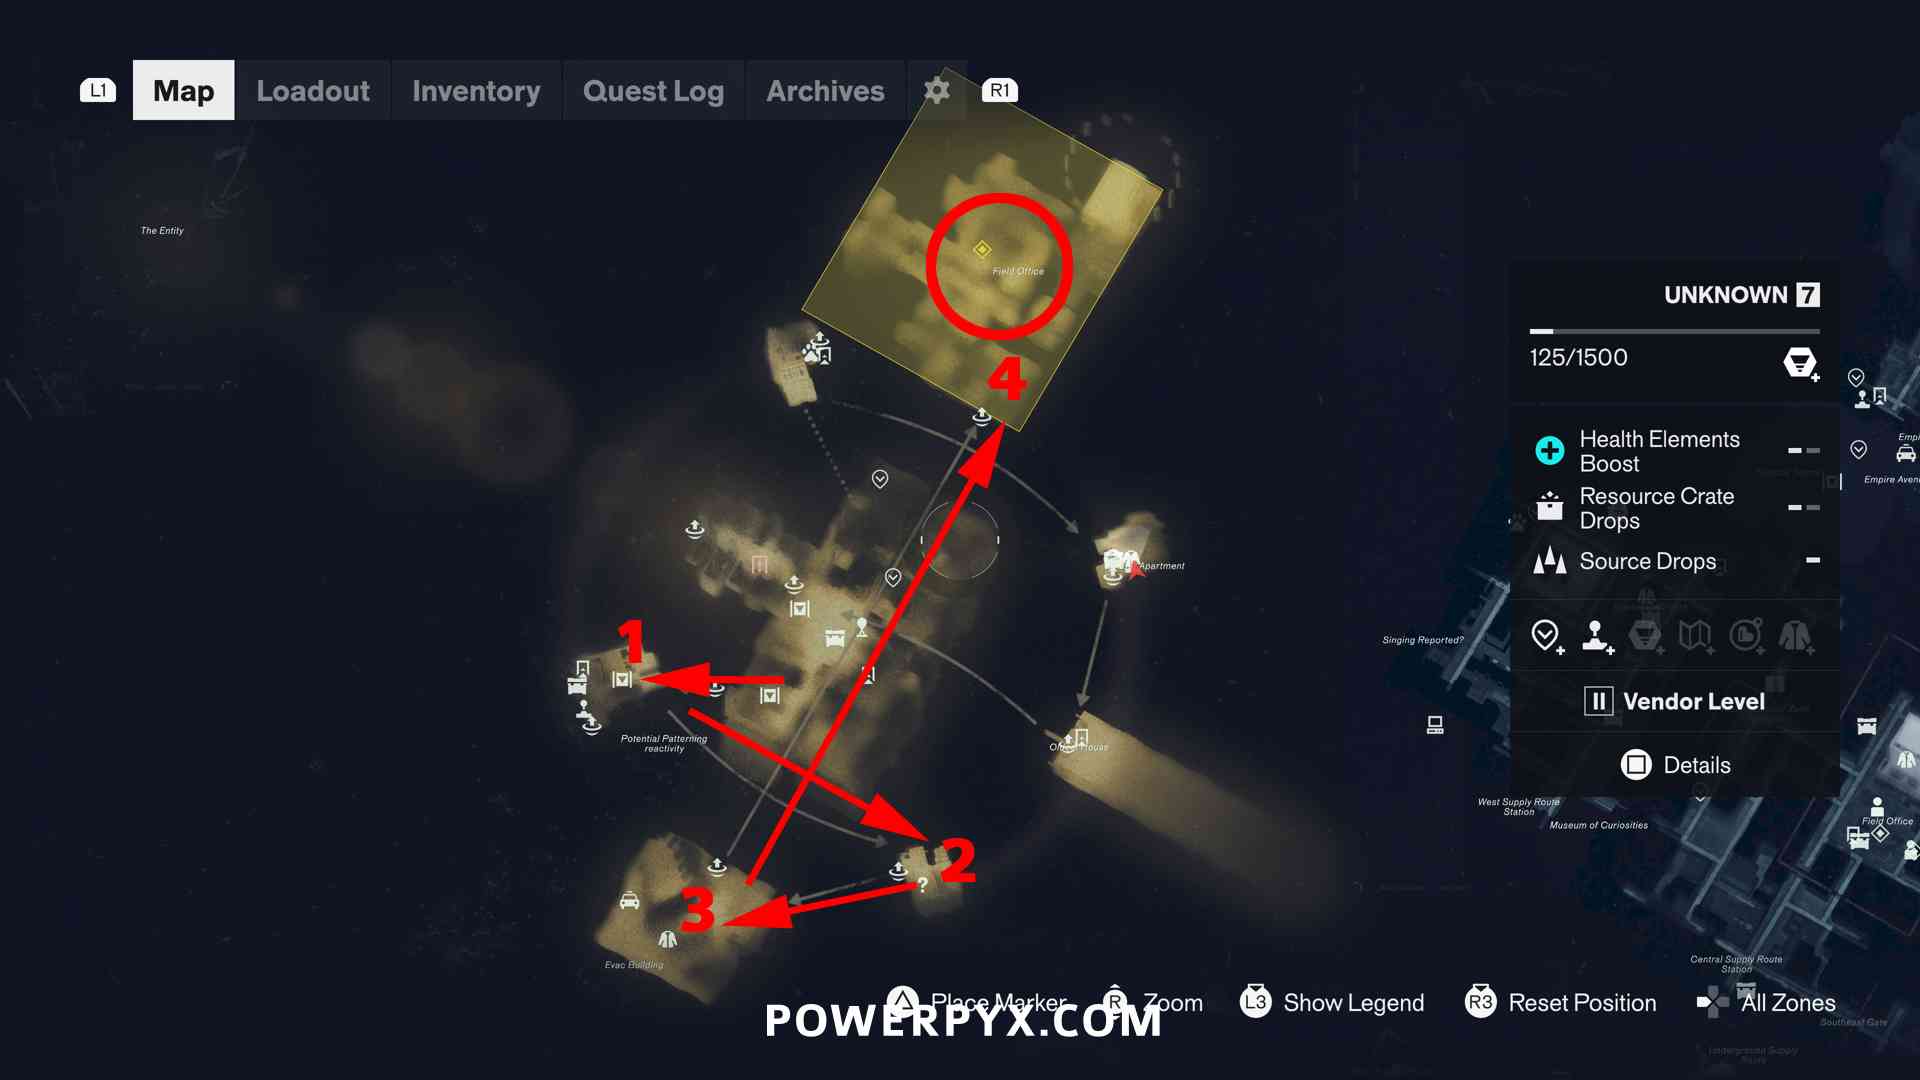
Unlocks after Main Mission: The Unknown Resonant. The trophy unlocks after leaving “The Gap” (not immediately when defeating the boss). This is an optional Resonant not needed for story progress. “Unknown” is the last zone you reach in the story. After Main Quest: The Hedron Link, you automatically get the Side Quest: Pope’s Research. You have to do this side quest first – in the Unknown Zone you will find research balloons, interact with them and they will drop crates with antennas inside. Place the antennas in the red circles nead the balloon (in correct order). Then a “Gravity Well” appears that transports you to the next island. After you reach the southern-most island with the “Evac Building” text on the map, use the Gravity Well there to reach the northern-most island with the “Field Office” text on map. You will automatically start the quest “The Unknown Resonant” when you go there.
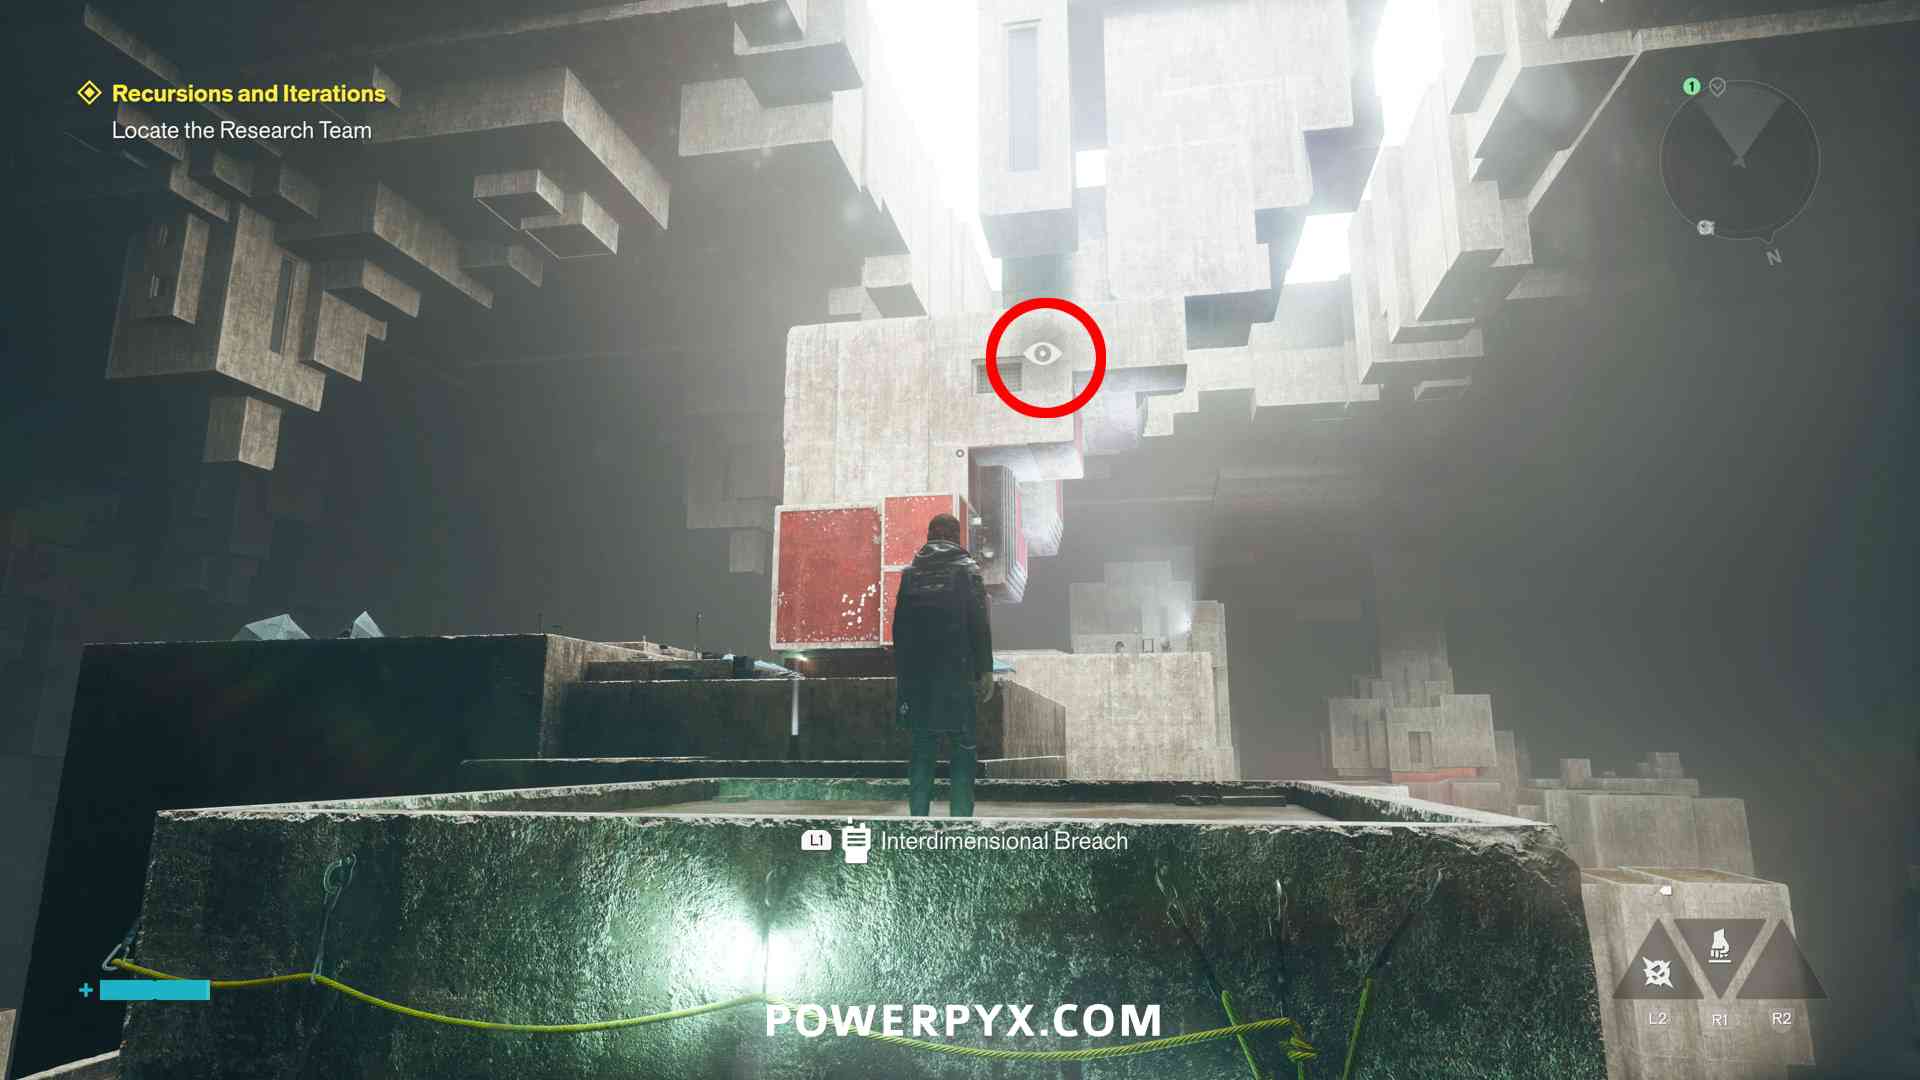
Defeat the enemies inside the building there to rescue 4 soldiers. They will open the door forward. Then you see 4 sheds, you must hit the glowing one that’s out of sync, 4 times in a row to break the pattern and open the door forward. Then you must turn on the power to the next door. Follow the path left of the locked door to find the power, carry it to the next cube, and from there to the door (you must be very quick for this). In the next building go upstairs, then go over the rooftops to the right and you’ll reach a plaza with enemies. Defeat them and enter the elevator in the next building to reach the Resonant. |
||
 |
Astral Reconfiguration Kill the Resonant in the Underpass. |
|
|
Unlocks after Main Mission: The Underpass Resonant. The trophy unlocks after leaving “The Gap” (not immediately when defeating the boss). To reach this Resonant you must go to the “The Spire” in the Underpass zone (zoom in on the map to see the white text over this area). You reach the Underpass automatically from story progress. Use the
|
||
 |
Insidious Growth Kill the Resonant in the Park. |
|
|
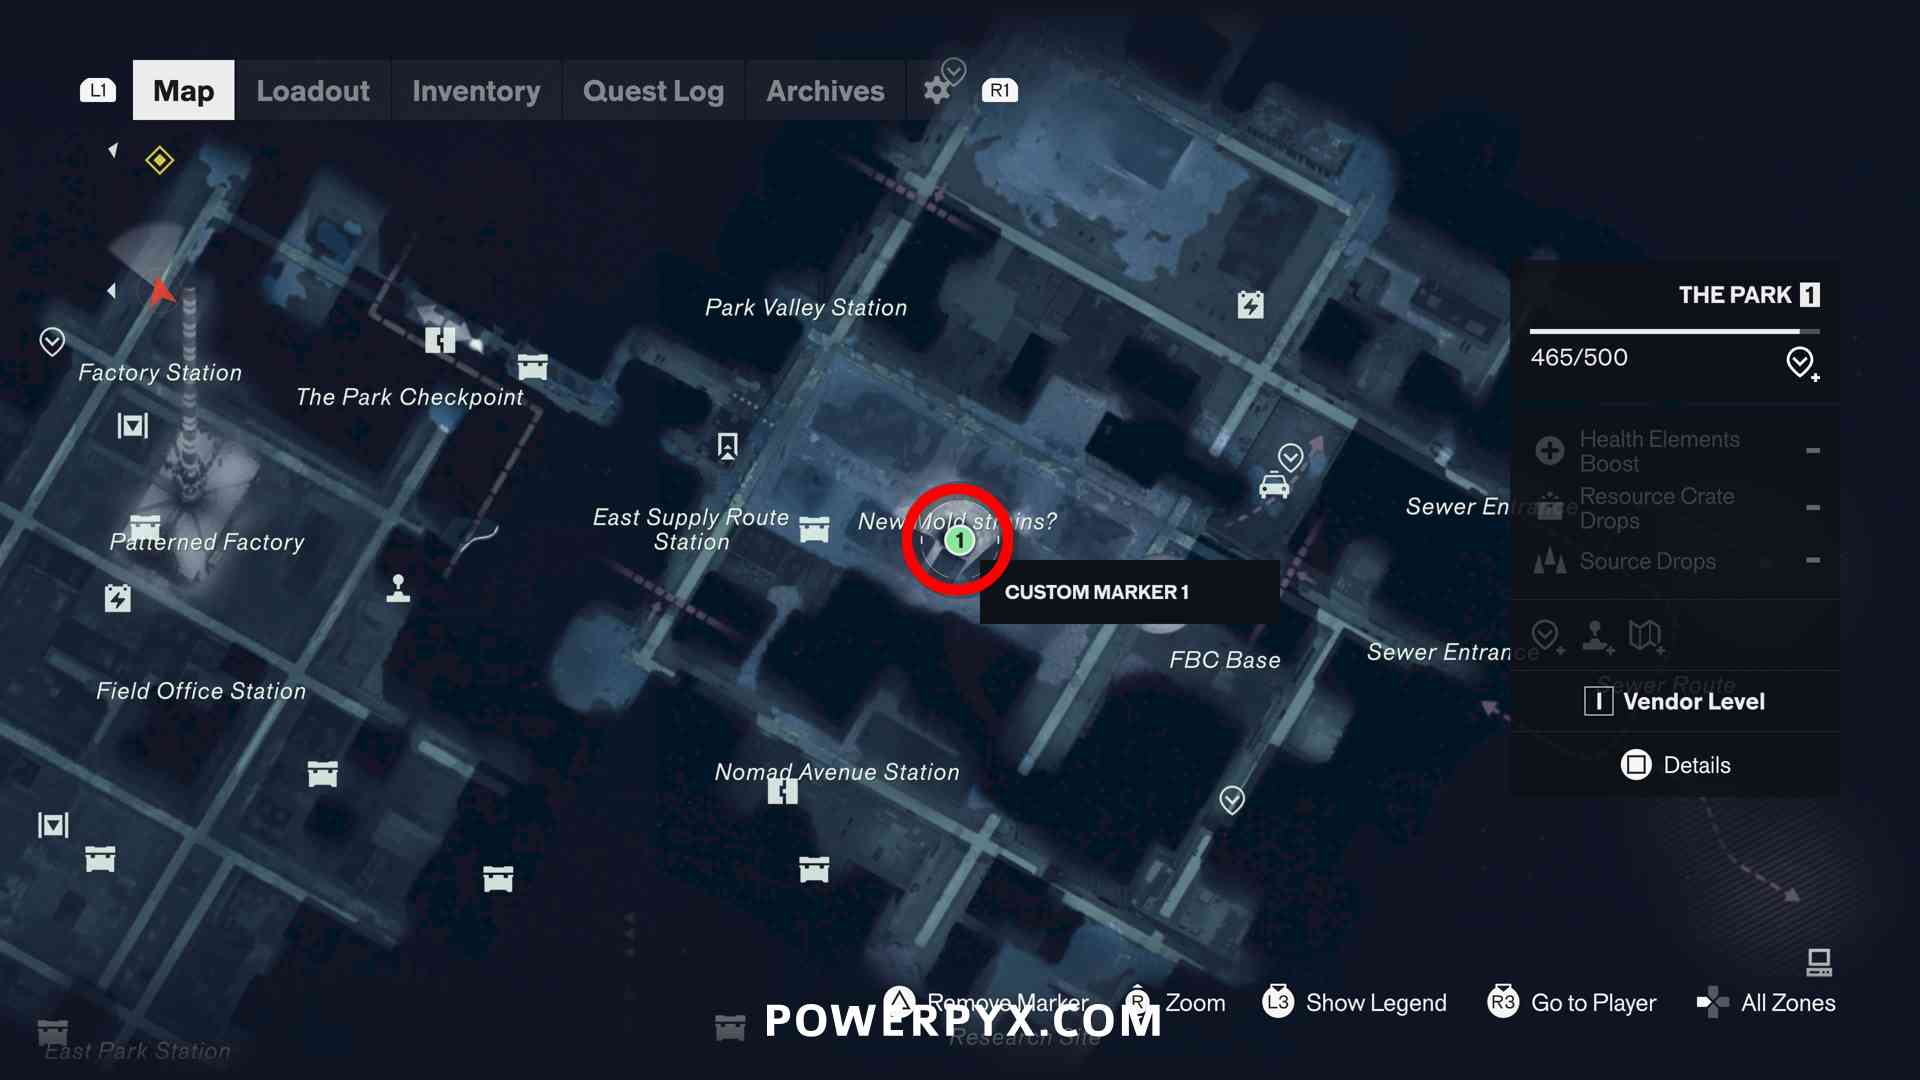
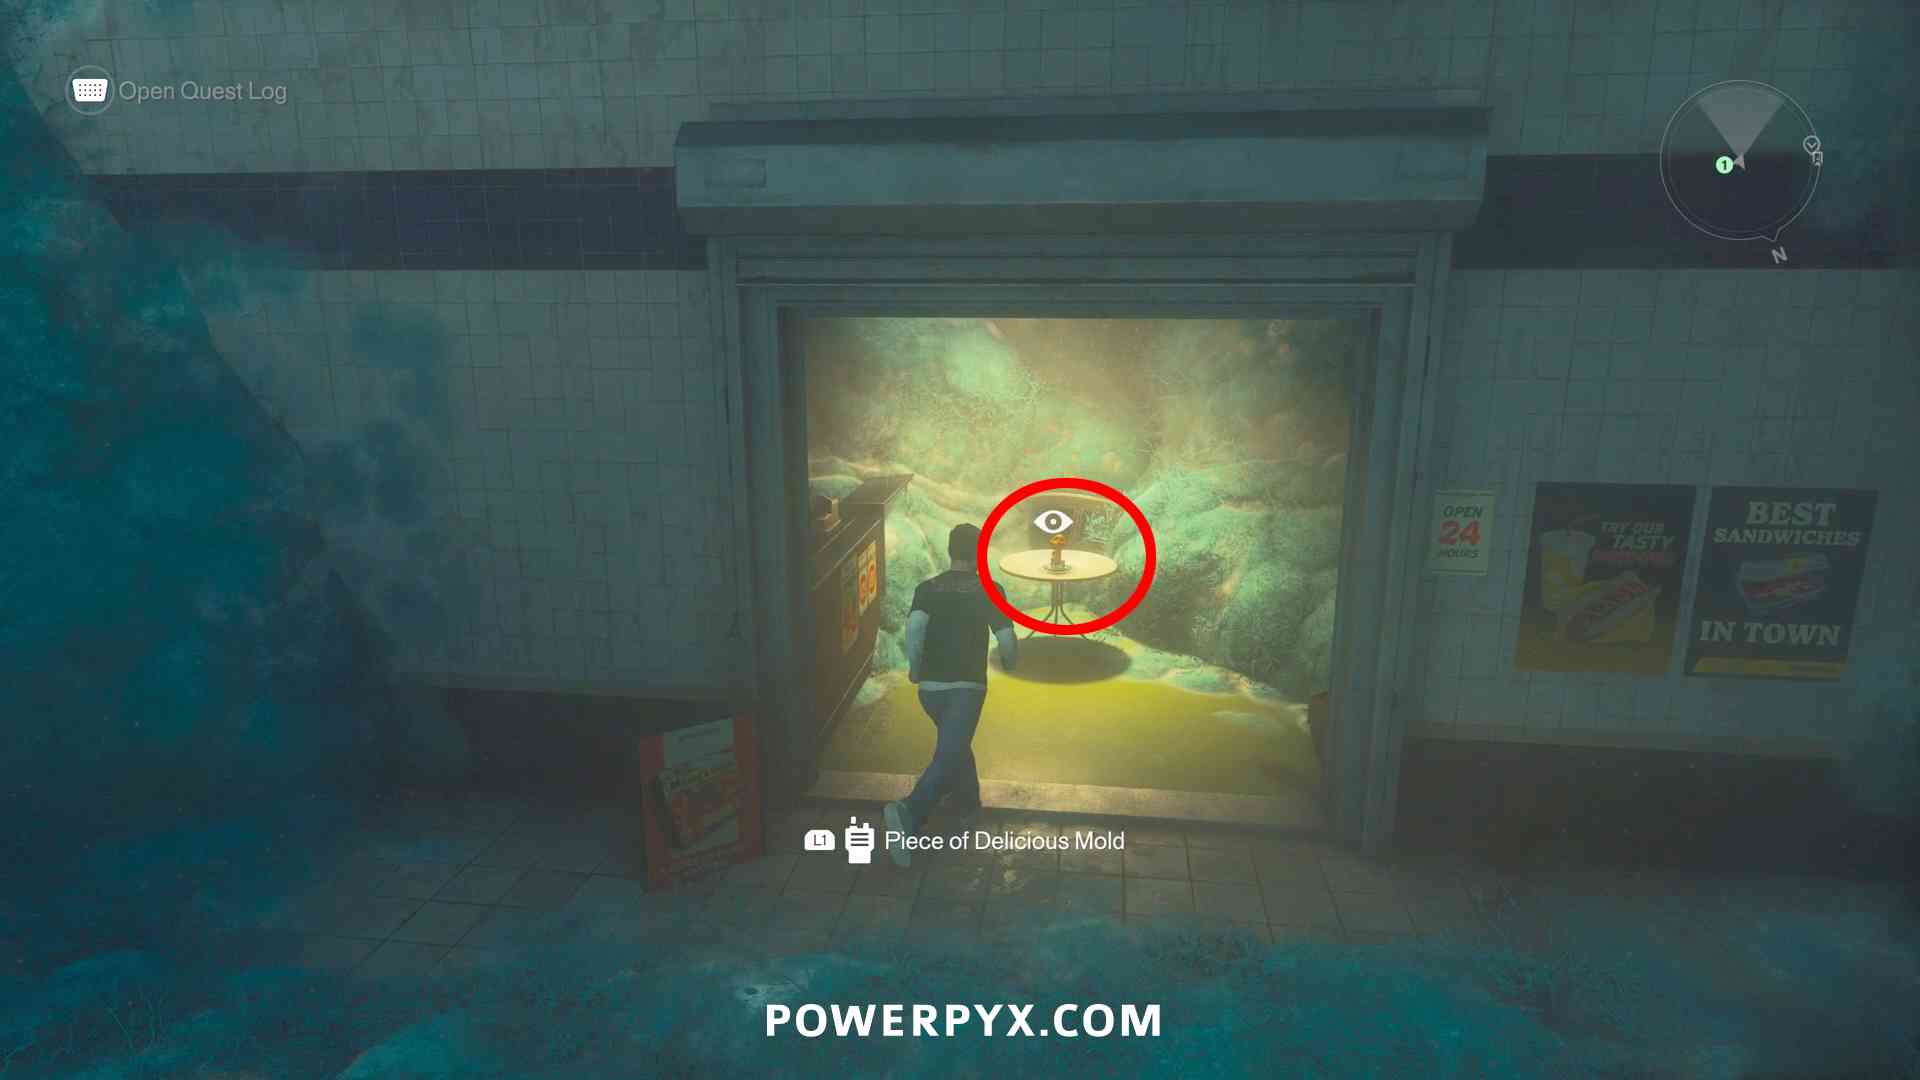
Unlocks after Main Mission: The Park Resonant. The trophy unlocks after leaving “The Gap” (not immediately when defeating the boss). This is an optional Resonant not needed for story progress. “The Park” is an entirely optional area that you don’t visit during the story. In the north-east corner of Central you will find “The Park Checkpoint” (zoom in on map to see it). Go through there to reach the Park. You can go there any time after reaching Central zone. In “The Park”, drop down the big hole in the middle where on the map it shows the white text “New Mold strains?”. There you will find a mold you can eat. Eat it to start the Resonant quest, then 3 more molds get marked.
You must now eat the next 3 molds: Mold 1 (Pizzeria) requires you to go through the Sewers in the north-west corner of The Park. Defeat the enemies in the objective area to open the door to the Pizzeria. The mold is sometimes a bit buggy and doesn’t have the interact prompt, in this case attack the windows of the Pizzeria from outside and the yellow fog in the Pizzeria should go away so you can interact with the mold. Mold 2 (Minimart) is in the south-west corner of The Park, this is the easiest to reach. Just defeat the enemies to open the door to the Minimart. Mold 3 (Gym) is in the north-west corner of The Park. Again defeat the enemies to open the door. Once you’ve eaten all 3 Molds you must return to the spot where the quest started, where you ate the first mold in the hold in the middle of The Park. The Mold Door here will now open and leads to the Resonant. |
||
 |
Thermal Termination Kill the Resonant in Central. |
|
|
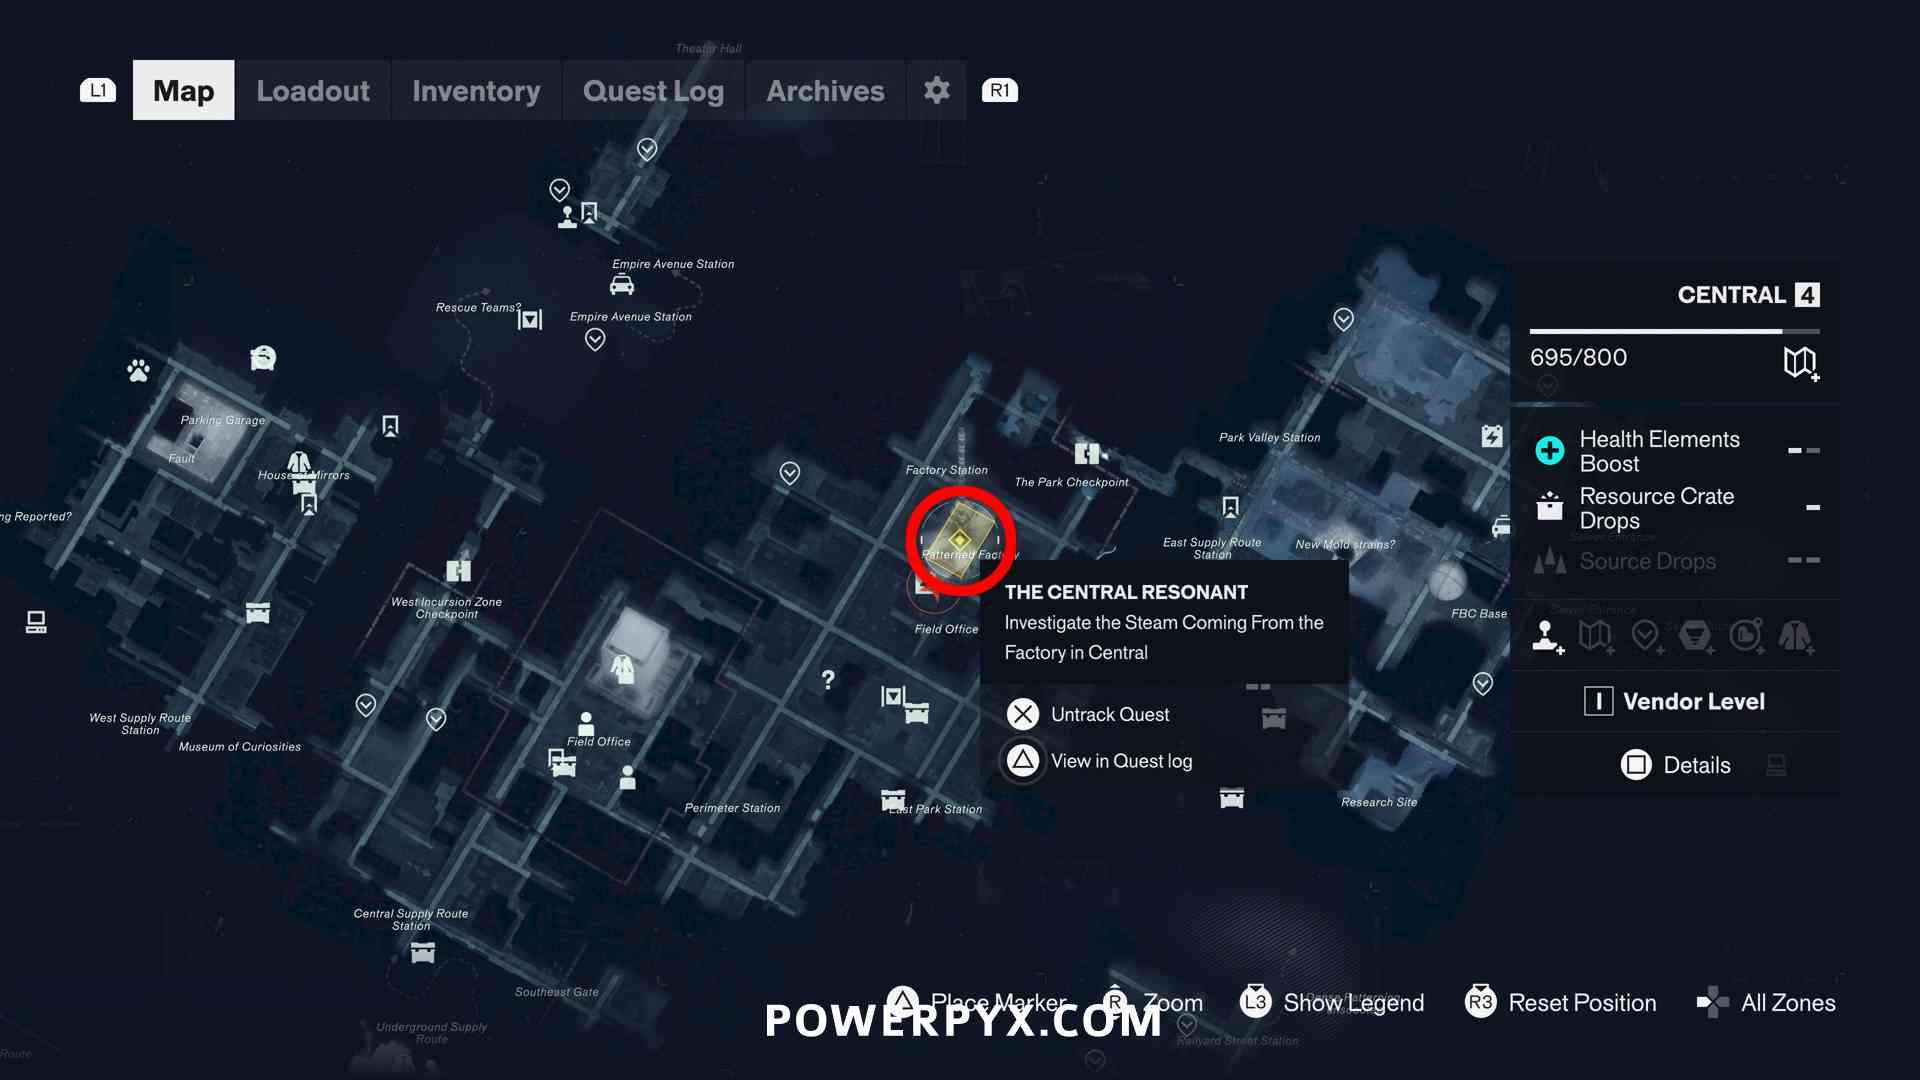
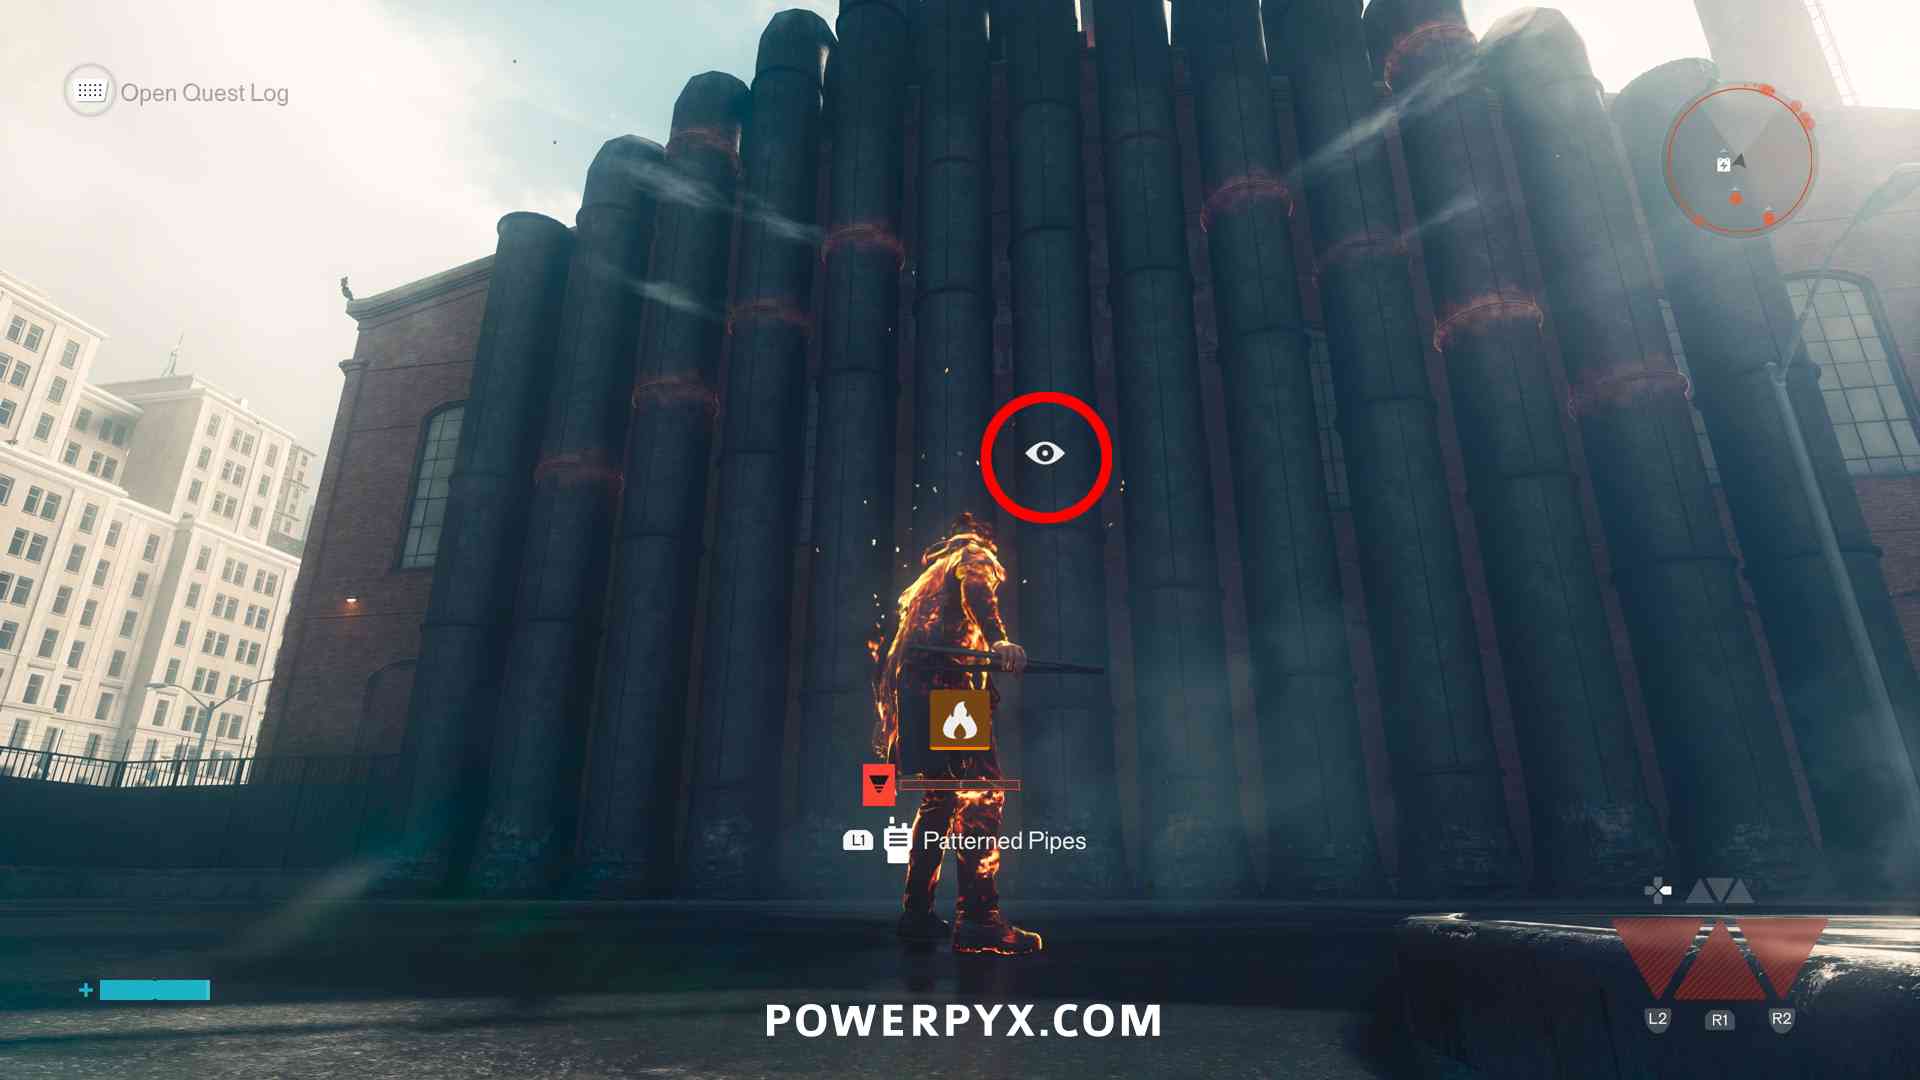
Automatic story-related trophy, cannot be missed, unlocks after Main Mission: The Central Resonant. The trophy unlocks after leaving “The Gap” (not immediately when defeating the boss). You are required to defeat this Resonant to advance the “Contain the Crisis” Main Story. To reach this Resonant you must go to the “Patterned Factory” in Central zone (zoom in on the map to see the white text over this area). Use the
|
||
 |
Curtain Fall Kill the Resonant in the West Incursion Zone. |
|
|
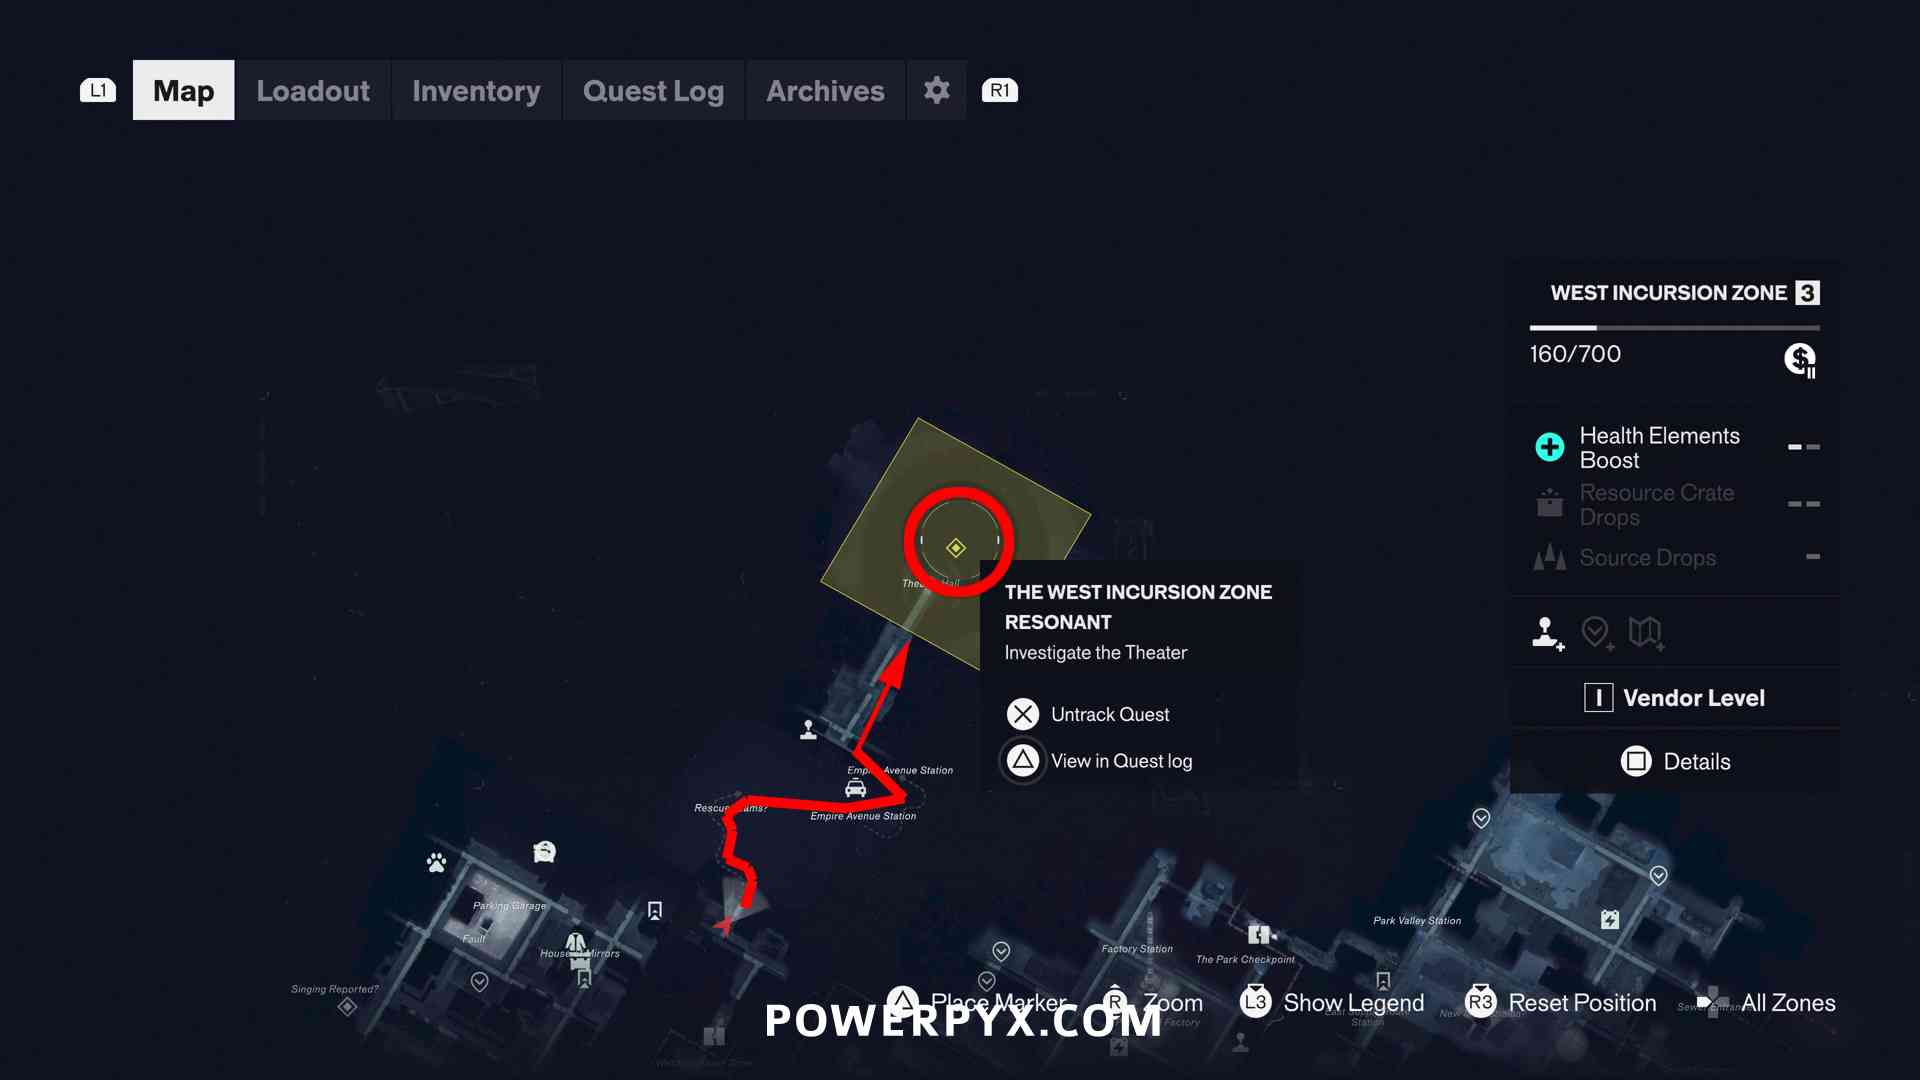
Automatic story-related trophy, cannot be missed, unlocks after Main Mission: The West Incursion Zone Resonant. The trophy unlocks after leaving “The Gap” (not immediately when defeating the boss). You are required to defeat this Resonant to advance the “Contain the Crisis” Main Story. To reach this Resonant you must first have done the Jesse quest “The Incursion Fault” which will automatically get marked in your quest log when entering The West Incursion Zone for the first time (the region in the top left of the world map). This quest gives you the Gravity Shift ability, then you can cross the gap to the theater where the Resonant is. On the left side of the long gap you can then use Gravity Shift and jump over to the side of a building and follow the path to the theater.
|
||
 |
Artistic Liberation Kill the Resonant in Downtown. |
|
| Automatic story-related trophy, cannot be missed. This will be the 1st Resonant you defeat, during Main Mission: Orientation. The trophy unlocks after leaving “The Gap” (not immediately when defeating the boss). | ||
 |
Astral Potency Reach Aberrant Strength 100. |
|
| Aberrant Strength is determined by what Primary and Secondary Weapon upgrades you unlock. Unlocking weapon upgrades requires materials, which are guaranteed drops when defeating enemies, bosses or completing main and side content. The more weapon upgrades you unlock, the higher your Aberrant Strength goes. The best way to go about this trophy is to first focus on your preferred Primary and Secondary Weapon of choice. By the time you’ve maxed both out, you’ll be at around Aberrant Strength 50.
As you reach the endgame, you should have enough materials to craft new skills, thus reaching Aberrant Strength 100. Focus on crafting upgrades that increase Strength by +3 or +5 first, then +1. If you’re missing materials, you can always buy some at the Vendor, provided that you have the required Vendor level (from leveling up the regions by doing quests and the activities |
||
 |
Versatile Expert Unlock 30 Talents. |
|
| To unlock Talents, you must first warp to the Gap. Once you’re in the Gap, interact with the floating rock between the base of the monolith and the stele. Here you can buy Talents. Unlocking Talents requires materials. You will unlock this trophy naturally while working on everything else. | ||
 |
Personal Development Obtain 4 Health Upgrades. |
|
Health Upgrades are found inside Large Resource Crates (marked on map with  icon), and you get 6 of them from completing the 6 Secret Hideouts. Every time you open a special container, you get 1/3 of an upgrade. This means you need a total of 12 different upgrade pieces to unlock this trophy (open any 12 of the health upgrade containers). There are more containers than needed for this. Because you get 6 from the Secret Hideouts automatically, you only need to find 6 more of these throughout other quests and in the open world. They get marked on the map when going near them, after you’re done with everything else you will have enough of them marked on the map. icon), and you get 6 of them from completing the 6 Secret Hideouts. Every time you open a special container, you get 1/3 of an upgrade. This means you need a total of 12 different upgrade pieces to unlock this trophy (open any 12 of the health upgrade containers). There are more containers than needed for this. Because you get 6 from the Secret Hideouts automatically, you only need to find 6 more of these throughout other quests and in the open world. They get marked on the map when going near them, after you’re done with everything else you will have enough of them marked on the map.
Health Upgrades look like big “clown crates”:
|
||
 |
Zone Warden Unlock 40 Zone Upgrades. |
|
| In Control: Resonant, you don’t level up your character, and instead you level up the different Zones of Manhattan. There are 7 Zones (Downtown, Central, Evacuation Zone, West Incursion Zone, The Park, Underpass, Unknown). Each time a Zone reaches a new level you unlock an Upgrade. You can level up Zones by completing main and side content, World Events and defeating enemies. You will almost certainly unlock this trophy naturally on your way to the Platinum.
Each zone has 15 levels x 7 Zones = 105 Zone Upgrades. You only need 40/105. The events get marked on the map with a white arrow icon |
||
 |
Astral Obtain 4 Power Upgrades. |
|
| Power Upgrades are found inside Large Resource Crates (marked on map with icon), and you get 6 of them from completing the 6 Testing Facilities (Unsupervised Science Side Quest). Every time you open a special container, you get 1/3 of an upgrade. This means you need a total of 12 different upgrade pieces to unlock this trophy (open any 12 of the power upgrade containers). There are more containers than needed for this. Because you get 6 from the Testing Facilities automatically, you only need to find 6 more of these throughout other quests and in the open world. They get marked on the map when going near them, after you’re done with everything else you will have enough of them marked on the map.
Power Upgrades look like big “metal crates”:
|
||
 |
Combat Rediness Equip a Combat Ability in every slot. |
|
Control: Resonant features 6 ability slots. They are displayed in the bottom right corner of the screen, and you can press  to switch between two sets of three abilities each. to switch between two sets of three abilities each.
The abilities are unlocked from defeating the Resonant main bosses:
Then you can equip them in The Gap (hold To equip an ability in the 6th slot and unlock this trophy, you must do Side Quest: Pope’s Research to get the “Resonant Token”. Then interact with the Mural in The Gap and equip any 6 abilities. |
||
 |
Paranatural Artisan Craft 30 Artifacts. |
|
Artifacts are mainly unlocked by playing through main and side quests or bought at Vendors, provided you’ve reached the required Vendor level for each Zone (from leveling up the regions by doing quests and the activities  marked on map). Crafting an Artifact requires materials, which are looted by completing main and side content as well as opening containers in the world. The best way to go about this trophy is to craft your preferred Artifacts of choice and then hold off on crafting the remaining ones. If you want, you can reload one of the prior autosaves to get your materials back, or duplicate your profile save in the title screen to have a backup. marked on map). Crafting an Artifact requires materials, which are looted by completing main and side content as well as opening containers in the world. The best way to go about this trophy is to craft your preferred Artifacts of choice and then hold off on crafting the remaining ones. If you want, you can reload one of the prior autosaves to get your materials back, or duplicate your profile save in the title screen to have a backup.
You can craft the same artifact 30 times for this and it will count toward the trophy. If you have sufficient materials you can keep crafting the same artifacts. |
||
 |
Diligent Consultant Complete 20 FBC Tasks. |
|
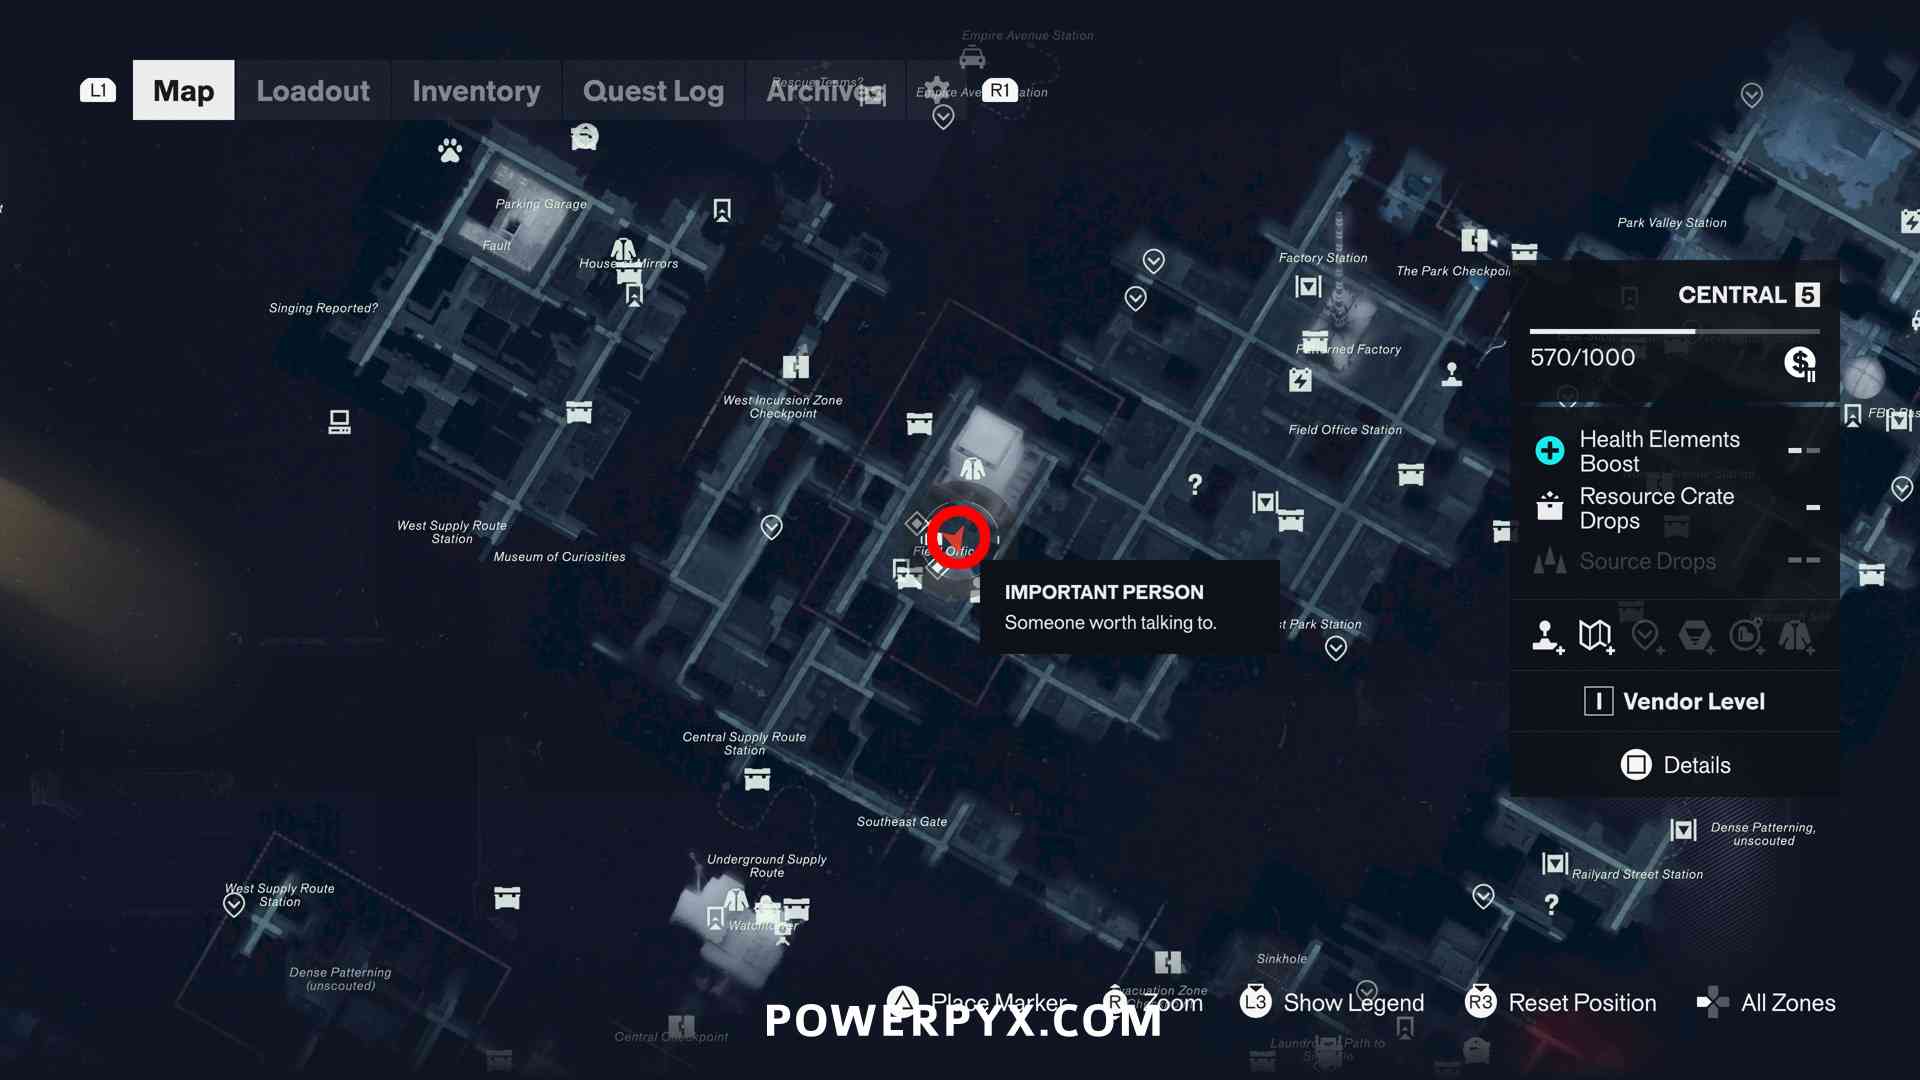
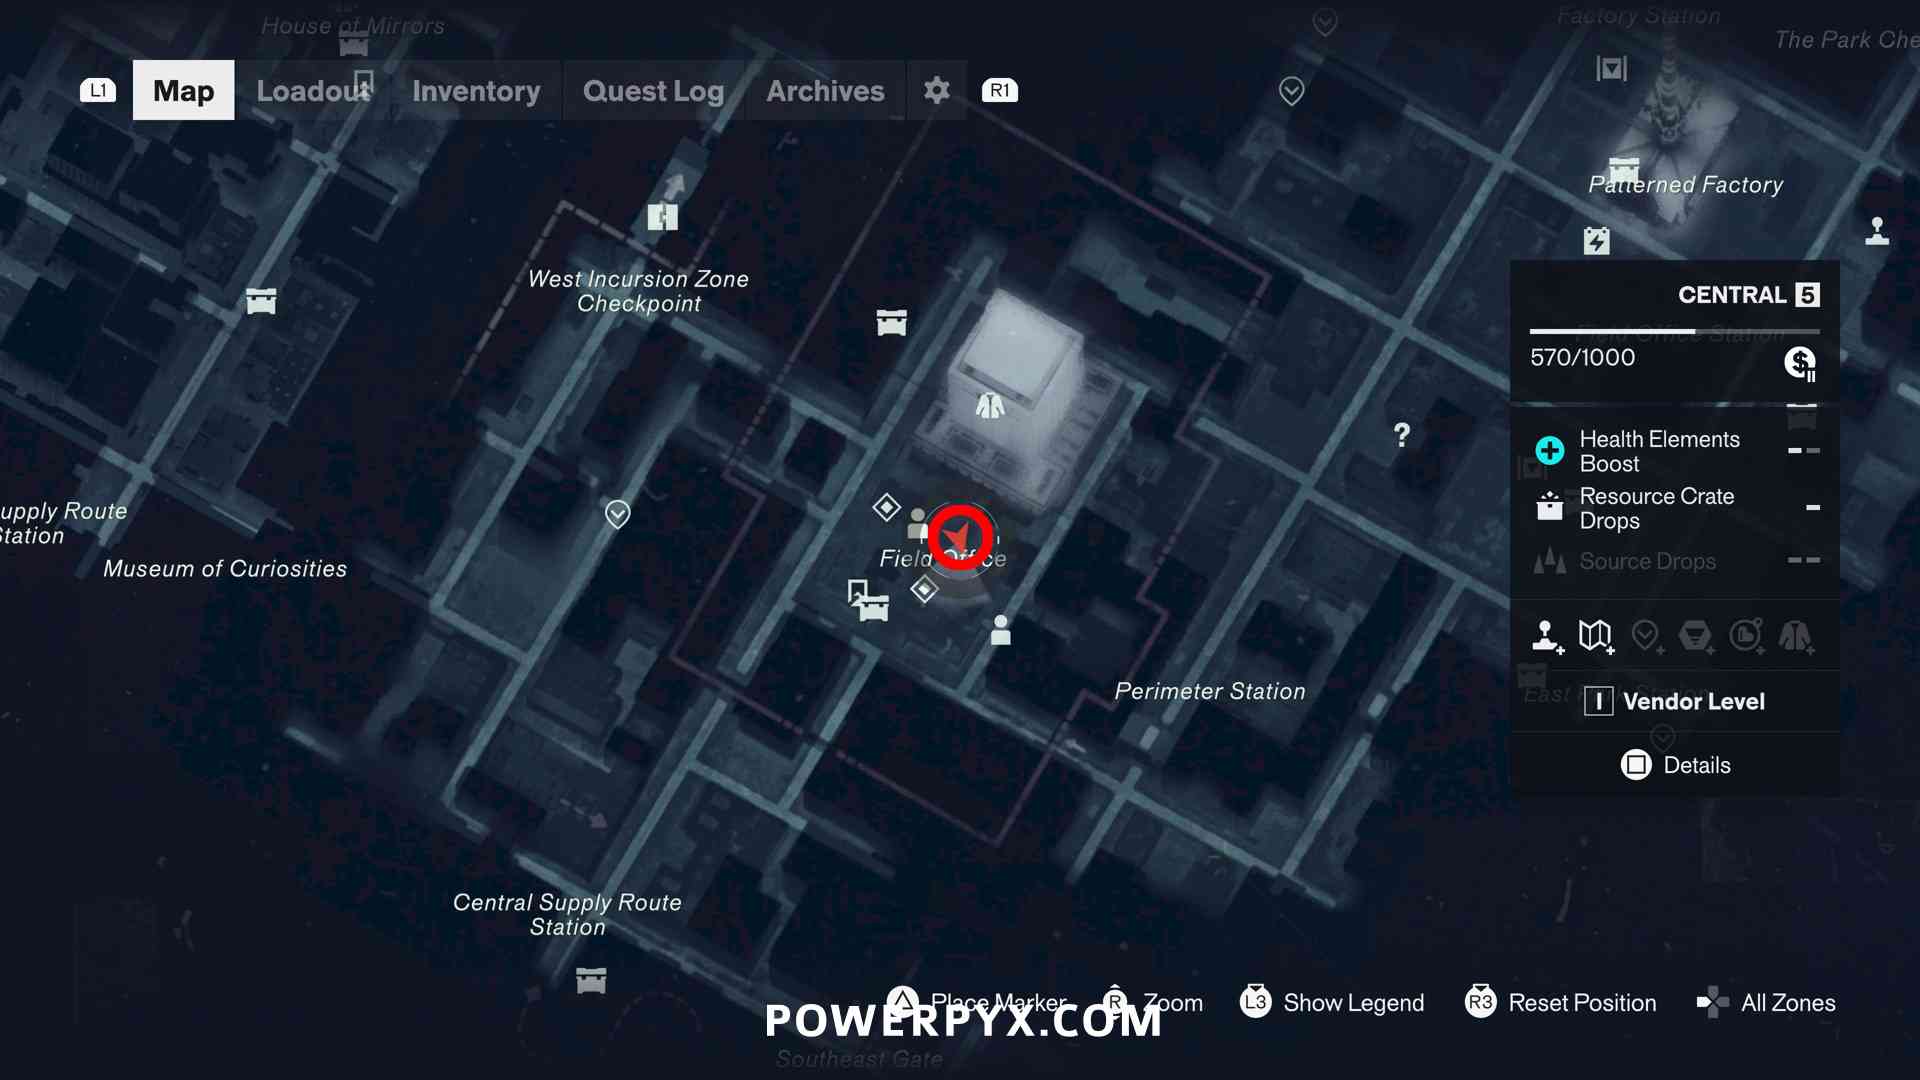
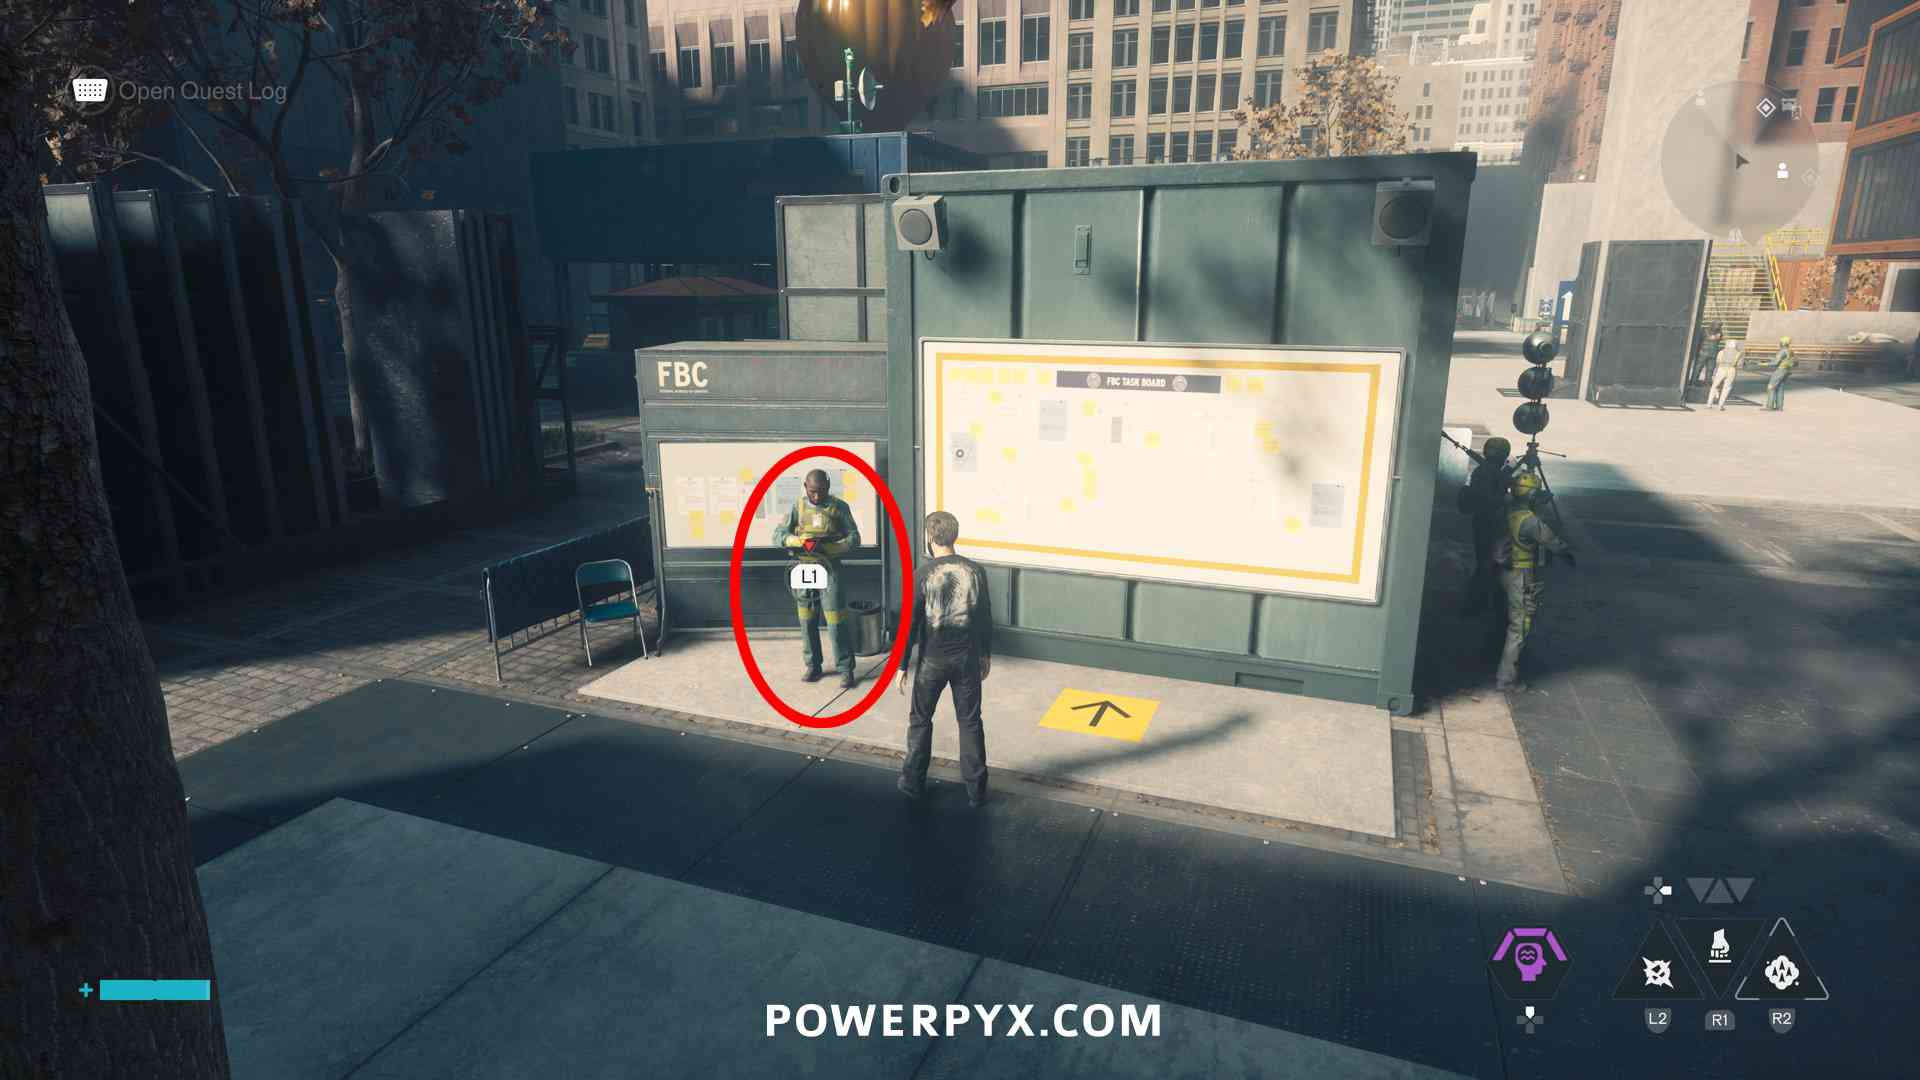
| First, interact with the NPC in Central > Field Office. Just outside the Field Office entrance, where the “O” of “Office” is on the map. He isn’t marked, but when approaching he will say “hey, got a minute?” and has a red interact prompt on him (if he’s not there or you can’t talk to him, advance the story further). He will introduce you to FBC Tasks.
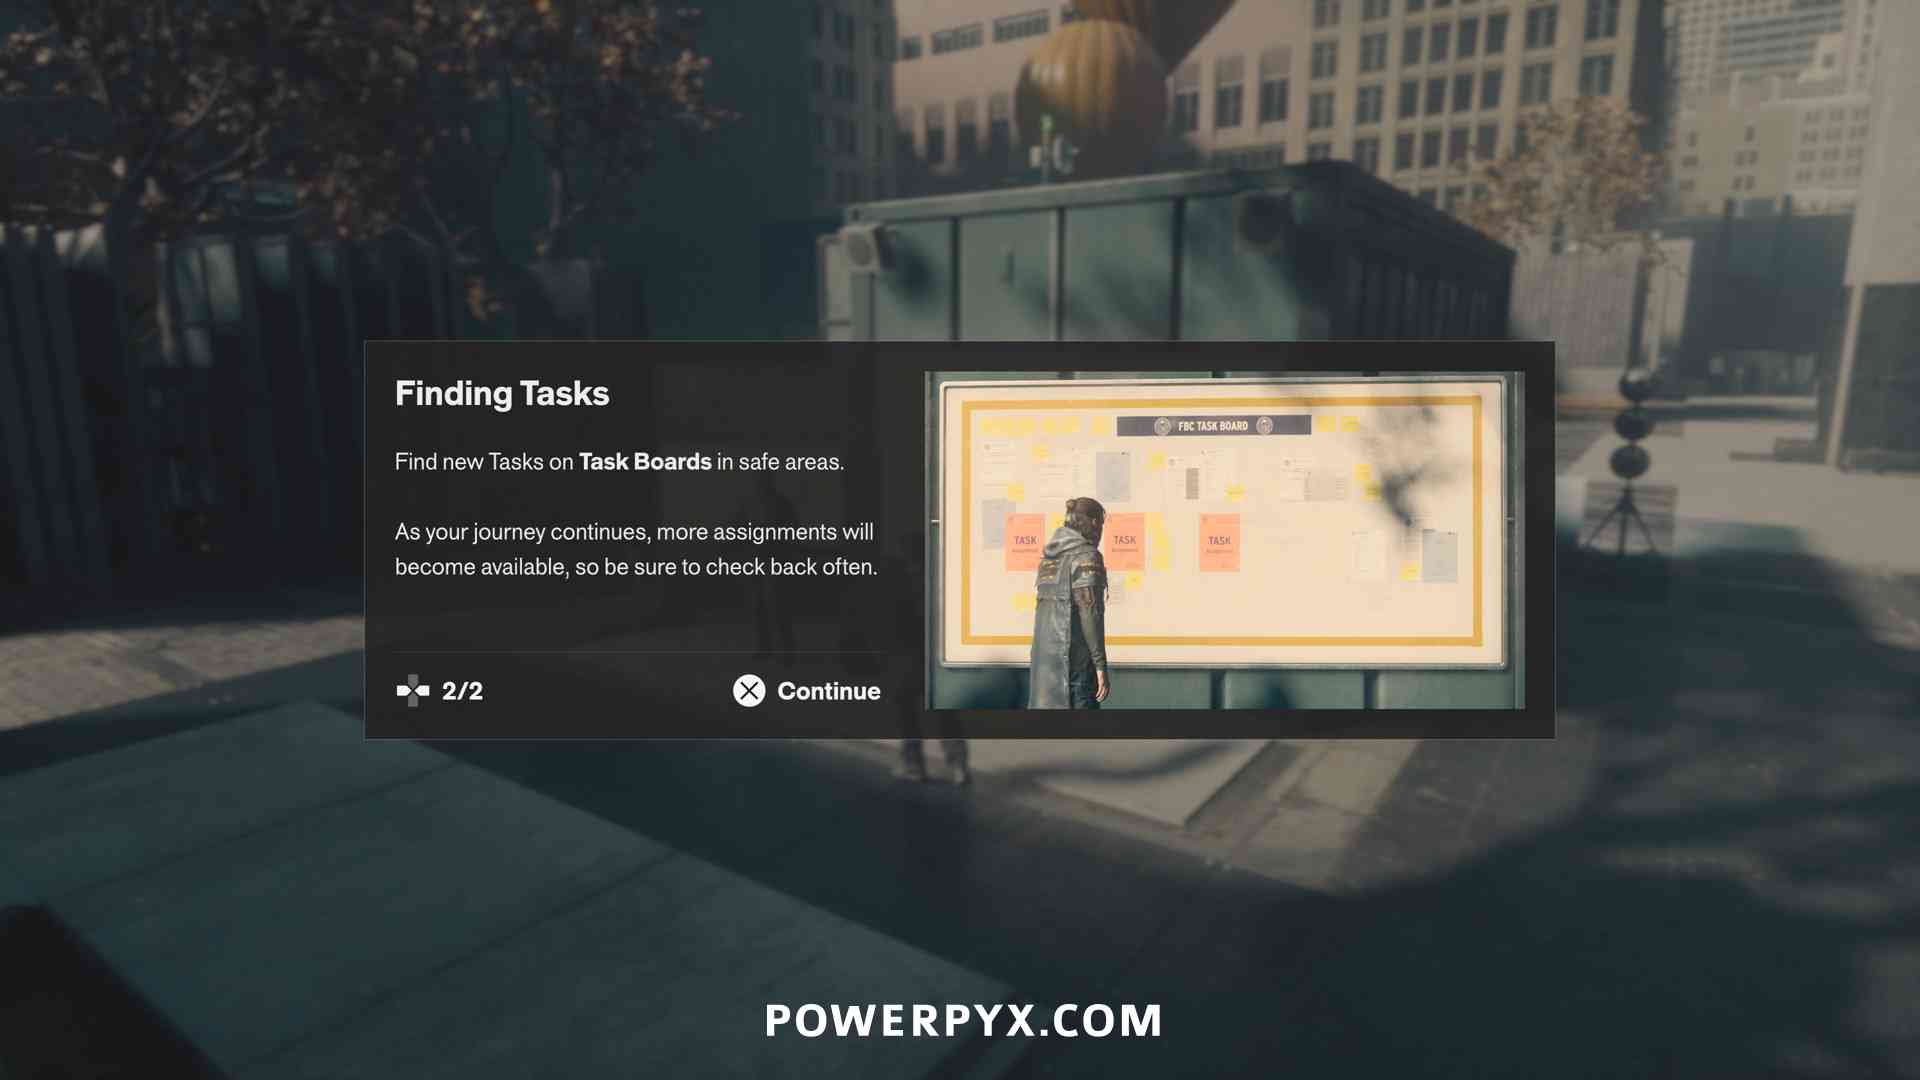
Afterward you can find one FBC Taskboard in each zone. Refer to FBC Taskboard Locations. FBC Tasks are short mini quests that can be started by interacting with these noticeboards. FBC Tasks include reaching a specific scouting location, defeating enemies, escorting FBC agents back to the nearest base or safe location and many more. There are 7 boards and 6 tasks per board for 42 total tasks. You only need any 20 of them, there are many more than you need. More tasks unlock as you advance the story. You can still clean these up after the story. |
||
 |
Form Over Function Obtain 12 outfit items. |
|
| Outfits are obtained by completing main and side content, from defeating all Resonants, buying them at vendors, and from beating the SHÜM arcade minigames, or redeeming outfit codes under Options > Gamepaly > Enter Redeem Code (e.g. EV172-LN211-PL279). While working on other content towards platinum you will get 12 Outfits automatically. | ||
 |
Panopticon Intern Contain Altered Items and help Langston. |
|
| To unlock this trophy, you need to complete the following side quests: | ||
 |
Be What You Want to Be Save everyone during karaoke. |
|
| SEMI-MISSABLE
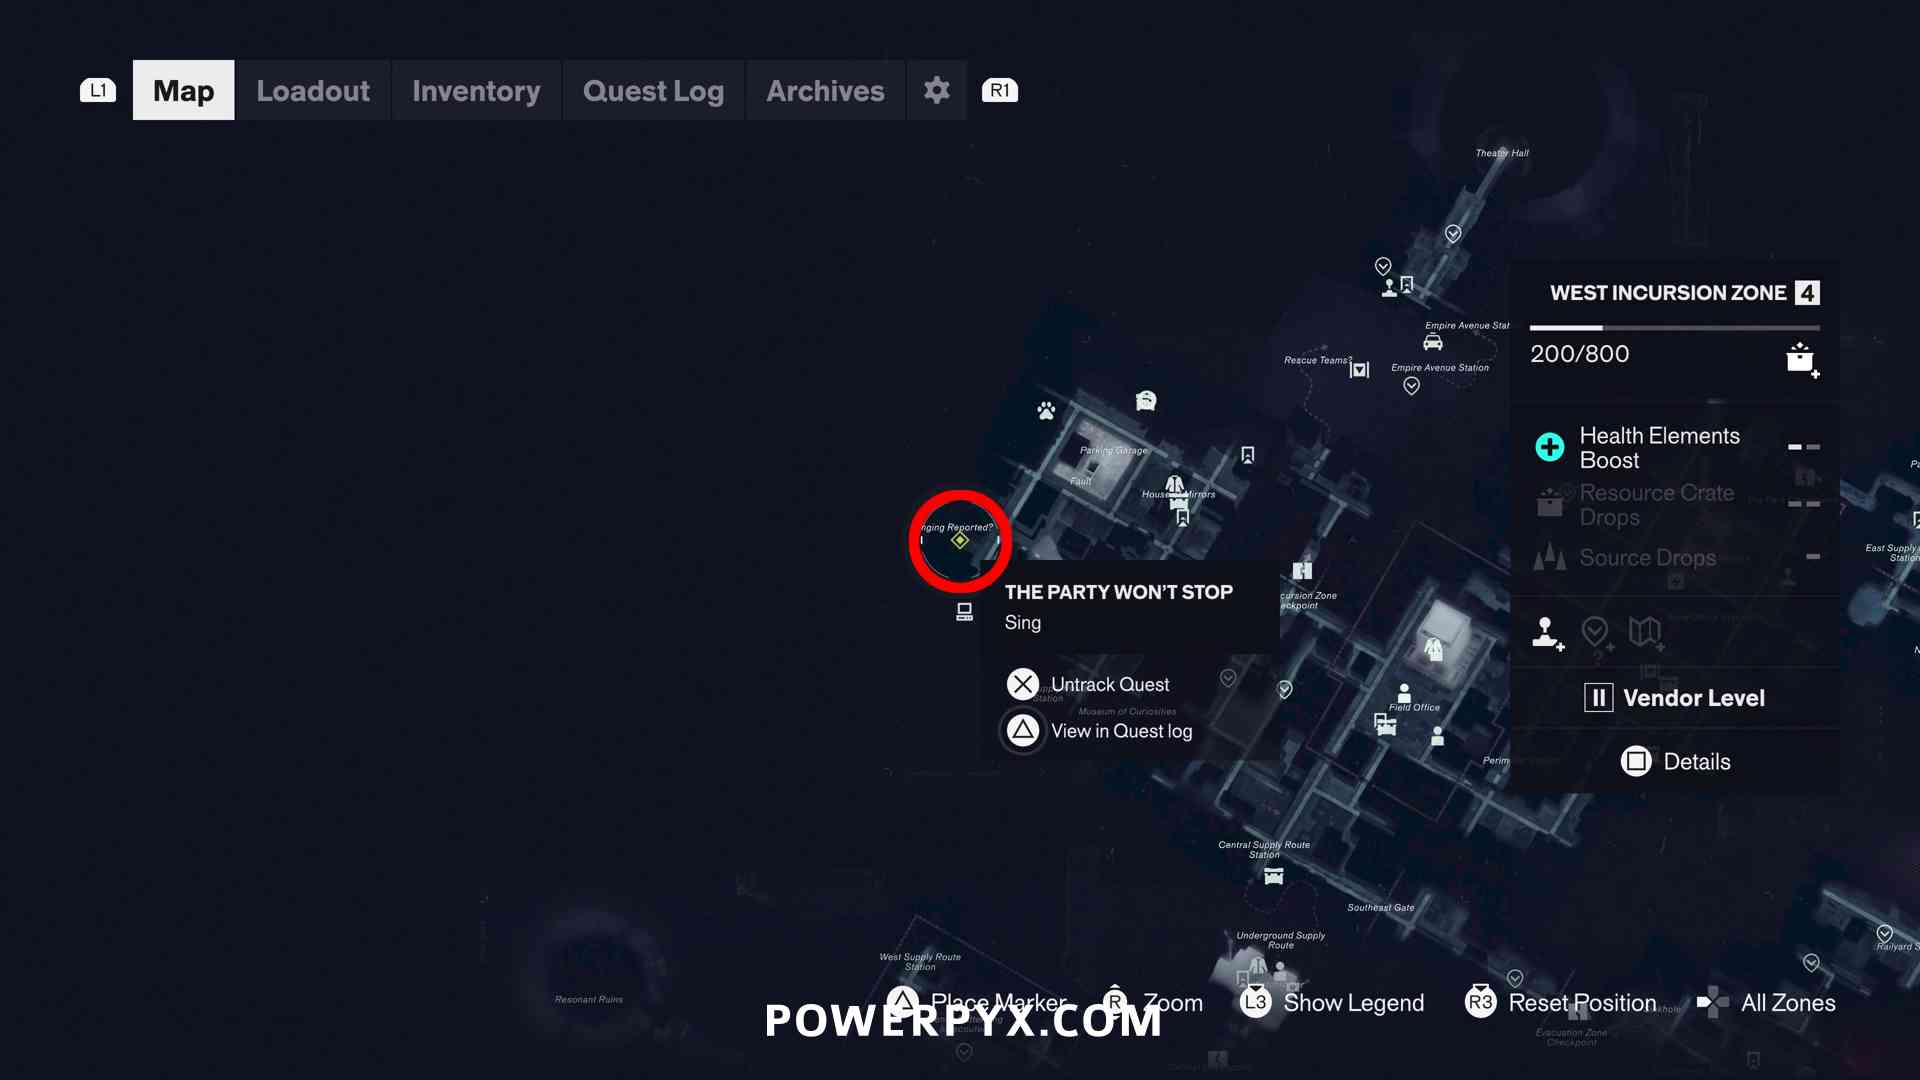
This trophy takes place during Side Quest “The Party Won’t Stop“. It starts automatically when going to the south-west corner in region “West Incursion Zone”. You will hear some music coming from an apartment building, going close to the quest will automatically add it to your quest log.
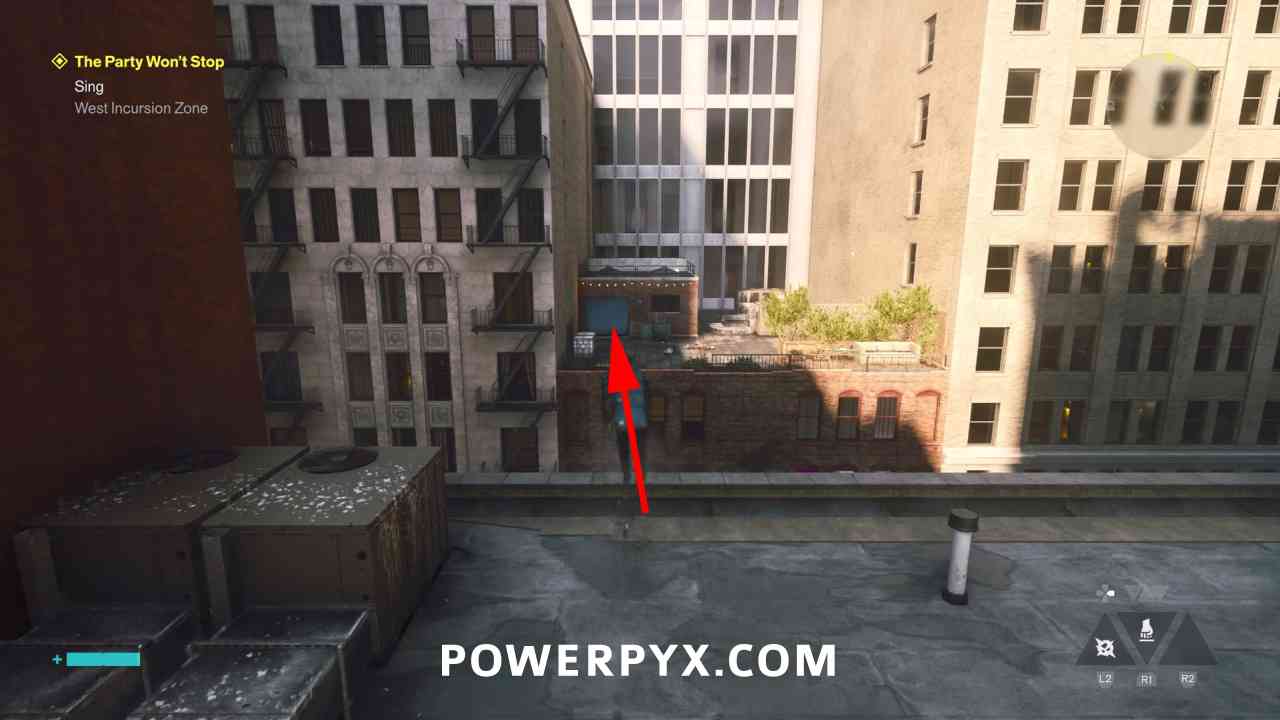
Approach from the higher street directly east of the quest marker and jump over to the roof. On the roof of the building you can enter through the door.
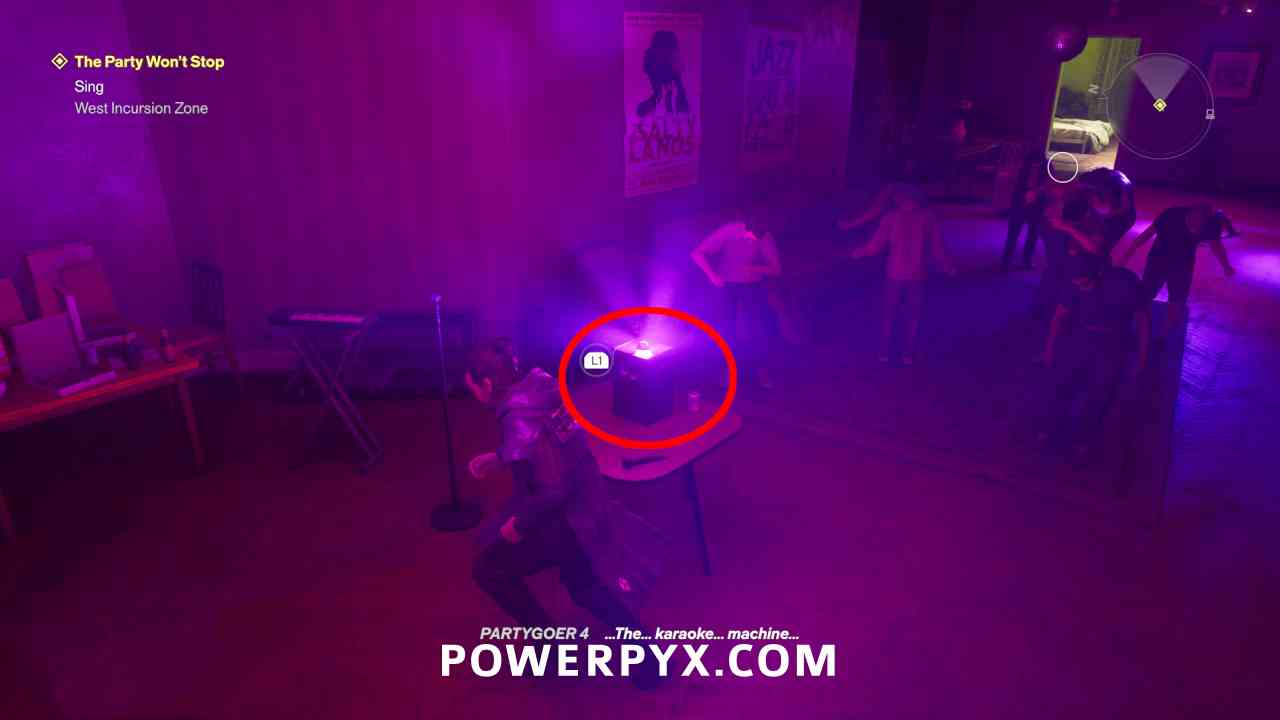
Then inside the building you find people dancing at a party. Interact with the karaoke machine at the party.
You must select the 9 correct lyrics. If you make a wrong choice, someone will drop dead, thus voiding the trophy. If you make a mistake, pause the game > go to Settings > Load Game > reload last save. Correct Choices:
The reason this is only “semi” missable is that the game keeps permanent saves after each main quest. So if you’ve missed it, you can always go to Settings > Load Game > reload one of the early game saves (e.g. after “Power Lines” / “Into the Sinkhole”) and head straight to the quest marker again, thus can still do it without starting a new game. |
||
 |
Threshold Researcher Deal with all the Thresholds in Manhattan. |
|
Reward for completing 3 Side Quests:
Unsupervised Science: requires you to access 6 underground laboratories and complete their puzzles (one per region, except The Underpass). The Last Taxi: there are 7 taxis across Manhattan, one per region. Enter the taxi to be taken to a different area, then you must interact with taxis in the correct order to be taken back to Manhattan. Crossing the Threshold: as part of this quest you will investigate the Dig Site Threshold. |
||
 |
Budding Analyst Help Pope finish her research. |
|
| This unlocks from completing Side Quest: Pope’s Research. This starts immediately after Main Quest “The Hedron Link” (just after reaching the final region called “Unknown”).
The quest takes place exclusively in the “Unknown” zone. You have to find research balloons, which get marked on the map once you unfogged it. Each research balloon drops a crate with antennas inside. You must place the antennas in correct order in the red circles on the ground near the balloon. This will create “Gravity Wells” that let you travel between the islands of the “Unknown” zone. |
||
 |
Work-Life Balance Complete all instances of the Sketchbook. |
|
| » Dylan’s Sketchbook Locations | ||
 |
Dog’s Best Friend Gain a furry friend. |
|
| This trophy requires you to find a lost dog in each of the Zones. Each Zone has one dog location which gets marked when going near it. In each Zone, the dog wants you to find her plush toy. The toy always looks the same, a small blue dragon that is always in the immediate vicinity of the dog. Once you’ve found the toy in all Zones, interact with the dog in The Gap to unlock the trophy. | ||
 |
Backroom Espionage Visit all the Secret Hideouts. |
|
| » Secret Hideout Locations | ||
 |
Budding Mycologist Deal with the major Mold Incidents in Manhattan. |
|
| Reward for completing 4 Side Quests: New Growth, Carbon Copy Part I, Carbon Copy Part II, Carbon Copy Part III. | ||
 |
Astral Adept Max-out any Aberrant Form. |
|
| See trophy Astral Potency. |
||
 |
Field Control Reach level 5 in every Zone. |
|
| See trophy Zone Warden. |
||
 |
Paranatural Craftsman Equip 3 Artifacts. |
|
| See trophy Paranatural Artisan. |
||
 |
Psychic Domination Command a Breaker enemy. |
|
|
Command is an ability that is unlocked from the quest The Unknown Resonant. Once you’ve unlocked it, a purple head icon will be displayed in the bottom right corner of the screen. Build up 3 charges by defeating enemies. Then you can press |
||
 |
Intense Precision Keep Dominance active for 60 seconds. |
|
|
First, you must buy the Talent called “Dominance”. You do this by going to the hub area “The Gap” (hold
Then “Dominance” is triggered whenever you falter (stun) an enemy and perform an The easiest method is to go to Options > Assist Mode > enable “One-Hit Falters” (check this box). Then you can farm it on the training enemy in the Gap. Interact with the big stone in the Gap, next to the stone circle where you bought the talent. The training enemy will keep spawning infinitely every few seconds. Hit it once to stun it with the assist mode setting > do |
||
 |
Paranatural Agility Perform 3 Perfect Dodges in less than 6 seconds. |
|
|
To perform a Perfect Dodge, you’ll first want to unlock the talent “Perfect Dodge” (by interacting with the small stone circle in The Gap).
Now perform a perfect dodge on 3 attacks within 6 seconds by pressing |
||
 |
Love to Deep Dive Visit the Gap 3 times in less than 5 minutes. |
|
| Very quick and easy trophy. Simply hold until you’re in the Gap. Repeat twice more immediately until the trophy unlocks. |
||
 |
SHÜM! Play a level in SHÜM! |
|
SHÜM is an Arcade Machine game which unlocks in each Zone after reaching the required Zone Level (hold  on map to see the level requirement for each zone). On the map it will be marked as a “Challenge” with a joystick symbol. Each Zone has at least one SHÜM Arcade Machine. Simply interact with it and play a level, the trophy will unlock afterward. You’ll need to set any score in the minigame, if you exit without finishing a game it won’t unlock the trophy. on map to see the level requirement for each zone). On the map it will be marked as a “Challenge” with a joystick symbol. Each Zone has at least one SHÜM Arcade Machine. Simply interact with it and play a level, the trophy will unlock afterward. You’ll need to set any score in the minigame, if you exit without finishing a game it won’t unlock the trophy. |
||
 |
Out of Uniform Equip an outfit item in every customization slot. |
|
| Interact with any wardrobe, they get marked on the map with a “jacket” symbol (for example, in Downtown > Oldest House, Evacuation Zone > Evac Building). You will see 6 customization slots: Top Layer, Hair, Base Layer, Facial Hair, Accessories, Body and Face.
Equip one in each slot. You will unlock them from main and side quests and buying them from vendors (after leveling up the zones sufficiently). You should get one of each automatically from main quests, except accessory, which you can buy from the vendor in Downtown, he sells a pair of glasses. You will unlock plenty customization items from the other side quests you have to do for trophies. |
||
 |
Up to the Task Complete a World Feat. |
|
| World Feats are the side activities marked on the map by white icons, such as “Hiss Hive”, “Hold the Line”, “Suspended Extermination”. Complete any one of these. You will get this automatically while playing through the story as some world feats are needed to advance main quests. | ||
 |
FBC Recruit Complete an FBC Task. |
|
| See trophy Diligent Consultant. |
||
 |
Core Competency Obtain a Health Upgrade or Power Upgrade. |
|
| See trophies Personal Development and Astral. |
||
 |
Field Work Reach level 3 in any Zone. |
|
| Automatic story-related trophy, cannot be missed. You will automatically unlock this during Main Quest: Evacuation Procedures, if you haven’t it unlocked it from open world exploration before then.
Each map zone has 15 levels, which you can see by pressing |
||
 |
Finalization Protocol Unlock a Combo Finisher. |
|
| First, you will need to reach at least Aberrant Strength Level 15. You increase your Aberrant Strength by buying new Primary/Secondary Form abilities in The Gap, see Astral Potency.
Then you can interact with the big metal pillar in The Gap (hold |
||
 |
Paranatural Apprentice Craft an Artifact. |
|
| In the Gap interact with the small well and craft one Artifact, this costs materials you find in crates and as drops from stronger enemies. Also see trophy Paranatural Artisan. |
||
 |
Promising Recruit Unlock a Talent. |
|
| In the Gap interact with the small stone circle and buy one Talent (Perks). Also see trophy Versatile Expert. |
||
 |
Astral Construction Purchase an Aberrant Upgrade. |
|
| In the Gap interact with the big metal pillar and buy one upgrade for your Primary Form or Secondary Form. Also see trophy Astral Potency. |
||
 |
Parautilitarian Obtain your first Combat Ability. |
|
| Automatic story-related trophy, this will unlock after Main Mission: Orientation, when the story makes you choose your first Combat Ability. | ||
 |
Assigned to Accept Obtain Aberrant. |
|
| Automatic story-related trophy, this will be your first trophy at the very start of the game, after choosing your starting class. | ||
 prompt on The Spire from afar, can be done when standing north-east from the fast travel door (see map below), this will add the quest to the quest log. Then climb up the Spire using Gravity Shift ability. After some climbing you will eventually reach a locked door leading to the boss. You must collect the 3 keys from the floating islands around this area to open the doors to the boss. One is left of the door, one to the right, and one opposite the door in the direction where you climbed up.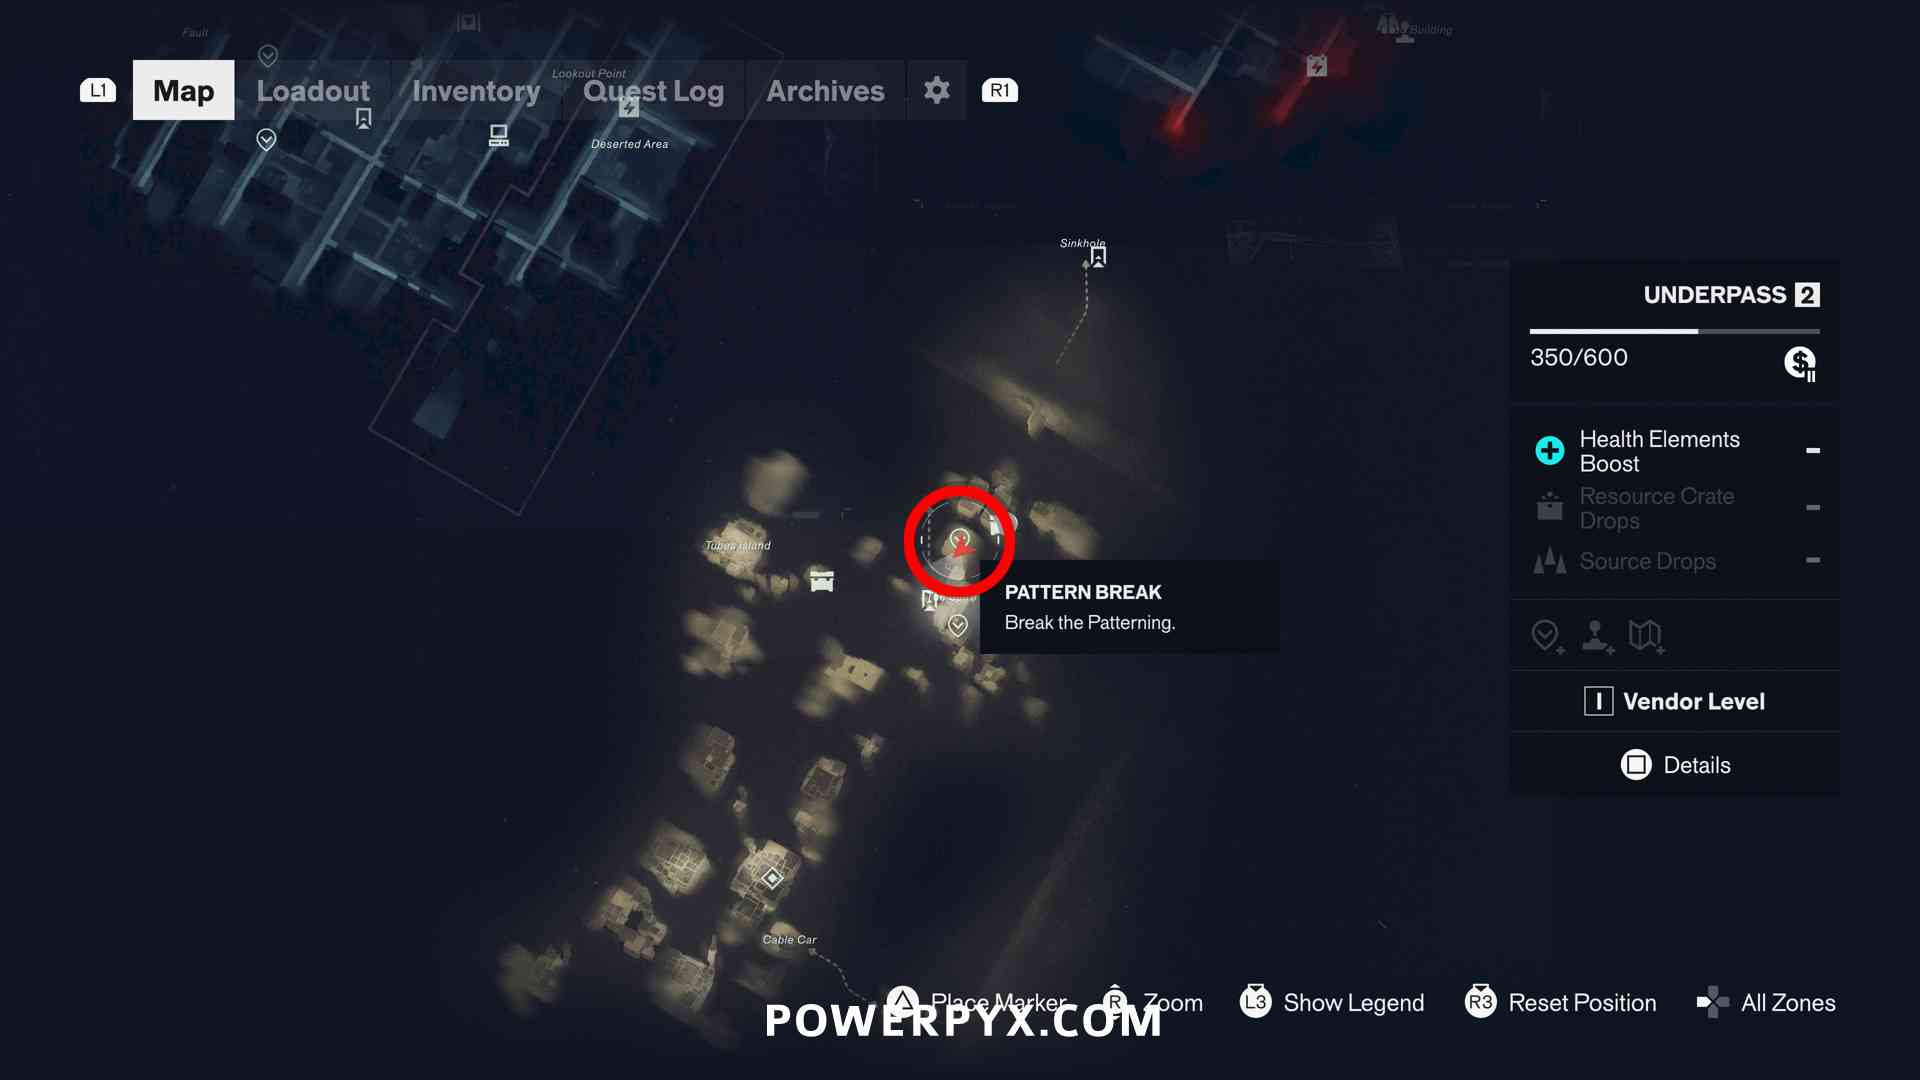
 /
/  /
/  .
.
 on the D-Pad to command an enemy and get it to fight for you for a limited time. Breaker enemies are oversized Hiss enemies built out of smaller Hiss. The Hiss Transporter (rogue bus), is a good example. You’ll run into these regularly in Central, including during “Hold the Line”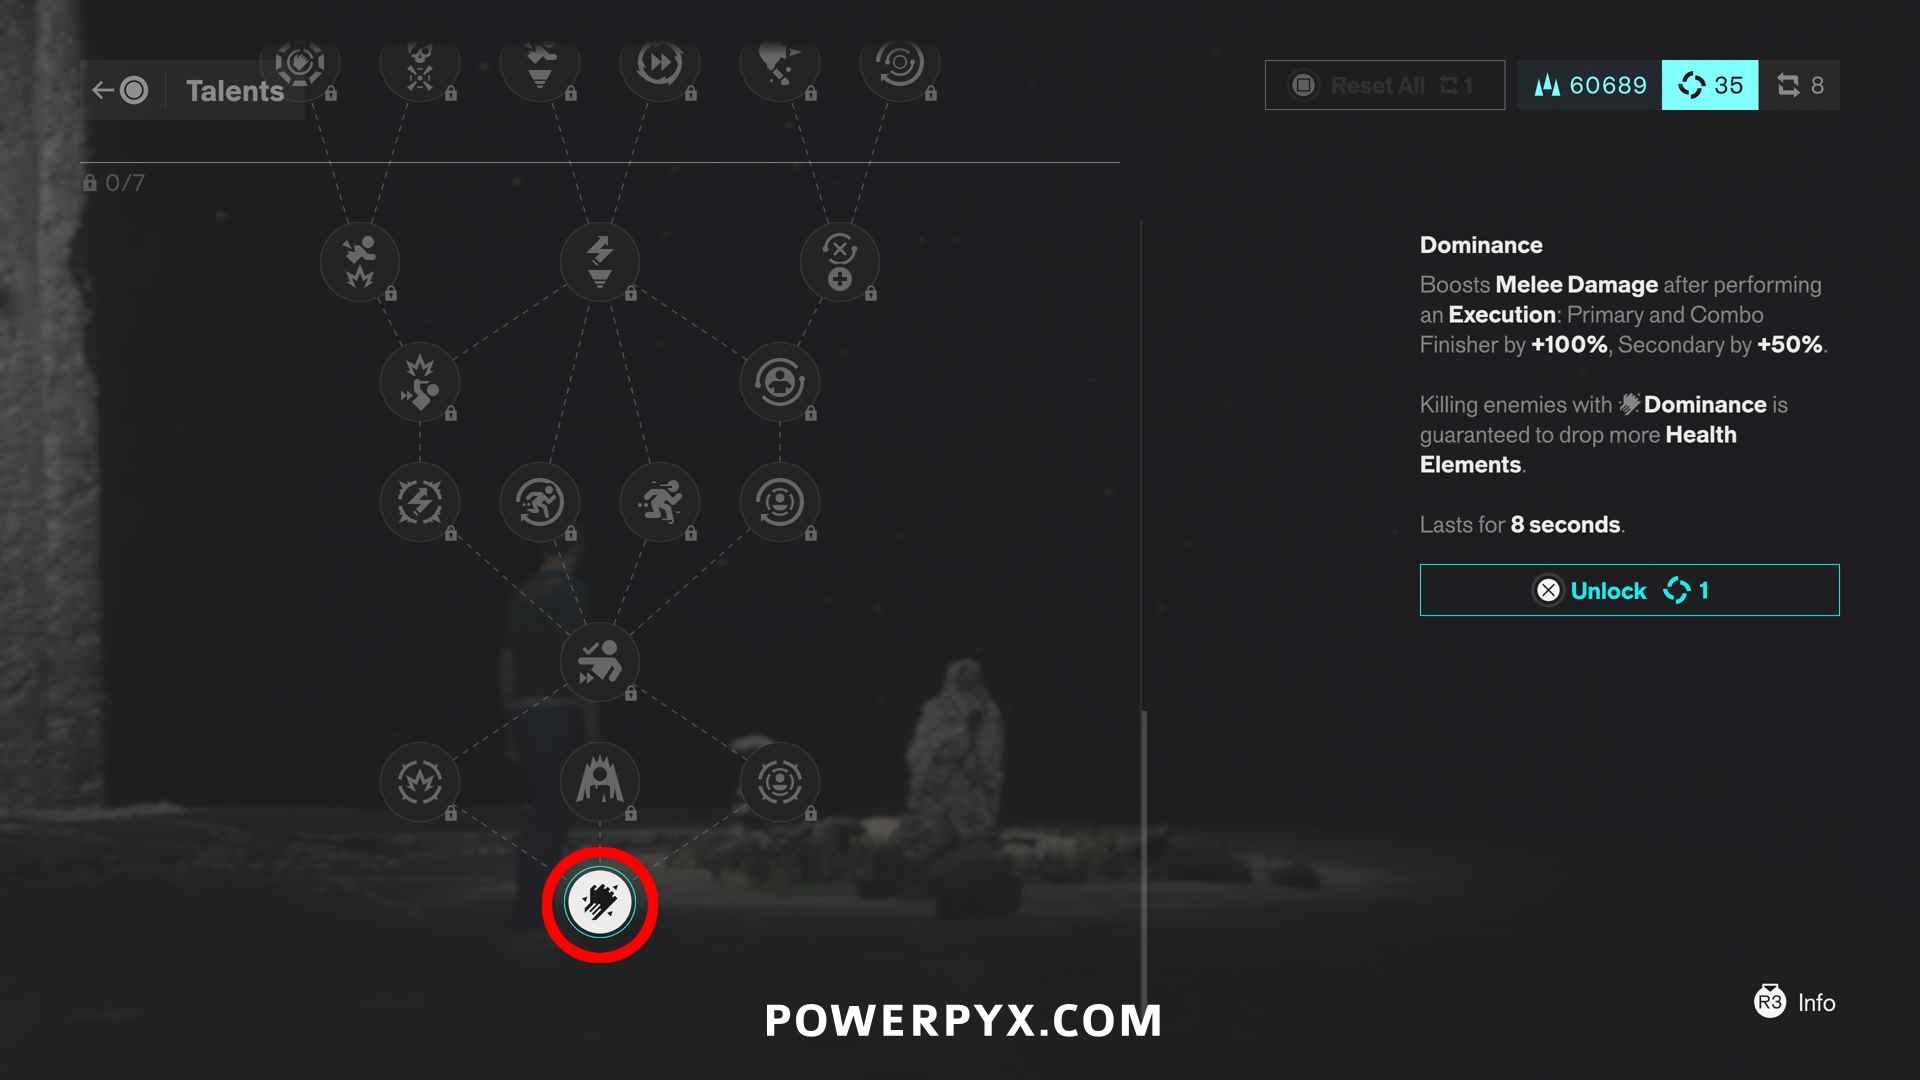
 finisher, you will see a white icon in the bottom left of the screen that quickly depletes. You have to keep this effect going for 60 seconds by quickly chaining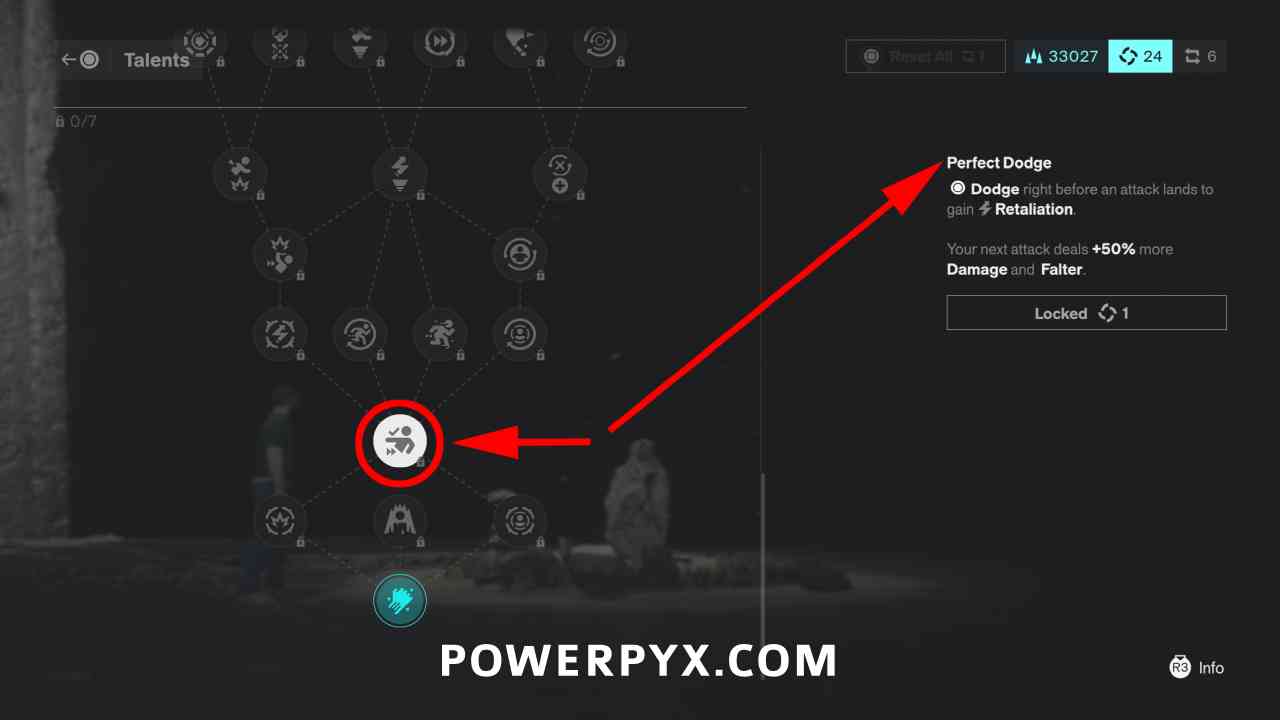
PowerPyx says
Pretty unique game. Have fun.
Ben-Gun says
I completed New Growth side quest – it did not unlock Budding Mycologist trophy ???? Tried different choices, it doesn’t pop.
Something else must be required as well..
vrusix says
turns out I just had to do the twin sisters quest and it popped.
MaaXz says
I got the trophy after Carbon Copy Part 3.
dj says
How does Intense Precision work? Is it an ability as it doesn’t seem to last long?
DefiledOne says
Why is this game a 3 difficulty rating instead of 1 if you’re using cheats?
PowerPyx says
The difficulty doesn’t come from the combat, but from the game being tricky to navigate with confusing objectives. A lot of players will be lost without walkthroughs. At the very least you need good spatial perception and navigation skills for this game, which is more than most AAA games nowadays ask from players.
BKW says
Because the game does not have yellow painting and bluefart to guide you throught the map. The puzzles are hard to solve also
Jerry says
I’ve already got most of the trophies—this game objective is tricky indeed. Now I’m just waiting for your freeze camera guide… These cameras don’t show up on the map, so finding the missing ones is tough. Thanks for your guide though
D3mystic says
Thanks for the guide.
Are there any collectibles/quests that require a certain ability or story progress? If so, which abilities should I prioritize first?
Frey says
Budding Mycologist is not unlocking for me.
I’ve done New Growth sidequest. Also done the twins sidequest as one suggested above.
Any idea what is missing?
Frey says
I went back to Park zone and got 2nd part of the quest. Apparently there’s more! 3 in total in fact.
It should popped after you cleared both New Growth & Carbon Copy 1,2 & 3.
Frey says
I also want to add.
You need more than Unsupervised Science sidequest to pop Threshold Researcher.
It popped for me after completing Taxi sidequest.
Angel says
Could someone tell me how to activate the automatic running feature in the assistance options? It’s not there.
TrophyForHire says
You will also need to do the Into The Valley Of Death to pop Panoticon Intern trophy.
I believe same apply with Budding Mycologist, Beside the New Growth you will have to do other sidequest involved with the Mold – Someone confirm it pop when doing twin side quest which i believe it called Carbon Copy. He might did some other sidequest already along with it to pop it.
spyro says
i think with assist mode on , the game can be done with much faster than 30 hours if you rush everything. more like 20-30 hours. because the story itself is like 12 hours with god mode and 1 shot on.
Saudumm says
Quick tip: You can get the “Intense Precision” trophy in the training arena in the gap. Just turn on “One Hit Falter” and kill the endlessly respawning enemies with finishers for 60 seconds. Quick and easy trophy that way.
Faisal says
for Threshold Researcher trophy ,,, for sure u need to do the last taxi side quest
James says
I think the 30 artifacts trophy is missable simply by the fact that once you’ve done all resonants the world stops reseting and you only have a finite amount of enemies to earn money by defeating. I’m currently grinding out my last few thousand and i didnt exactly spend much so if anyone goes spend crazy they could shoot themselves in the foot.
PowerPyx says
Not missable, there are enemies everywhere after the story when you’ve defeated all Resonants, and you can buy more materials from vendors. I keep running into large groups all the time. I didn’t do any optional stuff during story and had more than enough materials to craft 30 artifacts after story before doing all the side content cleanup. Just craft and refund the same cheap artifacts 30 times in a row and keep defeating enemies over the map during cleanup for more materials.
wickdsamurai says
Thanks for the guide. I haven’t started yet but is there a way in-game that collectibles are tracked? I dont want to collect some during the main story and have to backtrack to the same ones.
Archer says
Is it possible to get locked out of Carbon Copy part 2? Cause I only started the part 1 after beating the game, and completed several FBC tasks but the part 2 is still not triggered for me.
Kevin says
For “Panopticon Intern” trophy you need 6 side missions, not 5. Side mission “Into the Valley of Death” is Neede for trophy
Matt Willis says
Thanks for the great guide as usual. I would note that the game is significantly easier after the patches post launch. I got the platinum in a completion time of 25 hours without turning on any if the assist features. Patchy notes show enemy TTK has been reduced significantly, in some zones combat frequency has been reduced and some bosses have been made easier. The Dancer before and after a recent patch was noticeably easier for me. I put the gane into sleep mode after dying multiple times. The game patched between the and when i next played and I defeated the Dancer first time after whilst barely getting hit. Completed the last 2 resonants and final boss fights without dying once.
Synactix says
Probably hit a platinum-breaking bug. When moping everything up after story, the sidequest Panopticon Request is not available at Langston, even after Valley of Death. Tried an older save (half-game) and the quest is there. Anyone has the same problem? It`s the last quest before getting the plat.