
Secret of the Ring Ruins is a Main Quest in The Legend of Zelda: Tears of the Kingdom (TotK). This walkthrough will guide you through all objectives of the Secret of the Ring Ruins story mission.
Requirement: Started Main Quest: Find the Fifth Sage & Finished Main Quest: Camera Work in the Depths, then find the quest giver in Kakariko Village in Necluda region
Reward: Unlocks Main Quest: Guidance from the Ages Past
Quest Info: After you told Paya and Tauro about the false Princess Zelda, they began exploring the Ring Ruin previously forbidden by the impostor. They believe there is a stone slab carved with Zonai writing inside.
Objectives:
- Photograph the Stone Slab in Ring Ruins
- Go to Popla Foothills Skyview Tower
- Talk to Tauro in Zonai Ruins
- Solve the Serpent Riddle
- Return to Popla Foothills Skyview Tower
- Reach End of Thunderhead Isles
- Reach End of Dragonhead Island
Starting Location: Secret of the Ring Ruins
After getting Main Quest: Find the Fifth Sage, you will have to look for clues to the Fifth Sage’s location. As part of this you must do some other Main Quests first. Secret of the Ring Ruins is a part of this questline. It starts in Kakariko Village in Necluda region. In the north of the village talk to Tauro & Paya, the two people standing at the Floating Ring Ruins. They will have a red quest marker over their heads. They will tell you to enter the Ring Ruins to find the Stone Slab. You will also need to have completed Main Quest: Camera Work in the Depths (from Robbie/Josha in Lookout Landing) to unlock the ability to take pictures.


Photograph the Stone Slab in Ring Ruins
Climb up the scaffolding in front of the quest givers. At the top use Ascend ability to teleport into the Flying Ring Ruins.


Once inside, select the Camera from the Ability Wheel and take a picture of the slab.

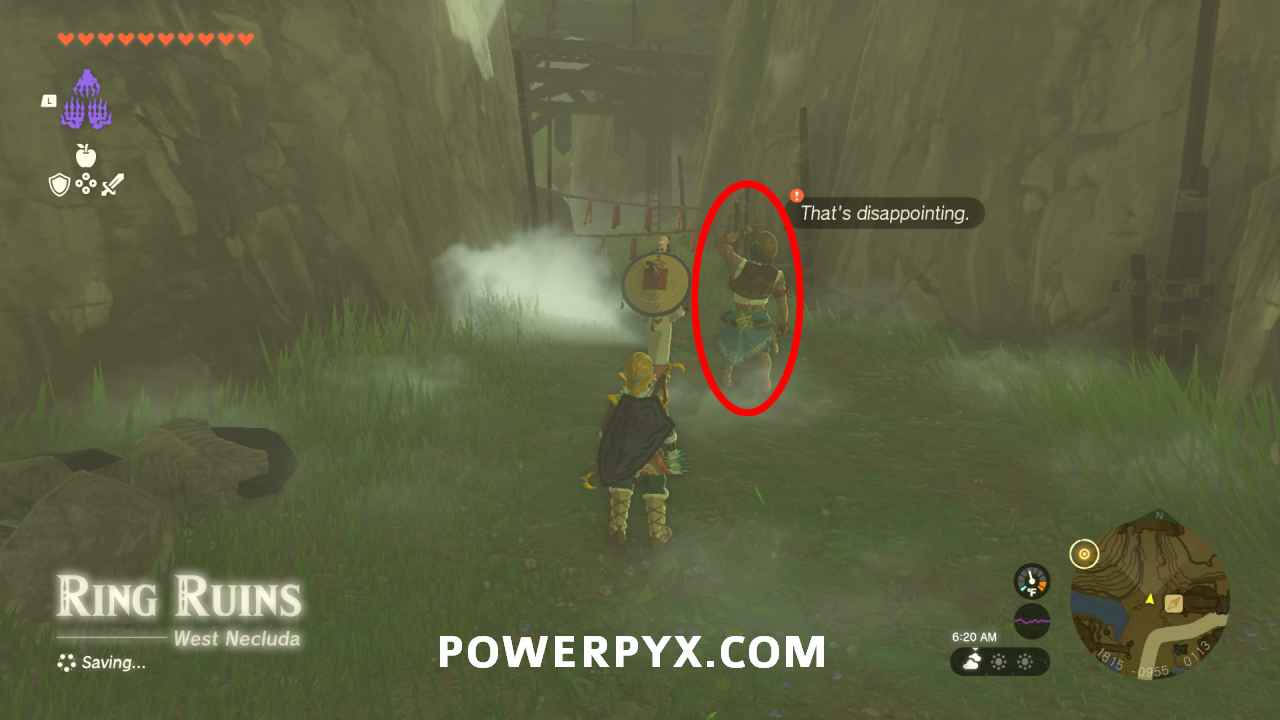
Then use Ascend again to teleport through the Ring and glide back down to the quest givers. Talk to them and say “What about this image?” to show the picture you took.

They will read the slab and you get a new waypoint at Popla Foothills Skyview Tower.
Go to Popla Foothills Skyview Tower
Go to Popla Foothills Skyview Tower. You can activate the tower by dropping down the well in front of it to find the trapped repairman, then enter the cave via the south wall down the cliffs from the tower (coordinates: 0605, -2226, 0051) to free him. He repairs the tower for you.
Talk to Calip in front of the tower. If he’s sleeping, skip time until noon at the campfire. He tells you to investigate the Zonai Ruins in Faron, to the southeast by Dracozu Lake. You can glide there from the skyview tower.


Talk to Tauro in Zonai Ruins
At the northeast edge of Dracozu Lake, behind a campfire, you can enter the ruins (coordinates: 0968, -2531, 0008). Talk to Tauro inside.


He gives you a riddle: “Wear the electric garb hidden at long-necked dragons along the wide-mouthed forest serpent. Offer a Zonai charge to the altar at the tail.”
Solve the Serpent Riddle
First, you must find the 3 “Charged” armor parts and equip them. They are all nearby, in caves along the River:
#1 – Charged Shirt
Open the chest in the same room where you talked to Tauro (coordinates: 1002, -2539, 0013).


#2 – Charged Trousers
Follow the river south, on the right side of the river will be a cave. The entrance is blocked by rocks, use Yunobo’s attack on it to break the rocks. The chest is inside the cave (coordinates: 0986, -2689, 0007).


#3 – Charged Headdress
Keep following the river a little further south, there’s another cave entrance on the left. It’s blocked by brown roots. These can be sliced by attacking with a melee weapon. The chest is inside (coordinates: 0970, -2803, 0007).


Zonai Charge Altar
Make sure you equip all 3 armor pieces from the inventory! With the armor equipped, you must place a Zonai Charge on the altar in a cave in the west of Damel Forest. Keep following the river to get there. The cave entrance is at coordinates 0707, -2757, 0010. Open the inventory > click “Hold” on a Zonai Charge >  to return to game >
  to place it directly on the altar.


This will play a cutscene. Then you get a new quest marker.
Return to Popla Foothills Skyview Tower
Fast travel back to Popla Foothills Skyview Tower. Talk to Calip in front of the tower. If he’s sleeping, skip time until noon at the campfire.
Reach End of Thunderhead Isles
Use the Popla Foothills Skyview Tower to catapult up, then glide to the flying islands to the southeast. It’s a long glide, you need to make use of Tulin’s gust of wind, and if you don’t have enough stamina you might not make it. You can either consume meals midflight that restore stamina, or sleep at a stable in the expensive bed for 50 rupees to get an extra stamina bar, or complete Shrines and trade 4 Lights of Blessing for a stamina upgrade at an angel statue (one is in Lookout Landing in the underground bunker).
Here’s the island where you must land, called Thunderhead Isles on the sky map:


There are lightning strikes in this area. To not attract lightning, unequip your weapon / bow / shield from the inventory! Then you won’t get hit by lightning anymore.
You need to reach the end of this flying island chain. Glide from one island to the next, use Ascend to teleport through pillars and on top of ruins. From elevated positions you can glide to the next island more easily.
At one point, you will reach a lightning conductor that is wired to a ram. When the lightning strikes, it will activate the ram. Stand on it to be catapulted to the next island. You can equip a weapon near the lightning conductor, then unequip it, it will hit the conductor and not you.


In the next section with the fairy enemy, Ascend up the tower and glide across to the next island.


Then you reach a metal rail. Don’t use the rail, instead Ascend up the rocks left of the rail and glide across to the next island.


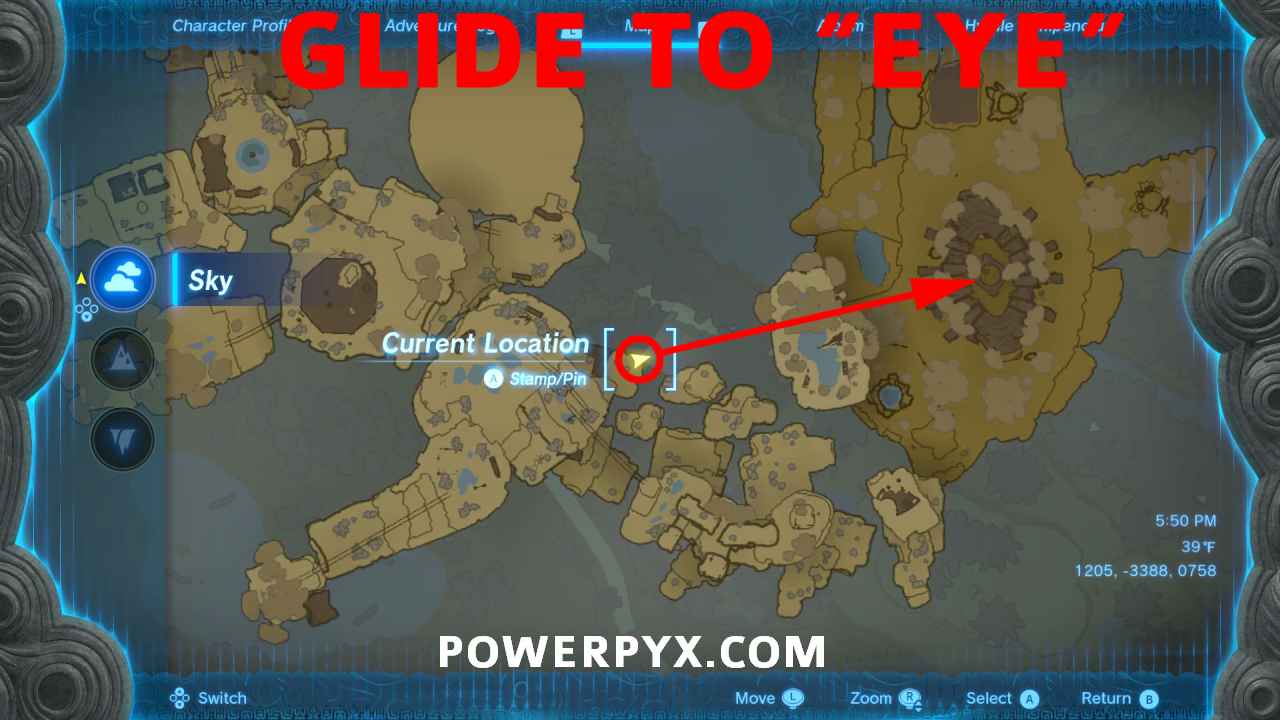
From here, look down to the last big island that’s shaped like a dragon head. You must glide down to it and glide into the “eye” of the island, where you see the green light of a shrine.

After landing, activate Joku-u Shrine.

Reach End of Dragonhead Island
Destroy the roots across from the shrine with a melee weapon.


Then interact with the big gate. It will consume 10 health hearts. If you don’t have enough health, you must go complete Shrines and trade the Lights of Blessing for Health Hearts at Angel Statues (e.g. one is in the bunker of Lookout Landing). Make sure you eat some meals to heal, or fast travel to Lookout Landing to sleep in the bed in the bunker and then fast travel back here to the shrine.

Behind the gate, activate the green device. It will shine a green laser from the sky and the quest finishes after the cutscene. It will trigger a new Main Quest Guidance from the Ages Past.

This finishes Secret of the Ring Ruins Main Quest in The Legend of Zelda: Tears of the Kingdom.
Next Quest: Guidance from the Ages Past
For all other Quests refer to The Legend of Zelda: Tears of the Kingdom Walkthrough.
Leave a Reply