Star Wars Jedi: Fallen Order has 256 Collectible Locations needed for trophies & achievements, split into 5 different categories. In total, there are 45 enemies, 19 Encrypted Logs, 107 Chests, 32 Secrets (8 of which are Stim Canisters), and 10 Terrarium Seeds. The remaining 24 Secrets are Life / Force upgrades and also count towards the 75 Force Echoes, of which there are more than you need for the trophy. However, it’s recommended you still grab all the extra ones because most of them are located in hidden locations which will help fill out BD-1’s Holomaps as you need 100% exploration in every area too. Following this guide grant you 100% completion in all of the planet sub-areas, thus the related trophy
To unlock the Platinum trophy, you need to scan all enemy types and Encrypted Logs, find and unlock all Chests, find all Secrets, and find and plant all 10 Terrarium Seeds. The guide below lists the locations to all Collectibles. The list has been organized by planet sub-areas.
Nothing is missable! You can still find all Collectibles after the story. You can also use the in-game Customization and Databank menu (  /
/  ) to determine what you’re missing.
Important: It’s recommended to avoid everything except the Terrarium Seeds and scanning enemies during your story run. This guide has been written as a walkthrough from the beginning to end of each area to make the clean-up as efficient and fast as possible. If you already got some Collectibles during the story it will be harder to follow along, so better not touch any Collectibles on your story playthrough. Furthermore, many Collectibles are unavailable on your first run through each area and would make for excessive and unnecessary backtracking.
Note regarding Echoes: There are more Echoes in the game than are required for trophies / achievements (you need 75, we found 113). There are even more than this but they are not all part of this guide (anything you need for trophies / achievements is complete here). If you find more optional ones feel free to share them in the comments below. Additionally, this guide doesn’t cover environmental scans for Databank entries as they aren’t needed for trophies EXCEPT Cordova’s Journey.
Trophies & Achievements Earned from Collectibles:
- Collector
 – Collect all chests and secrets
 - Medical Droid
 – Find all of BD-1’s stim canisters
 - Green Thumb
 – Have a fully grown terrarium
 - Data Disk
 – Find all of BD-1’s encrypted logs
 - Data Collector
 – Scan all enemy types
 - Echo Location
 – Discover 75 Force Echoes
Overview:
- 113 Force Echoes
- 107 Chests
- 32 Secrets
- 45 Scans (Located in Tactical Guide)
- 10 Terrarium Seeds
- 8 Stim Canisters
- 19 Encrypted Logs
Guide by Darth_Krid & FranciRoosters
Empire Enemies (Every planet except Dathomir)
Tactical Guide:
- Scout Trooper
- Scout Trooper Commander
- Stormtrooper
- Stormtrooper Commander
- AT-ST
- Security Droid
- Flametrooper
- Heavy Assault Trooper
- Probe Droid
- Rocket Launcher Trooper
- Elecrobaton Purge Trooper
- Electrostaff Purge Trooper
- Purge Trooper Commander
- Electrohammer Purge Trooper
- The Ninth Sister
- The Second Sister
- *Spoiler* (Story-related; cannot be missed)
Haxion Brood (Bounty Hunters) (Every planet after the Arena Battle sequence)
Tactical Guide:
- Haxion Brood Bounty Hunter
- Haxion Brood Commando
- Haxion Brood Bounty Droid
Planet: Bogano
Tactical Guide:
- Oggdo
- Bog Rat
- Splox
- Oggdo Bogdo
Area: Landing Pad
- Stim Canister #1 (Secret #1). As soon as you get off the ship, walk down the circular path to get directly underneath you, then use Force Push through the cage to move the sphere onto the switch. Go through the open door and grab this. Note that the optional crew member is found right next to this by using Force Push on the weakened wall.


Area: Fractured Plain
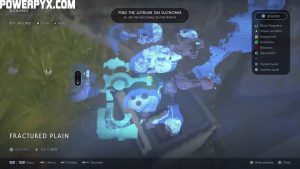
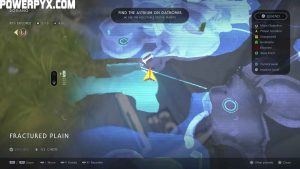
- Terrarium Seed #1 – Featherfern: You need Double Jump (obtained later in the story) to get over to this area. It’ll be on the ground where you land.

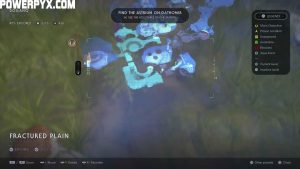

- Echo #1 – Remnants of a Lost Civilization – 5. Zeffo Colony. From the Featherfern seed, imagining this ledge is a crescent moon, walk to the other end to find a little white statue emitting an Echo. It’s just across the small gap from the bronze structure.
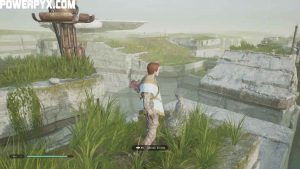
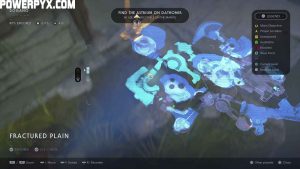

- Chest #1 – Lightsaber Material (Neuranium). Double jump across the remains of the broken metal bridge to this Chest.


- Echo #2 – Bogling Studies – 2. Dead Bogling. In the exact centre of the circular part of this area. You need double jump to get up to this platform.
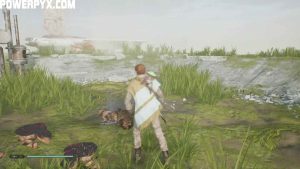


- Chest #2 – Lightsaber Sleeve (Peace and Justice II). Walk north from the Force Echo (towards the temple) to the end of this area that’s jutting out.

Area: Bogdo Sinkholes
- Echo #3 – The Researcher – 2. Research Notes (Secret #2). Soon you’ll come to a fork in the road, with the story path left, a locked door straight ahead and some narrow pipes leading across to some fans on the right. Go right, slow the fans down, drop down into the area and then freeze the fans on the floor. Jump across and grab this Echo which is also a Force Essence upgrade.
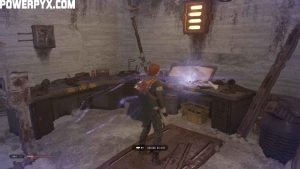


- Echo #4 – Bogling Studies – 1. Bogling Corpse (Secret #3). At the back of the circular arena where you defeat the Oggdo Bogdo.


- Chest #3 – Poncho (Sumi). Next to the Echo above.

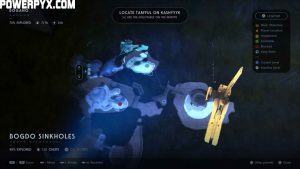

- Chest #4 – Mantis Paint Job (Republic). Pull the bridge in this area down with Force Pull, then go across to the other side to find a rope to swing on. Jump to the rope, then turn back on yourself and jump towards the fan, using Force Slow while in mid air. Hopefully you’ll land inside on the ledge and get this Chest.


- Encrypted Log #1 – Archive One – Discovery: 1. An Ancient Sphere. On exactly the same ledge as the Chest above (same screenshots as above), scan the sphere in the middle of the room.
Area: Hermit’s Abode
- Chest #5 – Lightsaber Emitter (Eno Cordova). On the upper level of the hermit’s house. Go around to the left on this upper ledge and you’ll come to the Chest.


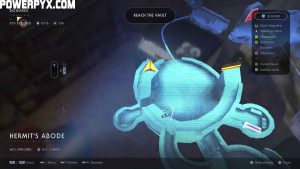
- Encrypted Log #2 – Archive Six – Vision: 1. The Premonition. Turn around from the Chest, hop over the ledge and go right through the doorway. Chop through some cables with your lightsaber, then scan the metal heap on the floor.


- Chest #6 – Lightsaber Switch (Eno Cordova). From the log above, drop down to the left and examine Cordova’s bed to chat with Cere about holochess. Then use Overcharge on the panel to turn the lights on and drop into the shallow hole in the middle of this room to find this Chest.


- Encrypted Log #3 – Archive One – Discovery: 2. Sage, Vault and Tomb. Inside the hut, next to the lightsaber workbench behind the fan you need to Slow.
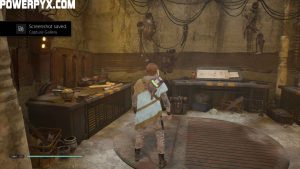


- Echo #5 – The Researcher – 4. Larder. Also inside the hut, in the small larder branching off from the central room.


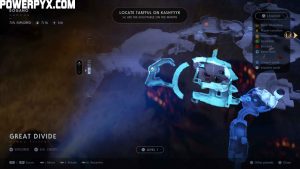
Area: Great Divide
- Chest #7 – Poncho (Bogano Dawn). After using the second zipline and receiving another Holomap tutorial, you’ll have to drop down to the level below you and kill an enemy. After this, turn around and the Chest will be there.
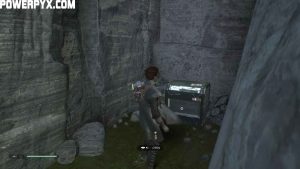


- Echo #6 – The Researcher – 5. Traveling to the Vault. Just after the Chest, cross the gap by swinging on the vine and reach the Meditation point. Just to the left of this around the corner is this Echo.


- Chest #8 – Lightsaber Switch (Valor and Wisdom II). After learning to wall run and on the way back to the story path, run along the panel and then the wall to reach a platform. Just around the left is a Chest.


- Echo #7 – The Researcher – 3. Research Camp. After taking the lift up, go through the narrow rock passageway then take a right through another one. Just to the left on the ruins of a campfire is this Echo.

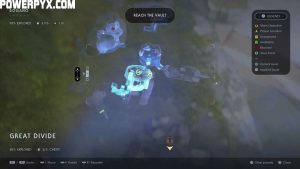

- Chest #9 – Lightsaber Material (Corundum). Follow the path after the Echo to reach two Chests next to each other which are hard to miss. For this one, you need Slice.


- Chest #10 – Lightsaber Sleeve (Valour and Wisdom II). Same location (and screenshots) as above, except you can open this at any point.
- Chest #11 – BD-1 Skin (Z’Gag Wave). Force Push the bridge near the Meditation Point in Subterranean Refuge and go across it to this Chest. Needs Slice.


- Echo #8 – Remnants of a Lost Civilisation – 3. Ancient Bones. Proceed onwards from the bridge and you’ll come to a fork. Go left, slide down the mud and jump to a rope. Swing across and follow the linear path to reach this Echo.


- Echo #9 – Remnants of a Lost Civilisation – 6. Resting Place. Just after the last Echo inside the rock. You’ll have to defeat some enemies first.

Area: Subterranean Refuge
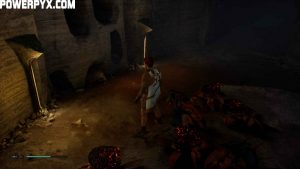
- Terrarium Seed #2 – Kalpi: From the area’s Meditation point, drop down to the right into the flooded area and kill the Bog Rat. Where it died, scan with
 to find this seed.


- Echo #10 – The Researcher – 8. Secluded Sanctuary. From the Meditation Point, facing indoors, drop to the right and go through the entrance. Wall run to a ledge and then find a very narrow path with ridge walls either side. Use both double jumps and wall runs to get to the top of the steep slope and find this Echo.


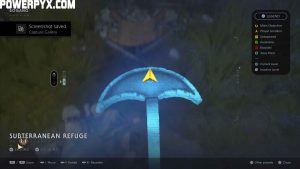
- Echo #11 – The Researcher – 9. Cordova’s Padawan (Secret #4). From the top of the steep slope, don’t slide down but instead wall run back the way you came and grab onto a vine. Swing to another vine, then angle yourself towards the left and jump to the wall. Run along this and double jump to a ledge, on which is this Echo/Life upgrade.


- Echo #12 – The Researcher – 6. Meditation. From the Meditation Point, facing inwards, drop down a ledge to the right and use the right-most wall run walls to go around the corner and get to a platform with this Echo.


- Echo #13 – The Researcher – 7. Frustration. Use the wall right of the Meditation Point to get to a ledge. From this ledge, continue wall running until you get to another ledge with the Echo.


- Stim Canister #2 (Secret #5). From the previous Echo, turn around and look up to see a stone you can Force Pull down. Climb up and onto the platform to find this gold Chest. If you want this earlier in the game, go to the amphitheatre structure in Binog Mesa, use the walls at the back to reach the next platform and from here drop into the large circular hole to land next to the Chest.


Area: Binog Mesa
- Chest #12 – Outfit (Pathfinder). From the top of the hole leading down to the gold Chest in Subterranean Refuge, climb up the stone amphitheatre and go left to find an area you can jump down to. The Chest is here at the end.


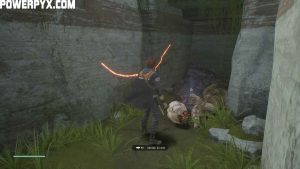
- Echo #14 – Bogling Studies – 5. Dead Splox. At the other amphitheatre in this area where you’ll fight three Splox, go to the bottom and through the narrow gap in the rocks, then around the corner is this Echo on the floor.


Area: Ancient Vault
- Encrypted Log #4 – Archive Seven – Goodbye: 2. Secrets of the Vault. Unlocks as part of the story after talking to Cordova’s hologram in the Vault. Unmissable.
Area: Abandoned Workshop
- Chest #13 – Poncho (Offshore). Swing across the rope and go to the far side of this plateau and this Chest is in front of some jagged fossil bones. Needs Splice.


- Chest #14 – Lightsaber Material (Lamina Steel). From the last Chest, look across to the other jagged fossil bones. This Chest is behind those on the cliff edge.


- Chest #15 – Lightsaber Emitter (Valour and Wisdom). You can access this area by using Force Push on the bridge in Great Divide, then following the path straight and jumping down into a flooded area. From the first floating platform in this room, dive into the water and go directly downwards to find this Chest against the rock.

- Chest #16 – Lightsaber Switch (Valour and Wisdom). Still underwater, this one is at the far end sandwiched between the back wall and the staircase platform.

- Echo #15 – The Researcher – 10. Old Memoirs (Secret #6). In the flooded area, climb the spiral staircase and take the first right and go through the door into the workshop. This Force upgrade is directly in front of you.
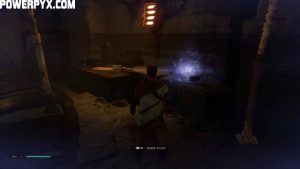


- Encrypted Log #5 – Archive Six – Vision: 2. Acquiring the Holocron. In the workshop, scan the stone figures to the left of the door.


Planet: Zeffo
Tactical Guide:
- Scazz
- Phillak
- Jotaz
- Skungus
- Tomb Guardian
- Rabid Jotaz
Area: Derelict Hangar
- Chest #17 – BD-1 Skin (Blue Leader). On the landing platform, amongst some crates in the shelter on the left.


- Chest #18 – Poncho (Bravo). In the hangar, near the back left, amongst some crates.


- Echo #16 – The Zeffo Villagers – 4. Hiding. When you get to the waterfall area, go right and enter the cave. Follow the path to the left to find this Echo.


- Stim Canister #3 (Secret #7). In the same area as the Echo above, continue on until you find this golden chest.


- Chest #19 – Lightsaber Emitter (Duty and Resolve). Moving on through the area to where the Stormtroopers are, go around to the back of the house, then climb up a platform and jump up to a small roof with this chest.


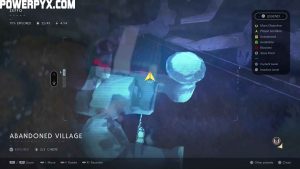
Area: Abandoned Village
- Echo #17 – The Zeffo Villagers – 3. Separated. Defeat the patrolling Scout Troopers, then head left along the cliff edge to a doorway where this Echo is located.


- Echo #18 – The Zeffo Villagers – 1. Eviction. After the Scout Troop Commander, head left and this is on the edge of the cliff between two houses, under a broken bridge.


- Chest #20 – Outfit (Guardian). On a roof of a building in the main area of the village, by a yellow chair and a door that opens.


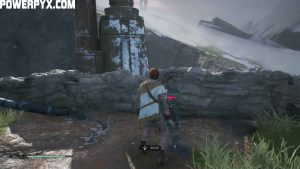
- Chest #21 – Lightsaber Sleeve (Duty and Resolve). Walk on the pipe, grab onto the ledge on the right and keep going until you see a yellow-roofed tower. Climb on it and climb on the ledge in front of you. You’ll find this chest in plain sight on the right.


- Chest #22 – Lightsaber Material (Durite). Located right in the back corner next to the circular tower, use Slice to open this one.

Area: Turbine Facility
- Chest #23 – Lightsaber Material (Copper). When you enter the Turbine Facility, take the path on the right, walk on the pipe and then look left to find a chest on a ledge.
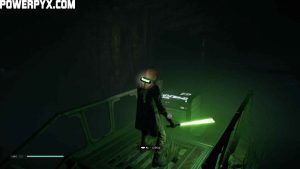

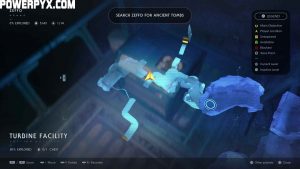
- Encrypted Log #6 – Archive One – Discovery: 3. The Sages. Go back to the fork at the start of this are and take the path on the right, wall run across the panel, walk across the pipe and scan the crate.


Area: Gusty Bluffs
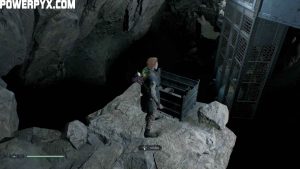
- Echo #19 – Imperial Excavation – 3. Pressured for Relics (Secret #8). In the area where you need to Force Slow the wheels so that you can cross over, Slow the last wheel in a way that allows you to reach the Meditation Point above. From there, climb up the ledge and work your way upwards, Slowing wheels until you land on a ledge. Go left and go through the cave until you find this Life upgrade.


Area: Weathered Monument
- Echo #20 – The Zeffo Villagers – 7. Hideout. Use the wind gusts near the wall run walls to reach the ledge up above. Go through and use the two narrow walls to reach the other side, then look up to the left to find a ledge with the Echo.


- Echo #21 – The Zeffo Villagers – 6. Dead Villager. Back in the village, Force Slow the fan and step through to find this.


- Chest #24 – Mantis Paint Job (Occultation). Go to the lightsaber bench and go up past the wall run panel and the machine you have to Force Slow. Jump onto the machine and then to the left to find this chest.


- Chest #25 – Lightsaber Switch (Duty and Resolve II). When you drop out of the factory back into the village, look for a tiny hut on the right under a wall panel where you can use Splice to open the door to find the chest inside.


- Chest #26 – Lightsaber Sleeve (Elemental Nature II). In the area with the three broken pipes and the Heavy Assault Stormtrooper, climb up the rope, take a sharp right around the corner and find this chest on a rock.


- Terrarium Seed #3 – Royal Fluzz: Take a left after climbing the rope and walk down this steep hill to find the Seed.


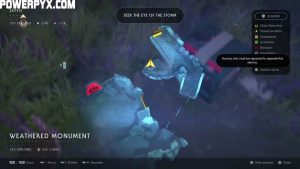
- Chest #27 – Mantis Paint Job (Mercenary). Right next to the Seed (same location and screenshots as the above Chest). Needs Splice.
Area: Auger Pulverisers
- Chest #28 – Lightsaber Switch (Duty and Resolve). After you come out of the dark hangar, on the left of the metal platform where some Stormtroopers are waiting for you.


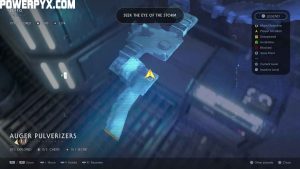
- Chest #29 – Lightsaber Material (Durasteel). When you need to Force Slow the pulverisers, slow the first ones and go inside the dark area. Slow the next pulveriser when it’s to the far left and quickly step into the alcove on the left to find this chest.

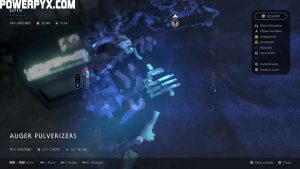

- Echo #22 – Project Auger Officer – 2. A New Officer (Secret #9). After wall-running up onto the third pulveriser and heading outside, you’ll notice a flimsy fence that you can jump through. Force Stop the pulveriser, drop down and keep using Slow to reach the metal grid with the Life upgrade Echo on top.
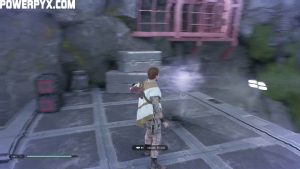
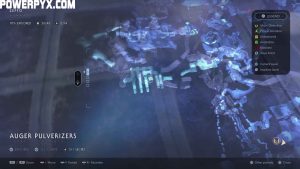

- Chest #30 – Mantis Paint Job (Starfighter). After getting past the pulverisers using Force Slow and defeating a few Stormtroopers, this is an easy to spot Chest on the left.


Area: Ancient Catacombs
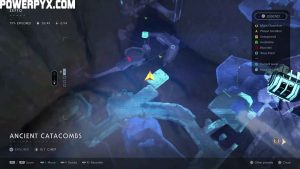
- Echo #23 – Project Auger Officer – 3. Questionable Use. Immediately after reaching the Ancient Catacombs do a wall-run, keep climbing up until you see a second wall you can run on immediately after on your right. Turn around, do a second wall-run. You’ll find this Echo at the end of the tunnel.


- Chest #31 – Mantis Paint Job (Charisma). In the dark tunnel of the Ancient Catacombs you’ll find a better lit area with a blowing vent. Jump on this vent to reach a hidden ledge with the Chest.


Area: Ice Caves
- Echo #24 – Project Auger Officer – 4. Ice Excavations. From Windswept Ruins, Force Push down the wall at the entrance to Windswept Ruins. The Echo is sitting on the floor at the back of this area behind the wall.


- Chest #32 – Poncho (Wayfarer). After sliding down and getting to the Meditation Point next to the lift, there is an area you can drop down to. Kill the Scazz and grab the Chest.
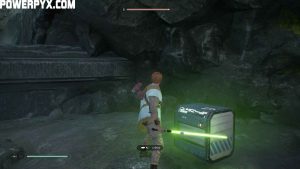


- Echo #25 – Project Auger Officer – 8. Officer Krane. A Jotaz will burst through some ice and attack you. Kill it then enter its lair to find this Echo sitting on a ledge.


- Chest #33 – BD-1 Skin (Bestine). Head down the rope you can cut, then follow the path around to the next elevator. Go beyond this and do some wall running and eventually you’ll get to a section with two enemies. The Chest is sitting on the right side of a door.


- Chest #34 – Lightsaber Material (Cerakote). Just to the left of the Chest above.


- Echo #26 – Project Auger Officer – 5. Finding Artifacts. In the same room as the two Chests above, on a table on the left.

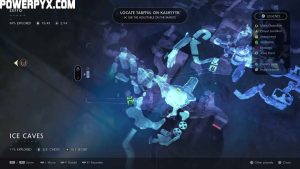

- Chest #35 – Lightsaber Material (Arcetron). Go through the door back to first elevator and the Meditation Point, then down the rope and jump across to where the Scazz’s are. Slow the spinning wheels, then wall run to a platform where you can see this Chest on the right.
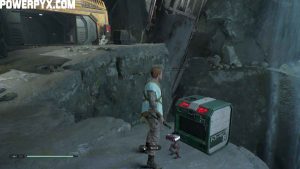


- Echo #27 – Imperial Excavation – 6. Cave-In. Take the elevator up and go through to where the Meditation Point is. This is in the back right corner of that flooded room.


- Stim Canister #4 (Secret #10). On the way back from the Tomb of Miktrull, you can pull a series of yellow ropes towards you to take a shortcut back. Use one of these to swing into a wind vent, which will lift you up so you can zipline up to a platform with this Chest.


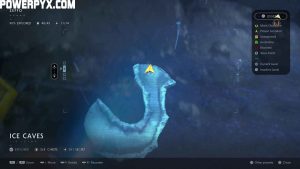
Area: Windswept Ruins
- Chest #36 – Lightsaber Sleeve (Duty and Resolve II). At the bottom of the stairs leading to the Tomb of Eilram, you’ll see a Rocket Launcher Trooper on a platform next to a wind vent on the right. Directly underneath this platform on ground level is an alcove with this Chest.


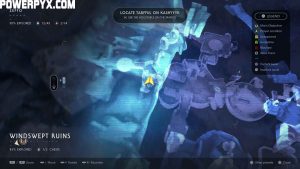
- Echo #28 – Zeffo Culture – 2. Zeffo Rituals. On the ground level at the bottom of the steps, behind a Force Push wall.


- Terrarium Seed #4 – Gillypod: From the Meditation Point, look up the stairs towards the tomb. You’ll see a wind vent straight in front of you in front of a platform. This Seed is on that platform.


- Chest #37 – Lightsaber Material (Osmiridium). From the platform the Rocket Launcher Trooper was on (the one above the previous Chest), jump to the wind vent and onto a higher platform with this Chest.

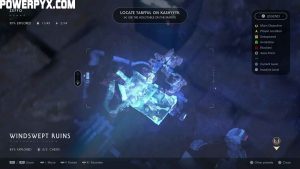
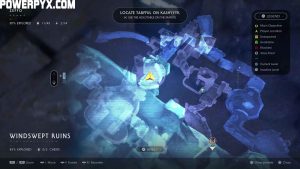
Area: Tomb of Eilram
- Encrypted Log #7 – Archive Four – Eilram: 1. Tomb of Eilram. Story-related; cannot be missed. It unlocks as Cal rides the elevator down into the tomb.
- Echo #29 – Zeffo Culture – 5. Whispers. In the room with the first giant sphere puzzle where you have to manipulate the wind to roll it into the middle, in the back left corner from where you enter.


- Echo #30 – Zeffo Culture – 1. Meditation Relics (Secret #11). Solve the giant sphere puzzle by rolling the ball into the middle. The central platform will raise up, revealing a room underneath. This Echo and Force Upgrade is in there.
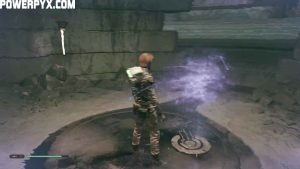
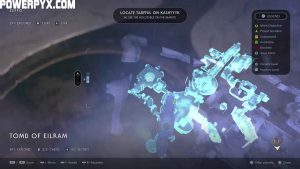

- Encrypted Log #8 – Archive Four – Eilram: 3. An Old Friend. Story-related; cannot be missed. Unlocks after you learn Force Push.
- Echo #31 – Zeffo Culture – 4. Tomb Guardian. From the Meditation Point, go through the sarcophagus room and in the next room, drop into the room on the left. Force Push the rock, follow the path and Push another couple of rocks until one drops down to the level below. Use this to climb the wall to the left, on top of which is this Echo.


- Chest #38 – Lightsaber Material (Silvian Iron). Right next to the Echo above (same screenshots as above).
- Echo #32 – Sage Eilram – 2. Broken Artifacts. Go back to the Meditation Point and behind you is a wall you can now destroy with Push. Go through, wall run and jump to the climbing wall. Go up, swing across the rope, jump to the next climbing wall and climb up to this Echo.


- Encrypted Log #9 – Archive Four – Eilram: 2. Sage Eilram. From the Meditation Point, jump down and run forwards into the area with the spheres and wind. Just after where the wind is blowing, climb up the ledge to the right and go forwards. Scan the rocks underneath the giant wind chime for this log.


- Chest #39 – Poncho (Outlander). In the sphere and wind puzzle room, climb up high to the exit and slide down the ice and then grab onto a rope. Turn around when swinging to see other ropes. The Chest is sitting on a ledge near the third rope where you’ll want to land.
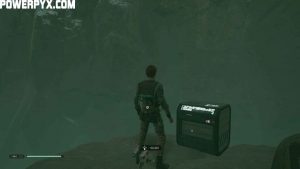


- Echo #33 – Zeffo Culture – 3. Offerings (Secret #12). In the room with the Tomb Guardian. At the back left Force Push the Skungus onto the gate in front of it and grab the Force upgrade.


- Chest #40 – BD-1 Skin (Balmgrass). Push the sphere from the lower level in the area near the Tomb Guardian, then freeze it with the Force. You’ll notice that a platform will come down. Climb on it, then put the sphere back to its location to make the platform go up. You’ll find the Chest up here.

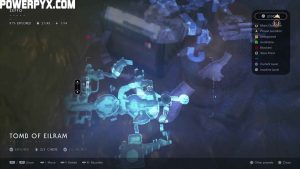

- Echo #34 – Sage Eilram – 1. Sage Training. On the ledge next (same screenshots as above for reference) to the Chest above, amongst some pots.
Area: Imperial Headquarters
- Echo #35 – The Zeffo Villagers – 5. Evidence of a Fight. Go past the fan and up the path and you’ll see a small cutscene of an Imperial Transporter taking off. This Echo is on this platform on the left in a corner.
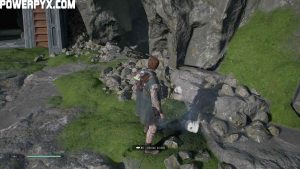

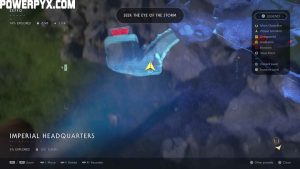
- Echo #36 – Project Auger Officer – 6. Missing Artifact. As soon as you enter this area, use Slice on the door to the right and find this Echo inside next to the Meditation Point.


- Echo #37 – Project Auger Officer – 7. Secret. In the area with the red laser door and a Purge Trooper, there’s a wall you can run on. Run on it to get to a new area, then take a sharp left. Pull the rope towards you to access this area with the Echo.


- Chest #41 – Lightsaber Material (Aurodium). In the area where you Slow the fan to get through, there is a vertical ramp you can pull down to jump on. Climb up, turn around, Slow another fan, jump through it then drop down to find this Chest.


- Chest #42 – Poncho (Serape). Where the elevator to the Tomb of Miktrull is, on the far side by some giant roots.


Area: Crash Site
- Echo #38 – The Zeffo Villagers – 8. Memorial. On the nearest island to you when you enter the water, on the left. This Echo is at the top of the small hill.

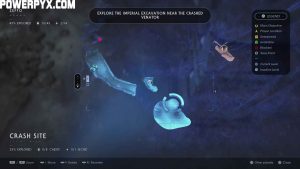

- Echo #39 – The Zeffo Villagers – 10. Drowned. Enter the cave next to the previous Echo and this one is straight ahead of you.
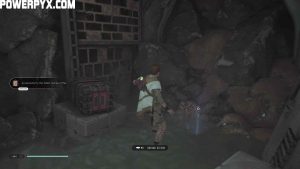


- Terrarium Seed #5 – Dreamwort: At the back of the large island in the middle of the water where you fight a Jotaz and a bunch of Scazz.


- Chest #43 – BD-1 Skin (Swoop). On the island with the two Phillaks at the back of the area.


- Echo #40 – Zeffo Culture – 8. Zeffonian Cranium (Secret #13). When you reach the Crash Site, go all the way to the right to find a rope you can climb up with. Enter the area and use the pulverisers to get on top of the ledge with the Life upgrade Echo on top.


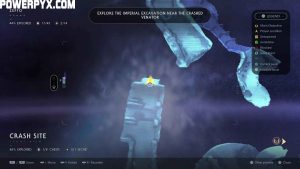
- Chest #44 – Poncho (Hyper Shell). When you reach the Crash Site, go all the way to the left to find some grates you can climb onto next to a Jotaz. Continue going all the way to the right until you see the Chest in the distance.
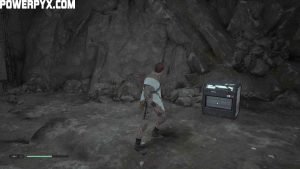


- Chest #45 – Lightsaber Material (Polished Bronzium). Underwater, right of the slide that got you to this area of Zeffo, more or less below a red metal part.
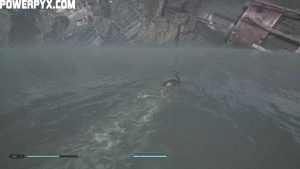

- Chest #46 – Poncho Material (Fjord). Underwater, from the slide that got you to this area of Zeffo, on the left side of the central structure with the Jotaz.
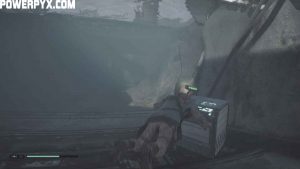
- Chest #47 – BD-1 Skin (Grungio). Same as above, but on the right.

- Chest #48 – Lightsaber Emitter (Elemental Nature). Underwater, swim all the way to the back past the platform with the Phillaks.
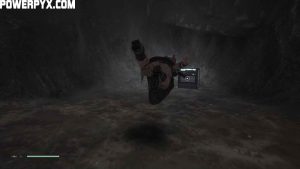
- Chest #49 – Lightsaber Sleeve (Elemental Nature). In an underwater cave, basically below the Meditation Point.

- Chest #50 – Lightsaber Switch (Elemental Nature). From the slide that got you to this area of Zeffo, underwater, all the way to the left, near a climbable ledge.

Area: Broken Wing
- Chest #51 – Lightsaber Material (Orichalc). When you get to the section with bunch of Skungus by the water, don’t climb on the pipe. Instead, drop down into the water to find the Chest.

- Echo #41 – Venator Wreck – 2. The Attack. In the electrified water area, stop the wheel so that it becomes a platform to let you jump up to a small alcove in the wall on the left inside the fan.


- Echo #42 – Venator Wreck – 3. Transmission (Secret #14). After solving the puzzle with the Overcharge switch and electrified water, this is right through the door after you take the lift up on the other side.


Area: Venator Wreckage
- Chest #52 – Lightsaber Switch (Elemental Nature II). Facing the Meditation Point inside the Venator Wreckage, swim to the right. The chest is hidden behind an open structure.
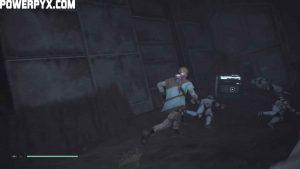


- Echo #43 – Venator Wreck – 5. The Padawan. When you reach the area with the Scazz’s, climb the grids on the left.


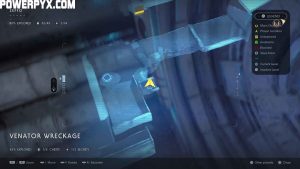
- Echo #44 – Venator Wreck – 6. Hiding. Eventually you’ll reach an area with a propeller you need to Force Slow in order to continue. Go straight ahead, past the electricity, then stop the fans in the area to find this Echo.
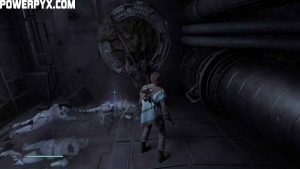


- Echo #45 – Venator Wreck – 8. Order 66 Executed (Secret #15). Shortly after you’ll reach a section that you need to cross by pulling some ropes towards you. Use the second rope to swing and double jump to the platform on your right where this Force upgrade Echo is.


- Echo #46 – Venator Wreck – 9. Reunited. Immediately after a Meditation Point. To get to this Echo, you need to chop through some cables with your lightsaber.


- Echo #47 – Venator Wreck – 10. Jedi Grave. In the final section with the three Stormtroopers shooting at a Jotaz. Hard to miss.


- Chest #53 – Lightsaber Material (Chromium). In the same area as Venator Wreck – 10. Jedi Grave. Use Splice.
- Chest #54 – BD-1 Skin (Cantonica). In the same area as Venator Wreck – 10. Jedi Grave. Use Splice.
- Chest #55 – Poncho Material (Starfighter). In the same area as Venator Wreck – 10. Jedi Grave. Use Splice.
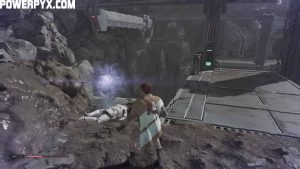
- Stim Canister #5 (Secret #16). On your way out of the Venator Wreckage. Practically unmissable.
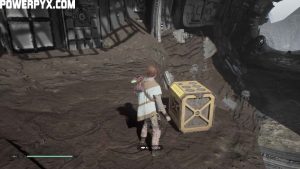


- Echo #48 – Venator Wreck – 11. Survivor (Secret #17). Practically unmissable. You’ll come across this at the end of the area on a Stormtrooper corpse, just before the elevator for the Imperial Dig Site.


Area: Imperial Dig Site
- Echo #49 – Imperial Excavation – 10. Guardians of the Tomb. After fighting the Stormtroopers on the bridge, go through into the interior of the ship. At the end of the first corridor on the right is a wall you can Force Push. Drop down to the bottom where the Overcharge panel is to unlock the shortcut and you’ll find this Echo.


- Echo #50 – Imperial Excavation – 11. Destructive Measures. Immediately after you defeat the Elecrobaton Purge Trooper and open the Overcharged panel, go through the door, turn left, wall run and jump to the platform with this Echo.


- Echo #51 – Imperial Excavation – 9. Discovering Relics. A little further on, you’ll have to wall run between two walls and jump to a yellow rope. On the rope, turn round to face where you came from and swing to the platform with this Echo.


- Stim Canister #6 (Secret #18). From the bridge with all the enemies and Probe Droids, ride the zipline that basically puts you back at the start of the area coming from the Venator Wreckage area. You need to time it so that you drop with
 and land on the structure below. Then, Force Push the wall to get this Echo.


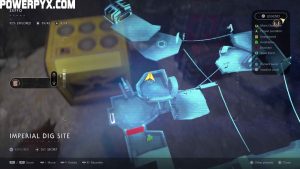
- Echo #52 – Imperial Excavation – 8. Closing In. In the same room as the Stim Canister above.


Area: Tomb of Miktrull
- Encrypted Log #10 – Archive Two – Miktrull: 2. Magnets. As soon as you enter the room when you need to burn the red vines using candles, press
 where BD-1 is pointing.


- Echo #53 – Sage Miktrull – 1. Age of Extravagance. After a Meditation Point, you’ll have to climb up some vines. When you climb up, turn left and go all the way to the end of the area. Near a Tomb Guardian is this Echo.
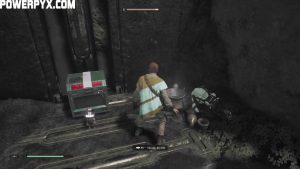


- Chest #56 – Mantis Paint Job (Greezy Money). Next to the Echo above (same screenshots as above).
- Chest #57 – Lightsaber Material (Haysian Smelt). In the room where the sphere was suspended in the centre and a waterfall, behind a Force Push wall on the left hand side of the wall of candles.
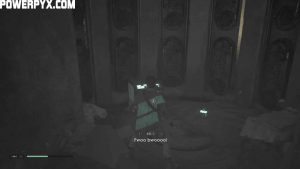


- Echo #54 – Sage Miktrull – 7. Zeffo Soldier Remains (Secret #19). On the other side of the candle wall, go through the door, open the gate using Force Pull and then go through and turn around to climb the vines on the door frame. At the top, jump to the branch on the right and over to this Force upgrade Echo.


- Echo #55 – Sage Miktrull – 3. Respected Symbol. At the other end of this room, use Force Pull to grab a candle to burn the vines, then step through to this Echo.


- Echo #56 – Sage Miktrull – 5. Offerings to Miktrull. On the way to the central area with the sphere, this will be right underneath the second door you have to open by pulling the counterweight and attaching it to the plinth. By a pot.


- Echo #57 – Sage Miktrull – 4. Zeffo Labourer (Secret #20). In the section with lots of circular platforms and switches to change gravity, you’ll see another section with a Skungus you have to Force Push into a breakable wall to grab this Life upgrade.


- Chest #58 – BD-1 Skin (Sumi). On the way back to the central area, switch the gravity on the bridge so you can Force Pull a candle towards you. Now, look to your left over the bridge to the vines hiding a Chest below. Force Push the candle to burn the vines (you may need several tries to do this), then work your way down to the Chest.


- Chest #59 – Mantis Paint Job (Zodiac Drifter). At the end of a hidden section accessed by swinging on vines on the top level of the lantern room. In this area, you have to solve a puzzle by turning off the gravity in a side room before using Force Pull and Push to fire a candle through the giant statue’s mouth to burn vines.


- Echo #58 – Sage Miktrull – 2. Oppression. From the location where you picked up BD-1 Skin (Sumi), run across the wall and pull the rope towards you to land where the Echo is.
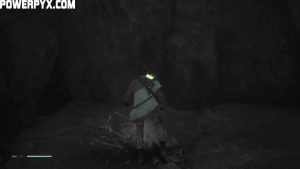


- Encrypted Log #11 – Archive Two – Miktrull: 1. Sage Miktrull. On the upper level of the circular room with glass dome you can raise with a rope, on the outside in a room you Force Push through a wall to get at.
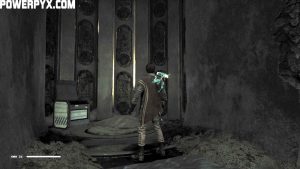


- Encrypted Log #12 – Archive Two – Miktrull: 3. The Key to the Vault. Story related, gained when you complete the ‘Raise the Spire” objective.
Planet: Kashyyyk
- Flame Beetle
- Wyyyschokk
- Jaw Plant
- Slyyyg
- Saava
- Mykal
- Albino Wyyyschokk
Area: Cargo Pad
- Chest #60 – BD-1 Skin (Sundari Dawn). From the Mantis, go down the ramp towards the battlefield where you killed the stormtroopers with the AT-AT. As soon as you get to the bottom of the ramp, hug the wall to the right and the Chest is at the end. You’ll need to use Slice.


- Chest #61 – Poncho (Rainforest). At the back of the battlefield area, underneath the crashed wing of the Imperial craft you shot down with the AT-AT.


- Echo #59 – Partisan Helmet. When you get off the Mantis on your second visit to Kashyyyk, there will be a helmet right in front of you. This doesn’t record a log in the databank.


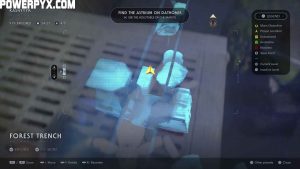
Area: Forest Trench
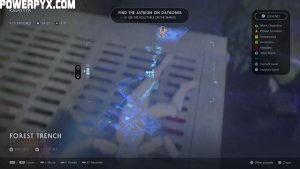
- Echo #60 – Imperial Occupation – 9. Patrol Station (Secret #21). From the Cargo Pad, keep going through the main door that gives you access to the next area, then turn right when you can and Overcharge the laser door with BD-1. Access the next area and use the switch found in the opposite corner from where you are to position the zipline to the right of the room, so that you can use it to access the Force upgrade Echo.


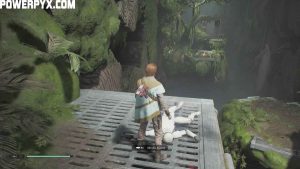
- Echo #61 – Insurgent Activity – 1. Saw’s Ambush. Along the path towards the Refinery, you’ll have to swing across a vine and then wall run and climb up. Turn around and jump onto the top of the wall you ran on and examine the dead Stormtrooper for this Echo.
Area: Imperial Refinery
- Echo #62 – Imperial Occupation – 10. Wookies in Hiding. From the Meditation Point, Force Push the pipe to create a path, then continue on until you see some vines you can cut off with your lightsaber on your right. Enter the tunnel to find this Echo.
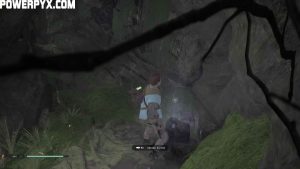


- Chest #62 – Lightsaber Emitter (Passion and Strength). From the Meditation Point, Force Push the pipe to create a path, then drop down to the platform where the Stormtroopers are. Turn around and use BD-1’s Slice to open the Chest against the wall.


- Chest #63 – Lightsaber Material (Matte). Once you enter the room where the Flametrooper kills the Flame Beetles, stay on the top level and use the Slice panel to open the door to this Chest. The door is on the right.
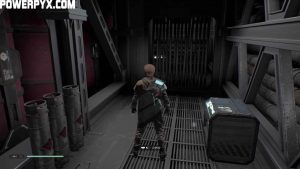


- Chest #64 – BD-1 Skin (Stygeon Prime). Cut the cords to enter a second hidden area just meters away from the location above.


- Terrarium Seed #6 – Bonshyyyr: Right where you face a couple of Wyyyschokk (they are being simultaneously attacked by Flametroopers), against the wall left amongst a pile of wood shavings.


- Chest #65 – Lightsaber Material (Doonium). Just to the right of the Seed above.


- Echo #63 – Imperial Occupation – 2. Wyyyschokk Attack (Secret #22) – From the Meditation Point in this area, don’t drop down to where the Flamtetroopers and Wyyyshockk are fighting. Instead, stay on the top level and in the back left corner is an entrance to a dark cave, through which this Echo is.


- Chest #66 – Poncho (Commando). On the same platform as the above Echo.

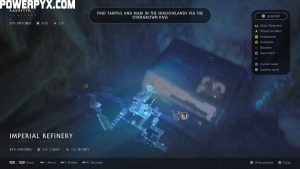

- Echo #64 – Imperial Occupation – 6. Refinery Cells. When you get to the area with the turbine you can Force Slow, you’ll have to climb onto some grates to make it across to the next area. The prompt to collect this Echo will appear as you shimmy across.

- Echo #65 – Imperial Occupation – 1. Wookiee Revenge (Secret #23). After pushing the button that activates the cells and frees the Wookiees, go back the way you came from and hang on the pipe that is above the area with the turbine. This will lead you to a new area with two fans you’ll have to Slow in order to find the Force upgrade Echo on the Stormtrooper corpse.

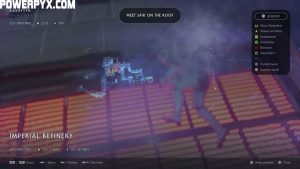

- Chest #67 – Mantis Paint Job (Bounty Hunter). In the area with muddy water and a turbine, accessible after learning Double Jump.


- Echo #66 – Imperial Occupation – 3. Poisoned Wookiee. When you get to the area with the void and a stationary turbine below, jump on the turbine and turn around to find the corpse of a Wookiee and this Echo.


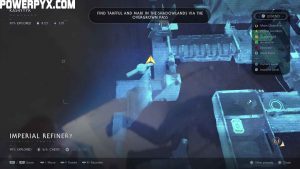
- Echo #67 – Imperial Occupation – 5. Wookiee Oppression. Climb back the ledge, turn right and use the red ledges and climbing grates to climb up to another ledge. Don’t go ahead to the fan in the yellow sap, but instead look up to the left and see a grate you can double jump to. The Echo is at the top here on a square platform.


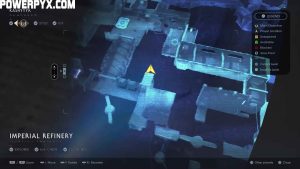
- Echo #68 – Imperial Occupation – 4. Slave Collar. From where you find Imperial Occupation – 11. Refinery Expansion (check the section below), do a wall-run and you’ll find this on a crate when you land.


Area: Overgrown Pass
- Chest #68 – Lightsaber Switch (Passion and Strength). On the right hand side of the narrow path through this area, next to a Slyyyg and two Fire Beetles. Slice it open.


- Echo #69 – Imperial Occupation – 7. Wookiee Witness. When you cross the metal bridge and see the Mykal, go left, climb up the fence and turn around. Pull the rope towards you and swing across to this Echo.
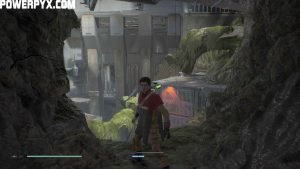
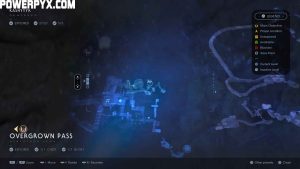

- Echo #70 – Imperial Occupation – 11. Refinery Expansion (Secret #24). Swing back across to the top of the climbable wall and carry on straight. Keep following the linear path until eventually you reach this Force upgrade Echo.


Area: Kyyyalstaad Falls
- Chest #69 – Lightsaber Sleeve (Passion and Strength II). After rope swinging across to this area and sliding down the mud path, go into the room on the right to find this Chest.


- Chest #70 – Lightsaber Switch (Passion and Strength II). When you get outside again, turn left to find a wall you can run on. When you land, look to your left to see a wall you can Force Push. Inside this room is the Chest.


Area: Kyyyalstaad Basin
- Chest #71 – Lightsaber Material (Crodium). After jumping into the water, swim all the way to the left to find this Chest on a platform.
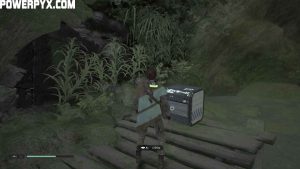


- Chest #72 – Lightsaber Sleeve (Passion and Strength). From the location above, jump back into the water and swim across to the right until you can get behind an upright wooden platform.
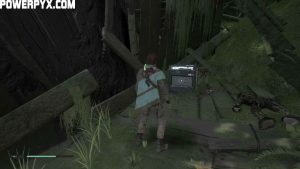


- Chest #73 – Lightsaber Switch (Peace and Justice). From the last Chest, go back into the water and dive straight down to the bottom and swim ahead. You will see this Chest amongst the reeds past the ruined droid tank.

- Chest #74 – Poncho (The Guardian). When you get to the Meditation Point, take a right, climb up twice and Slice the Chest on the left.


- Echo #71 – Insurgent Activity – 4. Partisan Retreat. Go straight up ahead from the Meditation Point and this is just up the hill.


Area: Gloomroot Hollow
- Echo #72 – Insurgent Activity – 5. Breaking Point. At the first fork in the road, go up to the right and find this.


- Terrarium Seed #7 – Milk Grass: At the next fork, you’re meant to go right and climb up a long rope to continue on the path. Instead, climb up to the ledge on the left, then go left to the end and find this Seed.


- Echo #73 – Wookiee Culture – 3. Sacred Shadowlands. Still on this divergent path, climb up and around until you have to jump down across three successive Jaw Plants. The Echo is on the platform.


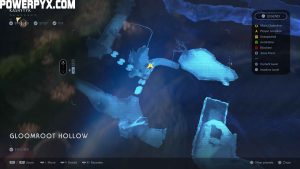
- Echo #74 – Insurgent Activity – 6. Partisans Ambushed. You’ll jump down onto a platform and crash through a weak wooden floor. When you climb out via the vines, this will be just to the right.


Area: Origin Lake
- Chest #75 – Poncho (Shyyyo). Instead of going the way with the wall run wall, go left and swim across to the other land area. Bounce up on the Lung Plant then run around onto the one facing horizontally on the side of the path and it’ll bounce you over to this Chest on the far side above where you started this area.
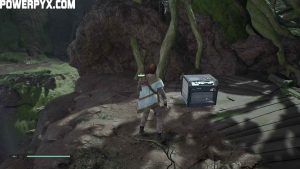


- Chest #76 – Lightsaber Switch (Peace and Justice II). Go back to the first Lung Plant mentioned above and dive straight down to find this underwater, below a stone arch.

- Chest #77 – Lightsaber Material (Electrum-Plated). Turn right from this Chest and swim straight ahead a short distance to find this one.

- Echo #75 – Wookiee Culture – 5. Wookiee Mourning Ritual. Turn right from this Chest and find an opening you can swim through. Go to the end, climb the vines and find this Echo.


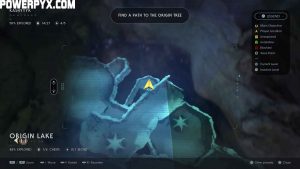
- Chest #78 – Lightsaber Material (Duralium). Swim out of this opening and look slightly to the right to see a narrow channel between two rocks. Swim through and see this Chest here.

- Echo #76 – Insurgent Activity – 2. Rescue. Back at the Meditation Point, wall run to the platform, turn left and use the Lung Plant to bounce across to the other island with this Echo on a wooden wheel.


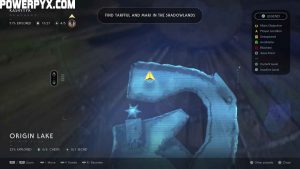
- Echo #77 – Wookiee Culture – 4. Spiritual Connection. Bounce back across to the previous island and this is in the left-most of the two doorways you can see.


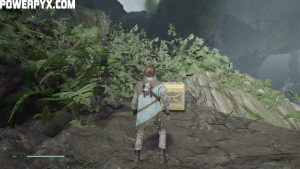
- Stim Canister #7 (Secret #25). Swim underwater and through the destroyed machine and use the Lung Plant to bounce you up to the vine wall. Climb to the top, turn around and double jump onto the Lung Plant you can see below, then jump again to another Lung Plant before landing on a platform with the gold Chest.


Area: Shadowlands
- Chest #79 – Lightsaber Sleeve (Valour and Wisdom). Instead of swinging across the rope and onto the vines, turn left and swim over to the platform with this Chest.


- Echo #78 – Insurgent Activity – 8. Imperial Trackers. After getting the Chest above, go back in the water, go through the waterfall and run round the corner to get this.


- Chest #80 – Lightsaber Emitter (Peace and Justice). In the next pool you dive into, instead of going straight, look left for this Chest.

Area: Deserted Village
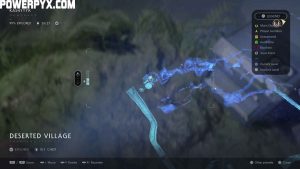
- Chest #81 – Poncho (Recon). From the wooden platform with the Electrobaton Purge Trooper, go to the right side and jump down to the mud slide. From there, jump to the Chest.


Area: Origin Tree
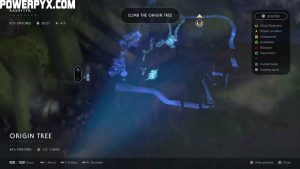
- Chest #82 – Lightsaber Material (Bronzium). After the long on-rails section with the mud slides, you’ll be dumped in a pool. Swim over to the only way out and dive down to find this on the bottom.

- Chest #83 – Poncho (Rover). Climb up from the Meditation Point, run straight ahead and look left into a small alcove.


- Terrarium Seed #8 – Mushbloom. Right next to the above Chest, scan the glowing mushrooms underneath the tree.


- Echo #79 – Wookiee Culture – 10. Kashyyyk Wildlife. Continue to the left after the Seed and climb the long rope. This Echo is at the top.


- Echo #80 – Wookiee Culture – 8. Sacred Tree. Look for the wall run wall near the bridge, run across it and jump on the Lung Plant. This is on the platform it bounces you up to.


- Encrypted Log #13 – Archive Five – Astrium: 1. Shyyyo Bird. When you see the bird through the trunks after climbing up some vines, continue on until you see the bird nesting on your right. Near its claws is a feather you can scan with BD-1.


- Echo #81 – Wookiee Culture – 9. Tarfful and Cordova. Eventually you’ll reach a platform where in the story the Shyyyo Bird appears and Cal remarks that it’s hurt. Just to the left is this Echo.


Area: Gnarled Heights
- Echo #82 – Wookiee Culture – 7. Wookiee Rite of Passage. After climbing up the long rope and bouncing on two Lung Plants, take a right at the fork and go along the tree branches to the end. You’ll come to another fork, so take the left branch for this Echo.


- Chest #84 – Poncho (Free Kashyyyk). Same as above, except take the right branch.

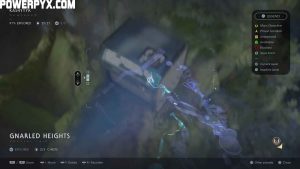
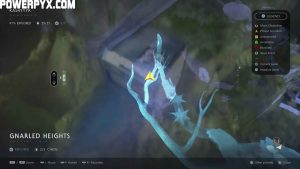
- Chest #85 – Outfit (Pilot). When you swing across to the huge log, instead of climbing to the top, jump off to the branch on the left and then turn left again to find this Chest.


- Echo #83 – Wookiee Culture – 6. The Last Shyyyo Bird. Eventually you’ll get to an area with a Meditation Point. Straight ahead from the it, on the right is the Echo. It’s a little hidden.

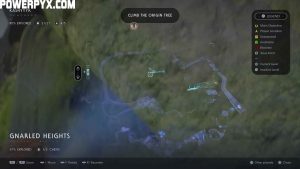

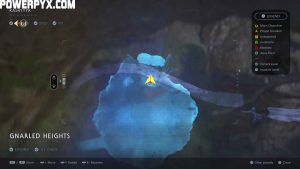
- Chest #86 – Mantis Paint Job (Perihelion). In the area where Cal healed the Shyyyo Bird in the story where the blue blood splashes are, climb the ledges on the right to find the Chest.
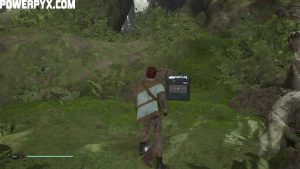


- Encrypted Log #14 – Archive Five – Astrium: 2. Origin Tree. On the same ledge as the Chest above.


Area: Chieftain’s Canopy
- Encrypted Log #15 – Archive Five – Astrium: 3. Astrium. Story-related when you reach the top of the Origin Tree. Unmissable.
Planet: Dathomir
- Bane Back Spider
- Lesser Nydak
- Nightbrother Warrior
- Nightbrother Archer
- Undead Nightsister
- Nydak Alpha
Area: Upper Strangled Cliffs
- Encrypted Log #16 – Archive Three – Dathomir: 1. Discovering Dathomir: story-related. Unmissable. It unlocks when you enter Dathomir for the first time.
- Chest #87 – BD-1 Skin (Yavin Prime). At the top of the cliffs, on the platform next to some large hanging pods.


- Echo #84 – The Nightsisters – 1. Nightsister Training. Next to the hanging pods, you can see this Echo shining behind a gap in the rocks. To get it, use wall run on two walls and jump up to the wooden platform then drop down behind the rocks.


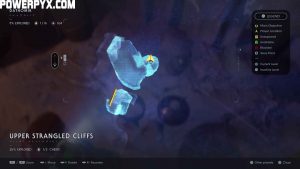
- Chest #88 – Lightsaber Emitter (Magus). Go to the wooden platform with a bunch of Undead Nightsisters and the shortcut rope, then head around the corner to the right to find a Chest you can Slice open.


- Echo #85 – The Nightsisters – 4. A Nightsister. From the Meditation Point in Brother’s Bastion, turn back behind you and jump to the second rope. Instead of jumping to the platform, swing higher and jump to the tiny wooden sandwiched between the archway.


Area: Strangled Cliffs
- Echo #86 – The Stranger – 10. The Outsider (Secret #26). From the Upper Strangled Cliffs, to the right of the last Chest, look to a path you can go down and a box you can Force Push. Push it forward to the end and then left to drop it down to the next level. Then Push it again to the left until you can climb up some vines. Climb up and around and then drop down to this Life upgrade Echo.
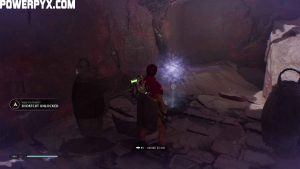


Area: Brother’s Bastion
- Chest #89 – Mantis Paint Job (Racer). Go up the stairs from the campfire, head through the narrow passageway and turn left. Go straight again and look behind the wall to the right to find this.

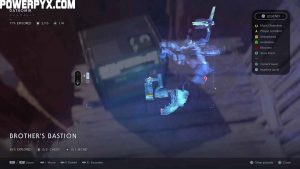

- Chest #90 – Lightsaber Switch (Magus). Shortly after the previous Chest, you’ll drop down into a room. This Chest is in an alcove to the left.


- Echo #87 – The Stranger – 11. Temptation (Secret #27). After the workbench where you made your double lightsaber, keep following the linear path and climb up some vines until you come to a ledge where you find this Life upgrade.


Area: Collapsed Settlement
- Echo #88 – The Stranger – 8. Power Struggle. From the Meditation Point in Collapsed Settlement, go through to a room with hanging pods and look left. Force Pull the gate, jump through and then climb the vines. Turn around and wall run past the pods to find this Echo.

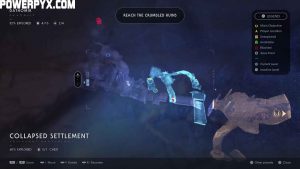

- Chest #91 – Lightsaber Sleeve (Power and Control). Go down the wooden lift and this Chest is in the room next to the door.

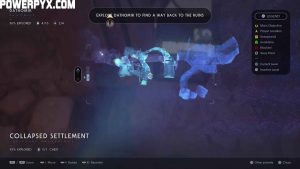

- Echo #89 – The Stranger – 6. The Chase. Head back up the lift and follow the path. This one is almost impossible to miss in the centre of the path on a Nightbrother corpse.

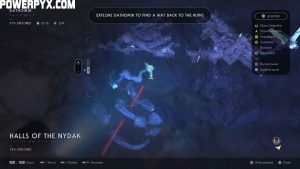

Area: Halls of the Nydak
- Echo #90 – The Stranger – 9. Submission. In the area with the big trunk, push the platform down, then turn back on yourself and run across the wall to land on a small ledge with the Echo on top.
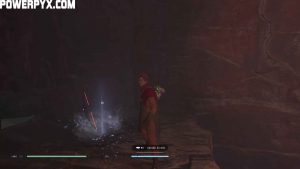


- Echo #91 – The Nightbrothers – 2. The Pit. Just to the left of the crate you can Force Push in this area.


Area: Swamp of Sacrifice
- Terrarium Seed #9 – Bleeding Gut: You’ll slide down a slope and eventually have to jump down into the Swamp of Sacrifice. This is straight to the left once you drop down.


- Echo #92 – The Stranger – 3. Survivor. From the Meditation Point, look to the archway and instead of dropping down, double jump to the platform higher up at the bottom of the arch.

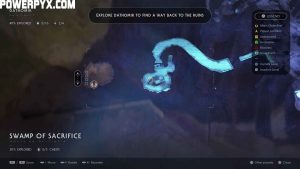

- Echo #93 – The Nightbrothers – 1. Combat Arena. Go up to the left of the arch, onto the branch and then drop down on the other side. This is in the mouth of the skull on the left.


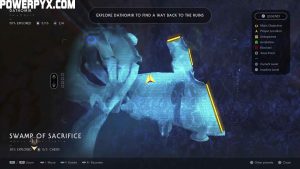
- Chest #92 – Poncho (Savannah). From here, go around to the right to find this Chest you can Slice.
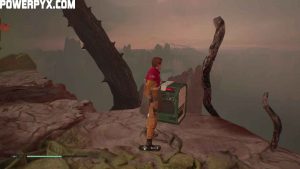

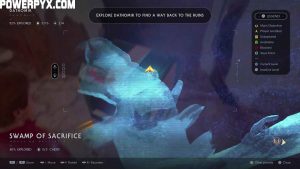
- Echo #94 – The Stranger – 2. Crashed Ship. Just to the left of the Chest, next to a tattered orange flag.


- Terrarium Seed #10 – Mushling: Across to the left is another area where a Lesser Nydak is roaming around and Undead Nightsisters spawn from hanging sack pods above you. Right next to these sacks against the wall is the Seed.


- Chest #93 – Lightsaber Emitter (Power and Control). From the Seed, go around to the right and before the wall with vines, there’s a Chest you can Slice to the left.


- Chest #94 – Lightsaber Switch (Power and Control II). Hard to miss, after you walk across a branch and jump down into an area with glowing mushrooms.


- Echo #95 – The Nightsisters – 7. Nightsister Mother. Don’t use Force Push on the rock with vines, but instead climb up and to the right to find a platform with this Echo.

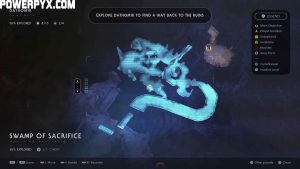

- Echo #96 – The Wanderer and the Witch – 1. Negotiation. Force Push and Slow the rock so you can climb up to the end of a broken wooden bridge. Turn behind you and jump down and across to the platform to find this.


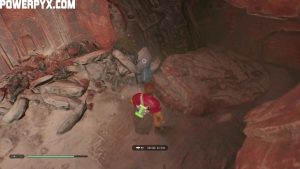
- Echo #97 – The Nightsisters – 2. Rituals. From the previous Echo, drop down the ledge to the left, run left and jump to the branch. On the platform at the end is this Echo.


Area: Witches Horn
- Echo #98 – The Nightbrothers – 3. Rite of Passage. After fighting the beast, climb the long wall. After squeezing through the narrow crack, this is in plain sight to the left on the platform.


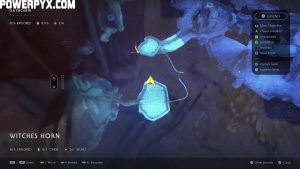
- Echo #99 – The Nightsisters – 8. Potions (Secret #28). After the flying sequence, go back to the pit where you originally fought against the monster and climb up the wall again. Squeeze through the crack one more time and go up the wall that you couldn’t finish climbing before. Then, go to the right of the platform for this Force upgrade Echo.


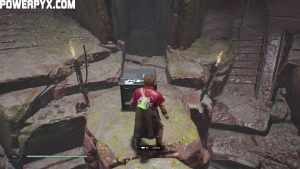
- Chest #95 – BD-1 Skin (Day of the Dianoga). Go into the room and find this impossible to miss Chest in the middle.


Area: Nightbrother Dungeon
- Chest #96 – Poncho (Vagabond). After shimmying under the bridge, go into the room on the left to find this.


- Echo #100 – The Stranger – 7. The Prisoner. In the same small room as the above Chest.


- Chest #97 – Lightsaber Material (Dolovite). Go across to the other side of the dungeon and take a left at the fork to see this in an alcove.


Area: Nightbrother Village
- Chest #98 – Mantis Paint Job (Aphelion). From the Meditation Point, go forward and jump down to the village below. Ahead of you, look for a house painted blue with a red symbol on it and use the nearby crate you can Force Push to climb up the ledges and drop into the room with this chest on the right.


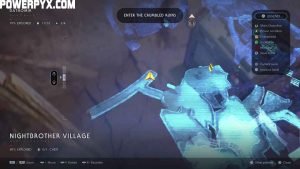
- Echo #101 – The Stranger – 1. Interference. From the chest, turn around and go forward as far as you can, then left at the fork, then left again into a house with this Echo at the far side next to a barred window.

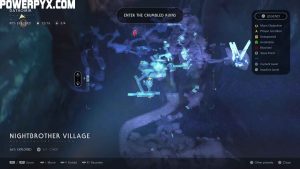

- Echo #102 – The Stranger – 4. Intruder. Come out of this house, turn right and run straight ahead to the end.
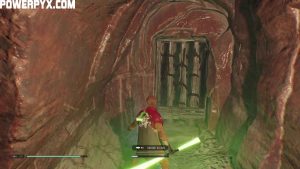
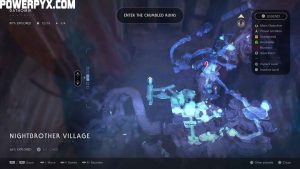

- Echo #103 – The Stranger – 5. Interlopers. When you get to the rope that acts as a shortcut, look down to the left and there’s a small gap between the wooden floor you’re on and another one. Look down into the gap to see this Echo you can drop onto.


Area: Nightmare Ruins
- Chest #99 – BD-1 Skin (Myrmidon). Looking at the entrance to the Tomb, go right and follow the path until you slide down a slope and wall run. Jump down to the next platform to spot this impossible to miss chest.
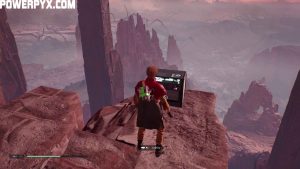


- Chest #100 – Poncho (Homestead). Wall run again, climb up the vines and turn right to find a chest you can Slice.


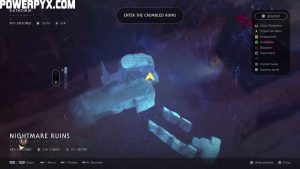
- Chest #101 – Outfit (Outlaw). A little further on, instead of jumping back to the main area on the right, head towards the tree with spiky luminous bulbs and find this chest at the end.


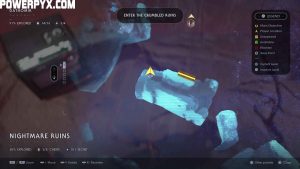
- Stim Canister #8 (Secret #29). Follow the path up a large vine wall, across a long branch and spot this gold chest for the upgrade.


- Chest #102 – Mantis Paint Job (Smuggler). Head inside the ruins and immediately turn right and then right again.


- Encrypted Log #17 – Archive Three – Dathomir: 2. Kujet’s Tomb. In the main hall of the tomb, in front of the statue to the right of the stairs before the Meditation Point.


Area: Tomb of Kujet (accessible only when you visit Dathomir for the second time)
- Echo #104 – The Wanderer and the Witch – 2. Seeking Power. From the Meditation Point, head further in and climb the luminous yellow vines over to the right. In the room, this Echo is next to a burning fire.

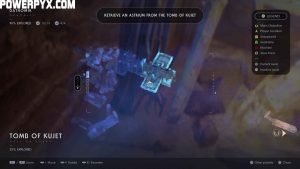

- Echo #105 – The Wanderer and the Witch – 3. Merrin’s Pact. Cross over to the other side using the branch and find this one in front of a shrine.


- Echo #106 – Sage Kujet – 1. Burial Place. Squeeze through the narrow gap and in the next room climb up some more luminous yellow vines to find this.


- Encrypted Log #18 – Archive Three – Dathomir: 3. Shrouded in Darkness. In the area immediately before the boss fight. Make sure to pick this one up before fighting the boss. It’s on the right in the hall.


Planet: Ilum
Area: Shattered Lake
- Echo #107 – The Gathering – 1. Enter the Gathering (Secret #30). From your ship, head to the right and through the gap in the cliffs. Wall run across a number of walls to get to this Force upgrade Echo.


- Echo #108 – Jedi Studies – 1. Master Mar Ti Kam’ron. When you get to the giant stone structure which you can climb with your claws, climb to the very top and onto a platform. Follow it around to the left to find a crystal plinth containing this Echo.


- Chest #103 (Poncho – Compañero). On the same platform, hack through the ice crystals to find this Chest.


Area: Jedi Temple
- Chest #104 – BD-1 Skin (Tibanna). When you jump into the water, dive down and this is behind the second column to the left.

- Echo #109 – The Gathering – 5. Angry Youngling. Swim through the hole next to this Chest, climb up the wall and go through to find this Echo.


Area: Crystal Caves
- Echo #110 – The Gathering – 3. Youngling Pride (Secret #31). From the Meditation Point, jump up to the nearby platform between two Jedi statues, turn left, cut through some frozen icicles and follow the path until you slide down an ice slope and wall run to get to a platform. The Life upgrade Echo is here next to a rock you can Force Push.


- Echo #111 – The Gathering – 6. Youngling Lost (Secret #32). After going between the Jedi statues, go right this time, jump across the gap and go left to see a rope you can Force Pull towards you. After a section of swinging, wall running and climbing, you’ll reach a pipe and can jump across to another one and then onto the platform with this Life upgrade.

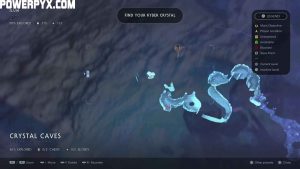

- Chest #105 – Lightsaber Sleeve (Power and Control II). Swing back to the platform below and go straight ahead through a narrow archway. There’s a Chest you can Slice open in here.


- Echo #112 – The Gathering – 4. Youngling Afraid. Go up the ramp behind this Chest and wall run to a platform. Jump down to another platform and then to the climbing wall but instead of climbing up, go down to a small ledge with this Echo.


- Chest #106 – Lightsaber Switch (Power and Control). In the area with the pool you have to dive into to go further into the temple, instead dive into the one behind it running horizontally across the platform. At one end is this Chest.

- Echo #113 – The Gathering – 2. Finding the Crystals. In the circular area with the lightsaber workbench, on the opposite side of the room from the bench.
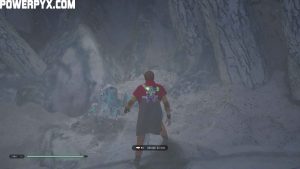


- Encrypted Log #19 – Archive Seven – Goodbye: 1. My Friend. Story-related. Unmissable. It unlocks after the cutscene between BD-1 and Cordova in the Crystal Caves.
Area: Imperial Trench
- Chest #107 – Lightsaber Material (Duraplast). At the Meditation Point at the end of Crystal Caves found after swinging across on a rope, there is a fork. Take the left path, jump over to the wall and climb across and up to a ledge with this Chest.


 – Collect all chests and secrets
 – Find all of BD-1’s stim canisters
 – Find all of BD-1’s encrypted logs
PowerPyx says
Hi guys,
there are still some OPTIONAL Echoes (NOT needed for trophies) which aren’t covered yet. You only need 75 Echoes, as of now 111 are part of this guide. If you find more, feel free to leave it in the comments (they are not relevant to trophies / achievements). Anything you need for trophies / achievements is complete here.
Environmental Scans for Databank Entries are not needed for trophies / achievements and not part of this guide.
hferg says
Does anyone know where the Researcher scan 11 is? That’s the only Bogano scan I’m missing.
quietest1one says
I finally found The Researcher #11 !
Top level of the Abandoned Workshop, where you fight three Oggdos at the same time. You need Pull and/or Jedi Flip to get up to here, I think. There’s a hut with a strut coming out of it, from which hangs the rope you use to get to Chest #4, the one behind the fan in the workshop. Instead of swinging from the rope, you go into the hut, where there’s a climbing wall you can use to walk along the strut. Get to the end and BD-1 will scan The Researcher – 11. Weather Sensor.
Will says
Fantastic guide! Got my platinum thanks to think. Great work!!
FranciRoosters says
Thanks so much for your feedback! It means a lot!
FranciRoosters says
Thanks!
DonCorneille says
Hey guys, amazing guide. Playing In 2021 and noticed all battle trophies can be farmed via meditation training. Faster as you can spawn as many enemies as needed without having to travel to planets/locations. Hope it helps. Keep up the amazing work powerpyx
Dan ZROGST says
First – thank you, this is the first complete listing I’ve found on the internet.
My issue is with Archive Five – Astrium Entry #1. “Encrypted Log #13 – Archive Five – Astrium: 1. Shyyyo Bird. When you see the bird through the trunks after climbing up some vines, continue on until you see the bird nesting on your right. Near its claws is a feather you can scan with BD-1.”
I am standing on this platform and have walked every inch of it and cannot get the prompt from BD-1. Just to confirm, here is a screenshot on the platform I’m searching: imgur.com/zb87BML.jpg
Can you help me? This is one of only two data entries remaining and the last achievement based item I need.
Dan ZROGST says
A bit more fiddling on that platform and I did pinpoint the exact spot BD-1 presents the Scan Prompt. Here’s two screenshots:
imgur.com/xzVG0aV.jpg
imgur.com/G1y6aqM.jpg
The very last Databank entry I’m missing is The Nightsisters Entry # 3 – but it does not appear on your list either? This isn’t required for an achievement but for completion’s sake I’m interested in finding it.
FranciRoosters says
It’s closer to the bird, literally under him.
ZZ says
About Encrypted Log #13 – Archive Five – Astrium: 1. Shyyyo Bird. Are you able to do this after you finished the story? Also if possible can you show me your map location of the holotape where I should scan him because I can find him on 3 possible locations and don’t know where to scan
Harry says
You can do this after the Story, if you continue past the bird, jump up the green plants, re set at the rest point and go back down to the bird you should then be able to scan the encrypted log( feather )
Jafar says
Wait so you’ve found wookie culture #2 and the beast (bogano) #2? Mind helping me?
ninemil says
Imperial Excavation – 7, anyone?
John says
I think it’s in the underground ice caves section. Try to position yourself directly below the giant sheet of ice that looks like it has a huge impact shatter pattern in it,
Angry Andy says
I forgot where I got it but this is what the entry says in case it helps. The Sound of Destruction: The MK-270 Imperial Pulverizers are crucial for project Auger as the icy barriers in Zeffos caves reguire an incredible amount of power to break through. Even the Empire’s specialized saws are not sufficient to break the ice.
Jade says
I was looking for this and found it by mistake? or at least i don’t know how i missed it prior. it is in the ice caves, at the bottom of the lift from the ancient catacombs. around to the left were that one Jotaz monster is.
the Fricking Ceiling is the thing to scan. standing in the middle of that area “should” prompt for a scan.
Patryk says
Will be a video guide for collectibles in youtube?
PowerPyx says
I’ll try to make one later, but it’s gonna be a while.
Irwynn says
Awesome guide, thanks. Only thing I want you to say – there are two types of echoes: ones that are scanable with droud and others , which Cal scans himself. Those ones also pop as force echoes. So are there both count as force so I only need to find random 75, or exactly gorce echoes only? Thank you
Darth_Krid says
Things you scan with the droid don’t count, they’re just datalog entries. Echoes are the things you press for.
for.
MH2 says
Where is wookiee culture 2?????
Jafar says
I swear that’s the one echo i haven’t found anywhere in any video or article. I’ve 100% completed the game, got the plat trophy, completed the entire databank and tactical database except for wookie culture 2. It’s eating me up.
FrozeNova says
Wookie Culture #2 is located inside the Origin Tree. Its over by the Lung Plant on the second level after the bridge. I hope this helps y’all. ^_^
KOTOR Legend says
Wookie Culture 2 is on Kashyyk in the Origin Tree area.
I’ll try to describe this as best I can.
There is a meditation spot and ahead you fight three of the large Wyyyschokk spiders.
After disposing of them, jump up the next ledge. There is a wall run green boost pod to the left and a ledge to jump to on your right.
Go to the immediate left hand side of the ledge to the right and BD-1 will find Wookie Culture 2 to scan.
Hope this helps you out.
MegaRalle- says
I have found everything in the broken wing but I’m still at 92%. Is it glitched or am I missing something?
Alexander says
In the turbine room with the elevator there is a ledge on the left side of the turbine
Darth_Krid says
Probably missing the Echo inside the fan at the end.
Eric says
If you’re still at 92% on broken wing with the turbine blade secret (mentioned in the guide) then you are missing the exploration on the exit. At the 3 bladed turbine with one broke wing that you slow to walk across, squeeze through the gap to leave the area. However, before squeezing back through the gap to get back to Crash Site, you need to drop jump down off the spiral ramp. I thought I was just going to die. Instead there’s a panel to overcharge which opens a different exit to the Crash Site. This is the missing 8% exploration.
Rtn says
Zeffo culture 7, any idea where to locate?
My zeffo map is at 99% 42/43. And every location on map is explored.
Darth_Krid says
You’ve missed a chest then. Scan each sub area to find where that chest is. Probably in the tomb on the 5th level down or something!
Strahd77 says
Zeffo Culture #7 – Wind Chimes is next to the Chest #39 – Poncho (Outlander) at the Tomb of Eilram.
FranciRoosters says
Thanks, but that’s not Echo. It’s a BD-1 scan IIRC.
Strahd77 says
Yeah but the Culture #7 that he asked is a scan not an echo. Was someone asking for an echo? I missed that
Rtn says
Cheers, finally found it. That was well hidden.
ninemil says
Looking for nightsisters #3 and the stranger #9, if anyone comes across them
Aeson says
Nightsisters 3 is in Collapsed Settlement on your way to Swamp of Sacrifice. After you squeeze thru tight passage you force pull a trap door and then climb up vines, you’ll come to a force push trap door and then a curved vine walk. In that room you get to is pottery on the right and another vine walk to the left. Straight ahead is a broken stair case #3 is on there just jump up to it.
ZoarialComet says
The only one i need is The Stranger: 9 from Dathomir.
Anyone know where it is?
Jafar says
You found wookie culture 2?
Kevin says
I need archive one discovery number 2 I need
ZoarialComet says
If you head to the Hermits Abode on Bogano and go into the room where the workbench is you should be able to scan the table in the back of the room.
Alex says
Dathomir – The Stranger – Entry 9
Kashyyyk – Flora and Fauna – 1 & 3
Anyone know what they are and where to find them?
Cheers!
John says
Stranger 9 I think is in an area where you need to pull down a rafter to wall run on it, and there 2-3 brothers shooting at you. You have to navigate across tree branches. Sorry for the bad description but this is from memory. Once you have wall ran across, stop and let the rafter go back up. You can now jump back the way you came into a hidden area
Fauna 1 Kashyyyk is the Tach. It’s tiny monkey you see once you’re at the treetops section. So glad they included it as a reference to KOTOR. 3 is Wyyyschokk Eggs, but I forget where thjat one is, possibly the Shadowlands. Look for a lot of small egg sacs.
Jakob E says
You can find 3 in the Albino Spider nest.
dernop says
For anyone having problems with Archive Five – Astrium Entry #1:
It wouldn’t let me scan it too, was driving me crazy!
To fix it i simply had to continue a little bit further up to the meditation point, rest and jump back down. The scan prompt showed up immediately! If that doesn’t work, try to reload your game there or completely restart it. This scan point is definitely slightly bugged for some reason.
Flety says
Imperial Occupatiom from Kashyyyk, where is it?
Flety says
imperial ocupation 8
Adam says
For the life of me, can’t find Ilum Terrain #2. Searched the whole planet several times and nothing. Seems like scans are buggy as hell. Guess I’m gonna wait for a patch.
John says
In the first underwater section with the geysers. Swim by one of those and BD will prompt
christopher says
you missed “the starnger” .9
from the first meditaion point in the halls of the nydak pull the wall (used to wall run to the meditation point) back up run across and wall run to the ledge
Paul says
You need to scan geyzer in the underwater area between jedi temple and caves. It should be the left one if you start from the jedi temple end…
I would very much appreciate if you could provide me with the location for Ilum Terrain #3
But maybe scans ARE buggy
Johnny says
Anybody knows where Nightsisters #6 is???
Johnny says
For terrain #4 if I’m correct it should be at the crystal cave before you dive into the small water hole. It should be to the left of the water hole, that was where I scanned it
Zerimar says
Ilum Terrain #3 is located in the Crystal Caves – To the left of the wall of ice near the two pools – the smallest one that you have to use to get to your Kyber Crystal – there is a small Kyber Crystal that you will see in the corner of the ice wall just to the left of that pool before you go into the pool.
Dustin Fisher says
On bagano theres the creature entry databank I have the first one I’m missing number 2 I got the large mural in the back corner of the map I cant find the second entry may you shine light upon this
Baptoo says
For The Creature Entry N°2, You have to Go in the Great Divide area ! to the TOP after climbing the vines, there is some kind of chair. If You can’t scan, just wait around 5minutes left to the chair Looking forward Ancien Binog Location ! The scan should spawn.
Steve says
Anyone know where to find
Zeffo – imperial excavation #4
Richard says
In Imperial Trench I believe in the room with all the KX Droids, there should be a bunch of containers off to the side, I’m looking for Ilum Terrain # 4 as well as Bogano – The Researcher #1 and The Creature #2 if anyone can point the way for me.
Detareh says
For Terrain 4, follow the path through when you first enter the crystal caves past where you scanned the geodes, when you reach the plateau after that you should see some sparkles in the wall, BD-1 will scan that. For creature 2 go to the top of the great divide, next to the hole, and stand next to the chair for less than a minute, you should see something in the distance.
Jakob E says
Resaercher 1 is to the left of the fan in the Hermit’s Abode
Darth_Krid says
Guide is looking amazing with all the screenshots, great job Franci! Puts the amount of effort that went into this into perspective. Awesome teamwork
FranciRoosters says
Restored says
Hey everyone quick question. I collected the secret for broken wing however it still says 0/1 Secret on my map under broken wing. I believe it counted in the data bank still. Does this void the collectible trophy? has anyone else experienced this issue?
FranciRoosters says
Try reinstalling the game.
Restored says
Unfortunately that doesn’t resolve the issue. I was on EA’s bug reporting and many people are having similar issues with chests/secrets not counting. This trophy guide should be updated with a potential glitch to the collector trophy.
PowerPyx says
Hey, yeah you’re right and thanks for reporting bugs and glitches. The trophy guide has been updated with that info accordingly!
GONTORR says
Where is the Log Data of the “The Zeffo Villagers” (Planet Zeffo) Nummer 9 ? I can’t find it… Can somebody please help ?
Stan says
Has anyone found The Researcher 13 and The Creature 2 on Bogano? The only ones I haven’t got.
GONTORR says
One is down at the wall with the creature painting an the other one is up on the top near the creature. There you will see a little “chair” for sightseeing. You have to wait a few seconds. Then you can scan…
Do you know where I can find the Zeffo villagers Number 9 on Zeffo ?
Answer says
The creature 2 is next to the chair closest to the big creature on top of one of the rocks. He’s nnot always in range so you have to stand there for a few seconds if he’s not in range.
Jakob E says
I may be wrong but there should be a Mural next to the shortcut door to the abandoned workshop on Bogano. I think that’s it. If not, the description might help. The description says “A faded mural located on Bogano not far from the Zeffo vault. It likely represents a planet but the artwork is too damaged to make out specifics.”
ItsATrap101 says
I got everything except #5 for Kashyyyk’s “Flora and Fauna” databank. Please help, I am a completist.
norrsen says
“Kashyyyk/Flora and Fauna – 5. Mushblooms”
I only got the BD-1 scan triggered after killing all enemies on the platform once and retaking the rope.
https://imgur.com/kRLQLao
Jafar says
Wookie culture 2?
Liam Tacon says
Has anyone found the nightsisters 6 wasn’t here on the website checked through
Johnny says
Same, that’s the last thing I am missing. Hope someone can give some guidance for that one!
Liam Tacon says
Johnny I finally found it at the start of the strangles cliffs go up the rope and head right their is a pod their that’s empty and BD-1 should scan the last one. Nightsisters #6 burial pods
Liam Tacon says
Sorry dont go up the rope after getting off the mantis and climbing the wall to the first area of nightsister zombies head right up the two platforms and there is an empty pod which BD-1 will scan
Jafar says
Wookie culture #2 anyone?
Dustin Fisher says
It’s weird I scanned the chair and it said someone sat there studying the creature you were right though I sat staring at the creature and the scan prompt showed up much appreciated thank you may the lightside guide you always or darkside either way is fine
norrsen says
Looking for “The Stranger – 5”. If you have it but don’t remember from where please share the name of the entry and the text.
Hunter says
Looking for Imperial Occupation 8 on Kashyyk. Does anyone know where this one is?
Jakob E says
8 is just under the slave collar, it is the red barrels
john says
imperial tech 3 databank location can anyone help.
Raddus says
LAATI/ l underwater in Origin Lake. It’s what you go through to get to the Shyyyo bird’s perch (after beating Kashyyyk’s main quest).
Eric says
It’s in the origin lake, when you go through the little underwater tunnel
HC Props says
Has anyone had issues scanning the Saava flower on top of the wall at the beginning of Shadowlands? I have reloaded multiple times and it is the last entry I need to Data Collector. It will not give me a prompt to scan at all….
Orgus says
i just scanned the saava plant and i got the data collector trophy instead of the data disk trophie… very weird
Orgus says
after I wrote this, i saw I was wrong, swiched the both by meaning, stupid me.. eventually I got everything and got the plat 5min ago.
Brandon R says
Looking for Dathomir: Sage Kujet #2 anybody know where it is ?
christopher says
sage kujet #2 is in the room with the astrium on the left wall BD scan
Galen Erso says
Is there any way to get back to the room with the workbench in the ice caves on Ilum once you’ve left?
Darth_Krid says
Yes, there are collectibles there.
Alexander Presson says
I cant get back into that room! The imperial door wont open.
Christopher Jones says
Researcher #13 nobody seems to know I’ve not found it either. When scanning the discarded hat on returning to Kashyyk I walked from it so no prompt showed and twice cutscenes broke a scan progress one right up in the Origin Tree- any hope to retake them once BD-1 bypasses them or got to replay the game all over again?
Steve says
I found Researcher #13 on Bogano not far from the Zeffo Vauilt. It was a faded mural. The location was across from the mural where you get Dathomir unlocked.
Ironwolf6896 says
Researcher #13: From the first meditation point after you climb up the vines, go left instead of straight and follow that path to a ravine. Drop down into the ravine, kill the monsters, and scan the mural in red paint on the wall. The view from above the ravine looks directly across at the Binog, almost like you could jump straight over to it [but you cant].
Lower right of the highlighted area:
bit.ly/2OA2p3O
Stacey Hufnagel says
The Researcher #13 – Faded Mural – “A faded mural located not fast from the Zeffo Vault. It likely represents a planet but the artwork is too damaged tio make out any specifics.”
I don’t remember where I found it, hopefully the text/description will help.
Raddus says
Just found Wookie Culture 2. It is a BD-1 scan in Origin Tree. After crossing the “bridge” but before the ramp you face two fireflies and a slug. Once you kill them just to the left of the ramp there is a Wookie Horn BD-1 can scan.
André Prado says
Cordova’s Journey – Archive One – Discovery #2 is bugged for me… It doesn’t show on my log neither It is available for me to collect it again. I have all trophies except for that glitched one and, obviously, the platinum. So frustrating…
Killbomb says
Thanks for the guide. Good game but the collectibles are a pain!
Martin says
„Echo #65 – Imperial Occupation – 1. Wookiee Revenge (Secret #23). After pushing the button that activates the cells and frees the Wookiees, go back the way you came from and hang on the pipe that is above the area with the turbine. This will lead you to a new area with two fans you’ll have to Slow in order to find the Force upgrade Echo on the Stormtrooper corpse.“
You canˋt push the button again, after the story.. And without pushing the button, you do not come to the new area with the two fans and the secret…
Any idea?
Matrim_Drasgen says
I just beat The Ninth Sister and left Kashyyyk. I am missing my 4th Entry into the Chapter 3 section. Is this part necessary dor Data Disk?
Cheng Chi says
same here
Ru says
Hi there, firstly, you are one amazing human thank you so much for making all these guides you’re incredible and you have a fan for life, quick question I am one trophy away from plat it’s to scan one of the bounty hunters I’ve finished all other trophies but the bounty hunters don’t seem to show up anymore? If I start a new game will my scan data be kept or do I keep moving from planet to planet so see if they’ll spawn?
Thanks so much
Bruninja says
I have the same problem. Can’t find the Brood Bounty Hunter. I’ve defeated him but scan was not available. I’ve finished the game but this one was not take into account.
Bruninja says
I came back to Oggdos Lair faced two bounty hunters and finally scanned the last one! I got the last trophy and the plat.
iamcuddles says
Echo #80 Know that there is a point of no (easy) return past this echo. If you continue to through the wall runs and then up on the bouncy pad it puts you on the path where the camera looks outside as you walk through. You cannot jump back down from this point. You have to go all the way through the rest of the world, and hitch the bird back down to the bottom.
Ugh.
Steve says
With stim canister you don’t need to double jump you can use the first lung plant to bounce on to the second instead of going to the vines
Steve says
*Stim canister 7
Capo says
Can anyone tell me what entry I’m missing in the “other characters” section in the databank? It’s between Tarrful and Chossyk. I’m at the end of the game and it’s the only databank entry I’m missing besides the last imperial enemy type.
Sam Ramsdale-Owen says
Hi
Thank you this guide was very helpful but I’m having an issue with the platinum trophie, I have 100% every map, almost every single echo, every enemy scanned, done everything even says 100% completed when I load it back up yet the platinum hasn’t popped up I don’t know what else to do could someone give me some advice please
FranciRoosters says
Reinstall the game.
Zerimar says
Empire on Ilum #1 – is one of the golden chests in the Imperial Trench when you first go through.
Empire on Ilum #2 – is a bit of machinery in the shortcut area that you have to unlock by getting the chest for the Imperial Trench.
syrow2 says
i didnt follow the guide i just used to to find the last few pieces i need. but now i only need to grow a few seeds. can i just stand somewhere in the middle of no where for like an hour to make them grow or do i have to be exploring and stuff?
please help
syrow2 says
fro future me to past me. yes it does
Baz says
I followed this guide perfectly for Zeffo and got all collectables but it says I’m only 99% explored. I’ve been looking around now for hours trying to find that last percent to explore. Any help on where this might be, I’m seeing nothing.
FranciRoosters says
If you’ve collected everything, sometimes you just need to defog a specific area of the map by walking through unopened doors (indicated by green in the holomap).
C1 says
I feel like a douchebag for complaining but this is probably the worst and most confusing guide you guys have ever done.
You recommend completing the story first and then go for collectables. Then in the guide you assume we get to the places in the same order as we do when playing the story. Not to mention the explainations like: ”in the area were…”
Great, but HOW do I get there from the last collectable?
As I was saying, I feel horrible complaining but take this as a form of constructive critizism. It would be amazing if you could actually after each collectable mention something like: ”return to Zeffo Village and from there, go north”. Instead of: ”here is the next one, hope you figure out how to get there”.
Love you, either way. Peace
FranciRoosters says
I understand your frustration, but when we released this guide PowerPyx was busy with Pokémon and couldn’t make a collectibles video. He will probably make one later on, but the best we could do then was to release a text guide instead of nothing at all. On top of that, the open-world, metroidvania style of this game didn’t help in the writing of the text guide, but we did our best to help you guys out. Again, better to have at least a text guide than nothing at all.
Ronstar says
Any idea how to get miktrull 5 on a 2nd time? The gate is closed but I can pull the cable through it but not attach it anywere. I think the plinth is on the other side of the gate. But how do u get there again?
John says
I have finished the story but haven’t scanned the AT-ST yet
Anyone know where one is
Robert says
On your way from the refinery to the shadowlands as there is an ATST crashed to your right, walk around to the side of its head and BD wil scan it.
Kyle Rines says
Can I get any help with flora and fauna 4 on Bogano?
Michrel L. Standefer says
I just landed on Ilum, and started Chapter 5. I ‘think’ I have all things possible at this point. I seriously doubt I would have gotten a lot of them without your guide’s help – Very well done, kudos for the effort, and one very large ‘Thank-You’ from a long time old gamer. :-)
Hakeem says
Seriously? We can’t pick up collectibles on the first run through? Savage.
Zago says
Thanks for this awesome guide. Very well written and detailed.