Welcome to the Resident Evil 8 Village Walkthrough for the full game (also known as RE8 or Resident Evil Village). All Chapters are covered here. This full guide will help you finish the game should you get stuck at any point. Resident Evil 8 Village takes place after the events of Resident Evil 7 Biohazard. You again play as Ethan Winters, a survivor of the Dulvey indecent in Lousiana that occurred in Resident Evil 7. After moving to Europe and attempting to live after rescuing his wife Mia, Ethan’s daughter is taken by Chris Redfield for an unknown reason, and he is embroiled in supernatural catastrophe in a small European Village. This walkthrough focus on main story events and items required for progression for usage if you are stuck in a playthrough or need a refresher on progression during a speedrun.
A thorough first playthrough on Standard difficulty will take around 6-10 hours, depending on how thorough you are. There are no traditional Chapters or Mission Select. Instead, the game is divided into multiple map areas. You can always check the map to see in what area you are.
For all Collectibles refer to the Resident Evil 8 Village Collectibles Guide.
Prologue
After the initial cutscenes, you are in the Winters’ house, needing to put Rose to bed. Go out of the living room and up the stairs, and at the top take a left then go through the door on the right at the end of the hallway. Place Rose in the crib, then go back downstairs to Mia in the kitchen.
Village
Ethan wakes up at the wreck of the vehicle he was being transported in. Follow the linear path through the forest (don’t worry about the flashlight being pointed at the ground, this is only for the first part of the game). When you reach a building go inside and through to the basement and open the cabinet at the end, then turn around and go back out of the building and continue following the linear path.
Continue following through path through the village until you enter a house again and pull back a curtain to meet your first village resident. They give you a weapon, then you end up in the basement and can continue following the linear path. After the next scenes end you will have your first enemy encounter. Deal with the Lycan, then go inside the house it came out of and into the pantry to pick up [Bolt Cutters], then use them to open the gate in the yard.
Go into the house in front of you then upstairs and grab the handgun ammo off the shelf. This starts the large Lycan ambush that you need to deal with. Go back downstairs and move the shelf in front of the door, then one enemy will appear inside the house that you need to deal with. The growling outside will subside and you can move the shelf and go back out the front door, then follow the blood trail on the ground into the next building. Once you enter the Lycan will start attacking again, and you need to drop down the ladder to the lower area and go out into the next village area.
Here you have to survive for a period of time before the game progresses. You can barricade yourself in another house for a while, then climb up on the roof if needed. You need to wait until after Urias appears (the big Lycan with the hammer) then run down the path with the water in the middle through the buildings to trigger the end of the ambush, where you will be shot with an arrow then all the Lycan leave.
After the scene with the Hag, you need to find two crests to get through the gate to the castle. The first one, the [Maiden Crest] is located in the nearby church. After grabbing the crest, continue through the Fallow Plot to the building at the end. Climb through the window, then over the wall, and open the gate. After more scenes go up to the front door of the house. When you are in the first room of Luisa’s house you will just need to hang out for a bit, then follow her into the next room. After more scenes, you will be in the garage. Go into the other room into the kitchen and open the green drawer to pick up the [Truck Key], then rotate and exam it to obtain the [Screwdriver].
 |
 |
Go back into the prior room and use the [Truck Key] to start the truck, then drive it through the wall. Continue climbing up the building, then when you are outside use the [Screwdriver] on the hut in the front of the yard to obtain the [Demon Crest].
Go back through the Fallow Plot and to the gate past the church. Place the [Maiden Crest] in the left spot, and the [Demon Crest] in the right spot, rotated to match the image on the rest of the gate.
 |
 |
Follow the path through the gate, then pull the switch to the right of the door in the next area.
Underground (Mines)
After the scenes, you will be handcuffed and running away from the Lycans chasing you down. Follow the largely linear path, breaking the boards in your way when needed. When you drop into the large square room with the door at the end you will need to avoid the spike roller to continue. To do so, turn around and face the direction you entered the room from, and the spot to hide will be in the right-hand corner. Wait for the spike roller to move all the way towards you and you will be free from the handcuffs, then follow the path out of the area and you will be back where the switch was. After pulling it, follow the path through into the castle.
Castle
In the castle go through the door to the left following the hallway, then when you enter the “Hall of the Four” interact with the door on the left with the writing on it. After the cutscenes finish, interact with your right arm to get down. Go through the door to the left, then interact with the gate on the fireplace and crawl into the opening. Once you reach the statue at the end of the hallway interact with it to receive the [Maroon Eye Ring]. Go into your key item inventory and inspect the ring, then rotate it to look directly at the front and examine it to obtain the [Maroon Eye].
Continue through the gap, then when back in the “Hall of the Four” go up the stairs to the “Main Hall”, up the staircase to the left to the second floor, then down the right hallway and inspect the door and insert the [Maroon Eye] to open it.
As soon as you open the door one of the Dimitrescu sisters will appear. Run through the area you just opened and drop down a hole into the dungeon area. Follow the linear path through the dungeons, killing or avoiding the Moroacia in your way. When you reach the end you will be attacked by one of the sisters again, and end up in a room with broken windows. The sisters are weak when exposed to outside air, and you can damage them when the windows are open like in this room. Deal with the sister, then go into the kitchen where you can pick up [Sanguis Virinis] out of the tub in the room. Go back to the “Main Hall” and to the second floor again into the “Wine Room” where you can place the [Sanguis Virins] in a holder on the wall. This opens a door, where you can then obtain the [Courtyard Key] from a chest. Go back down to the “Main Hall” and go through the “Dining Room”, using the [Courtyard Key] to get outside.
In the “Courtyard”, go to the southeast corner through the door, then up the stairs to the second floor. In the next hallway, you can obtain the [Castle Map (Main)] from the wall, then go through the door in the “Hall of Ablution”. In this room, you need to rotate the 4 statues to proceed. The solution is always the same, and you want to rotate every statue one time EXCEPT the horse. When rotated it should be the three men facing the man on the horse, the man on the horse facing the woman in the robe, and both the woman in the hat and the woman in the robe facing each other.
After rotating the statues the pool drains, then you can proceed through the door in the ground. Follow the linear route through the blood-filled dungeon to the other side then up the elevator at the end. On the balcony enter the room that Lady Dimitrescu was just in, and grab [Dimitrescu’s Key] from the wall in the left corner.
After picking up the key use it on the nearby locked door, then you will end up in a dungeon area. Follow the path over to a switch in the wall, where you will unceremoniously have your hand removed. Lead Lady Dimitrescu around the area so you can get back to the switch and use it again, then follow the path out using the [Dimitrescu’s Key] on the door, then picking up the [Mask of Sorrow] off the statue to go up the elevator.
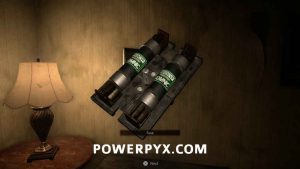
For the next mask, go back to the second floor of the main hall and through the door you put the [Maroon Eye] in. This time go to the end of the hallway where there is a door you can use [Dimitrescu’s Key] on, leading into the “Hall of Pleasure”. In this room grab the [Mask of Pleasure] from the statue, which will lock you in. Crouch through the fireplace and go into the next room where you will fight another one of the sisters. Pick up a Pipe Bomb from the corner of the room, then move the shelf on the opposite wall and throw a Pipe Bomb at the cracked part to blow it up, letting the outside air in allowing you to defeat the sister.
 |
 |
After she is defeated, grab the [Mounted Animal Skull] from the wall in this room, then inspect it in your Key Item inventory, looking at the screw on the back to remove it from the base. You can then place it it on the statue in the prior room to get back out to the main area.
 |
 |
For the third mask, go back to the “Courtyard” then through the locked door on the north side. You can pick up [Castle Map (Annex)] from the wall, then go up the stairs to the second floor and into the “Opera Hall”. Go downstairs and interact with the piano, completing the puzzle. You can just mash keys on the piano to get the right notes, it shows where on the scale you are relative to the note you need next. After completing it, grab the [Iron Insignia Key] from the drawer that opens.
 |
 |
Go through the door on the lower floor of this room, then up the stairs where you can now use the key on the door opposite the “Opera Hall” to enter the “Library”. Here you will need to fight the third and final sister. To do so you need to pull the switch on one of the central pillars in the room, which opens the large doom in the middle letting the cold air in for a limited time, allowing you to deal with the sister. If you don’t kill her before the dome closes, you can just pull the switch to open it again. When she is dealt with go through the next door and pick up the [Mask of Joy] from the statue in the next room.
You can unlock a door which leads back to the “Main Hall”, then go through the silver door into the “Atelier”. In here it is a puzzle where you need to shoot 5 different bells to get through the large painting. #1 is out in the open, sitting on a table. #2 is in the wall on the swinging pendulum arm and you have to time your shot at it. Climb up the stairs, where you can see #3 out the window outside. #4 is in the chandelier, which you can shoot once to make it swing then shoot the bell. Finally, #5 is a tiny bell that is on the shelf to the right side.
 |
 |
Follow the linear path and you will get up to the “Rooftops”. Follow the linear path over the roof and you will reach a point where you slide on a zipline, leading you to the statue where you can pick up the [Mask of Rage], the final one you need. Use the ladder and elevator to get back down to the main floor of the castle.
WARNING: If you need anything in the castle you have to grab it now before going through the mask door. The castle cannot be entered again after leaving, and anything missed will need to be picked up on another playthrough.
When you’re ready to proceed, you can place the masks on the statues in the “Hall of the Four”. From left to right facing the door the masks are placed: [Mask of Sorrow], [Mask of Pleasure], [Mask of Joy], [Mask of Rage]. Continue through the door on the other side, going forward into the “Tower of Worship”, and interacting with the coffin.
Lady Dimitrescu
After interacting with the coffin you will start the boss fight against Lady Dimitrescu. She has mutated into a giant dragon-like creature, and you are fighting her on a tower. The basic idea for the fight is to shoot her still “normal” torso part on the back of the dragon to do the most damage. Keep backing up for this first section, avoiding lunges from the dragon. If you are doing this knife only, the basic idea is just to get behind her and keep hitting the back leg of the dragon, because it can’t do anything when you’re behind it until it turns around. If she flies away and hovers in the outside of the area, you can shoot her body to stagger her, causing her to drop onto the tower for a short period where you can get in more damage.
When she days the dialogue line “More blood” the fight will progress to the second part, where you are put on a stairwell higher up the tower. Don’t try to damage her right now, just make your way up to the top floor of the tower. She will fly around outside the tower, then drop into the middle with you, where you just need to keep putting damage into her until she dies.
When the fight is over, go to the altar at the front of the room and pick up the [Dirty Flask] to leave the area.
Village 2nd Visit
Break the lock on the door, then follow the path to a scene with the Hag. After it is finished, open the chest on the table to obtain the [Winged Key]. Use it on the gate, then follow the path back into the village. After some explanation from the Duke, you need to go back into the village to the house with the red chimney. The gate to the southeast of the statue in the “Maiden of War” area is now open and you can go through that area. Follow the path to the gate with the “Do Not Enter” sign and break the lock, then go into the building on the left. The cabinet at the end has a combo lock on it that uses the code 070408, and inside you can find the M1911 Handgun as well as the [Jack Handle].
Go back and use the jack handle on the jack under the tractor to lift it and get through to the next area. Take your next two rights to a spot with a gate where you can use the [Iron Insignia Key], then climb the ladder on the next building which is the one with the red chimney you were looking for. Go inside and open the chest on the table, which contains a key piece you examine, combing it to obtain the [Four-Winged Key].
Return to the Duke, and you will now be able to go through the door to the north side of the area the Duke is in.
House Beneviento
Follow the linear path to the end where you reach a door. Interact with the drop slot and choose to place the [Family Photo] from your inventory into the slot. Continue down the path and enter the house. Go through the door at the back of the main room, then down the hallway to the left and down the next elevator. Follow the hallway to the end, and interact with the flask sitting on the doll.
All your weapons are now gone, and you need to solve a series of puzzle to get out of the area. First, you need to interact with the large doll on the table to get some items to proceed. Interact with the right shoulder and move your hands to pull a section off, obtaining the [Silver Key]. (You can skip this step if you want to save time).
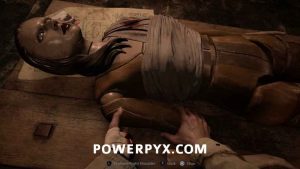 |
 |
Next go around the other side and interact with the left leg, pulling it off to obtain a [Winding Key].
 |
 |
Finally, interact with the left hand to pull off the [Blood Covered Ring]. (You can skip this step if you want to save time).
 |
 |
Use the [Silver Key] on the nearby door, then interact with the sink twice, the second time selecting the [Blood Covered Ring] from your inventory, which makes Ethan wash it off, obtaining the [Wedding Ring]. Go into your invetory and inspect the ring to get the code 052911. Use this code on the paddle on the door you entered the doll room from to get back out into the hallway.
 |
 |
Go down the hallway and into the first door on the left. Interact with the music box, then use the [Winding Key] to open it. You now need to move the slots the cylinders are in to make the music box work. Use the scratches you can see on the cylinders to get them in the correct order. When you successfully match them you obtain [Tweezers].
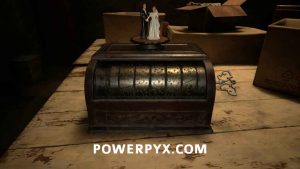 |
 |
Go back into the doll room and interact with the mouth of the doll, moving it all the way obtain. When prompted use select the [Tweezers] to obtain the [Film].
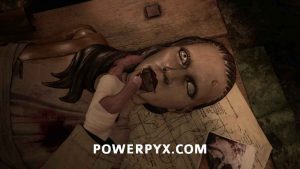 |
 |
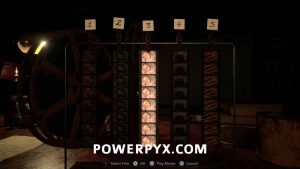
Go back down the hallway again all the way to the end where you enter a study. Interact with the hanging film, then select the [Film] out of your inventory to place it on the stand. Interact with the stand again and move them into the order based on the clue on the paper to the left. The correct order is: Bear, Book, Rose, Music Box, Ring. Play the movie, then a door on the other side of the room opens.
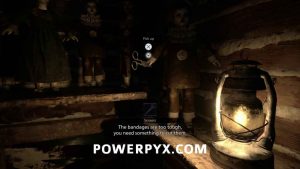
Go into the wall and grab the [Scissors] from the doll on the right. Use them to cut the bandages blocking the path. Follow the hallway to the end, unlocking the door which gets you back into the room with the sink.
Go over to the large doll again, using the [Scissors] to cut the bandages on the torso to obtain the [Brass Medalion].
 |
 |
Now in this room go down the hallway to the left where there is a door with a picture on it. Interact with it and place the [Brass Medallion], then interact with the other to spots. Change the top left to the bird pointing to the right with wings going left (press  once), then the bottom one to the three closed eyes (press
  twice).
 |
 |
Follow this passage to the end and then climb to the bottom of the well to find a [Breaker Box Key].
Go back to the prior room and start going down the hallway until you see the baby. You will now need to avoid the baby while progressing. Go back to the doll room and wait behind the table until the baby enters the room, then go around the opposite side of the table that it starts going to chase you (can also take the path through the other hallway too). Go all the way to the end of the hallway to the elevator and use the [Breaker Box Key] on the breaker box to obtain the [Relief of a Child].
 |
 |
Go into the study and back through the spot in the wall into the hallway, then to the doorway on the left where you can place the [Relief of a Child] to open it.
Go to the end of this new hallway to the bedroom, then interact with the box on the wall to obtain the [Fuse].
Go back down the hallway you came through again until you here the baby chasing you again, then turn around and go back into the bedroom and hide under the bed. Wait for it to enter the room and start moving around the bed, then you can crawl out the front and run down the hallway. You need to go left and take the long way back to the elevator through the doll room because the right path is blocked.
Interact with the fuse box and place in the [Fuse], then quickly get inside the elevator when it opens and push the button to close the door and go back upstairs.
Donna/Angie
This part is sort of a boss fight, but you aren’t actually fighting the doll in a normal manner. It will hide somewhere in the house, and you need to locate it three times to kill it. If you take too long searching then the other dolls will attack you, dealing damage and eventually killing you if you fail too many times.
The first time it is always upstairs in the bedroom at the end of the walkway.
The second and third time are random, the doll can be various places around the house and you need to quickly search for it. Possible places it can be are: in the corner directly left of the entrance near the blocked door, in the dining room to the left sitting by the couches, the back corner of the dining room by the cabinet, the very far end of the hallway near the elevator.
After you have found her three times the “fight” is over, and you obtain another key piece, which when inspected combines with the prior one to give you the [Four-Winged Unborn Key]. You then pick up the [Legs Flask] from the pedestal in the corner, then can go back to the village.
Moreau’s Area
In the village you can now use the [Four-Winged Unborn] key to go through the gate leading South from where the Duke is. Follow the small river running down the middle area to a wall of green goo, which you can damage to destroy and proceed further. Break the next one to climb a ladder and get into the area with the windmill. Go inside and down the stairs all the way and down the lift.
In the next area go down the tunnel to the left with the tracks on the floor, then up the stairs and squeeze through the gap to obtain the [Arms Flask] after a cutscene.
Go back the way you came, then a left and then immediately right to go up some stairs. Hit the wood where the yellow tape is to make a path going forward, then follow it to the end of the area where there is a house building by a tree. Inside the building on the left you can grab the [Boat Key].
Go back the way you came again and take a right when back in the first area to get outside. Follow the path to the end where you can use the [Boat Key] on the boat in the water, then drive it through the two tunnels. After the cutscenes you will be on a dock in the water, follow the path to the pumphouse building. Continue out the other side and down the path towards the windmill. Using the crank on this one breaks it, so continue down the ladder inside this windmill.
In this next section, you traverse the water-filled area over submergible platforms that the transformed Moreau will continually swim through trying to get you. Wait for him to go by before going on platforms. To get to the next set of buildings you need to break some supports to drop platforms, and you do this on the tower by also shooting the yellow taped part on the left with a gun from that side.
Go through the building and push down the first cart, then drop to the area with the switches. You need to pull these switches to temporarily raise platforms in the water to progress. First use the BLUE and the ORANGE to get across to the other building, where there will be all three colors of switches. In here you want to quickly pull them in the order GREEN, BLUE, ORANGE, then pull the ORANGE switch you run by as you quickly get to the end.
The next part is a long section of the submergible walkways. First get to the middle platform as Moreau will flop down on all of them, then when he leaves quickly run to the end before he drops them again.
Follow the path where you will push down a cart to get back to the central building, which now has a second cart to push down allowing you to progress. Pull the switch to lift a boat out of the water, then go through the middle and quickly break the goo that appears to get out of the boat before Moreau destroys it. Drop the ladder so you can climb it, and you will now be on top of another windmill. Interact with the [Crank] to obtain it.
You first need to go around and interact with the ladder section on the ground, then you can go back to the gears and use the [Crank] to stop the windmill. Climb up to the top and use the zipline to get back to the first windmill, then use the [Crank] on it to get power running in the pumphouse. Go inside and interact with the console, then complete the light puzzle to get the switch working (the solution on the side is rotated to the right).
Use the switch to drain the water, then go out the door to the right and follow Moreau into the next area.
Moreau
Now you fight Moreau in this drained area. Like Lady Dimitrescu the best way to damage him is by shooting his “normal” body that is located in the mouth of the giant fish part. Keep backing away and shooting it when you can, watching for when he lunges or spews goo at you.
After enough damage is dealt he will climb onto the top of one of the buildings. When he does this you want to quickly get underneath one of the covered areas marked with the yellow cords and paint. Moreau will start spewing goo into the air, which comes down as rain that damages you if you aren’t in one of the covered areas. This also spawns goo blocking the paths around the area which you have to destroy if you want to move to other spots during the fight.
After that, he comes down again and you can keep damaging him like normal. Depending on how long the fight goes for he may go on the rooftops again, in which case you just hide again under the covered areas.
Once he is defeated follow the newly opened path into the tunnel which leads to the room you originally saw Moreau in when you obtained the flask. Grab the key piece off the table, then examine it to combine it and obtain the [Six-Winged Unborn] key. You can use it on the near gate, then head back to the village.
Stronghold
In the village follow the signs Heisenberg has placed to lead you to the stronghold. This will lead you through a large number of Lycan on your way to the end of the area to obtain the flask. In these areas, you don’t actually need to kill any to progress, only if they’re in your way (or if you feel like killing them).
The first section once you reach the end you need to pull two levers to open the metal gate. They are reached by the stairs on the left, and the ladder on the right.
 |
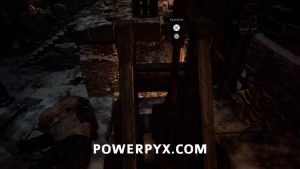 |
Continue through the doors and go up the stairs. In the next section you follow the path up, then there is a zipline you can interact with to get over to the other side of the area and continue along the path. At the top you just need to get through the door behind the group of Lycan that appear, then go back down the stairs to continue.
Urias
Now you need to fight Urias, which is the huge hammer-wielding Lycan from the ambush at the start of the game. He starts up on the raised platform, and whenever he is up there will perform an attack where he jumps down towards you with a hammer swing. Then he will normally follow you around in this lower area, doing various swing combos and attacks depending on how close you are. You can avoid swings by standing on the opposite side of the large stone pillars, until the point where he sometimes will grab them and throw them at you. After enough damage he will climb back up on the middle platform and do a roar, which summons 1 – 2 normal Lycans to also bother you. For damage just keep shooting him in the face if possible until you defeat him.
After he’s dead go through the newly opened door and continue until you get to the room with the television where you can pick up the [Torso Flask], the last of the four. After the scenes follow the path out and use the boat, then climb the ladder to get back into the village.
Heisenberg’s Factory
WARNING: If you have anything else you need to do in the village or other areas you can get back to you need to do it now before going to the factory. Once you go there you proceed to the end of the game.
Back in the village you can return to the area by the Duke and place the four flasks into the chalice. Once all four are placed you obtain the [Giant’s Chalice].
 |
 |
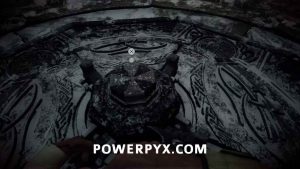
Take the chalice over to the “Ritual Site”, the area with the large statues that you came through after exiting the castle and place it in the middle of the stone circle. This moves the middle platform down and allows you to walk across the bridge leading to the factory.
Follow the path into the factory and through the rooms. Interact with the curtain in the final room and you will have a talk with Heisenberg. After the cutscenes you will be running around from an enemy, just follow the linear path down the hallway, then drop into the chute on the right side when you reach the dead end.
Follow the path out of the area you drop into, pulling the grate off the vent at the end to proceed. Follow the path and you will end up in an area where you can find the Duke in a large elevator. To continue, go through the door to the right of him. When you reach the room with the metal door you should see a red light on it. Throughout the factory, you can find these on doors or machinery, and you either knife or shoot them to destroy them, opening doors or stopping machinery.
Follow the linear path through the dark room until you reach the room with the casting machine, which is the main tool used to progress in the factory. First, go down the path to the left, following the linear path into a room with a large case where you can obtain the [Relief Mold].
Go back to the casting room and use this in the machine to obtain the [Relief of a Horse], which you then use on the spot in the wall to the right to continue.
 |
 |
Follow the path through the next room with the machinery. If you want to stop the pistons to get by easier you can shoot the red lights, or just time running underneath them (you take damage if they swing down when you are under them, but also damage the enemies that way). Continue through the rooms and up the stairs to another metal door with lights on it. Inside here is another case that contains the [Cog Mold].
Go back two rooms where there is a door you can go through that leads directly back to the casting machine, where you can use the [Cog Mold] to obtain the [Large Cog]. Take this and use it on the machine you ran by when getting the mold which then allows you to turn the generator on.
 |
 |
The door to the left of the stairs you went up before is now open, and you can continue through there. In the room with the Soldat walking around on the lower floor you need to go upstairs where there will be a metal door that has 5 lights on it to break. Go through the next area and again go to the second level, where you will again find another 5 light door. This leads back to the dark room you came through at the start where you can now interact with a switch to lower a platform to proceed.
In the next hallway will be another 5 light door, leading to an area where you are again attacked by Sturm and need to run away down the hallway. Go through the doors at the end and you will be back in the main open factory area, where you can pull a switch to activate the elevator the Duke is on, raising it to your floor. You can now use this to go up and down between these two floors if you needs.
Take the ladder up, then follow the linear path through some tubes and a mineshaft area, where you can crouch into a vent in the wall in the room with the large drill in the middle. Go through the door on the other side to a room with a huge turbine at the top. To proceed up through this turbine you need to shoot the 4 red lights located on it. 1 directly in the middle then 3 around the outer rim. After you shoot all 4 it stops, and you can climb a ladder at the top to continue.
After going through another hallway you will reach a long room with another turbine at the end. To avoid dying you need to shoot the light in the middle while being sucked towards it.
Go through where the turbine was, and walk along the pipes to the right that lead along the wall. At the end of them there is a ladder you can climb leading to a hatch. Go up the elevator, and in the next room there is a case that contains the [Key Mold]. Go through to the next area, where you are again out in the main open factory and there is another switch you can pull to bring the elevator up here, which is actually required to progress.
 |
 |
Take the elevator back down the B4, then go through the area leading to the casting machine, which will now be dark and have more enemies in it. Use the [Key Mold] on the machine to obtain [Heisenberg’s Key], then go back and take the elevator back to B1 so you can use the key on the nearby door to continue.
Sturm
In the next area, you need to defeat Sturm do continue. This fight takes place in a (starting out) small set of hallways that get knocked down and the area expanded as Sturm charges around. At the start of the fight, it will only charge a single time then get stuck, where you can then attack the small red turbine on its back to deal damage.
After some damage is done the body of the engine on its head will glow red, and it will start doing either three charges in a row or shooting large jets of fire at you. When it’s charging you want to wait for the third one before you try and damage it, because it does the three in quick succession and gets stuck for a bit after the third. When it’s shooting fire at you it will track where you are until the fire actually starts then stay still. If you are able to get close to it you can use this to your advantage by moving behind it when it’s shooting fire and damaging the turbine.
After enough damage is dealt it will explode and you can leave out the nearby door. Climb out onto the boom arm and interact with the switch to raise yourself up to the next area. Continue through the doors, where you will be knocked to the bottom of the factory. Follow the path through for some more cutscenes, then interact with the vehicle to proceed.
Heisenberg
The first part of the Heisenberg fight you are driving around the vehicle you are on, using it to attack the Heisenberg. You can block melee attacks the same way you normally, then shoot either a machine gun or a cannon at the boss. To deal damage you need to shoot the red glowing points located on either or his arms and one at his base. If you’re trying to avoid damage you should shoot the points only using the machine gun, then use the cannon when he starts moving to attack you because it staggers him and interrupts his attacks. The fight while on the vehicle basically doesn’t change, just keep shooting the glowing red points as they appear.
After enough damage is dealt he will knock you off the vehicle and you will be on foot. You now need to continue damaging him with normal weapons by shooting him in the face. Avoid attacks by staffing to the side or moving close to him, and keep damaging him until the fight ends.
Chris
After some cutscenes, you will now be playing as Chris. Follow the linear path through the forest for another cutscene, then you will need to start moving into the village. This part is relatively linear, you are just following the path through the village that you should know by now, killing or avoiding the Lycans in your way until you reach the village center that now has a giant wooden cross in it. Here you now need to use the laser pointer to mark it three separate times to destroy it. After each marking, you need to wait a minute before you can mark again, and will have a wave of enemies spawned on you. You can try to kill them or just avoid them because they are all instantly killed the next time you mark the cross. After it’s destroyed take the new path down.
Urias Strajer
You now have another boss fight with Urias Strajer. As the name would imply this one is similar to the one you fought as Ethan, but much stronger and with armor on its face which means that is off the table for damage. Its back is exposed and shooting it there does deal more damage, but it generally doesn’t leave it exposed for very long. After a while you will start being able to call in airstrikes on it, which is the best way to kill it quickly. Avoid its attacks in the same way you did against the one as Ethan and call in airstrikes when you can.
After it’s dead. take the newly opened path. After a cutscene continue down the path until you reach a lab, then interact with the door at the back.
After more scenes you will be back playing as Ethan. When you are back in the central village area grab any supplies you need, then follow the path to the “Ritual Site”.
Miranda
Now all you have left is Miranda, the final boss of the game. She stays mostly human-shaped for the entire fight, so you deal damage by just shooting her in the head or body. After some time she will start changing forms, switching to one with a number of large spider legs carrying her around, then one where she flies in the air. In the spider form, you avoid her the same when she’s on the ground, then if she jumps to a higher platform you need to start running around the room to avoid when she tries to jump down on to you. When she flies around she will sometimes dive at you, or summon either one large or three small brown orbs that float over her head. You can shoot these balls to destroy them, but if you don’t they will light on fire and be shot towards you. She will then rotate through these three forms during the fight.
If a number of black pillars appear out of the ground and a large brown orb in the middle you need to hide behind one of the pillars. The orb in the middle will light on fire and start sending small flaming orbs outward that damage you if you aren’t behind a pillar.
Sometimes the entire area will darken making it hard to see. When this happens Miranda will hide in the darkness in normal form, and you need to find her when she appears and attack her to allow you to see normally again.
After enough damage is dealt she will grab you and hold you in place, while summoning a large brown ball above her. You need to quickly shoot this ball to blow it up and damage Miranda. Once you have successfully done this she will start attacking you while still held in place, and you need to keep damage her to kill her and end the fight.
This concludes our Resident Evil Village Walkthrough.
- Resident Evil 8 Village Wiki & Strategy Guide
- Resident Evil 8 Village Collectibles Guide
- Resident Evil 8 Village All Treasure Locations & Solutions
- Resident Evil 8 Village All Cooking Ingredient Locations
- Resident Evil 8 Village How to Unlock Infinite Ammo Cheats
- Resident Evil 8 Village Trophy Guide & Roadmap
















DarthGianotti says
Muchas gracias!
Thank you very much!
Great guide, keep up the good work.
Dedet says
I want play for first playthrough. What weapon should i upgrade more? *for good any condition. Thanks