Welcome to Resident Evil 2 Walkthrough for the 2019 Remake on PS4, Xbox One and PC. Here you can find a full Walkthrough for RE2 for both Leon and Claire Story Campaigns. This will help you get through the game in case you get stuck. This walkthrough will show you where to go for main objectives in order to progress the main story. If you’re looking for all Collectibles you can use the complete Resident Evil 2 Collectible Locations Guide along the way to see them listed in chronological order. For the purpose of this main walkthrough we’re focusing only on how to get through the story and main objectives.
Speedrun Video Walkthrough
This video Standard Difficulty Video Walkthrough focuses on only the main objectives in case you need more visual reference.
Gas Station
Right at the start of the game you will have to enter the gas station in front of you. There is nothing of interest outside the station, so simply head in.
While inside, simply follow the only open door there and take care of the zombie after the cutscene. Either kill it and or simply stun it with a headshot and run past it. At the end of the room grab the key and open the door next to the one you used to come in. Run between the shelves to the exit for the next couple of cutscenes.
Streets of Raccoon City
Your objective is very simple: reach the police station. This short part of the game wants you to navigate through a small maze of roadblocks and cars.
There is only one path which leads to the next area, so you shouldn’t get lost here. Once you reach the entrance another cutscene will play and you will be able to start the real part of the game.
Police Station
Once inside the police station you will be welcomed with a typewriter to save your game and an item box just in front you. The place where you want to go, however, is the closed shutter in the east side of the 1st floor with a lever next to it. Pull it and continue through the dark hallway.
Push away the shelf in your way and follow the hallway to the very end to hear someone screaming. Open the shutter the screaming comes from and you will receive a notebook with some useful information. Once you have it, wait for a zombie to crash your small party in this room, get rid of it and head back to the main hall the way you came. There will be a couple more zombies to deal with on the way back.
Marvin, a knife and a new Path
Back in the main hall you will receive a knife, which can be used as a defensive item in case you get grabbed by an enemy. The reason you receive the knife, however, is for the taped box in the west side of the first floor.
You want to cut it free and follow the hallway to the very end, until you reach the Operations Room. Once inside you can grab a map there if you wish. You have to climb through the open window on the left wall of the room, with a crate in front of it.
Once outside you have a variety of rooms to visit. What you really need to do, is head towards the staircase and follow it to the very top (3rd Floor). Follow the only path there and grab the Spade Key from the table, since you will need it to progress further.
Spade Key and the 3 Statue Medallions
With the spade key, you can now obtain the 3 Medallions you need to enter the underground part of the Police Station. Follow the path in the 3rd Floor to a storage room, where you can find an inventory upgrade and a statue behind a wall you are supposed to blow up with C4. Keep this room in your memory, since you will have to come back here real soon. Head through the Spade Key door into the Library.
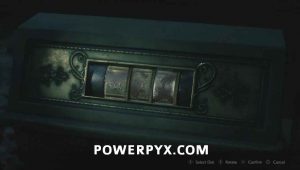
While in here, head down the stairs and enter the door to your left. There you will find one of the 3 statues you need to interact with in order to obtain the Medallions you need. The code for the Unicorn Statue is: Fishes, Scorpion and the Jug (those are zodiac signs, the 3rd one being Aquarius). Grab the Medallion and this time go through the Spade Key door on the lower floor of the Library.
Welcome back to the Main Hall, 2nd Floor. While in here go to the middle section of this floor and you will find the Lion Statue with the 2nd Medallion you need. The Code this time is: Lion, Twig, Bird.
Bolt Cutters and Detonators
Head back to Marvin as we wanted you to. While in here you can get rid of the 2 Medallions in your inventory at the Goddess Statue next to Marvin’s spot. You now need to head to the East Side of the 2nd Floor, where you can use the Spade Key again. Follow the hallway until you see a cutscene with a helicopter crash. After the cutscene you will see Bolt Cutters on a trash bin in front of you, pick up this key item.
With it you can open the door right in front of you and the very next door leading into the East Office, where you want to grab 2 items. In the small office room on the left side grab the valve and at the end of the table in the middle the fuse. Get rid of the chair blocking the door and head left to the fuse box. Use the fuse and you will now have gotten rid of the shutter and can go back to the main hall again.
From here you have 2 places you want to visit. I recommend head back to the Operations Room through the Reception and open the 3rd chain lock with your cutter there. In the newly opened room you will find an Electronic Gadget, one part of the Detonator you need. With this and the Valve you found earlier open the only other door in the room you are in, which is a shortcut to the hallway with many rooms. (You might want to grab the Inventory Upgrade from the safe in the West Office while you are here, the code is L9, R15, L7).
Go back to the staircase and this time head to the Shower Room on the 2nd Floor and use the Valve to stop the steam.
Follow the corridor and head towards the S.T.A.R.S Room. In the hallway you will encounter your first Licker so beware. In the S.T.A.R.S. Office you want to the head to the small office on your left and grab the Battery there. Combine it with the Electronic Gadget and you will have the Detonator.
Blowing up the Explosive Blockade and Getting 3rd Medallion
With your Detonator, head back to 3F Storage Room through the Library and use the Detonator on the C4 there.
Keep some distance from the explosive and once your path is clear, head inside to find the third statue you need. The symbols will be a burnt but you can still see a bit of the symbols on it. The code this time is: Woman, Bow, Snake.
Watch out for the Licker in the Storage Room now and head back to the Main Hall through Library again. Place the last Medallion and you will now have access to the underground section.
From now on Leon and Claire will have partially different ways, so be sure to check the one you need. They do have similarities, however.
Get to the Parking Lot and say Hello to Bill
Place all 3 Medallions into the statue on the 1st Floor of the Main Hall and a new path will open. Follow the path to the elevator and once you reach a staircase, leave in the middle of it (there is nothing to do in the bottom part of the staircase).
Follow the metallic walkway until you reach a shelf you have to move and a cutscene will trigger. You will now enter your first boss fight against William “G” Birkin, to whom I will simply refer as “G” from now on. The best way to fight G is using the arena to your advantage, keep running in circles and shooting G in his head, and later shoot him in the eye on his shoulder when he exposes it. You don’t want to get stuck in a corner with only one exit and you should only go into the corners if you want to grab some ammo or herbs. Try keeping a mid-range distance from G since being to close will make him use his melee attack and being too far will make him disappear above the arena in order to surprise you from behind / above. After the fight climb the ladder and follow the only path. After moving the platform you can find an upgrade for your inventory slots in a locker. Soon you will reach the parking lot.
Separate Ways for Leon / Claire
This part works a bit different for Leon and Claire. As Claire you will have to only reach the morgue here in order to find the Diamond Key. Same goes for Leon, but he will also have to use the Crank to reach the Generator Room and turn on the power there. You will find it in the Prison Area you followed Ada into. Remember this place, since you will have to come back here later. Watch out for Lickers (Claire) and Dogs (Leon) on your way to the Morgue. Open the 2nd to last lid on the wall behind the middle table for the Key and watch out for 2 Zombies afterward.
As Claire you will have to follow the path, Chief Irons went. Use your Diamond Key and turn on the power for the private Elevator into Chief Irons’ Office. As Leon Use the Crank to reach the Generator Room and turn on the power there. In Leon’s generator room you will also find one of the 2 electronic cubes (in orange boxes you have to examine). This cube Claire will have to find in East Storage Room on third floor of the Police Station. The 2nd cube is same for both characters, to be found in the Clocktower where we’re now headed.
Once inside Chief Irons’ Office grab the Heart Key hidden in a picture frame. In the same room you will also find the same puzzle Leon has to solve in the Prison Area. With the heart Key you can reach the same staircase Leon reaches by turning on the power in the Generator Room and using the Crank.
The Gear and the electronic cubes
Once you reach the staircase head to the 3rd Floor and grab the big gear from East Storage Room 3F as both Leon and Claire there. As Claire you will also have to open the Heart Key Door in the same room as the Gear in order to find the Electronic Cube that Leon found already in the Generator Room.
With the gear and the Orange Box in your inventory now head through the second door in the 3rd Floor to the roof. Climb down the ladder (it will break for Leon) and search for the valve at the lower level.
Turn the valve on the lower level and use it on the upper level in order to extinguish the fire blocking your way in the 2nd Floor. As Leon you will also have to enter the small room, which is shut tight for Claire. There you will find the Clubs Key you will need. Once the fire is extinguished, you will have to walk through the now fire-free hallway and from now on you will a friend following you around. The Tyrant (Mr. X) will start chasing you and you can’t kill him. You can only stun him for a while or simply run away from him.
Getting the Handle and reaching the Clock Tower
With Heart Key (Claire) or Clubs Key (Leon) in your inventory, there is one room left you will have to visit. It is the room with 2 locked doors (one for each key) in the 1F West Side. In there you will find the Handle you need to push the shelves in the Library.
In the Library use the Handle and move the shelves to form a bridge for the floor above. Move the shelf on the right once to the left, the one you needed the handle for once to the right and push the remaining 2 shelves to the right twice each.
Cross the newly built “bookshelf bridge” and head to 3F balcony. Enter the first door along your way to reach the Clock Tower. There you can place your Gear but take it with you after lowering the stairs. Head up the stair and replace the Small Gear there, with your Big Gear and take the Small Gear back downstair to place it into the mechanism behind the cage with the bell. The bell will grant you access to the 2nd electronic cube.
With both cubes head back to Chief Irons’ Office (Claire) or Jail (Leon) and place them both on the electric panel. Solve the small puzzle with wires and you will be granted access to the parking lot keycard.
At this point the path for Leon and Claire will split. Below, Leon’s path is color-coded in Blue and Claire’s path in Red. Leon’s path will lead to the Sewer Entrance while Claire’s leads to the Orphanage. Both their paths will rejoin in the Sewers, from there it will be identical again.
Sewer Entrance (Leon)
In this scenario, after using the keycard on the garage door you’ll be following Ada. You’ll go through sewers and have a crocodile boss fight. After that you play as Ada and then reach the sewers. Continue with the Sewers below.
The Orphanage (Claire)
Once you have placed both cubes and solved the puzzle, you will be able to grab the parking lot keycard… but a cutscene will trigger instead and you will switch to playing Sherry for a short part of the game.
You start in a bedroom of the orphanage and have to get out. Turn left and grab the toy, examine it to find a puzzle stone. Place this stone in the puzzle next to the door.
Copy the puzzle solution from the image above. Once you have solved the puzzle you will receive scissors, which can be used to cut the tape and to escape the room. Follow the only path through the hallway until you reach a room with a corpse lying on the table and while grabbing the key, a cutscene will trigger.
Chief Irons will chase you and if he catches you, you are dead. Run upstairs into the room and hide behind the furniture.
Irons will walk in a circle around the furniture you are hiding behind, so continue walking in a circle as well. Irons will go left afterwards and you will hear him move something out of the way. Once he comes back you will have a chance to take the newly opened path and hide under a table on the other side of the furniture barricade. Stay there until Irons triggers a cutscene in which he runs into the bathroom.
Once he goes in there you’ll have to grab his key from the door and run back all the way to the room where you tried to grab the key before (the one with the corpse on the pool table). Irons will chase you, so be quick and don’t let him catch you. Once you reach the above-mentioned room, Sherry’s part will end and you will go back to Claire.
Back in Irons’ office take the elevator to the parking lot and use the keycard on the panel to open the shutter.
Watch out for Mr. X who once again will try to get you. Stun him or outrun him, your choice. Leave the parking lot and head through the gate with 2 zombies bashing their heads against. Go up the iron stairs and follow the only path, while avoiding / killing dogs and taking a shortcut through a bus.
Right after exiting the bus you will reach the orphanage. Head into the room Sherry’s part ended in and take the ladder down into the basement.
After outrunning Mr. X once again and after another cutscene you will find yourself in a room with a small ledge you can jump down off. Do this and follow the only way through the sewers until you reach a room with the item box, typewriter and 6 boxes on the wall where you are supposed to place chess-figure plugs into. The Sewers part begins.
The Sewers
From now on Leon’s and Claire’s playthrough will be identical again until almost the very end of the game. With 3 chess plugs in the wall, you will have to find 3 more to open and vault-like door and save Sherry / Ada. Head through the door left of the big window and use the lever to move the bridge. Cross it and head left first until you reach a cable car. Grab the T-bar Valve Handle since you will need it twice.
With the t-bar handle head back and this time go right of the bridge through the door and go down the dark stairs. The road will split once again, you can either go left through a dark passage and a T-bar handle hole — or go right to raise the gate and go back to the beginning of the sewers. We’ll go to the left first, but we have to do both paths anyway.
When going left, open the gate with the t-bar handle and follow the path until you reach a table with a key (irrelevant for the story walkthrough) and a ladder down to a swamp area called Bottom Waterway. Go down and cross the lair of G-monsters. You will reach the Storage Room with a lot of plug sockets. From here you can get the Queen Plug and King Plug. Take them both with you back to the road split (You can optionally grab the Flamethrower for Leon or Spark Shot for Claire as well while there).
Going right through the gate to the beginning now, where another T-bar handle hole awaits next to a blue herb. Open it and take the workroom lift to the area above. You will reach the Workroom with a dead zombie on the ground and an inventory upgrade on a table. Open the door and grab the Rook Plug needed from the socket on your left after leaving the room.
With all 3 plugs head back to the room where you started your chess-figure plugs hunting and solve the riddle on the wall. The solution is: Pawn / Queen / King on the right wall and Bishop / Rook / Knight on the left wall. As reference points, where the Pawn and Knight are supposed to go is displayed via stickers on the sockets already so the game tells you the solution where two of the six plugs need to go.
Once done, head through the vault door and down the stair in order to turn on the power. When trying to leave the room, G will attack you once again. Place yourself next to the “High Voltage Box”. It is a safe spot where he can’t hit you. Once G breaches through the shutter run past him down to an area with a container in the middle. Behind the container is a control panel. Press the red button to send the container away, damage G a lot and call the container back to knock him off the platform. It is hard to say how much you have to damage him, but I usually try to bring him to his knees trice and it almost always is enough to defeat him with calling the container back only once.
Once you defeat G you will be now able to enter the garbage room to save Sherry / Ada. With your sidekick saved, head back to the cable car and the sewers will be done. You will now head towards the last location in the game – NEST, which is an Umbrella Laboratory.
POINT OF NO RETURN: Pulling the handle in the cable car marks a point of no return, so be sure you have accomplished everything you wanted in the sewers / police station before pulling it.
The Lab (NEST)
After arriving in the Lab you will notice that your wristband only allows you level 1 access but to reach the remaining parts of the lab you will need level 2. The section for Leon and Claire is identical.
Head through the Cantine, up the ladder and follow the path into the kitchen. You have now skipped a General Staff door. In the nap room you will find the General Staff Access for your wristband. With that you can now head into the main room of the lab with 3 ways: the one you came from, one heading west and one heading east. You can now head east into the greenhouse area.
Follow the only path and you will reach a room with a computer in which you can enter blue alien symbols. This computer will allow you to enter 2 codes which you will have to find. One of them opens a ladder in the area with plant-zombies, the other one opens the shutter for machine with green fluid. The codes can be found on the ladder itself and on a trophy on a table in the lounge after you took the ladder. The codes are identical on all difficulties and if you imagine the symbols to represent a number pad (like on your phone) the codes are: 3123 and 2067. (For B-Scenario 2048 and 5831).
From the same room grab the Dispersal Cartridge and head into the Drug Testing Lab with the green syntehsis fluid machine. You will have to move the fluid between the syringes until the one on the left matches the height of the red line. The solutions are A: R G B R G B R G and for B: B R G R B R B G R G. (For Red, Green and Blue buttons respectively – Green is left, Red is Middle, Blue is right).
With the solution in your cartridge head through the Lobby, up the stair and grab the Signal Modulator from the storage room. With it, head back to the Lobby and use it to turn the power back on. You do this by interacting with the switch box then examine the Signal Modulator to put it in the correct frequency. It shows the frequency level in 3 letters above the switch box which in our case is MURF. After switching to that modulator frequency you still need to line up the graphs by using the left and right stick. Then insert the signal modulator in the switch box to turn on the lights.
Now you can head into the Cold Storage Lab and freeze your Cartridge. With the frozen Cartridge head back to where you got it from to get rid of some weed infestation. A cutscene will show you where to grab Wristband Access Level 3 so do it.
With Level 3 Access you can now head west in the main room and this will start the endgame. Once again turn the power back on with the Signal Modulator on your way (examine it in inventory, put in the frequency, make the line up the graphs). Follow the only path to grab the G-sample and on your way the back the 3rd fight against G will trigger. Shoot the 3 eyes on his body (shoulder, leg, back) and afterward the eyes on his chest. Repeat the process twice and finish him up with more shots to his chest.
The escape sequence is almost identical for Leon and Claire with the exception being having to run back to Sherry first with Claire. Head into the elevator and follow the path to the end. Leon will have to fight Super Tyrant and Claire will meet G in his final form. With Leon deal damage to Tyrant’s chest until Ada drops you a Rocket Launcher to finish him and for Claire shoot the G’s eyes with the minigun until he’s dead.
Congratulations! You have finished the game, but there is a lot more to come. You can play as the other character now or you could also try the 2nd run.
If you’re going for a 2nd run (also called “B-Scenario”), most of the game will be identical, but puzzle solutions will have changed. If you need help with the 2nd run Puzzles, refer to our full Resident Evil 2 Remake Puzzle Solutions Guide.














Jason says
Hey Pyx, if I am following your speed run walkthrough, can I pause and upasue to follow your guide? Or does the timer keep going when you pause? Thank you.
Vonzurch says
the clock does stop when you pause the game, you can check it athe right top corner of the screen
Jake says
Hi! You didn’t mention where to find the gold gear so the bell will knock off the electronic cube ?
DK says
Hey Buddy, I did mention it. It is mentioned in the first line of the “The Gear and the electronic cubes” part.
litt7eprincess says
The big gear is found in the East Storage Room 3F
To activate the bell to knock down the second electronic cube you only need the big gear (as above) and the small gear which is in the clock tower as per the guide.
Ivan says
Do cutscenes pause the timer?
HUNK4SMASH says
I see people skipping them during speedruns, so it’s probably a good idea too.
Most games, the cutscenes do not freeze the timer.
Pro solo gaming says
Game timer stop during cutscenes.
ChaoticRe says
You never mentioned how to get the grenade launcher during your run
Matt says
I think I found it in the lab which he hasn’t got to yet, which is the perfect place to start using it. Hope this helps
Hawkwind667 says
Grenade launcher is obtained from the weapon locker in the safe deposit room. It requires the weapon keycard from the Art Room to open.
Loxim says
Are you planning on updating the rest of the walkthrough like it says at the bottom?
PowerPyx says
Of course, it will be finished soon
PowerPyx says
The walkthrough is finished now, sorry that it took a bit longer. Was a lot to do between Resi 2 and Kingdom Hearts 3 releasing close together.
Loxim says
No problem. Two great games to play is tough to choose which day to play them.
tepinie says
good job
Gary says
In resi 2 when you have finished can you keep the items in your storage box?
Roman says
Hello Powerpyx!
I didnt understant how to find the codes in the laboratory without guides?if i want to play myself without help.
To find the code yoy have to use the ladder, but to use it you need the code. How can it be?