
Horizon VR Call of the Mountain Trophy Roadmap
- Estimated trophy difficulty: 5/10 (due to
 Top of the Class)
 - Approximate amount of time to platinum: 8-12 hours
- Offline Trophies: 36 (1
 , 4
, 4 , 11, 20
 )
) - Online Trophies: 0
- Number of missable trophies: 0
- Glitched trophies: Nothing Yet
- Does difficulty affect trophies?: There are no difficulty settings, but you can make the game easier with accessibility settings and it won’t affect trophies
- Minimum Playthroughs: 1 full playthrough + 1 mission replay
- Free-Roam / Level Select after Story?: Yes, Mission Select is available after completing the game
- Supports Manual Saves?: No, only Autosaves
- Release Date: February 22, 2023
 Top of the Class)
 , 4
, 4 , 11
, 11 )
)Introduction
Welcome to the Horizon VR Call of the Mountain Trophy Guide! The quintessential VR2 experience, Call of the Mountain will demonstrate what the PSVR2 is capable of doing. The majority of the gameplay will consist of climbing and shooting your bow, which can be quite physical. In order to get Platinum, you will need to complete the game, collect all of the collectible types and do various miscellaneous trophies. By following the Horizon VR Call of the Mountain Collectibles Guide, you will get the majority of the trophies. There are also 2 challenge trophies to complete
The game has various accessibility options that you can adjust to make your experience easier if you desire. They can be found under Options > Accessibility.
Step 1: Complete the Game, Collect all Collectible Types and Complete any MiscellaneousTrophies
Play through the game finding all the collectibles. In Mission 2: Pilgrim’s Trail, the path will split and you will not be able to get all collectibles here in one playthrough, so you will need to replay this after you finish the game. Follow the Horizon VR Call of the Mountain Collectibles Guide to collect everything. There are also miscellaneous trophies to earn, several of which you will get naturally, but others you might need to actively attempt.
Below are the missions to unlock the various miscellaneous trophies. Some can be done in multiple missions, but these are the best missions for those trophies:
- Mission 1: Brightdawn – Defeated a Grazer

- Mission 5: Talonreach Ascent – Disc Shot!
- Mission 6: Mother’s Tears – Carja in Shadow and Lights Out
- Mission 9: Devil’s Anger Ascent – In your Element
While playing through the game, you can adjust your settings to make things easier if you desire. Under Options > Accessiblity, you can adjust the following settings to make the game easier without affecting any trophies. While it is recommended you play the game without any accessibility settings, these are an option if you want to make combat faster or are struggling with combat or climbing.
- Damage Dealt – up to 5x
- Damage Received – down to 0%
- Climbing Reach Multiplier – up to 2x
- Disable Falling While Climbing
- Auto Load Arrows
Step 2: Clean up remaining Collectibles, Challenge Hub Trophies
Once you finish the game, you will unlock Mission Select. If you collected everything during your first playthrough, you will at the very least need to replay Mission: Pilgrim’s Trail for the alternate path, but if you missed any other collectibles or miscellaneous trophies, play through the respective missions again to get anything you missed. There will also be 2 challenges to complete in the Challenge Hub, as well as a Machine Safari to embark on, both of which can be done either from the main hub in Dawn’s Grasp or the main menu. These can be accessed earlier in the game, but it is best to leave these until you’ve finished the game.
The Archery Range challenge is very manageable, but the Assault Course challenge will require very fast and precise climbing. This is the hardest trophy in the game and can be very physical, especially if it takes you many attempts.
Useful Tips, Tricks and Guides:
Horizon VR Call of the Mountain Trophy Guide
 |
Answered the Call Earned all Trophies in Horizon Call of the Mountain |
|
| Earn all other trophies in Horizon Call of the Mountain to unlock Platinum. | ||
 |
Defeated a Thunderjaw Defeated the Thunderjaw at the top of Talonreach |
|
| Story-related. Cannot be missed.
This will be earned at the end of Mission 5: Talonreach Ascent. |
||
 |
Defeated a Stormbird Defeated the Stormbird at the top of Devil’s Anger |
|
| Story-related. Cannot be missed.
This will be earned at the end of Mission 9: Devil’s Anger Ascent. |
||
 |
Defeated a Fireclaw Defeated the Fireclaw in Day’s End |
|
| Story-related. Cannot be missed. This will be earned at the end of Mission 12: Day’s End. |
||
 |
Defeated a Bellowback Defeated a Bellowback |
|
| Story-related. Cannot be missed.
This will be earned during Mission 6: Mother’s Tears. |
||
 |
Defeated a Shellwalker Defeated a Shellwalker |
|
| Story-related. Cannot be missed.
This will be earned at the beginning of Mission 7: Elder’s Calling. |
||
 |
Defeated a Scrapper Pack Defeated a Scrapper Pack |
|
| Story-related. Cannot be missed.
This will be earned at the end of Mission 3: Upper Slopes of Brightdawn. |
||
 |
Defeated a Glinthawk Flight Defeated a Glinthawk Flight |
|
| Story-related. Cannot be missed.
This will be earned either during Mission 2: Pligrim’s Trail if you take the left path, otherwise it will be earned during Mission 4: The Sunspear. |
||
 |
Defeated a Grazer Defeated a Grazer in Brightdawn |
|
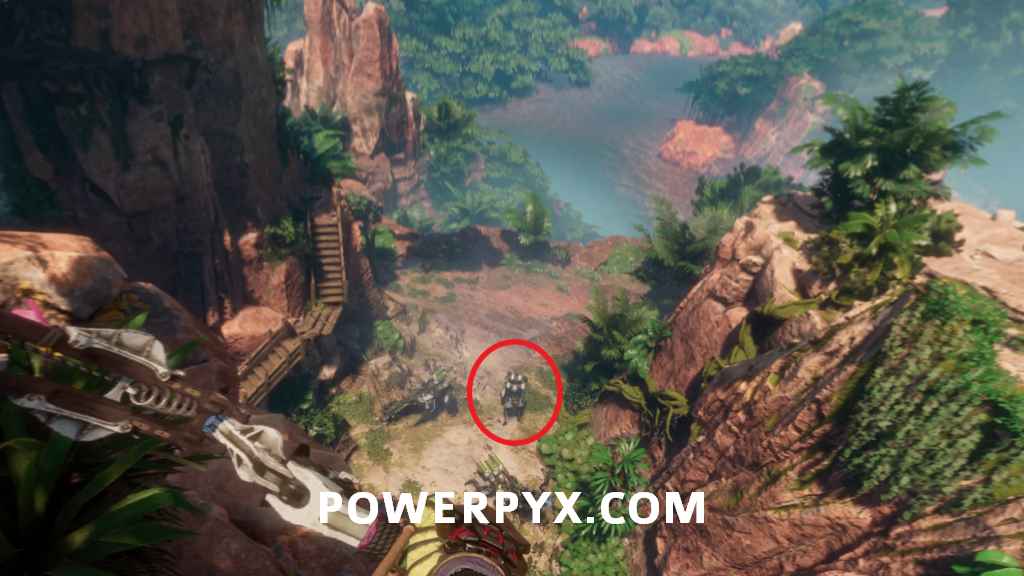
| The only opportunity to defeat a Grazer is after picking up your bow in Mission 1: Brightdawn. Directly below you to your right will be a herd of Grazers. Shoot one a few times to kill it. If they all manage to run away before you get a kill, simply restart checkpoint and try it again.
|
||
 |
A Rock to the Head Climbed Brightdawn to the view of Dawn’s Grasp |
|
| Story-related. Cannot be missed.
This will be earned at the end of Mission 1: Brightdawn. |
||
 |
The Sunspear Completed the Pilgrims’ Trail to the top of the Sunspear |
|
| Story-related. Cannot be missed.
This will be earned at the end of Mission 4: The Sunspear. |
||
 |
A New Threat Discovered the Powerful Machine Lure at the top of Talonreach |
|
| Story-related. Cannot be missed.
This will be earned at the end of Mission 5: Talonreach Ascent. |
||
 |
The Metal Devil Repaired the Transmitter Box to Ascend to the Metal Devil on Devil’s Anger |
|
| Story-related. Cannot be missed.
This will be earned at the end of Mission 8: Talonreach Tower. |
||
 |
Asera’s Fall Stopped Asera from reaching Meridian on her Tallneck |
|
| Story-related. Cannot be missed.
This will be earned at the end of Mission 11: Eagle’s Fall. |
||
 |
Crafted Pickaxes Crafted your Pickaxes |
|
| Story-related. Cannot be missed.
You will craft your pickaxes in the hub area after completing Mission 2: Pilgrim’s Trail. |
||
 |
Fully Equipped Crafted and Collected all of the Tools |
|
| Story-related. Cannot be missed.
There are five tools in the game, and you will need to collect them all to be able to progress throughout the game.
The Grapple will be your last tool to collect, and you will craft this at the beginning of Mission 10: Devil’s Anger. |
||
 |
Mastered the Elements Crafted Elemental Ammo |
|
Throughout the game you will find components for various arrow types. For this trophy you will need to craft either a Blaze Arrow or Shocker Arrow. With these components, pull out your bow and turn it upside down, then press  when hovering over your desired arrow type. Place the components in their craft spot and you will craft all of the arrows you have available for that type. when hovering over your desired arrow type. Place the components in their craft spot and you will craft all of the arrows you have available for that type. |
||
 |
Fully Armed Collected all of the Weapon and Ammo types |
|
| In order to get this, you will need to get both weapons and seven ammo types. The Bow is found in Chapter 1: Brightdawn, and the Blast Sling is found in Chapter 6: Mother’s Tears. The Bow will have five arrow types, which can be crafted after finding their respective arrowheads, whereas the Blast Sling will have two types of ammo that are simply collected. As long as you don’t actively avoid making one of the arrow types, you should earn this upon crafting Precision Arrows in Mission 9: Devil’s Anger Ascent.
Weapons and Ammo Types:
|
||
 |
Warning Beacon Shot a Warning Beacon |
|
See Full Alert  . . |
||
 |
Alerted Shot all of the Warning Beacons in a Mission |
|
| See Full Alert . |
||
 |
Full Alert Shot all Warning Beacons in Horizon Call of the Mountain |
|
| There are 111 Warnings Beacons spread throughout the game. Warning Beacons are targets you can shoot, often hanging off the scenery. Many of these will be visible on your direct path, but some are quite sneakily placed throughout the game. Whenever you shoot one, your total count for that mission will update. If collecting these through Mission Select after finishing the game, you can leave a mission as soon as it saves to make sure it counts, or you can leave to the hub area via a campfire. | ||
 |
Master Climber Completed a Legendary Climb |
|
| See Legendary Climber . |
||
 |
Legendary Climber Completed all Legendary Climbs |
|
| There are 6 Legendary Climbs throughout the game. As the name implies, these are long climbs up significant landscapes. Several of these you will unlock naturally as they are story-related, but a few of these will be optional. If collecting these through Mission Select after finishing the game, you can leave a mission as soon as it saves to make sure it counts, or you can leave to the hub area via a campfire. | ||
 |
Collector Found a Lore Collectible in Horizon Call of the Mountain |
|
| See Scholar . |
||
 |
Scholar Found all Lore Collectibles in Horizon Call of the Mountain |
|
| There are 20 Lore Collectibles spread throughout the game. These are traditional collectibles that you pick up to collect. Many of these will be found on tables in buildings, sometimes inside some type of container. You can view your Lore Collectibles from the Lore Room in Dawn’s Grasp, the hub area. Unlike the other collectible types, one Lore Collectible will be found in the Challenge Hub, so it will not display on any of the Mission Select collectible trackers. If collecting these through Mission Select after finishing the game, you can leave a mission as soon as it saves to make sure it counts, or you can leave to the hub area via a campfire. | ||
 |
Cairn Builder Constructed a Cairn |
|
| See Master Cairn Builer . |
||
 |
Master Cairn Builder Constructed all of the Cairns in Horizon Call of the Mountain |
|
| There are 7 Cairns to build throughout the game. These are indicated by a pile of rocks sitting on a platform with two wooden sticks on the side, showing how high you must stack the rocks to create the Cairn. You will need to stack the rocks on top of each other, which can sometimes prove frustrating if the cairn collapses. If collecting these through Mission Select after finishing the game, you can leave a mission as soon as it saves to make sure it counts, or you can leave to the hub area via a campfire.
|
||
 |
In your Element Triggered an Elemental Explosion by Destroying a Machine’s Canister |
|
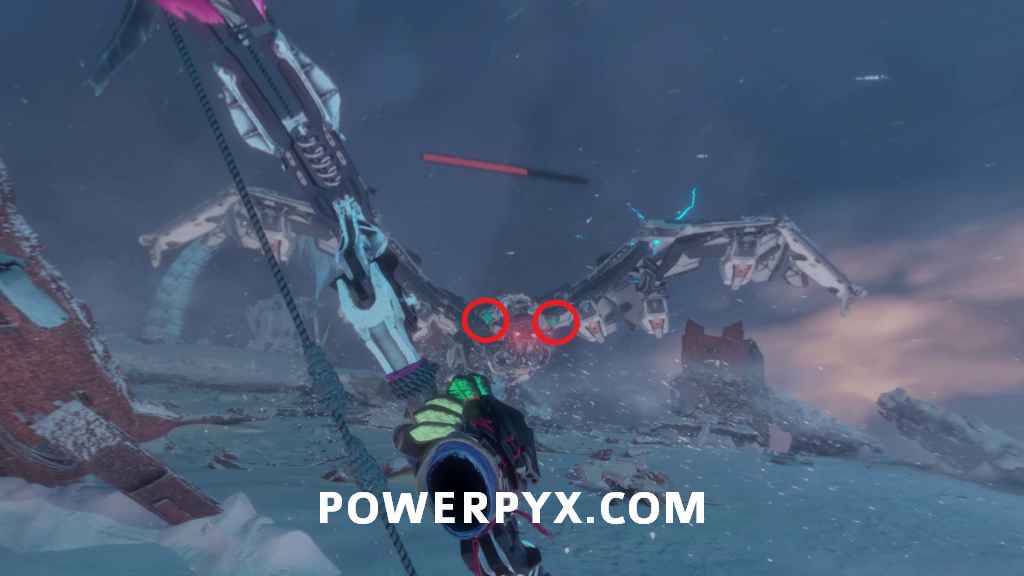
| Several of the larger machines in the game (like the Thunderjaw and Stormbird) will have blaze and frost canisters on their bodies, which when shot enough will explode and apply that element to them for a short period. The best opportunity to do this is on the Stormbird in Chapter 9: Devil’s Anger Ascent. The frost canisters on the Stormbird’s shoulders are very easy to see, and they will explode from a single arrow, so they are very easy to destroy.
|
||
 |
Lights Out Shoot a Watcher in the eye before it spots you |
|
| This can be done on the right path of Mission 2: Pilgrim’s Trail, but the easiest spot for this is during the first encounter in Mission 6: Mother’s Tears. There will be several Watchers that appear right in front of you, when they are scanning in front of them, try to shoot them in the eye. If you miss and alert them, simply restart checkpoint and try it again.
|
||
 |
Heavy Hitter Used the Ballista or Blaze Barrels to Damage a Machine |
|
| Throughout several encounters in the game, particularly those against larger machines, there will either be blaze barrels around the arena for you to shoot, or ballistae that you can mount and shoot. The earliest opportunity for this will be against the Thunderjaw in Chapter 5: Talonreach Ascent, as it will have both blaze barrels and ballistae for you to use. This will likely come naturally, as many of the fights from this point forward have blaze barrels and they are always worth using. | ||
 |
Carja in Shadow Got through a Watcher Stealth Area Undetected |
|
| This can be done on the right path of Mission 2: Pilgrim’s Trail, but the easiest spot for this is during the Watcher encounters in Mission 6: Mother’s Tears. In any Watcher encounter, sneak through the area without them fully discovering you. Their search beam can turn yellow, as long as they do not turn red and become fully alerted. During the encounters in Mother’s Tears, you will be able to use the red grass as cover to sneak past them undetected. | ||
 |
Disc Shot! Shot a Thunderjaw Disc out of the Air |
|
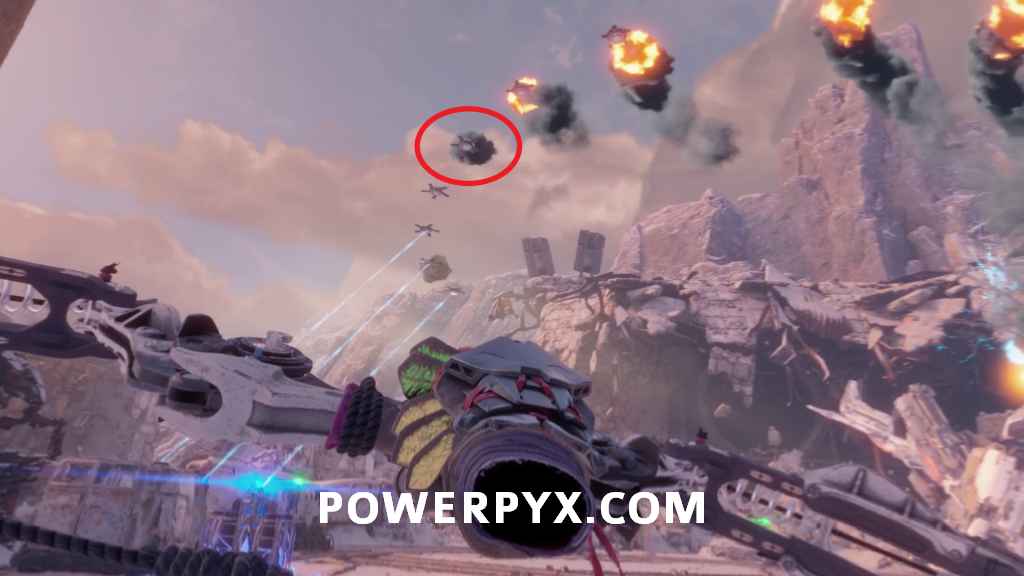
| You will face a Thunderjaw in both Mission 5: Talonreach Ascent and Mission 10: Devil’s Anger. During these fights, the Thunderjaw will shoot out a barrage of discs that create lasers that point at you. For this trophy, simply shoot one of these discs out of the air.
|
||
 |
Clean Run Completed a Mission without Dying |
|
| The easiest mission to do this on is Mission 1: Brightdawn. Not only is this the shortest level, but it only have one combat encounter with a single Watcher, and the climbing sections are very easy. If you need to you can adjust your Accessibility settings to make it so you cannot lose health, and also make it so you cannot fall during climbing sections, making it effectively impossible to die. Restarting checkpoint will also void the trophy. | ||
 |
Top of the Class Achieved the highest score at the Dawn’s Grasp Assault Course |
|

The Dawn’s Grasp Assault Course can be accessed in the Challenge Hub. In order to access the Challenge Hub, you can either go down the elevator in Dawn’s Grasp, or access it from the main menu. Before you can ever attempt to beat the highest score here, you will need access to all tools, so wait until you have obtained the Grapple before attempting this. In order to beat the best score, you will need to get a score of 1500 or higher. Scoring for the Assault Course is based on the rings you go through, and the time it takes you to complete the course. With the route you take with all tools available, you will get 1300 points from the rings you pass through, so you will need to get the remaining 200 points from completing it fast. My completion time was 1:51, which gave me 223 points, so you will need to finish it in roughly 1:55 or faster. The first thing you will need to master in order to complete this is learning the route. Follow the route normally until you reach the second zipline. Instead of going right, you will want to go left and up to a wall you can scale with your Pickaxes. Once you climb up, there will be a Ropecaster Swing. Swing and take the zipline to reach a Ropedart section. After crossing the Ropedart zipline, climb up and immediately look up to spot a Grapple point. Climb up and turn right to spot another Grapple point. Now zipline to the finish.
The second thing you will need to master is completing sections quickly. Go to Options > Accessibility and adjust Climbing Reach Multiplier up to 2x. This will make your climbing faster overall. Do not use Auto Rotation When Climbing, as this can cause you to bug out when trying to grab a zipline and lose your time. Whenever you are using ziplines, you will want to manually pull yourself down the rope to descend it faster. Similarly, with ropes that you jump to, grab it once then immediately let go to drop faster, and grab it near the end so you land safely.
When you have a tool point coming up, make sure to pull out your tool in preparation for it. With the pickaxe wall, remember that you can grab your pickaxe by reaching over your shoulder and pressing Other than that, simply try and climb as fast as you possibly can. Skip as many grabs as you can. Don’t overexert yourself when attempting this multiple times in a row, as you might find your performance will decline the more you attempt it. Take a break and retry later. Below are my times at each checkpoint (when the timer is first visible) as a reference for how quickly I reach each section. I did this using controller movement for walking rather than gesture movement:
|
||
 |
On Target Achieved the highest score at the Dawn’s Grasp Archery Range |
|
|
The Dawn’s Grasp Archery Range can be accessed in the Challenge Hub. In order to access the Challenge Hub, you can either go down the elevator in Dawn’s Grasp, or access it from the main menu. In order to beat the best score, you will need to get a score of 1500 or higher. Scoring for the Archery Range will be based on how quickly you complete it and how many targets you hit. There will be the primary targets that will stay up and you will need to hit all of these to finish the attempt, and there will also be bonus targets. These bonus targets will appear in front of the waterfall and will only stay for a few seconds. Every time this bonus target pops up, you will want to make sure you hit it if you want to beat the score. There will be 3 bonus targets that appear during the challenge. My completion time was 49 seconds which gave me a score of 1,543 with all 3 bonus targets hit, so you will need to hit them all quite quickly. It is best to play the challenge a few times to learn the positions and when the bonus targets appear, then try do it quickly. If you want, you can go to Options > Accessibility and turn on Auto Load Arrows to make shooting faster, so you can effectively rapid fire your arrows at the targets. I had this turned off like in the screenshot below and you can still rapid fire arrows this way, but having it enabled might make it easier for you.
|
||
 |
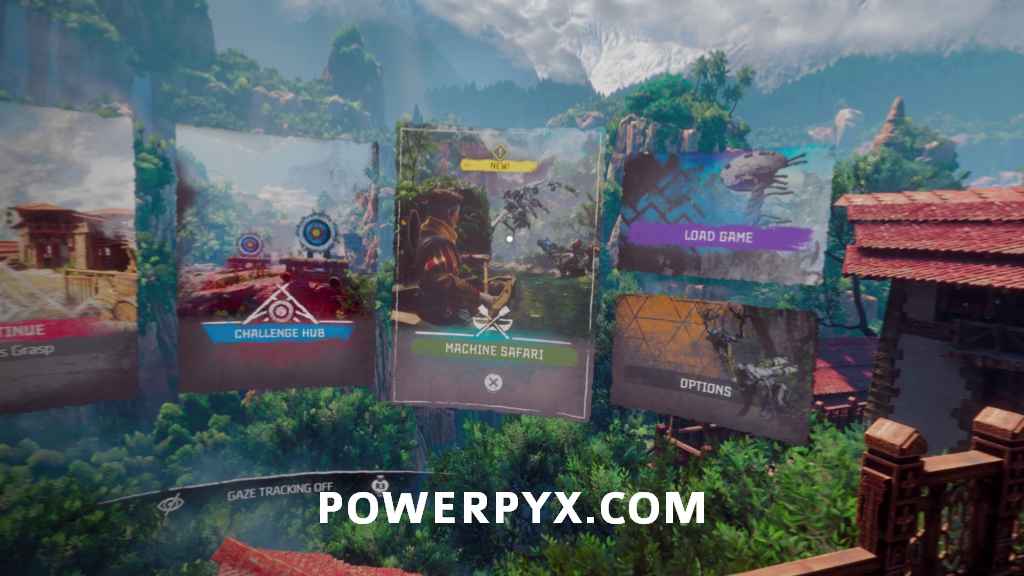
Machine Safari Embarked on a Machine Safari |
|
| In order to embark on a Machine Safari, you can either interact with the boat toy in the Lore Room in Dawn’s Grasp, or access it from the main menu. You can do this at any point once you have access to the Dawn’s Grasp hub area after completing the second level. You do not need to complete the Machine Safari for this trophy, simply starting it is enough.
|
||


 rather than grabbing it from the weapon wheel. Do note however with 2x climbing reach multiplier, you may accidentally grab the ledge instead of a pickaxe when doing this, so make sure to reach far back to grab the pickaxe.
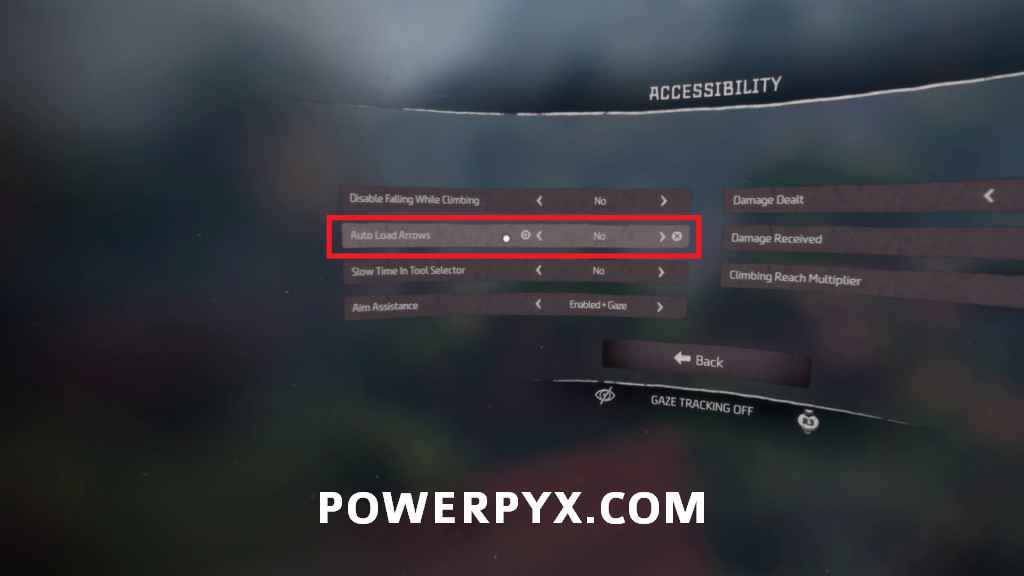


AZZA says
Carja in Shadow trophy not unlocking tried both missions Maybe it’s bugged .I made sure not to let them even get yellow.
OTPYG says
It didn’t unlock on Mother’s Tears for me despite definitely never being spotted. Luckily it unlocked on a replay of Pilgrim”a Trail for me though.
OTPYG says
Regarding ‘Top of the Class’
“Do not use Auto Rotation When Climbing, as this can cause you to bug out when trying to grab a zipline and lose your time.”
THANK YOU for this. Was wondering why I was always slipping off the damn zip lines. Turned it off and smashed out a 1:51 first attempt. Thanks again.
Archavia says
Yeah I had this issue for a few runs before realising it was the auto rotation, you would think it would help but it just ended up being a hassle.
Buzz says
Can confirm restarting checkpoint voids the Clean Run trophy. Had to keep restarting to defeat a Grazer and never fell or died to the Watcher.
Archavia says
Thanks for confirming, will add it in.
Joa_NYC says
Nice!!..thank you!
Are you gona do one with kayak mirage?
PowerPyx says
Nothing planned for Kayak, sorry.
Nikki_boagreis says
Estimated time until platinum 8-12 hours, will most likely wait until this gets a price drop if it’s not very lengthy my backlogs a mile long anyhow.
Chris says
For this type of game, I think the length is perfect. If it was shorter, I’d be disappointed but if it was longer, I’d think it was way too long of a game for this game.
I like the game overall and I like the climbing that people seem to say there’s too much of, but there might be too much for some people. I’m at 11 hours and halfway through the last mission and I like the game and think it’s the perfect length for this type of game. Of course, I’ve been super excited for PSVR 2 and been loving it since Day One.
fostex747 says
For “Top of the Class” I also think that it helps to activate the slow motion option for the item wheel in the accessibility menu.
Archavia says
I never even noticed this feature existed! I assume it would help yes, as there is quite a bit of time spent selecting the items.
fostex747 says
With this option I did it in 1:44 in the second try after watching your video. So I’m pretty sure the challenge timer is also running in slo-mo.
Jeremy says
Scholar trophy is stuck. I have all the collectibles yet in the trophy tracker it says I’m missing one. Do I just need to redo the entire game?
Archavia says
Do you have the one in the Challenge Hub? This doesn’t show on any of the chapter select screens.
matto says
I’d like to note it for anyone who didn’t get all the collectables their first playthrough. If you grab what you missed and then exit to the menu, it does NOT save them. You have to complete the mission in order to mark them as completed.
BadyPl says
Climbing after the last fight in mission 3 is not working for me and I can’t complete the legendary climb and pick up the item on top. Anyone having this problem? What to do with this? The path lights up for me, but I can’t grab any handle.
Cosimo Elettrico says
How is it possible I’m not able to reach the time to achieve the top of the class trophy. My best time is 2 minutes….The settings are all right….
Roy says
2 challenge trophies ruin this game… Unnecessarily difficult…
Zack says
Pretty sure “carja in shadow trophy” is glitched. Done it in Mothers tears but it doesn’t pop. ????????????
Zack says
Got it on pilgrim’s trial. ?
hir says
Defeated the Thunderjaw at the top of Talonreach
It is not story related. You can die during this fight, and it will not restart. Game will remove the machine, and while cut scene will be “you defeated thunderjaw” trophy will not pop.
hir says
For the trophy “top of the class” time of 1:55 will not net you the trophy. Final result will be 1495 ????
What a sick dev made this time. I truly wish to see them doing it!