PowerPyx.com

PowerPyx

  • Trophy Guides
  • Game Guides
  • Wikis
  • Trophy Lists
  • Next Guides
  • Contact
Show SearchHide Search
Home » Game Guides » Horizon Forbidden West » Horizon Forbidden West The Wound in the Sand Walkthrough

Horizon Forbidden West The Wound in the Sand Walkthrough

February 17, 2022 by Sellers 3 Comments

The Wound in the Sand is a Side Quest in Horizon Forbidden West (HZFW). This walkthrough will guide you through all objectives of the The Wound in the Sand side mission.

Location: Arrowhand
Quest Giver: Jetakka
Quest Level: Level 19
Requirement: Automatically starts upon completing Side Quest: Thirst for the Hunt.
Reward: 4750xp, 2 Skill Points
Mission Info: According to Cahplain Jetakka, the Desert Clan’s troubles are from over. He needs Aloy’s help in he capital of Scalding Spear.

Objectives:

  • Meet Jetakka at Scalding Spear
  • Follow Jetakka
  • Follow Yarra
  • Scan the Wound in the Sand
  • Follow the Pipes
  • Kill the Machines
  • Examine the Corpse
  • Follow the Pipes
  • Find the Source of the Water
  • Scan the Pump
  • Find a way to repair the Pump
  • Return to the Wound in the Sane
  • Talk to the Guard
  • Go to Yarra’s Quarters

Starting Location: Arrowhand

Automatically starts upon completing Side Quest: Thirst for the Hunt.

Meet Jetakka at Scalding Spear

Travel to Scalding Spear and talk to Jetakka.

Follow Jetakka

Follow Jetakka a short distance and then talk to Yarra here.

Follow Yarra

Follow Yarra to the next objective, still within scalding Spear.

Scan the Wound in the Sand

Scan the water tank under the ground directly ahead with your focus.

Follow the Pipes

Still with your focus active, follow the underground pipes to reach the next objective, leading far out of Scraping Spear.

Keep following the pipes you’ll have to climb a wall directly upwards to a new area. The map images below show the area where you’ll end up at the end of the pipes.


Kill the Machines

In this new area, kill all of the machines.

Examine the Corpse

After killing the machines you will be prompted to examine a corpse over a log close to where you climbed up previously.

Follow the Pipes

Use your focus and continue following the pipes again from the corpse.


Find the Source of Water

After following the pipes for a little bit, you will have to climb a series of small walls directly ahead in a linear path, into a cave.


Scan the Pump

Use your focus to scan the lever and valve here.


Find a Way to Repair the Pump

Look up at the ceiling, use pullcaster :l2: + :triangle: > hold :r2: to pull down a grate on the wall, and also pull down the beam just to the left of it.


Turn around and climb the yellow ledge, next to the entrance where you came from. Then jump backwards onto the beam you just pulled out, then jump to the vent.


At the other end of the vent turn the valve.

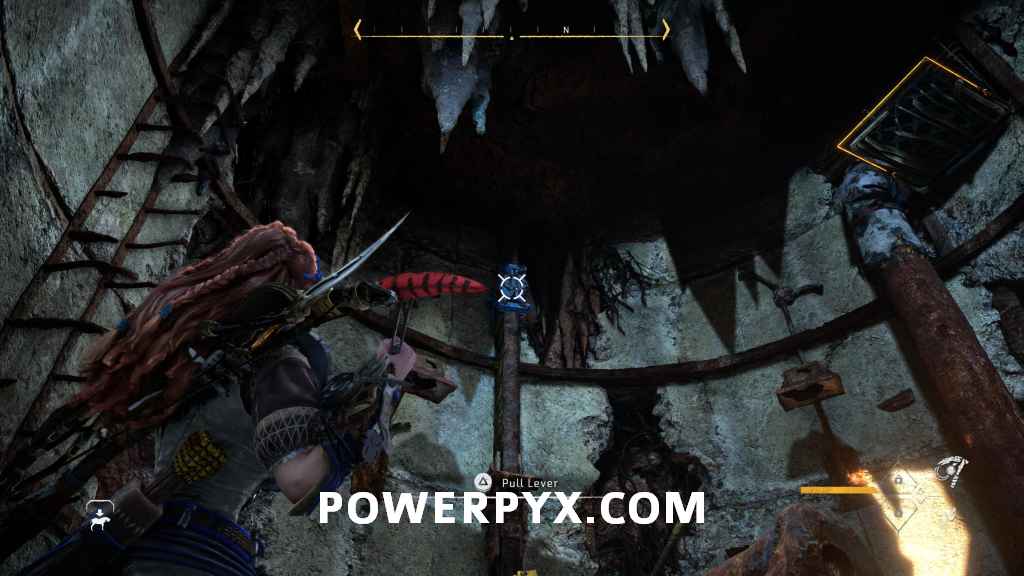
Jump down from the valve, there is a lever, pull it.

Turn around and climb back up to the valve and turn it, use the ledges on the left, the one on the right will break if you try to use it. From the 2nd ledge on the right here, press :circle: to jump backwards and grab the ladder. This is timed, you will need to pull the lever again if you don’t get back to the valve in time. Make your way back to the starting room through the vent and talk to Yarra.

Return to the Wound in the Sand

Return to the wound in Scalding Spear and go back to the wound.

Talk to the Guard

At the wound talk to the guard here.

Go to Yarra’s Quarters

Still in Scalding Spear, go to Yarra’s quarters located nearby, a cutscene will automatically start, after some dialogue the quest will be complete.

This finishes The Wound in the Sand Side Quest in Horizon 2: Forbidden West. The next quest “The Gate of the Vanquished” starts automatically after this.

For all other Side Quests and Main Quests, check out the complete Horizon Forbidden West Walkthrough.

« PrevHorizon Forbidden West Thirst for the Hunt WalkthroughNext »Horizon Forbidden West The Gate of the Vanquished Walkthrough
Share
Tweet
Shares 0

Filed Under: Game Guides, Horizon Forbidden West

Comments

  1. N says

    February 27, 2022 at 8:15 am

    The timing on those last 2 lever pulls SUCKS. I’ve been doing in 4, 5 times now and never make it fast enough. WTF?

    Reply
    • R says

      March 11, 2022 at 4:07 am

      You have to turn the higher valve, run jump to the low valve room, then sprint out and run behind the fence double jump and back jump to the broken ladder. Took me 3x

  2. Hugo Trindade says

    March 20, 2023 at 12:19 am

    This quest is bugged for me. The dude keeps getting stuck on the ramp inside the city.

    Reply

Leave a Reply Cancel reply

Your email address will not be published. Required fields are marked *

Youtube 1,160,000Subscriber
Facebook 10,006Fans
Twitter 0Followers

Latest Trophy Guides

Forza Horizon 5 Trophy Guide

The Elder Scrolls IV: Oblivion Remastered Trophy Guide

AI Limit Trophy Guide

The First Berserker: Khazan Trophy Guide

Assassin's Creed Shadows Trophy Guide

Monster Hunter Wilds Trophy Guide

Kingdom Come Deliverance 2 Trophy Guide

Red Dead Redemption 2 Trophy Guide

Latest Game Wikis

Assassin's Creed Shadows Wiki

Kingdom Come Deliverance 2 Wiki

Black Myth: Wukong Wiki

Elden Ring Wiki

Hogwarts Legacy Wiki

God of War Ragnarok Wiki

Cyberpunk 2077 Wiki

Red Dead Redemption 2 Wiki

Recent Posts

  • Forza Horizon 5 Trophy Guide & Roadmap
  • The Elder Scrolls IV: Oblivion Remastered – How to Get Ectoplasm
  • The Elder Scrolls IV: Oblivion Remastered – How to Start Shivering Isles DLC
  • The Elder Scrolls IV: Oblivion Remastered Trophy Guide & Roadmap
  • The Elder Scrolls IV: Oblivion Remastered – How to Get Lockpicks

Horizon Forbidden West Wiki

  • Wiki Home
  • Walkthrough
    • Reach for the Stars
    • The Point of the Lance
    • To The Brink
    • The Embassy
    • Death’s Door
    • The Dying Lands
    • The Eye of the Earth
    • The Broken Sky
    • The Kulrut
    • Cradle of Echoes
    • The Sea of Sands
    • Seeds of the Past
    • Faro’s Tomb
    • Gemini
    • All That Remains
    • The Wings of the Ten
    • Singularity
  • Side Quests & Errands
    • Deep Trouble
    • The Twilight Path
    • The Bristlebacks
    • Learning Machine Strike
    • The Enduring
    • A Dash of Courage
    • A Bigger Boom
    • Shadow from the Past
    • Shadow in the West
    • Signals of the Sun
    • The Burning Blooms
    • Need to Know
    • A Tribe Apart
    • Drowned Hopes
    • The Promontory
    • The Roots that Bind
    • The Oldgrowth
    • The Music in Metal
    • The Second Verse
    • What Was Lost
    • Forbidden Legacy
    • Shining Example
    • Thirst for the Hunt
    • The Wound in The Sand
    • The Gate of the Vanquished
    • Burden of Command
    • In Bloom
    • Signal Spike
    • Breaking Even
    • Broken Locks
    • The Deluge
    • The Taste of Victory
    • Sons of Prometheus Data
    • Lofty Ambitions
    • Nights of Lights
    • Boom or Bust
    • Blood for Blood
    • The Valley of the Fallen
    • Supply Drop
    • Call and Response
    • First to Fly
    • A Soldier’s March
    • A Hunt to Remember
    • Tides of Justice
    • In the Fog
    • The Blood Choke
    • The Way Home
    • The Souvenir
  • Machines
    • Grazer
    • Burrower
    • Scrounger
    • Leaplasher
    • Scrapper
    • Spikesnout
    • Skydrifter
    • Plowhorn
    • Charger
    • Lancehorn
    • Longleg
    • Bristleback
    • Fanghorn
    • Redeye Watcher
    • Widemaw
    • Clawstrider
    • Corruptor
    • Bellowback
    • Glinthawk
    • Shell-Walker
    • Stalker
    • Grimhorn
    • Ravager
    • Snapmaw
    • Sunwing
    • Clamberjaw
    • Rollerback
    • Rockbreaker
    • Behemoth
    • Dreadwing
    • Tideripper
    • Shellsnapper
    • Stormbird
    • Thunderjaw
    • Frostclaw
    • Scorcher
    • Slitherfang
    • Tremortusk
    • Fireclaw
    • Slaughterspine
    • Tallneck
    • Specter
    • Specter Prime
  • Weapons
  • Outfits
  • 100% Completion Checklist
  • Tallnecks
  • Hunting Ground Trials
  • Melee Pits
  • Cauldrons
  • Rebel Camps
  • Rebel Outposts
  • Gauntlet Runs
  • Relic Ruins
    • Relic Ruins: The Daunt
    • Relic Ruins: No Man’s Land
    • Relic Ruins: Restless Weald
    • Relic Ruins: The Dry Yearn
    • Relic Ruins: The Stillsands
    • Relic Ruins: Runner’s Wild
    • Relic Ruins: The Long Coast
    • Relic Ruins: Isle of Spires
  • Vista Points
  • Black Boxes
  • War Totems
  • Signal Towers
  • Survey Drones
  • Dyers
  • Salvage Contractors
  • Skills
  • Door Codes
  • How to Get Mount
  • How to Get Flying Mount
  • World Map
  • Trophy List
  • Trophy Guide
  • New Game+ DLC Trophy Guide
  • Terms of Service
  • Privacy Policy
  • Cookie Policy
  • YouTube
  • Facebook
  • Twitter

© 2008-2025 PowerPyx.com, all rights reserved.

Share
Tweet
Shares 0