
The Wings of the Ten is the 16th Main Story Quest in Horizon Forbidden West (HZFW). This walkthrough will guide you through all objectives of the The Wings of the Ten main mission.
Starting Location: Tilda’s Mansion
Quest Giver: automatically triggered upon completing All That Remains
Quest Level: Level 32
Requirement: having completed All That Remains
Reward: +16000 XP, +2 Skill Points, +1 Tenakth High Marshal, +1 Tenakth Reaver, +1 Regalla’s Wrath
Mission Info: Aloy has a plan to end Regalla’s rebellion, defeat the Zeniths and rescue Beta and GAIA. But first, she must reunite with her companion…. and lay a dear friend to rest.
Objectives:
- Return to the Base
- Talk to Zo
- Craft the Sunwing Override
- Go to the Peaks above the Base
- Override a Sunwing
- Mount a Sunwing
- Fly West
- Fly to the Tallneck
- Land on the Tallneck
- Override the Tallneck
- Call Your Sunwing
- Gather a Horus Energy Cell
- Fly to the Memorial Grove
- Drop the Horus Energy Cell on Regalla’s Forces
- Defeat Regalla
Starting Location: Tilda’s Mansion


Return to the Base
From Tilda’s Mansion, fast-travel to the Base.
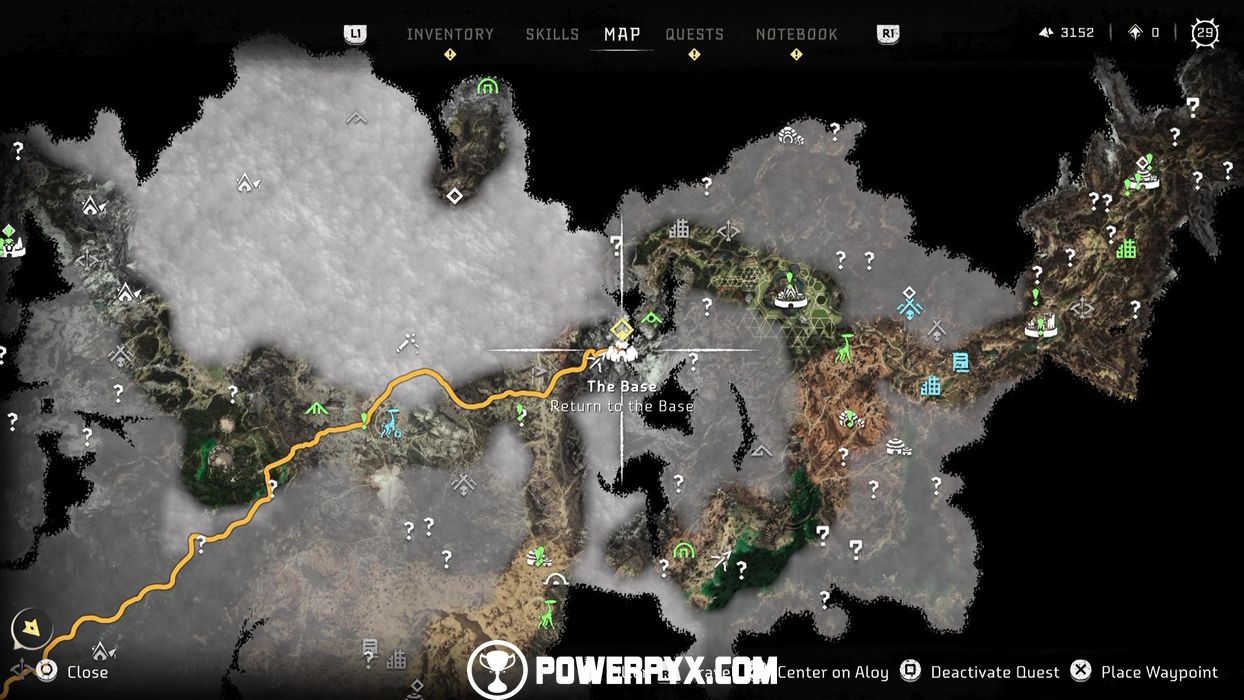
At the base, everybody’s mourning Varl’s demise. Furthermore, Beta and GAIA are Zeniths’ prisoners and Regalla is about to slaughter Kotallo’s tribes and take over Hekarro. Nothing could go any worse. But Aloy wants everybody to push through.
Talk to Zo
Before getting ready for battle, Zo wants to talk to us. Use the east exit to go outside and meet with Zo by the cliff who gives a pleasant, yet surprising, turn of events.


Craft the Sunwing Override
Go back inside and head to the Fabrication Terminal to craft the Sunwing Override. Now the Sunwing can be overridden.


Go to the Peaks above the Base
Exit the Base through the west side. Follow the main waypoint to climb up the mountain.

Override a Sunwing
When you get to the top of the mountain, hide in grass and sneak up to any of the Sunwing to override it. While you’re at it, scan it to add it to the Machine catalog.


Mount a Sunwing
Once overridden, mount it.

Fly West
Now fly west, to the main obvious waypoint and enjoy the scenery. At some point, you’ll get a new mission update from Tilda and the next objective will be pinned to the screen.

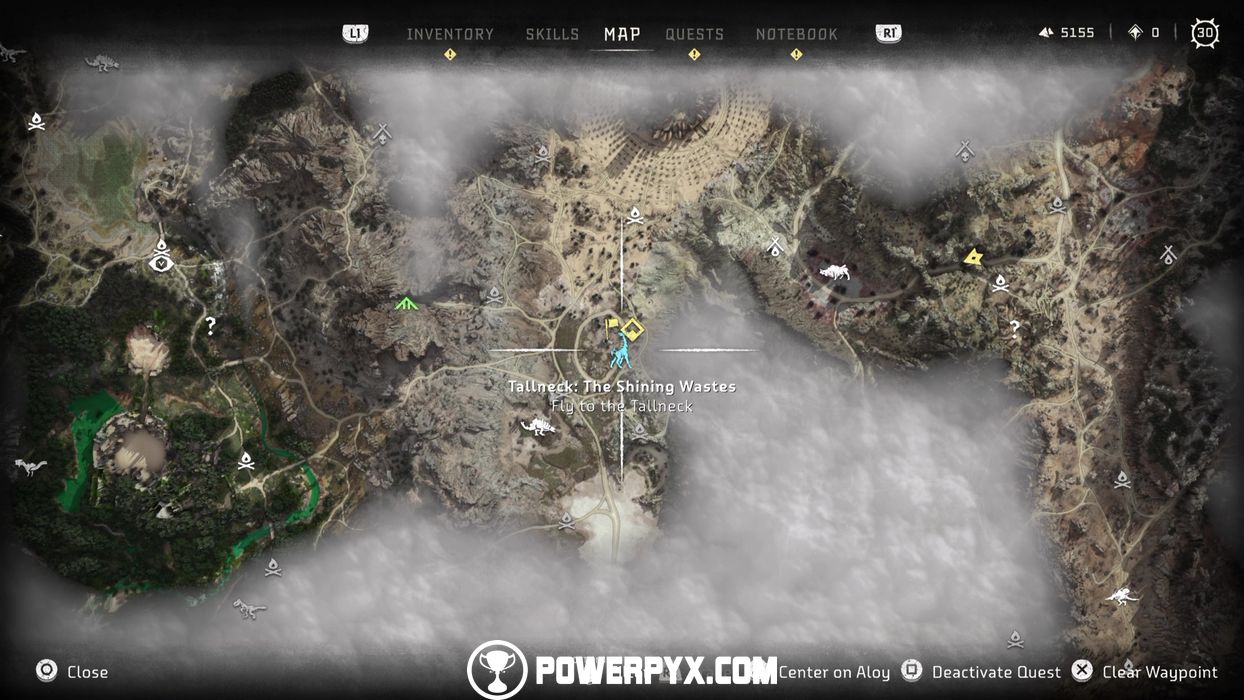
Fly to the Tallneck
As suggested by Tilda, get in range of the Tallneck.
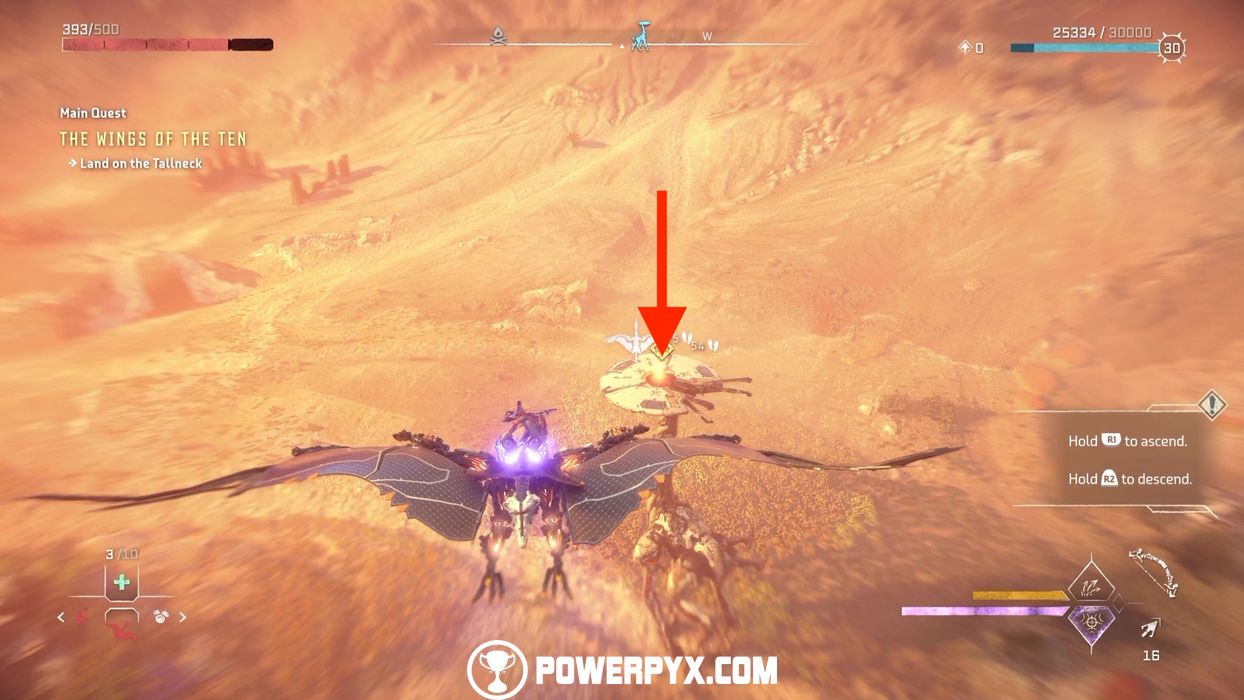
Land on the Tallneck
When you’re in range of the Tallneck, fly down and control the Sunwing to safely land on the Tallneck and when prompted press  to complete your landing.
Override the Tallneck
Now override it.
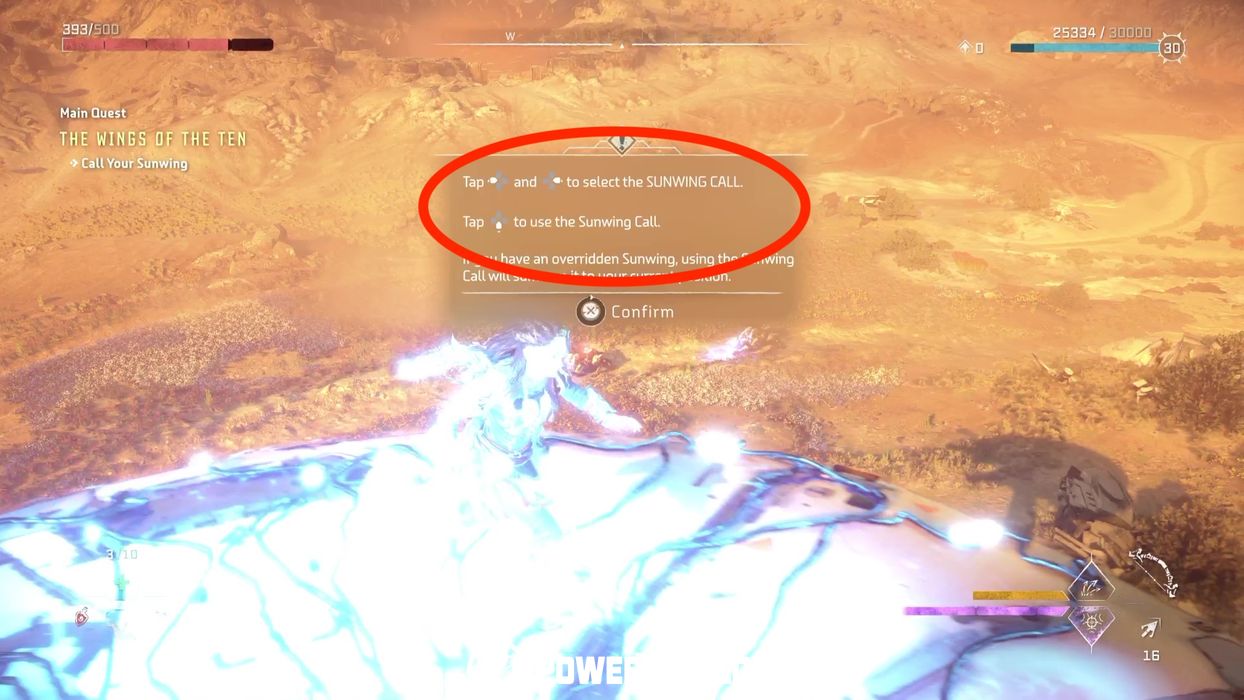
Call Your Sunwing
Call your Sunwing to your position to head to the next location.
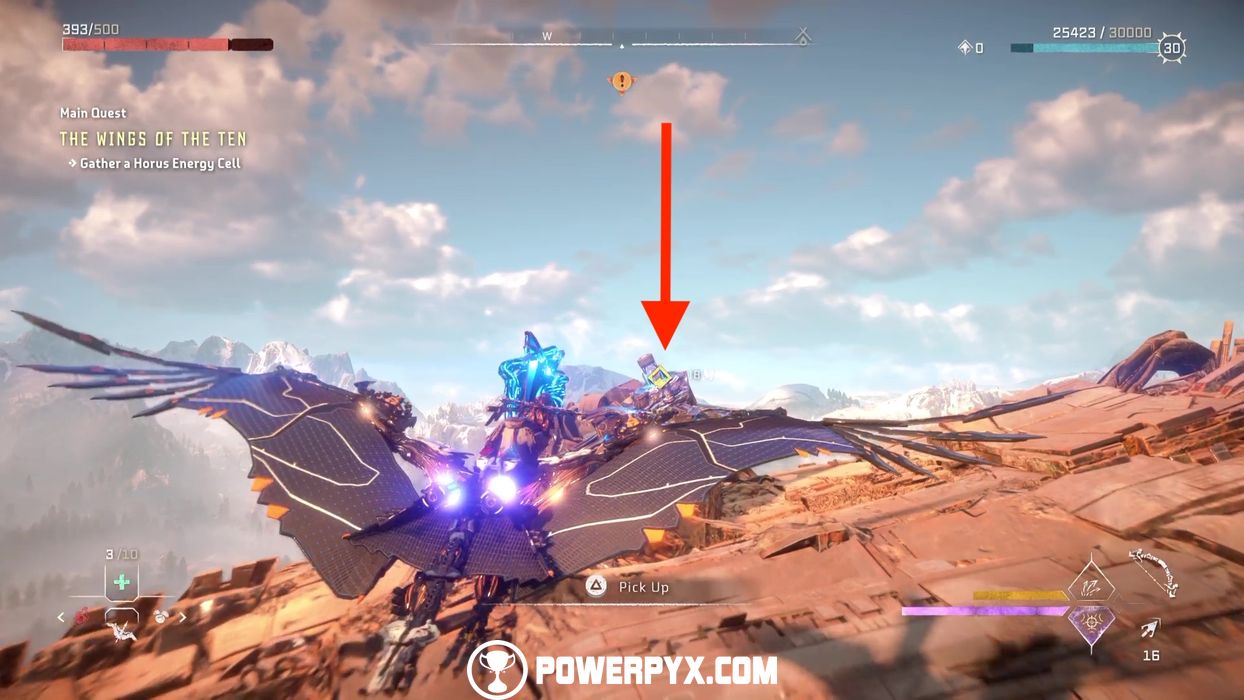
Gather a Horus Energy Cell
While flying on the back of the Sunwing, aim for the next main quest marker where we can gather a Horus energy cell. When you get in range of the energy cell, you’ll automatically be prompted to press  to pick it up.

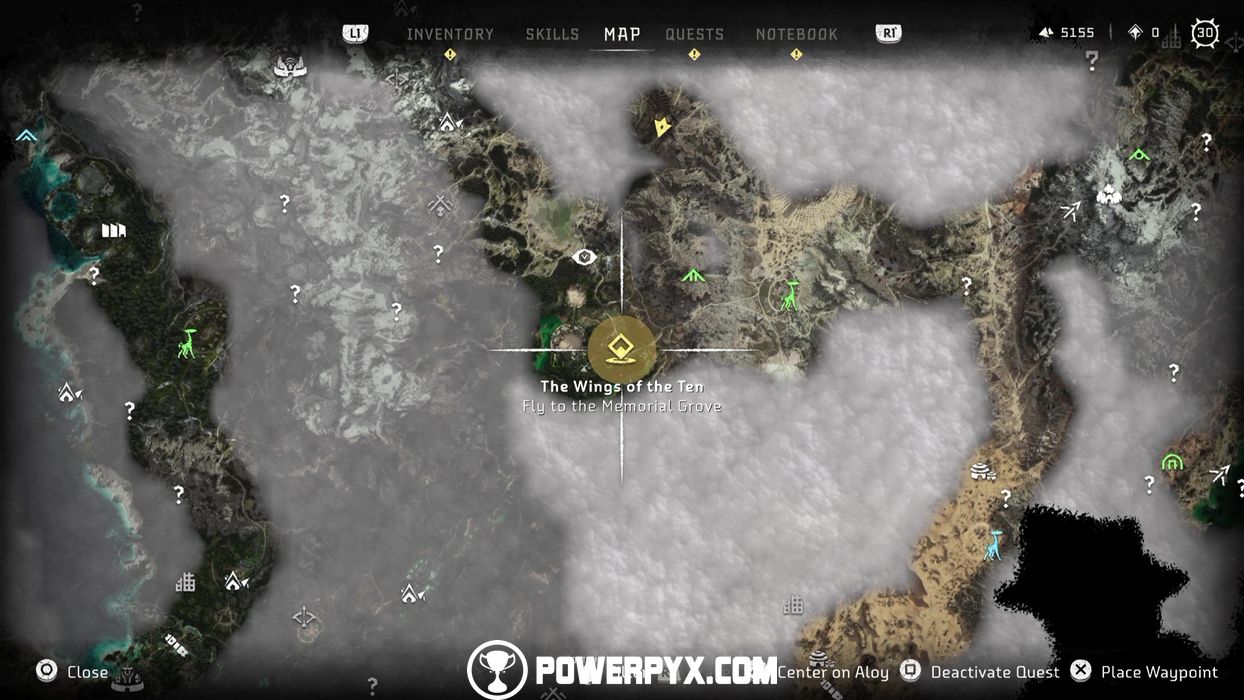
Fly to the Memorial Grove
Finally, fly to Memorial Grove.
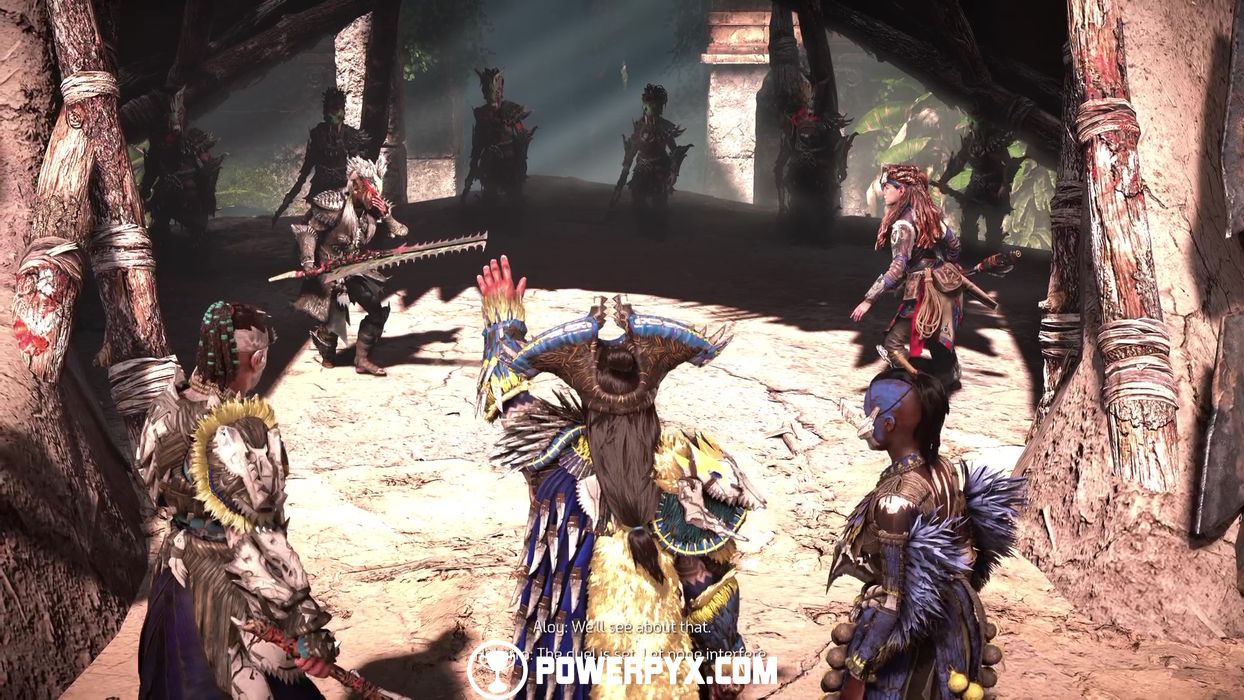
Drop the Horus Energy Cell on Regalla’s Forces
Automatically completed when the next cutscene triggers.
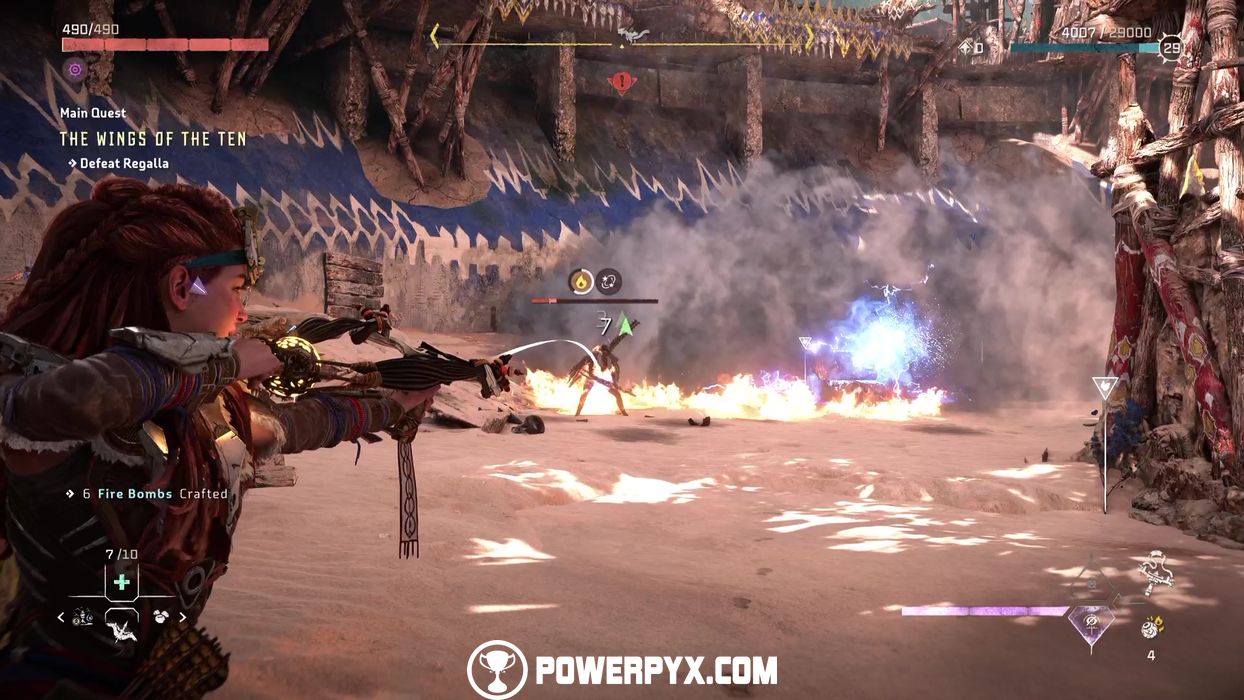
Defeat Regalla
Time to finish Regalla! Regalla’s fight spans over three parts:
- During this phase, Regalla will try to make quick work of you with rapid slashes. Dodge them and when she recovers, attack her by prioritizing her elemental weaknesses, Fire and Plasma.

- During this phase, stay crouched behind the wooden barricades and throw some Fire bombs and arrows at her to weaken her, then go all in on any kind of arrows, except for the elements she’s strong in.

- During this final phase, her attacks will be very similar as the first. So, dodge when she comes at you at full-speed and weaken her with Fire bombs and arrows.


Once Regalla is defeated, the game gives you the option to determine her destiny: you can choose to spare or kill her.
If you choose “There’s another battle ahead”, Regalla will join Aloy and the others at the Base. This will result in you NOT obtaining her bow, a very rare and powerful one with Precision and Strike-through arrows.
If you choose “Your life ends here”, Kotallo will kill her and Regalla’s dominion of tyranny will be put to sleep. This will result in you obtaining her bow instead. This is the recommended choice as having her bow can make a difference in remaining endgame activities.
If you choose “This isn’t easy”, Regalla herself will ask you to decide if you wanna let her live or kill her, resulting in you having to choose from either one of the two options above.

With Regalla out of the picture, Sylens is now forced to listen to Aloy.

This finishes The Wings of the Ten Main Quest in Horizon 2: Forbidden West.
For all other Side Quests and Main Quests, check out the complete Horizon Forbidden West Walkthrough.
Leave a Reply