
Seeds of the Past is the 12th Main Story Quest in Horizon Forbidden West (HZFW). This walkthrough will guide you through all objectives of the Seeds of the Past main mission.
Starting Location: The Base
Quest Giver: Varl (automatically triggered upon completing The Sea of Sands)
Quest Level: Level 24
Requirement: having completed The Sea of Sands
Reward: +12000 XP, +2 Skill Points
Mission Info: To recover Demeter, one of GAIA’s lost subordinate functions, Aloy must traverse a vast expanse of wilderness to reach the far western coast.
Objectives:
- Talk to Varl
- Go to DEMETER’s Coordinates
- Kill the Ambushers
- Go to DEMETER’s Coordinates
- Search the Facility
- Examine the Console
- Find Test Station Ivy
- Kill the Strangers
- Enter the Facility
- Examine the Paired Console
- Enter the Facility Tunnels
- Search the Tunnels for an Exit
- Find an Entrance to Test Station Elm
- Search Test Station Elm
- Restore Power to the Control Room Door
- Return to Alva
- Examine the Paired Console
- Enter the Tunnels
- Search the Tunnels for an Exit
- Find an Entrance to Test Station Ivy
- Kill the Dreadwing
- Search the Test Station Ivy
- Craft the Vine Cutter
- Return to the Data Core
- Destroy the Metal Flower’s Vines
- Enter the Data Core
- Recover DEMETER
- Return to the Base
- Deliver DEMETER to GAIA
Starting Location: The Base


Talk to Varl
Before heading out further into the west wilderness to look for DEMETRIS, Varl wants to talk to us. Leave GAIA’s control room and meet him downstairs. Once your conversation with Varl and Beta has ended, you’re free to track down DEMETER.
Go to DEMETER’s Coordinates
Head out the Base and start venturing further into the west.

Along the way you can override Tallneck: The Stand of the Sentinels to reveal more of the map.
Kill the Ambushers
Upon arriving at the location, you’ll be attacked by some Quen ambushers. There are some enemies in the camp and on the roof of the building (can grapple onto the roof by double-tapping  near grapple point).
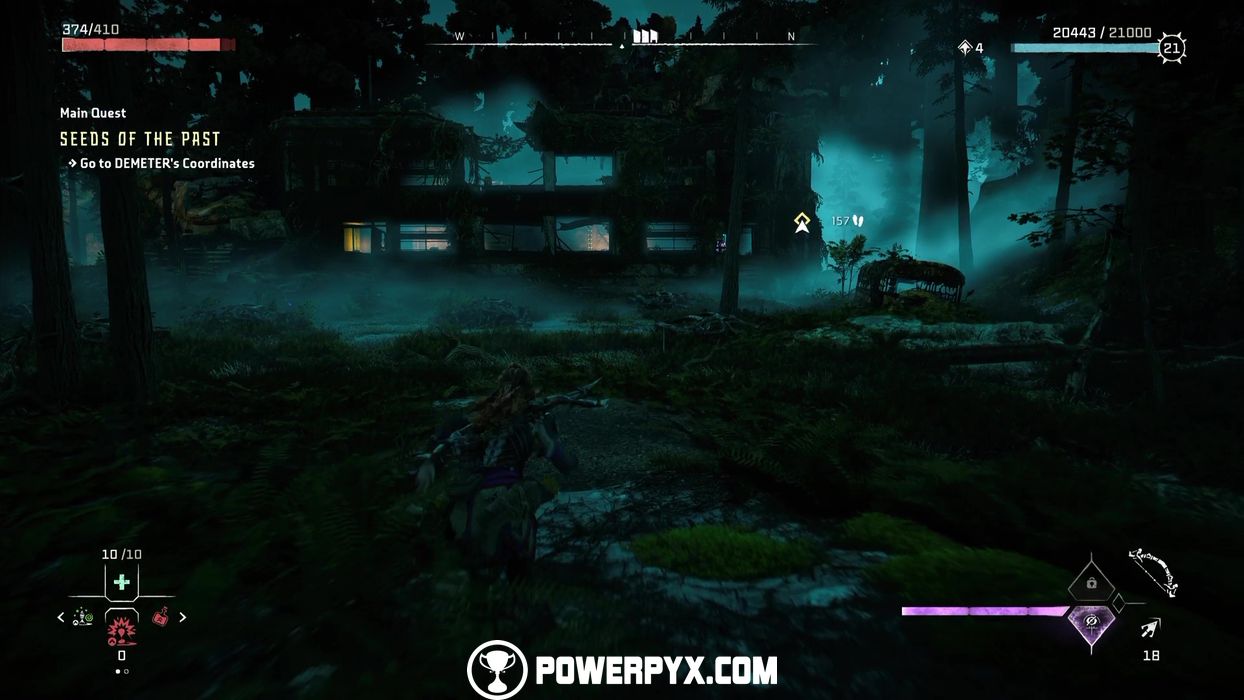
Go to DEMETER’s Coordinates
Now we can safely resume our search for DEMETER. From the roof of the building, zip-line onto the next building. Enter the building and proceed up the escalators and head for the Data Core Testing Facility.


Search the Facility
Left of the red flower is an open door with a wall you can use your Pullcaster on (  +
+  > hold
  ).
).

In the next room, there’s an air vent, again for your Pullcaster.

Now start climbing to enter a door.

Examine the Console
Approach the green-lit console in the room to activate the holo projector.

Find Test Station Ivy
Exit the room by rappelling down from the opening and approach the enemy camp.

Kill the Strangers
Clear out the enemies from the camp. You can go for stealth or direct approach, but we suggest stealth as these enemies are particularly thorny.

Enter the Facility
Once you’ve cleared out the camp, you can enter the facility through the door at the end of the camp. Here, you’ll meet Alva who is open to helping you track down DEMETRIS.


Examine the Paired Console
Approach the console in the room to authenticate.

Enter the Facility Tunnels
With the hatch now open, climb down the ladder and into the tunnels.

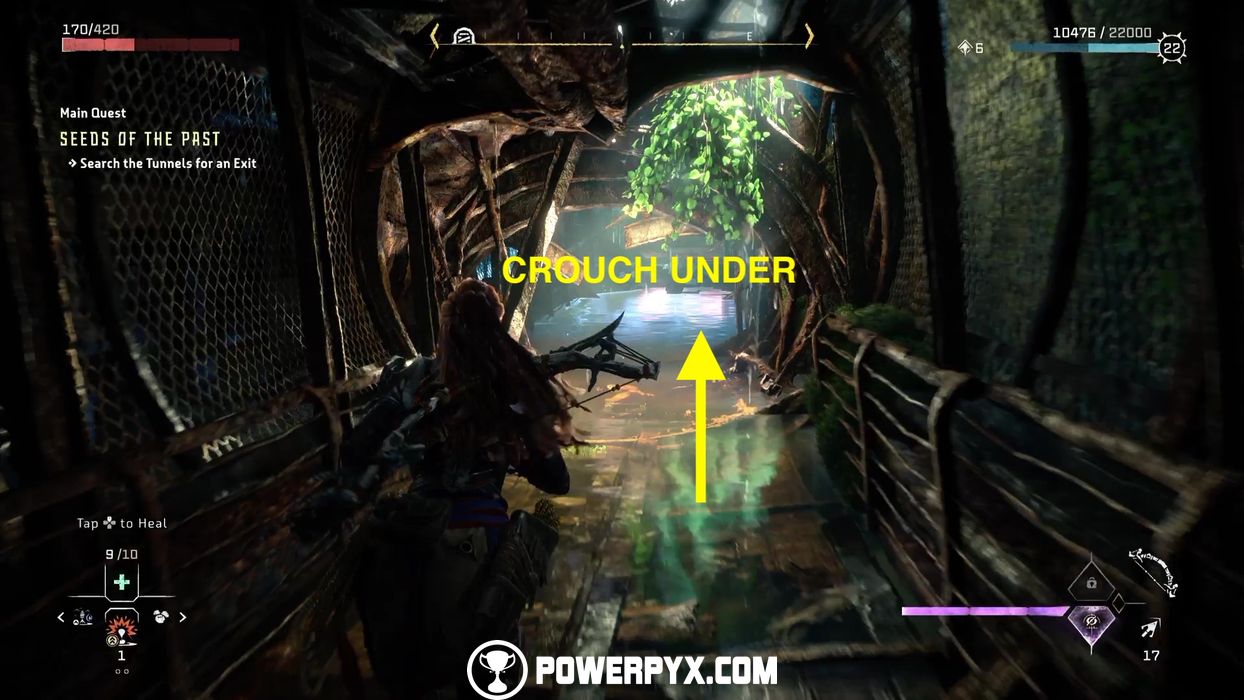
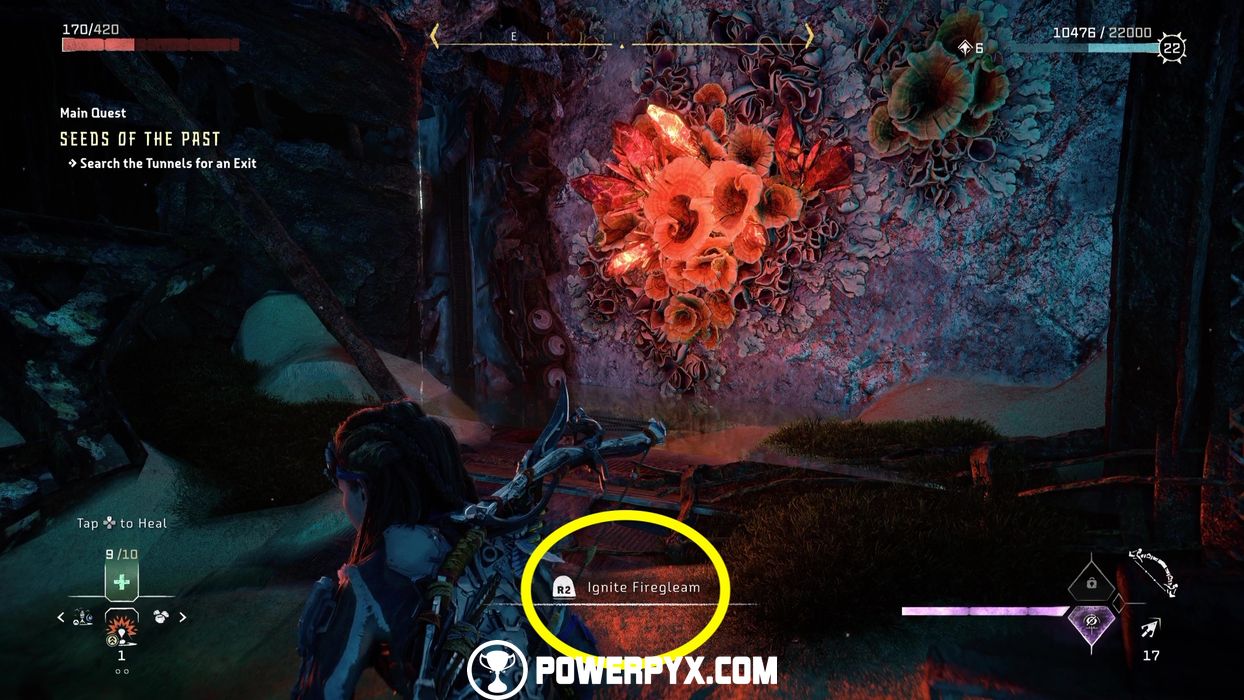
Search the Tunnels for an Exit
Once you’ve climbed all the way down, it’s time to get your bearings for an exit. Go down the one and only path and keep going straight ahead when you get to the fork with the blue light.

Crouch under the rust and ignite the Firegleam when you see it. Remember to step back to avoid getting caught in the explosion.
In the next room, as suggested by Alva, we can throw our Pullcaster at the hook in the wall to pull it down.

Enter the new tunnel and immediately go right and keep going until you can head right past an ivy wall.
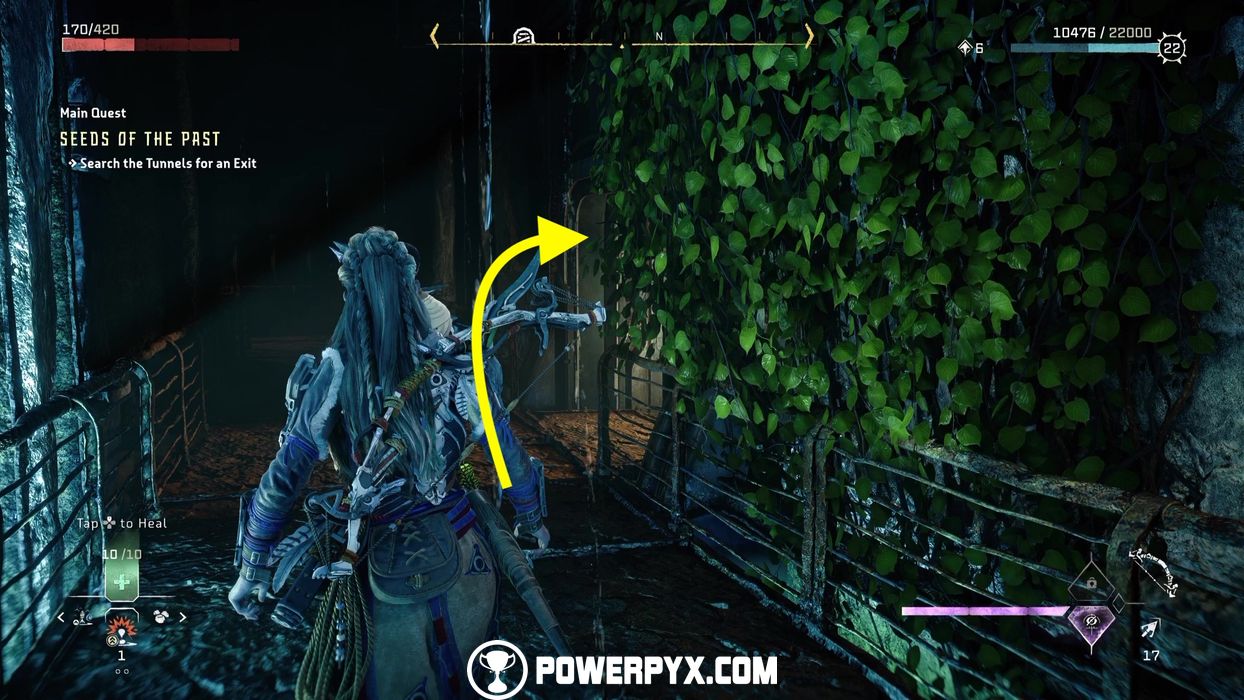
Now keep going down the only path there is until you can climb up a ladder and open a hatch.
Find an Entrance to Test Station Elm
We are now back outside. Continue through the tunnel to reach a wide, open area patrolled by some Burrowers and a Clawstrider. These should not be too much of a hassle for you to handle. As usual, decide if you want to engage or ignore them.


After dealing with the machines, head for the left side of the building with the big ELM sign on it. There’s ladder here that we can disengage to climb up the scaffolding and enter the facility.
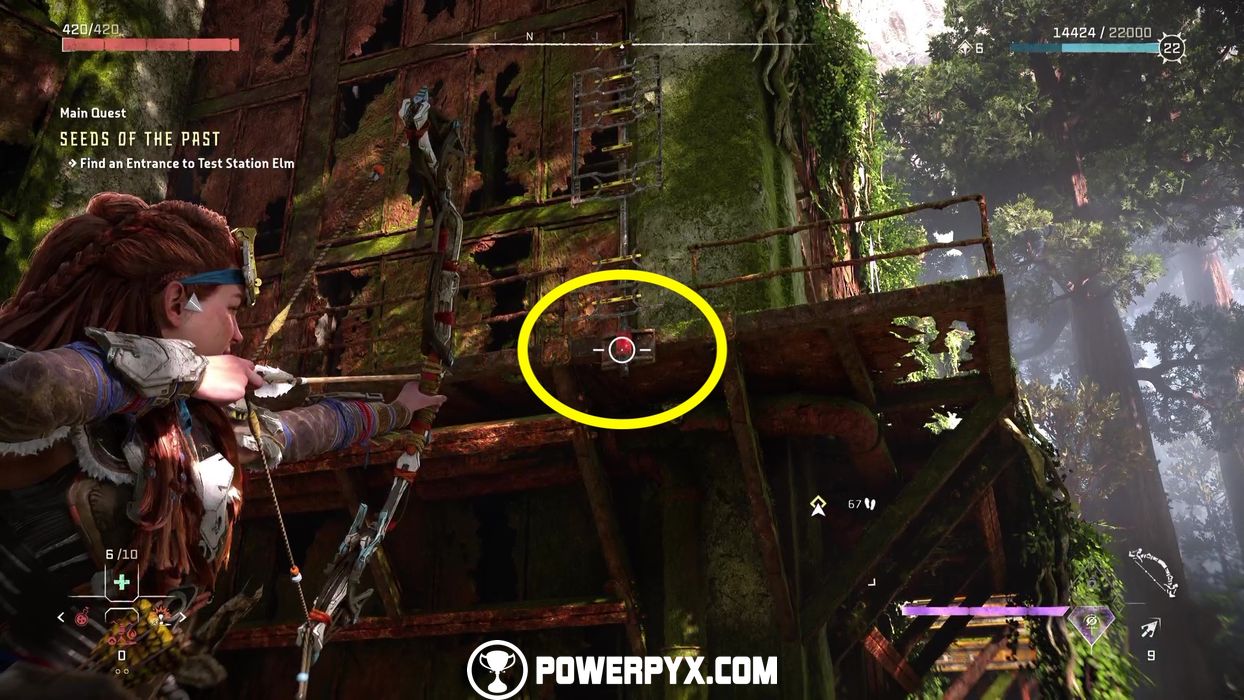
Parkour to the other end to find a hatch that you can pull off. Crouch under and through the air vent and continue on until you can open the other end of the vent.

We’re now inside the Test Station Elm.
Search Test Station Elm
We now need to reach the consoles, but, guess what, the doors are locked. Jump onto the first floor and near one of the corners of the room, by some metal crates, is an air vent to pull open.

On the other side, blow up the wall using the Firegleam.

Now, diagonally opposite the corner where the air vent is there’s a rack you pull. Pull it towards you and enter the battery storage to grab Maintenance Bypass Key.

Now interact with the key console in the room and this will open the vault door nearby.

Grab the storage unit and pull it towards you. Aloy will automatically let go of it so that Alva can jump on it and safely reach the console room. Once Alva is on the storage unit, pull it again until it locks into place.

Restore Power to the Control Room Door
Alva is now at the console and will unlock the storage rack that is the closest to the hatch we pulled open before. Pull the storage open and grab the energy cell.

Now go place it inside the slot in the room where you’ve blown up the Firegleam.


Return to Alva
The door’s power has now been restored and you can reunite with Alva.
Examine the Paired Console
With Alva on one console, we need to get to the other one, on the opposite end of the room. Use the storage unit to reach the other console and activate it.


We now have a new destination. However, more of the blight gets somehow released.
Enter the Tunnels
Climb down the hatch in front of you and into a new set of tunnels. Time to find another exit.

Search the Tunnels for an Exit
Go straight ahead and turn right when you see the second fork, at the blue light.

Now keep sprinting along the main and only path until you can climb up a ladder. We’re now back outside and can resume our search for Test Station Ivy.
Find an Entrance to Test Station Ivy
Make your way into the Proving Grounds by using the door that leads into a small pond.

Then, reach the building with the white leaf sign on it. However, a Dreading machine will be in your way and you need to eliminate it.

Kill the Dreadwing
The Dreadwing is weak to Fire Damage and is strong to Frost, Shock and Acid Damage.

If you own them, prioritize Fire arrows and Blast Traps. You can also use the Ropecaster to temporarily tie it down and lock it into place for landing arrow shots more easily. Additionally, some of its components can be used to trigger Shock and Purgewater chain reactions, so, if anything, aim for those parts. As usual, dodge whenever it swoops down on you. As for the Dreadwing itself, it has the ability to turn invisible, cast blinding lights and throw bombs. It also has no visible weak point, making it a strong enemy to defeat.
Search the Test Station Ivy
Once the Dreadwing is done for, we continue our search for Test Station Ivy. Make your way to the door leading inside Test Station Ivy to open it.

Enter the greenhouse and operate the console in the second room to activate the holo projector and continue.

We can now craft the vine cutter to get rid of the flower we saw early in the mission. We need a workbench though.
Craft the Vine Cutter
Pry the door open, go up the stairs and open the next door.

Now we need to climb up. Start by activating your Focus to highlight the climb points in yellow. Climb up and through the door and then zip-line to the ground.


We’re now back at the camp where we faced the Quen marines earlier in the mission. Use their workbench for the modification we need. Head to Special Gear and hold down to craft your new tool.

Return to the Data Core
Follow the waypoint to back to the data core flower.

Destroy the Metal Flower’s Vines
Now, destroy the metal flower’s vines with a melee attack until you can  install the vine cutter module into the data core flower.

Enter the Data Core
The vines will now dissolve, revealing a vault door that can be opened. We can at last retrieve DEMETER.
Recover DEMETER
Approach the console and insert GAIA Kernel to recover DEMETER and Alva can now access the entire server as she hoped.

However, some Quen Marines try to stop us, but Alva manages to persuade them to stop the assault.
Return to the Base
Before heading to the location given to us by Alva, we first need to get back to the Base and add DEMETER to GAIA’s matrix. Fast-travel to it for quicker access.

Deliver DEMETER to GAIA
You know the drill by now. Access GAIA’s control room and hand DEMETER to her.

We now have all of the Subordinate Functions. GAIA should now be able to acquire HEPHAESTUS.
This finishes the Seeds of the Past Main Quest in Horizon Forbidden West.
For all other Side Quests and Main Quests, check out the complete Horizon Forbidden West Walkthrough.
Eric says
Yea…stuck in ava. 8 see no console for her to activate and she just keeps telling at me.