Reunion is the twelfth main quest (path) in God of War Ragnarok. This walkthrough will guide you through all objectives of the Reunion Main Quest (Path).
Requirement: Complete Unleashing Hel
Reward: 7000 Kratos XP, 3500 Atreus XP
Quest Info: We must venture to Helheim to correct Atreus’ mistake. Perhaps the squirrel can help us.
Objectives:
- Approach Ratatoskr
- Find Garm in Helheim
- Pursue Garm
- Leave Helheim
- Run!
- Keep pursuing Garm
- Return to the Mystic Gateway
- Return home to Sindri’s
- Travel to Vanaheim, when ready
- Reach Freyr’s Camp
- Walk with Hildisvini
Approach Ratatoskr
Outside Sindri’s, head over to the Mystic Gate where Ratatoskr is waiting. He’ll open the path to Helheim for you, and send you on your way to correct the mess.
Find Garm in Helheim
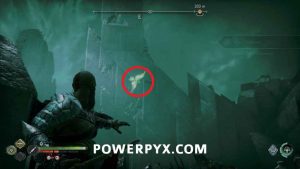
When entering Helheim you’ll spot Garm crashing around, and need to follow the path they made ahead. Before progressing too far, you can kill the Raven flying around in the first area.
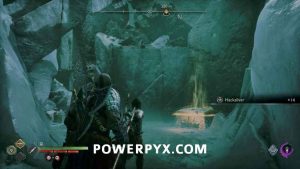
You can also drop off a ledge to the right where you can find a Materials Chest containing 1 x Asgardian Ingot and 12 x Dwarven Steet.
Climb back up and you can throw Draupnir at the spot on the wall ahead, allowing you to continue on the climbing path down the wall.
On the ground, you’ll need to clear out a group of Hel-Walkers. When they’re all dealt with you can then climb up to the second level in the area for the Rune Read “Prayer to Hraesvelgr”.
Look towards the ice on the wall to spot some more weak points. To break the ice you need to throw a spear at all three points and blow them up at the same time (like you needed to do with the Nornir Chest in Svartalfheim). Once the ice is cleared deal with the Hel-Walkers that were hiding inside, then climb up the wall.
In the next area, you’ll run into another Hel-Tear like the one that appeared outside Sindri’s House. Direct Atreus to it when you’re ready, then he’ll work on closing it while you are attacked by enemies. Like before, the timer is more based on enemies defeated than actual time elapsed, to try to take them out as quickly as you can. Once the Hel-Tear is closed you will automatically receive the Favor “Hel to Pay”, which requires you close the other 4 Hel-Tears spread around the Realms. Make sure to pick up the loot from this one when it’s closed to obtain a Frozen Spark (1/6 Blades Upgrade).
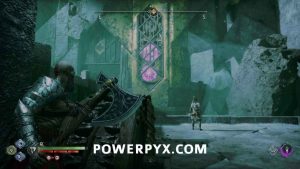
Drop off the ledge and shimmy across to continue. Ahead you’ll encounter your first of a few door puzzles, where you need to figure out how to freeze the door open to pass through. This first one is relatively easy; remember that you can freeze items using Sigil arrows, allowing you to remove your axe. This also applies for chaining the freeze using the arrows, so you don’t need to hit the spot in the first place. Shoot three Sigil arrows in the spot above the door, one on the gear, and two leading to the left. This allows you to raise the gate (which covers the gear) but then throw your axe at the leftmost Sigil, chaining the freeze to the gear so you can pass through.
 |
 |
Follow the path into the next area, defeating the enemies in your way. Drop down the ledge to the right, then follow the path toward the end of the walkway ahead. Look to the left where you can spot a vent to throw a spear at, which will allow you to progress. Grab the chest on your way by to obtain Tame the Beast (Blades Heavy Runic Attack). NOTE: If you accidentally miss this chest you can purchase this attack from the shop after you complete the story (you can’t get back to this chest later, but it doesn’t count towards 100% completion).
 |
 |
Pursue Garm
Keep following the path ahead. After Garm runs away again deal with the pair of Hel-Walkers, then crawl through the hole in the wall to the right.
Drop down and keep following the linear path. You’ll eventually run into a traveler you need to deal with in the area with the next door puzzle. Make sure to pick up all the items it drops to obtain the Boon of Wrath (Amulet Enchantment) and a Frozen Flame (Axe Upgrade).
Interact with the switch to start the door puzzle. This one operates similarly to the last, where you have to set some Sigil arrows before operating the switch. Space them evenly on the pillar to the right, then turn the switch, pulling the pillar down while the door opens. If space correctly you can then hit the top Sigil, chaining down to freeze the gear and allowing you to open the door.
 |
 |
Watch on the immediate left through the door where you can grab a Materials Chest containing 1 x Petrified Bone and 6 x Stonewood.
Keep following the path ahead until you hop over a low wall. Here the path splits, and you first need to take the close right to a dead end. From here look across to the far wall where you can spot a vent to toss a spear at. Head back around and jump across the gap to continue.
On your way by, you can loot a Legendary Chest which contains Thrust of a Thousand Soldiers (Spear Light Runic Attack). NOTE: If you accidentally miss this chest you can purchase this attack from the shop after you complete the story (you can’t get back to this chest later, but it doesn’t count towards 100% completion).
Keep following the path ahead dealing with the next group of enemies until you reach the area with Garm. Wait for Atreus to distract him, then when the chain bounces over the wall you need to quickly freeze it by throwing your axe at it, then interact with it to pull it over to the hook on the ground.
This doesn’t work, and Garm runs away. Keep following the newly opened path to the next area. After fighting the Legion enemies progress into the room with the pillars and follow the path around the back. You can toss a spear in another vent, allowing you to jump to the next area to the left. Follow the path after until you encounter Garm again.
Garm
This time you actually have to fight Garm, instead of having it immediately run away. When at a distance he will do stomp attacks that launch a line of ice at you, which can be easily dodged. He will rush in to do bite attacks, either starting with regular bites that can be blocked, or block break/unblockable bites that can be dodged. After dodging/blocking these attacks, attack his snout while it is up close to stun him momentarily, at which point you can deal damage. Don’t bother attacking him when he is at a distance, simply dodge and wait for the bite attacks. After enough damage, Garm will swing his chain at you, which you can dodge and then freeze by throwing your Axe at it. Grab the chain with :co: and he will be stunned for a longer period of time, allowing for bigger damage. This stun is a good opportunity to use runic attacks or Spartan Wrath if you have it equipped.
After enough damage Garm will howl and enter the second phase, which gives you a checkpoint. Garm will launch ice at you which you can dodge, and then throw the ice back at him for damage. This phase will be practically the same as the first, except now he’ll intermittently throw ice at you, as well as his ice stomps will launch multiple waves of ice instead of one. When he swings his chain at you to freeze, it will also have multiple swings before it gets stuck.
Repeat until Garm howls again and goes into the final phase, which once again gives you a checkpoint. His attacks will remain mostly the same, except now he’ll also jump down and do a large area-of-effect slam if you don’t manage to knock him down by throwing ice back at him. Continue dodging his attacks and unloading on him when he attempts to bite you. Once you freeze the chain in this phase, you will have a few QTEs to finish the battle.Once he is defeated, you will earn the trophy Off the Leash  .
.
Leave Helheim
Turn around and follow the path leading away from Garm’s corpse. In the next room you reach you can find a Legendary Chest, this time containing the Onslaught Shield. If you had obtained/crafted all shields prior then when you pick this one up you will earn the trophy Phalanx  . NOTE: If you accidentally miss this chest you can purchase this Shield from the shop after you complete the story (you can’t get back to this chest later, but it doesn’t count towards 100% completion).
Now you can start interacting with the puzzle for the door. This one is a little more involved, as you have two moving weights you have to interact with before you can freeze the gear. Place a Sigil on the visible one on the right first.
Crank the wheel two positions, which will raise the one with the Sigil and drop the other one. You then need to place a Sigil on the left weight, followed by cranking it back once. You can place your third Sigil on the left again, and if done right all three should line up and freeze the gear when you use your axe on the third one. Continue along the path ahead until you reach a door.
Run!
Turns out Garm isn’t dead, and you’ll need to run away to avoid being squished in the collapsing buildings. Follow the path ahead to exscape.
When you reach a room where you are blocked by Garm, you need to throw a spear at the metal ring on his leg to the left, then blow up the spear to get him out of the way.
Garm
You will fight Garm again, except this time he will have weak spots on his leg and neck that you can throw your Draupnir Spear at to detonate for big damage. His attacks will mostly be the same, slamming and throwing ice at you as well as the bite attacks. Repeat as you did before, while also damaging the weak spots when they are available until Garm’s stagger bar fills up. Attack him until he gets back up and his health bar restores, which will trigger a checkpoint.
The second phase will be identical, so repeat what you did until he is staggered again, except this time you can grab Garm with  to lead to a QTE to finish the fight.
Keep pursuing Garm
Garm gets away again, and you’ll need to pursue after him. Follow Atreus through the hole in the wall, then up the path ahead. There won’t be any more enemies or anything in the way, so just keep following the path until you find Garm again.
Return to the Mystic Gateway
With Garm dealt with, you can make your way back to the Mystic Gateway. Before climbing up, look to the right of the walkway to spot a vent where you can throw a spear, then grapple up the ledge to the left.
Take the path to the right first to reach a side platform. You can direct Atreus to pick up the items on the ground with  . If you hadn’t found any prior, this is a flower required for the Favor “Nine Realms in Bloom”, which will automatically be started if this is your first flower.
Follow the path in the other direction where you’ll have your final door puzzle. This one is slightly simpler and only requires two placed Sigils. The bottom gear ahead rotates, so you just need to place a Sigil in the first spot (shooting 3 times to increase the size), then rotate it up to the top and repeat on the bottom, allowing you to freeze the gear.
Just past the door, you can find the Lore Marker “Hraesvelgr”, along with a Raven sitting on the rock directly above.
Follow the path up the stairs to the left to reach a shortcut leading back to the Mystic Gateway, which you will need to interact with and remove the ice chunks from in front of.
Return home to Sindri’s
Interact with the Mystic Gateway and you’ll automatically select Sindri’s House. Head inside when you arrive to update everyone on what happened.
Travel to Vanaheim, when ready
You’ll need to travel to Vanaheim to meet up with Freya when you are ready to continue the story.
Reach Freyr’s Camp
In Vanaheim, hop in the boat, heading west, then north to reach the landing leading into Freyr’s Camp.
In the cave you can toss a spear at the two vents, allowing you to jump toward the main camp area.
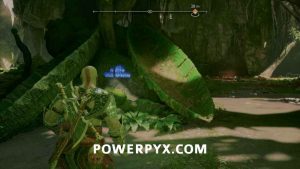
On the way in you can have a short detour to the left. If you hadn’t grabbed it already, there is the Rune Read “Vanaheim Lullaby” between the two boats.
Turn left and follow the path ahead where you can break through the wall with Draupnir to find a Legendary Chest containing one-half of the Muspelheim Yddgrasil Seed.
Head back and enter the main camp area and interact with the bowl by the fire.
Walk with Hildisvini
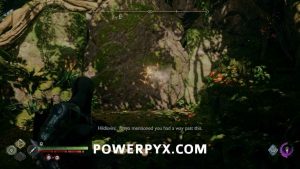
Head through the gate with Hildisvini and follow him along the path out of the camp. He’ll lead you to the spot with the rock you can break with Draupnir, then send you on your way to the next story quest.
This finishes Reunion in God of War Ragnarok.
Next up: Creatures of Prophecy
For all other quests refer to the God of War Ragnarok Walkthrough.










Leave a Reply