
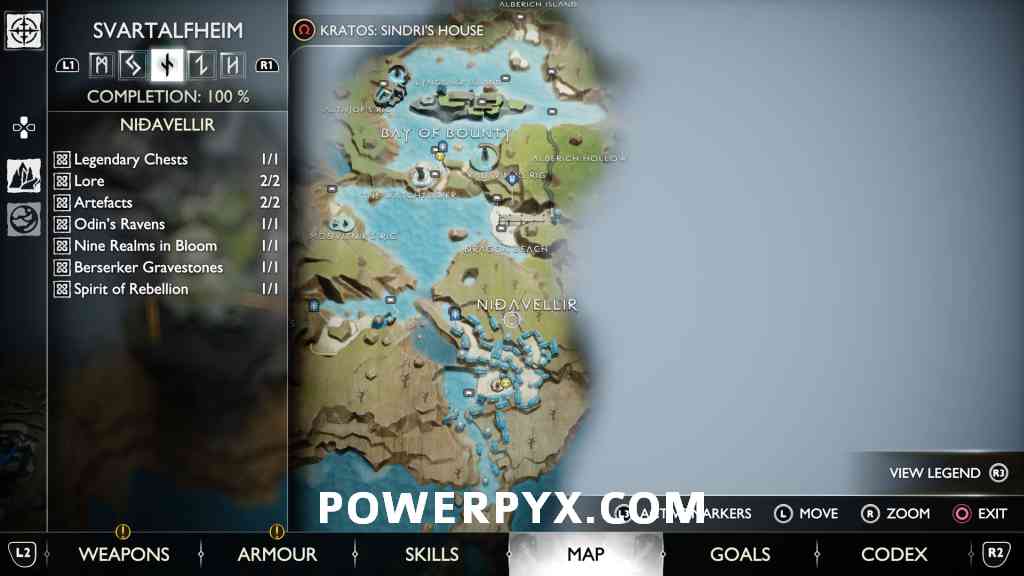
Nidavellir contains 9 Collectible Locations in God of War Ragnarok. This walkthrough will guide you to all the collectibles in Nidavellir Region in chronological order. Everything that’s needed for trophies and 100% completion is included. Nothing is missable, everything can be collected after the story.
- Legendary Chests: 1
- Lore: 2
- Artifacts: 2
- Odin’s Ravens: 1
- Nine Realms in Bloom: 1
- Berserker Gravestone: 1
- Spirit of Rebellion: 1
When you first visit the area in the story, you are still missing the unlockable skills needed to reach some collectibles. This walkthrough is intended for use after the story.
Collectibles Overview:
Collectibles
#1 – Artifact (Kvasir’s Poems – Large Society Ground Orb, The Performance)
After parking your boat and arriving at the town, there is a green blockade on the left docks. Shoot a green arrow at it to blow it up (aim and press  ), thus revealing the artifact behind. If this is your first story visit you must talk to the blacksmith first, he’s the next story objective just up the path, you get the green arrows from him.


#2 – Lore (Scroll – Shopping List)
Just before the smithing shop, you can find a golden lore scroll on the ground. In the middle of the market square, just a few steps away from the smith.


#3 – Odin’s Raven
From where you picked up the Lore Scroll, look up, a Raven sits on top of a house, to the left of the smithing shop. Just to the left of the exit of this area.


#4 – Artifact (Things Left Behind – Griep’s Firebomb)
From the last collectibles, crawl through the tunnel past the smithing shop to enter the next area. After exiting the tunnel, turn left to walk into another tunnel. There’s a purple-shining artifact on the floor.


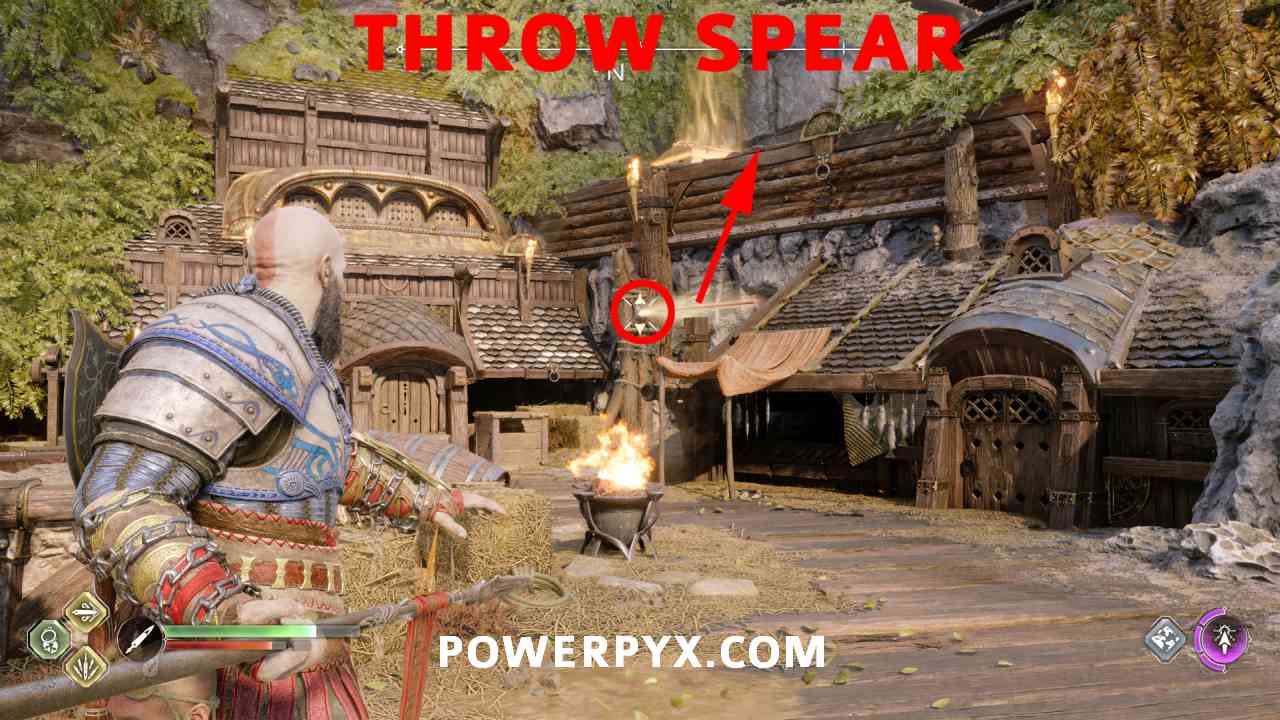
#5 – Legendary Chest (Luminous Recovery Handles – Blades Attachment)
From the last Artifact, climb up the tunnel exit. Immediately after exiting, straight in front of you, there is some gas/wind coming out of a wooden pillar. You need the Spear weapon for this one (unlocked during Main Mission 10: Forging Destiny). Throw the spear at the wind in the pillar, this creates a path to climb up. After climbing up you find a Legendary Chest above.

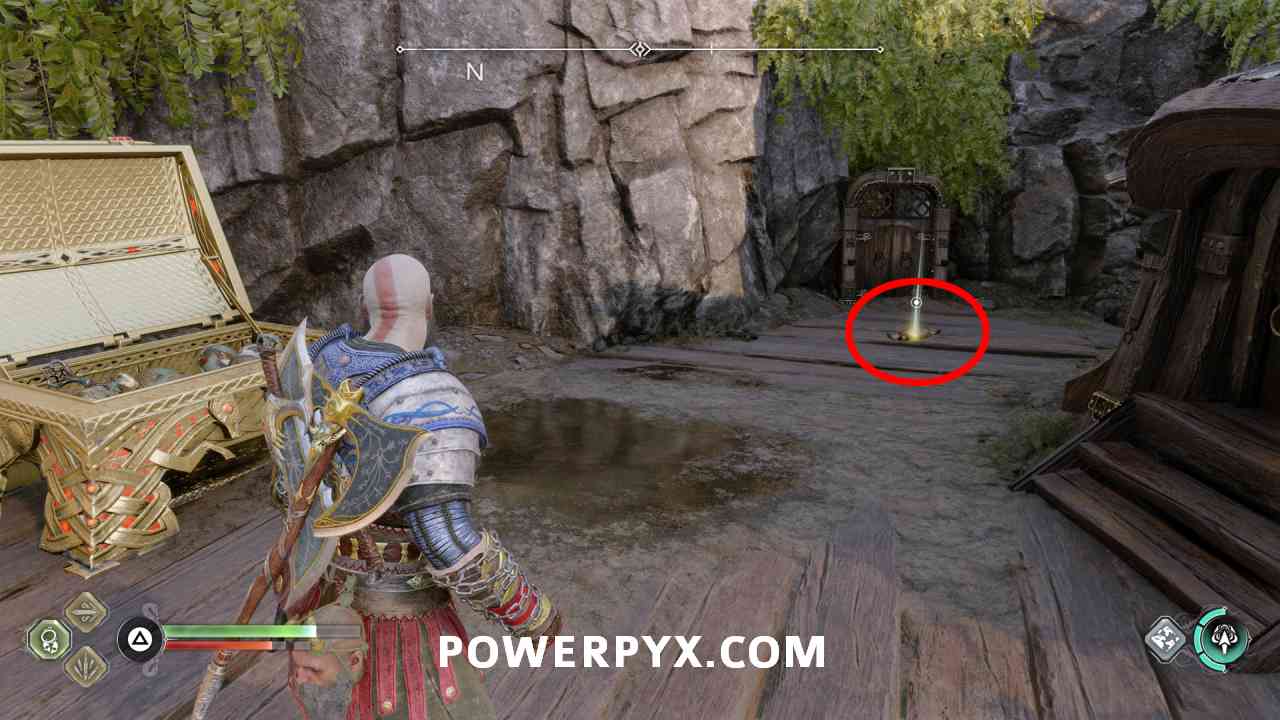
#6 – Lore (Treasure Map – Mining Glory)
Sitting right next to the Legendary Chest, look for a green-glowing scroll on the floor.
#7 – Nine Realms in Bloom (Flower: Sparkthorn)
Still in the same area, drop down from the legendary chest and walk downhill until you see a broken bridge on the left. Above the broken bridge you see more gas/wind coming out a wooden chimney. Throw your spear into it again (must aim it from straight across), this creates a path to jump over the broken bridge. On the other side is the flower. If it’s your first flower it will start the Favor “Nine Realms in Bloom” for finding all 9 Flowers.


#8 – Favor: Spirit of Rebellion
This “collectible” is for simply completing the Favor “Spirit of Rebellion” from Durlin. It’s available after Main Mission 10: Forging Destiny. Durlin will offer it to you at the end of Mission 10, so check under Goals > Favors if you already accepted it or even completed it. If you didn’t accept it during Mission 10, then after the story it can still be accepted in the tavern – from the flower collectible turn around and jump back over the broken bridge. Go up the path opposite the bridge with a cart and lots of pumpkins and enter the house at the end, Durlin will be there after the story and still offers the quest. You have to take a boat to Dragon Beach just north of Nidavellir, then throw a spear (unlocked in Mission 10: Forging Destiny) at the wall to climb up. This leads to a bridge at the top of the area, on the left of the bridge you can use the chisel (story unlock) on a blue shrine. This will cast yellow glyphs in front of the big statue at the end of the bridge, press on the glyphs to reveal a red chest, open it to get Durlin’s hammer. Then return it to Durlin. All of these waypoints have blue icons on the map so you can track them from the Favor quest log. Completing this favor also unlocks the trophy “Rebel Leader”.


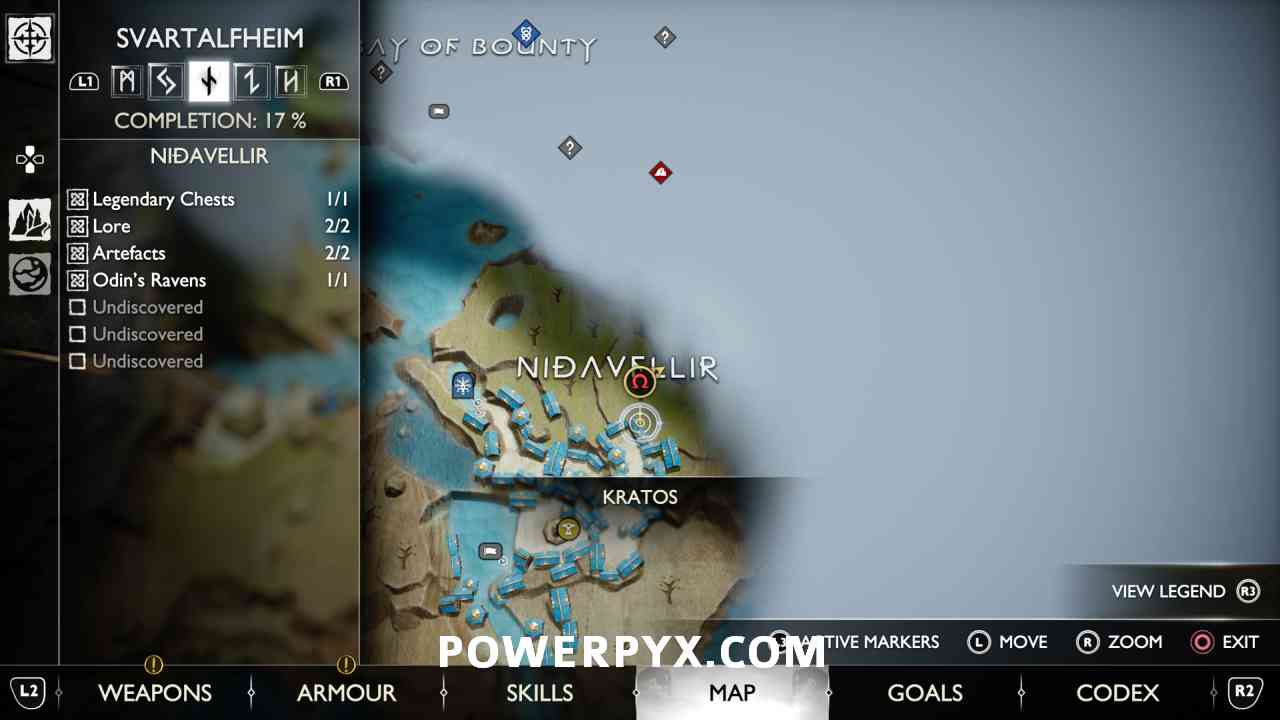
#9 – Berserker Gravestone (Asgard’s Fortitude – Amulet Enchantment)
At the northern end of Nidavellir town, enter the Mystic Gateway (blue icon on map). Teleport to the Mystic Gateway Svartalfheim > Nidavellir Beach (unlocked in Mission 10: Forging Destiny). After exiting the portal, the Berserker Gravestone will be in front of you. To interact with it you need a story item “Inert Hilt of Skofnung” which is automatically obtained in Mission 9: The Word of Fate. Defeat the boss “Hardrefill the Callous”.


That’s 100% of the collectibles you can find in Nidavellir area in God of War Ragnarok.
Next Up: Sverd Sands
For more Collectible Guides, check out the complete God of War Ragnarok Collectibles Guide.
cbrown says
I was unable to complete spirit of the rebellion in this order after the story due to Durlin participating in the viking funeral favor. After the story, you have to complete viking funeral first.