
Into the Fire is the eighth main quest (path) in God of War Ragnarok. This walkthrough will guide you through all objectives of the Into the Fire Main Quest (Path).
Requirement: Finish The Runaway
Reward: 2500 Atreus XP
Quest Info: Thor and I have travelled to Muspelheim. Time to find a piece of this mask…
Objectives:
- Search for the Mask Fragment with Thor
- Investigate Surtr’s Shrine
- Resume the search for the Mask Fragment
- Go back to Atreus’ quarters
Search for the Mask Fragment with Thor
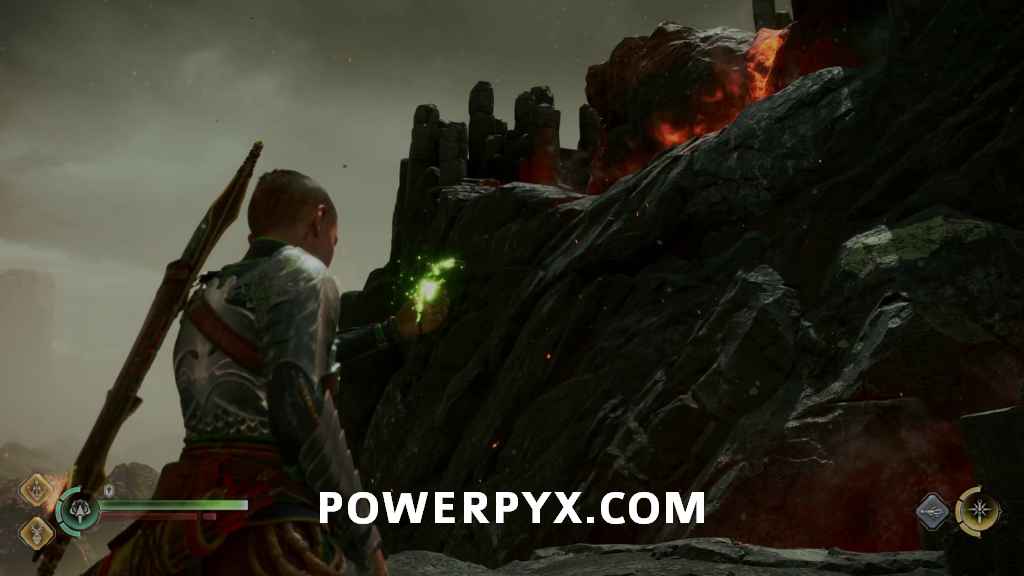
Now in Muspelheim with Thor, you need to make your way around the area searching for the next part of the mask. This is done by hitting  to pull it out, then going in the direction where it’s lit up the brightest. You don’t need to do this at all times, and the paths to follow are generally pretty obvious, but you do need to pull it out at dead ends. These spots are fairly obvious (they all look like the same rubble pile) and after pointing at them for a moment Atreus will prompt Thor to make a path.

Follow the path ahead to run into your first set of enemies and be prompted on using Ingrid in combat. She takes the role of the normal companion, and you can direct her to attack specific enemies with  or use her ability with
  . Thor helps out a bit too, but he’s lazy and will attack when he feels like it, so don’t count on him specifically in these combat areas.

Once the enemies are dealt with you can pill out the mask again and point it up the cliff ahead. This prompts Thor to grab you and pull you up to the next area.
You’ll need to deal with some more Draugr, and Thor is slightly more useful with the increased enemy number because he has more time to be useful. Once all the enemies are dealt with, you can go to the far wall to open a Materials Chest which will contain 2 x Ydalir Timber and 1 x Stonewood.
Head back near Thor and pull out the mask again, aiming it at the rubble on the right (relative to facing away from the chest) to direct Thor to clear the next path.

Keep following the path ahead until you reach the open area. You’ll need to deal with some Tatzelwurm and Brute Draugr, but nothing too strenuous with Thor and Ingrid.

When the enemies are all dealt with, pull out the mask once more and move toward the edge of the cliff. Thor will be waiting back near where you entered though, so move back over to him to jump down to the lower area.

You’ll end up in another combat area, with this time the main thing to worry about being the pair of Ogres that appears pretty quickly into the enemy wave. You can keep your distance from them pretty easily, then once all the other enemies are cleared out Thor will start focusing on the Ogres and help take them out pretty quickly. After they’re defeated, make sure to pick up the dropped items to obtain the Falcon’s Dive Runic Summon (which is much better than the default one).

Investigate Surtr’s Shrine
Thor finally caves and goes to try out the Trials, so you need to make your way down to check out Surtr’s shrine. Climb through the marked hole, then follow the path along the wall to reach the shrine area.

Watch in the cave on the left of the shrine as there will be a Wisp Totem you need to destroy before you can continue.

Head over and interact with the Shrine for another scene where you enter the Shrine.

Resume the search for the Mask Fragment
After the scene in the shrine, follow the path back up the wall to return to the prior combat area. Thor returns and muses about the Trials, and you’ll need to deal with the enemies by yourself for a while. They’ll continually spawn for a while until two level 5 Draugr appear, then Thor will drop down and kill the rest of the enemies instantly. You can then pull out the mask and point it towards the obvious pile of rubble to progress through.

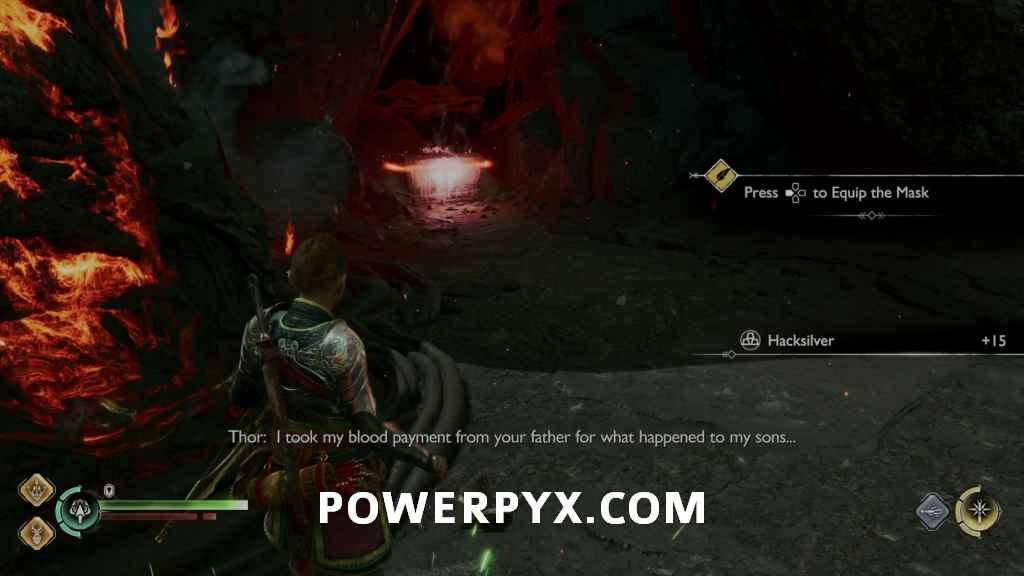
Follow the path ahead to the dead end, then pull out the mask and point it out toward the lava. After a bit you’ll need to mash  to stop getting pulled in the lava, obtaining the second part of the mask.
Go back to Atreus’ quarters
After being transported back to Asgard and discussing with Odin, you’ll need to head back to Atreus’ room to continue. Before leaving this area though you can go to the right side of the room from the stairs for a Legendary Chest which contains the Runic Capacity Accessory.

Head up the stairs and exit out of Odin’s study. You can take another look around the Lodge if you want, then when you’re ready to continue head into Atreus’ room at the back of the hall, then interact with the bed to end the current quest.
This finishes Into the Fire in God of War Ragnarok.
Up Next: The Word of Fate
For all other quests refer to the God of War Ragnarok Walkthrough.
Leave a Reply