God of War Ragnarok contains 35 Nornir Chests. This guide shows all their locations and solutions how to open them. Each Nornir Chest requires you to interact with 3 locks in the form of blue glyph symbols. You must either hit bells in quick succession, or destroy 3 totems, or detonate them simultaneously.
Each Nornir Chest gives you 1 Apple of Idunn (Health Upgrade) or Horn of Blood Mead (Rage Upgrade). This makes them one of the most useful collectibles in the game because they increase your two main stats. Especially on higher difficulties you should get all of them as early as possible to get stronger. The Apples and Horns aren’t fixed to specific chests, instead it alternates between these two based on how many chests you opened. If the last chest gave an Idunn Apple, the next one will usually give a Horn of Blood Mead and vice versa.
None of the Nornir Chests are missable. You can still get all of them after the story in free-roam. There are actually a few more chests than you need to fully upgrade your stats. The last few won’t give a reward if you already maxed out your stats. For 100% completion you still need all of them, however.
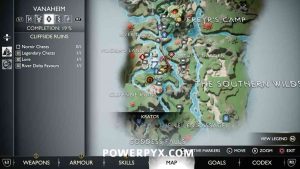
Depending on when you start collecting them the order can vary. This guide is based on free-roam after the story but you can use the overview below to jump to the region where you are searching. On the world map it shows whether there’s a Nornir Chest in a region or not. This way you can keep track which ones you found.
For more Collectible Categories see » God of War Ragnarok Collectible Guide.
Overview:
Svartalfheim
#1 – Aurvangar Wetlands
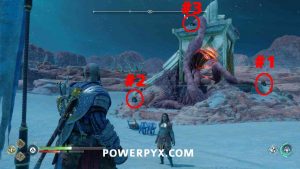
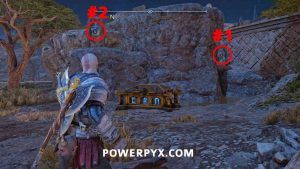
From the Mystic Gateway row your boat to the first island, then the Nornir Chest is on the right side. But first you must destroy the 3 seals, they look like rocks with blue glowing glyphs on them, throw you axe to destroy them. The first is up on the hill past a geyser (must freeze it with axe). The second is directly behind the Nornir chest on a little island. The third is to the right of the chest on a little rock. The image below has all 3 glyphs circled in red. After destroying all 3 you can open the chest.
#2 – Aurvangar Wetlands
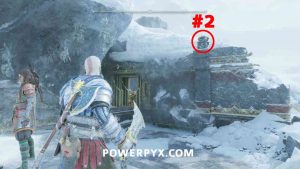
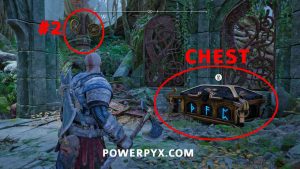
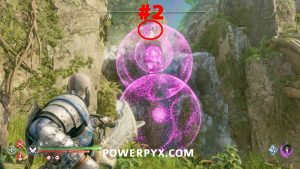
With the boat you can drive under some wooden beams on the left of the wetlands to reach a hidden island. You must spin 3 posts in this area until they show the same glyph as the chest seal. The first is to the right of the chest behind a geyser, just keep hitting it until the glyph on the chest no longer glows blue. For the second, grapple up the path to the left of the chest, then immediately turn right to see it on the rocks. For the third, drop down to the bottom at the back of the area to see it on the rocks.
#3 – Dragon Beach
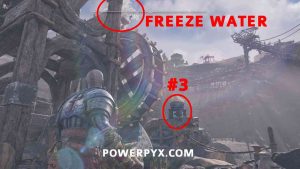
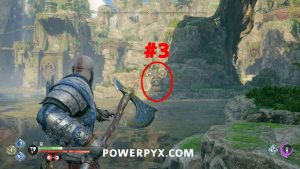
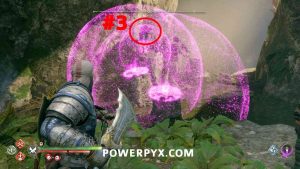
The chest is on the left side of the beach. To open it, you must destroy the 3 seal totems behind the geysers in the area. They are hard to see through the geysers, so first throw your axe at the geysers to freeze them, then you can see the seal behind. Aim at it, retrieve your axe with  and then throw the axe through the geysers. The first is directly behind the chest. The second is behind the dragon statue on the right side of the beach. The third is behind the geyser at the west side of the beach, close to where you can dock your boat. After hitting all 3 seals the chest can be opened.
#4 – Radsvinn’s Rig
To the left of the rig is a Nornir Chest. You must light all 3 seals with the Chaos Blades to open the chest. They look like little stone totems with blue glyphs on them. They are all hidden here in the same area as the chest, light them by equipping the Chaos Blades and pressing  +
+  . The first is directly left of the chest. The second is opposite the chest behind some metal bars, to destroy it climb up the ledges where you came from and throw the axe at the fire pot, this will ignite the seal. The third is to the right of the chest in the back of the area, shoot a green arrow at the two kegs to reveal the seal behind, and light it with your blades. Now return to the chest to open it.
#5 – Alberich Island
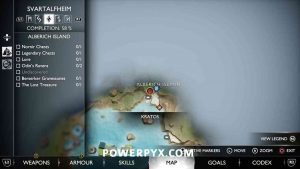
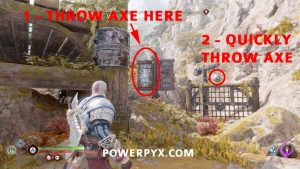
Take a boat to reach the beach of Alberich Island, in the north of the big lake. Directly on the beach you find the Nornir Chest. You must throw the axe at 3 glyph seals in quick succession. They are all here at the beach. The first is in the back left corner of the beach, throw the axe at the wooden board with white markings, this will raise the glyph seal behind the metal bars, quickly retrieve your axe and throw it at the glyph before it lowers again. The second one is at the front left of the beach, shoot a green arrow at the wooden crane that holds the glyph, then you can hit the glyph with the axe. The third is behind the chest. Since the first throw with the timed event is the hardest, it’s best to start with that one and then quickly hit the other two. If you take too long it will reset and you must hit them all again.
#6 – Myrkr Tunnels
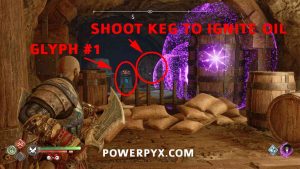
In the water puzzle room near the end of the tunnels, take the exit where you can crouch under some rocks. On the other side you find the Nornir Chest. It requires lighting 3 glyphs on fire. The first is to the left of the chest, your Chaos Blades can’t reach it so you must throw an axe at the keg next to it to spill oil, then shoot purple arrows around, and ignite the purple arrows with Chaos Blades, this causes a chain reaction that ignites the oil and the glyph. The second glyph is to the left of the first one (across from the chest). The third is in the tunnel across from the chest (where you came from), hidden behind some wooden crates that you must destroy first. After lighting them all on fire the chest can be opened.
#7 – The Forge
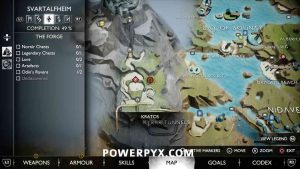
After you reach the Forge by using the train, enter the first area to the right of the wooden walkway, to a little side area that has a green heart drawn on a stone. The Nornir chest is there. To open it, throw a spear at the 3 tiny totems in this area and detonate them all at once (requires Spear from story progress). Throw spears with  +
+  and detonate them with
  to destroy all 3 totems at the same time or else they will respawn. The first is to the left of the chest on the rocks. The second is left on the chest, go to the end of the cliffs and look for it 20-30 meters/yards away on a mountaintop, the third can be seen from the wall where an artifact is.
#8 – The Applecore
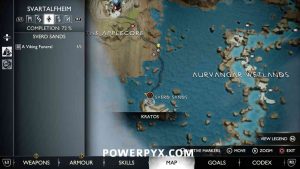
When backtracking to The Applecore via Aurvangar Wetlands > Sverd Sands (take elevator to go down), in the first Applecore section you can throw a spear at a wall on the right. Use it to climb up, the chest is there. You must throw the spear at 3 glyph seals and explode them all at the same time with  . The first and second are opposite the chest, hanging in the air. The third glyph is found to the right of the chest, climb up to the top of the rocks, then turn around to look in the direction of the chest and you will see it. After detonating all 3 with the spear you can open the chest.
#9 – The Applecore
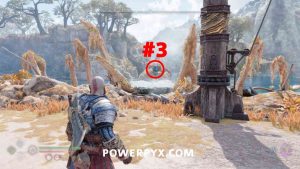
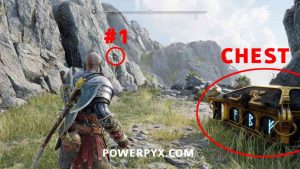
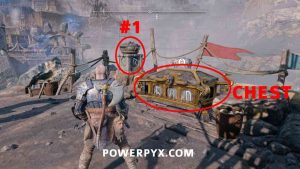
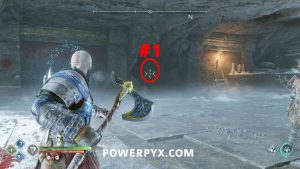
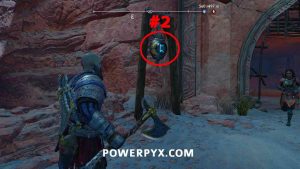
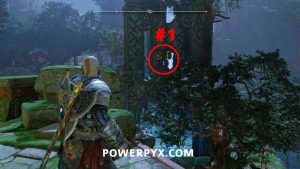
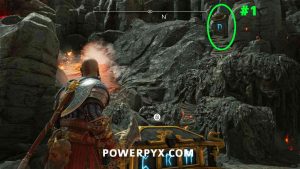
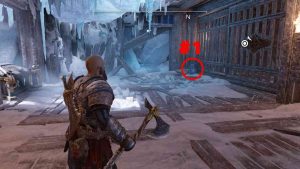
On the path between Jarnsmida Pitmines and The Applecore (basically the entrance/exit between these two areas). You must throw the spear at 3 glyph seals and blow them up simultaneously. The first is to the right of the chest, in the distance behind some water. This one is hard to see, you can see a blue shimmer through the water, and when aiming at it the reticle should change (see image with #1 below). The second is to the left of the chest where the Rift was, must throw axe at the explosive vase to clear the rubble, then the glyph becomes visible. The third is in on the path in the middle, next to a Mystic Gateway. Blow up all 3 spears with  to open the chest.
#10 – Jarnsmida Pitmines
Near the center of the area close to a small water wheel. You must burn 3 braziers with runes on them. You do this by selecting the Chaos Blades and pressing  +
+  . The first is directly left of the chest. The second requires you to drop down to the left, then use a grappling hook to jump over to the 2nd brazier. From the 2nd brazier jump back via the grappling hook, then the third brazier is under the moving water wheel. You must freeze the water in the channel above by throwing an axe at it, then you can light the brazier. Return to the chest when all 3 are lit simultaneously, it can now be opened.
Midgard
#11 – Well of Urd
Before the first climbing section, the chest is on the left. You must light 3 braziers with your Chaos Blades (  +
+  ) to open the Chest. The first is to the right of the chest on the rocks. The second is after climbing up, at the cliffside on the right. The third requires you to climb down the cliffside where the 2nd brazier was, then check on the left. When all 3 are lit you can open the chest.
#12 – The Oarsmen
When you first enter the area ignore the Nornir Chest. Instead make your way all the way through the area, in the outside area upstairs you need to pull a chain then go back downstairs. Lift the gate that leads back into the first room where you entered the area. To the left of the gate also shoot the rubble with a green arrow, to blow up the rubble. Now you have access to all 3 Nornir Seals. You must hit them with the axe in quick succession. First, hit the one by the Mystic Gateway, left of the Chest. Second, hit the one opposite the Mystic Gateway in the starting area. You’ll want to quickly retrieve your axe from the first throw, run over to the second to already be in line of sight of the third seal before you throw. Then quickly turn around and hit the third seal behind the rubble you blew up (behind the gate you lifted). You want to hit the third seal directly from where you stand when you hit the second seal, without running around. The 1st seal stays activated the longest, but the 2nd and 3rd seal turn back on very rapidly, hence you must hit those last two very quickly without running in between, which is only possible after you removed the rubble behind the gate. If the seals turn back on, repeat the process until you hit them all quickly enough.
#13 – Raider Hideout
Foun in the left corner of the hideout. You must light 3 braziers by using the grenades (from the vase in the middle of the cave). #1 is to the left of the Nornir Chest, behind red vines. Shoot a purple arrow at the vines and burn them with the Chaos Blades. Then pick up the grenade and throw it at the brazier. #2 is to the right of the chest, behind some golden ore in the wall. Throw a grenade at the ore to blow it up, then throw another grenade to light the brazier. #3 is on the right of the cave, you must shoot purple arrows at it, then throw a grenade, because the brazier is so far away the grenade will fall down but when it hits your purple arrow markers it creates a chain reaction to light the brazier. Now the Nornir Chest can be opened.
#14 – The Lost Treasury
The Nornir Chest is found in front of The Lost Treasury on the right side. To open it you must light 3 braziers with the Chaos Blades. #1 requires you to push the big golden wheel in front of the Treasury to the left. Then it will be revealed above on the right side. For #2, drag the wheel all the way to the right and climb up, then blow up the explosive vase, climb back down, push the golden wheel to the left, climb up the left path. Up there you find the second brazier. For #3, go through the path left of the second brazier, then push the big stone block to the left, drop back down and push the big golden wheel to the right to make it get stuck on the stone block. Then turn the wooden wheel to open the gate, shoot purple arrows at the cogs on the left and right and throw the axe to freeze them. Run through the open gate quickly, on the right of a Legendary Chest is the third brazier. Place some purple arrows to cause a chain reaction, so that you can attack a purple spot close to you and the fire jumps over to the brazier. Afterward, turn around and hit the weight holding the gate in place, then go back outside to open the Nornir Chest.
Alfheim
#15 – The Strond
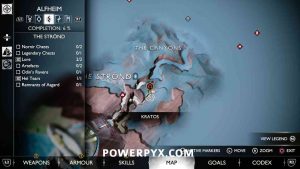
From the Mystic Gateway climb up and squeeze through the gap in the wall. Then go straight and drop down the ledge to find the Nornir Chest. You must light 3 braziers with the Chaos Blades (  +
+  ). The first is to the left of the Chest on the cliffs. The second is to the right of the Chest, look down the cliffs in the edge of the area. The third requires you to climb back up the path, climb up twice and then drop down on the left.
#16 – The Strond
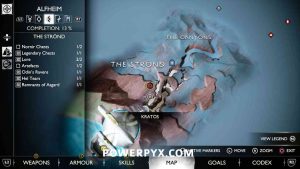
In front of the entrance to Temple of Light (basically end of The Strond area). You must throw the Spear at 3 totems and explode them all simultaneously. The spear is an automatic story unlock. For the first two, turn around from the chest and they will be in sight. The third is to the right of the broken bridge. After planting the 3 spears press  to detonate them, this opens the chest.
#17 – Temple of Light
About halfway through the Temple of Light, pretty much in plain sight and easy to see. You must hit the 3 seals in quick succession by throwing the axe. #1 is the furthest left of the chest, #2 is the closest left of the chest, #3 is in the corridor to the right of the chest (must first shoot green arrows to clear the rubble in front of it). The chest opens when you hit all 3 seals quickly enough. If you’re too slow you can retry. Use the quick throw with  +
+  .
.
#18 – The Below
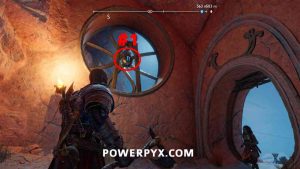
The Nornir Chest is behind a locked gate early in the area, before a bigger climbing section around some rock walls. You must first open the gate by the Nornir Chest and climb around the mountains to open the gate upstairs. Then you have all gates open to hit the 3 seals with your axe. You must hit them in quick succession before they turn back on. The first is upstairs in a window (inside), the second is in front of the Nornir Chest, the third is in the tunnel next to the Nornir Chest. Hit them in that order with the axe as quickly as possible. You can retry if the seals turn back on.
#19 – The Barrens
In the north, on a rock. You must first throw your axe through the 3 red glowing sacks from the north side of this rock (line them up to hit all 3 in one throw). Then light the 3 braziers on fire. Two are near the ground, can be reached with Chaos Blades  +
+  . One is at the top, must hit the explosive vase next to it, which is revealed after you cleared the 3 red sacks.
#20 – The Forbidden Sands
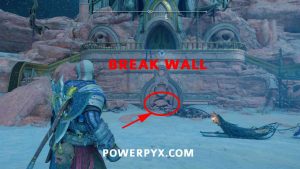
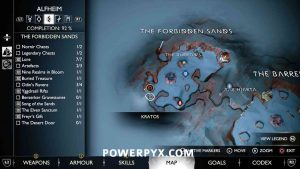
In the north of the area, below the entrance to Elven Sanctum, there’s a destructible wall that leads to the Nornir Chest (see image below). Once you’re in this hidden area you must first throw the axe at the purple crystal to make it fly through the 3 glowing red sacks. Then light 3 braziers. #1 is on the left, shoot a purple arrow at the campfire next to it. #2 is on the right, look down. There’s a campfire near it, place purple arrows between the brazier and campfire (can shoot up to 3 arrows in 1 spot to increase effect radius), then hit the campfire with a purple arrow to cause an explosion, the fire will cause a chain reaction that will light the brazier. #3 is also on the right, look up and shoot a green arrow at the movable wall, it will open briefly when shot. Plant 2 x triple purple arrows between the 2nd and 3rd brazier. Then shoot the 2nd brazier with a purple arrow to cause an explosion and have the fire jump over to the 3rd brazier. The moveable door in front of the 3rd brazier should be kept open, so you may need to shoot another green arrow at it if it closes.
#21 – The Forbidden Sands
In the south-west of the region, lift the rock to find the Nornir Chest. You must light 3 braziers with your Chaos Blades  +
+  to open the chest. #1 is to the right of the chest itself. #2 is across from the chest on the rock, place 3 purple arrows and attack one with Chaos Blades to cause a chain reaction (you can shoot 3 arrows at the same spot to make the reaction circle bigger). #3 is below what looks like a big rock bridge, again string 3 purple arrows together to cause a chain reaction, must shoot 3 arrows at same spot (9 arrows total) to reach far enough.
Vanaheim
#22 – The Southern Wilds
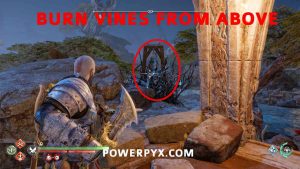
Keep following the linear path and you will reach the Nornir Chest, in plain sight in the middle of the main path, can’t miss it. You must turn 3 symbols by throwing the axe at them. The first is above the chest to the left. The second is to the right of the chest, must first burn the vines with your Chaos Blades (  +
+  ). The third is across from the chest, must burn the vines hanging down the ledge, the fire will spread, then you can throw the axe to turn the symbol. When you’ve turned the symbols to the correct ones, you will see that symbol’s light go out on the Nornir Chest itself. Then the chest can be opened.
#23 – Eastern Barri Woods
Keep following the linear path to find a small set of stairs leading to a Lore Scroll, keep going up the path behind the Lore for the Nornir Chest. You must spin 3 symbols by throwing your axe. The first is on the left of the stairs before the chest, burn the vines with Blades of Chaos. The second is behind the chest on the left. The third is to the left of the chest at the end of the path.
#24 – The Abandoned Village
At the Crane where you must use the Blades of Chaos to swing a burning keg around. Throw the axe to turn the crane, pull the burning brazier on it with your Chaos Blades, swing it into the two Nornir braziers to light them up. Then the third Nornir brazier is down by the river, with the Nornir chest next to it. After all 3 braziers are lit it can be opened.
#25 – Cliffside Ruins
After docking your boat at Cliffside Ruins, you can find the Nornir Chest on the right. You must turn 3 symbols to match the ones shown on the chest. #1 is on the right, burn the vines by placing purple runic arrows and then use your Chaos Blades on them to cause a chain reaction. You can shoot up to 3 arrows at one spot to increase the radius (place 9 runic arrows total, 3 spots x 3 arrows each). #2 is found to the left of the Chest but you must climb up the wall and jump across the platforms to see it from above. #3 can be seen from the blacksmith, must get back in your boat and row it there.
#26 – The Veiled Passage
To reach this area, it’s highly recommended you follow The Cliffside Ruins Collectible Guide first, which will automatically open up the path to The Veiled Passage. Then you can row your boat there. The Nornir Chest is at the first beach on the right. Grab a grenade from the vase, on the wall across are red vines blocking one of the Nornir Seals, shoot 1 runic purple arrow at it and toss a grenade to blow up the vines. Now place 3 purple runic arrows on the wall between the Nornir seals, throw the grenade to cause a chain reaction to hit all at once. The chest itself is behind the golden ore, can throw another grenade to blow that up.
#27 – Goddess Falls
From the beach climb all the way up, the Nornir Chest is there at the upper waterfalls, at the entrance to Vanir Shrine. You must light 3 braziers by placing purple runic arrows and causing chain reactions with the Chaos Blades. Remember you can shoot up to 3 arrows at the same spot to create a bigger radius of effect, this is necessary here (can have 3 active purple runes with 3 arrows each = 9 arrows total for maximum radius). #1 is in the left corner of the area when facing the Nornir Chest, place purple arrows on the wall and attack with Chaos Blades to cast fire. #2 is on the waterfall in the center of the area, must place 2 x 3 purple arrows from the rock below to the rock with the brazier, attack the rock below the brazier. #3 is to the right of the chest, must place 2 x 3 purple arrows on the rocks in the water and attack with Chaos Blades.
#28 – The Jungle
After making the water flow again in The Jungle, row the boat to the island with a Mystic Gateway. Climb up the ledge, burn the vines on the ceiling (place 3 purple runic arrows and burn them with blades of chaos). Then you can jump to a Legendary Chest and circle back to where the Mystic Gateway was. There are 3 Nornir glyphs you must hit with your axe until they show the correct symbol. The first is above the Celestial Altar, can be seen on your way back from the Legendary Chest. The second is behind the Celestial Altar, must burn the red vines in front of it. #3 is to the right of the Nornir Chest.
#29 – The Sinkholes
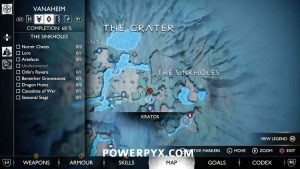
After sliding down the long rope to enter the area (coming from “The Crater” region). You must light 3 braziers. #1 is to the right of the chest. #2 is left of the chest. #3 is above the chest, must climb to the ledge above. You must place purple runic arrows and attack those with your Chaos Blades to cause a chain reaction that lights the braziers.
#30 – The Sinkholes
At the end of the area where you fight the big flying dragon (main objective in this region). Explode your spear on the 3 Nornir Totems simutalenously. #1 is to the left of where you climbed up, at the cliffside. #2 is on a pillar to the right of where you climbed up. #3 is to the left of the Nornir Chest.
#31 – The Plains
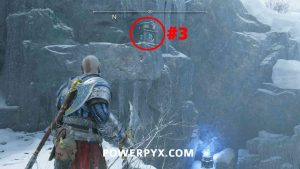
In the north-west corner of The Plains there’s a locked gate with poison behind. Shoot a purple runic arrow 3 times at the gate, then throw axe to freeze the poison and lift the gate, the chest is behind it. You must destroy 3 Nornir totems. #1 is to the right of the chest in a tree. #2 is left of the chest on a hill. #3 is behind the chest in a tree, must throw axe at the poison totem to go there.
#32 – The Plains
Where animals are trapped under purple glowing glyphs. There’s a Nornir Chest here. You must hit 3 bells quickly before their lights turn on again. #1 & #2 are directly right and left of the chest, can be seen while standing in front of the chest. #3 is to the left of the chest, hidden behind the rock, but it has vines around it that you must burn first. Climb up to the Mystic Gateway, where an Yggdrasil Rift is, from there you can use the Chaos Blades to burn the vines. Then climb back down and throw the axe at them in the order #1 > #2 > #3, if you’re quick enough the chest will open.
Muspelheim
#33 – Burning Cliffs
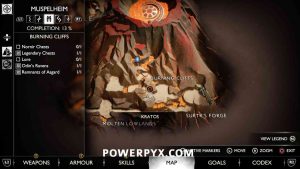
From the Mystic Gateway follow the linear path until you squeeze through a wall, then turn left and climb along the wall. After walking a little bit downhill (before Remnants of Asgard encounter), there’s a yellow-glowing rock on the right. Throw the spear at it to blow it up. Behind it is the chest. You must light 3 braziers on fire to open the chest by using the Chaos Blades with  +
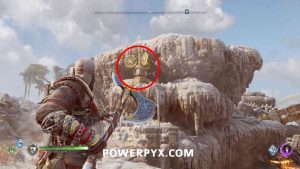
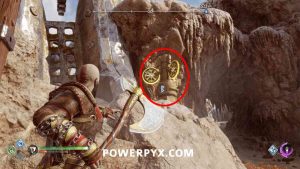
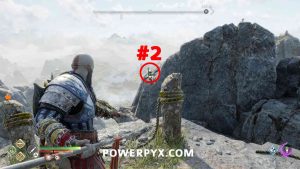
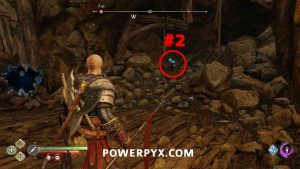
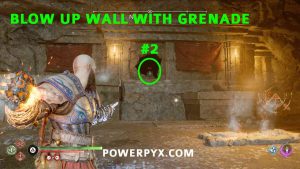
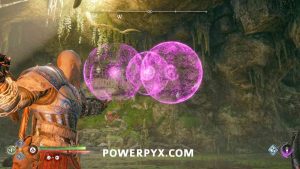
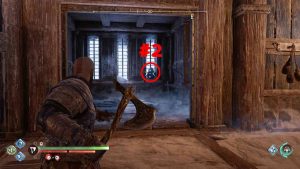
+  and also placing purple arrows for chain reactions. The first is behind the chest, get close to it and use Chaos Blades on it. The 2nd and 3rd are across from the chest. You must first light the left of the two (see image before labeled #2). To do so, go back to where you blew up the yellow-glowing rock with Spear, plant 3 purple arrows on the walls, place one of them close enough that you can light it with the Chaos Blades, thus causing a chain reaction that lights the left brazier. Remember you can (and should) shoot up to 3 purple arrows at the same point to grow the radius of the chain reaction. So in total use 9 arrows, shoot 3 at each spot for them to cover a much bigger radius, this makes it easier for your fire to jump over to the brazier. The third brazier is the on to the right, for it go back to the Nornir Chest. Turn around from the chest to see Brazier #2 and #3. You must place purple arrows between the 2nd and 3rd brazier, then shoot an arrow into the 2nd brazier that you already lit up. If you hit the fire in the brazier it will create a little explosion and your purple arrows cause a chain reaction that carries the fire over to the 3rd brazier (see image labeled with #3 below). Afterward you can open the chest.
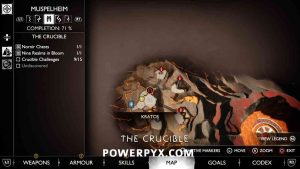
#34 – The Crucible
This is unlocked after completing the first 6 Crucible Challenges.
Helheim
- No Nornir Chests in this Realm
Niflheim
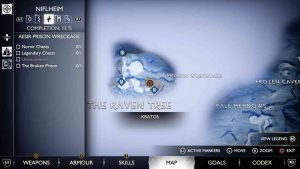
#35 – Aesir Prison Wreckage
First, you must have finished the story. After the story, a new path to the left of the Raven Tree opens up. Follow this path to reach the prison (can’t be reached from Mist Fields region, only through Raven Tree). The Nornir Chest is one floor down from the top, behind a grate. It can be accessed from the floor below, by going into the corner-cell and breaking through the wall above. You must destroy 3 totems to open it. #1 is in front of the chest. #2 is one floor down, in a prison cell (lift the gate and kill enemy inside). #3 is on the bottom floor in the middle where some frozen rubble is (where you can’t walk). Return to the chest afterward.
Jotunheim
- No Nornir Chests in this Realm
That’s all of the Nornir Chests in God of War Ragnarok.
For more Collectible Categories see » God of War Ragnarok Collectible Guide.




















































bellerophon says
Thank you for your hard work! This game is huge, cant plat without guide.