Chapter 4: Dawn of a New Era is the 4th story mission in Final Fantasy 7 (VII) Rebirth. This walkthrough will guide you through all objectives of the Dawn of a New EraMain Mission.
Area: Junon
Objectives:
- The Fortress
- Under a Steel Sky
- Fact-Finding
- Turning In
- Trouble Brewing
- Washed Ashore
- Twilight in a Sunless Town
- Respite
- A Stranger’s Voice
- Well-Earned Rest
- Friends Together Again
- Priscilla’s Plan
- Ready to Fly
- Dolphin Show
- The Shiplift
- Linking Up
- Infiltration
- In Search of Lost Robes
- Fatigues
- Out of the Civvies
- Hello, Old Friend
- Rain on His Parade
- The Seventh Infantry
- No “I” in “Team”
- Time to Pay, Shinra
- Ninja Ops
- Hue and Cry
- Junon Harbor
- Friends Await
- The Back Door
The Fortress
At the start of the Chapter, you are in the Junon open-world area. If you want you are able to go exploring the area, such as the Chocobo Ranch that is just off to the left on your way to the objective, but you unlock a number of side quests later in the Chapter so if you want to save time backtracking you can wait a bit until you start exploring.
When you are ready to progress make your way toward the marked location near the large cliff.
Under a Steel Sky
After reaching the marked spot, head along the path around the cliff to reach the village of Under Junon.
Fact-Finding
After entering the village, you need to take a look around. You can visit the nearby stores and interact with your friends, though there aren’t any relationship interactions here.
Turning In
After a short period, you’ll be prompted to head to the Inn when you’re ready. Go over and speak with the innkeeper to continue.
Trouble Brewing
After speaking with the innkeeper you’ll be prompted to go back outside by a girl yelling for help. Follow her down to water level.
Boss: Terror of the Deep
- Weaknesses / Status Ailments: Lightning
- Lesser Resistances: Fire, Stop, Petrify
- Greater Resistances: Ice
- Immunities: Proportional Damage, Berserk, Slow, Silence, Sleep, Stone, Morphable Items
- Absorbed Elements: —
- Items Dropped: —
- Rare Items Dropped: —
- Stealable Items: —
- Assess Info: Inflicting enough damage on its head while it is in the water will pressure it and cause it to take to the air. Attacking the Water Cells it creates will pop them.
It’s recommended to bring Aerith into this fight since at this stage of the game, with her high Magic stats she’s the only character who can reliably heal the entire party at once with high HP using the Pray Materia or her Healing Wind Limit. Furthermore, this fight is difficult in close quarters due to Terror’s attacks and speed so her ranged attacks help to chip away at its health while staying out of harm’s way. Finally, the boss likes to bind your character by trapping them in a Water Cell, which are resistant to physical attacks but weak to magic, so as Aerith’s regular attack is classed as magical, she can break them easily. Tifa is also handy to have in this fight. Although she will take damage, if you can keep her healed then her ability to build the Stagger bar quickly and raise the damage % during the Stagger phase is invaluable.
The only element worth using against Terror is Lightning, so use that and your stronger abilities on the Head area, which will cause it to Pressure quickly. He will also go into the air, making him easier to hit but you’ll have to be more vigilant about where he is. After a third of its health is gone, a short cutscene will play and then it will start building up an attack called Oceanic Tornado. When released, this will take up a large area in the middle of the square arena you’re on and will do huge damage, likely killing you. Make sure to stay far away whenever you see this move, and even when the main maelstrom is gone, there will be little tornados shooting up from the water below through the floor which you have to avoid.
Still, as long as you’re keeping on top of healing and making the most of the Stagger period and using your abilities, this should be fine. If Aerith doesn’t need to heal, create an Arcane Ward and use your strongest Lightning spells for double casts.
Hard Tips: You know the drill by now, use Elemental-Lightning in your weapons to exploit its weakness. It may be worth bringing either Barret or Aerith here due to their ranged attacks, but you can just use lightning spells instead if you prefer. Try and avoid using MP with Cloud as he will have another boss fight this chapter, but feel free to use everything for your other two characters. If he ever grabs a character, make sure to attack the Tail Fin as it can instantly kill the grabbed character if you don’t attack it.
Washed Ashore
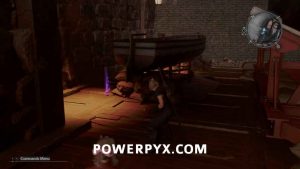
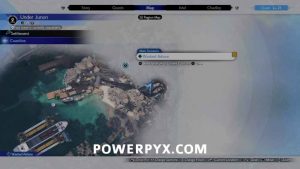
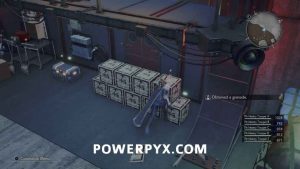
After the boss has been defeated, Cloud will be out in the water. Swim back to the marked location on the shore for a scene. After you are meant to head back up to the village, but before that you can move nearby to find an HP Up Materia.
Twilight in a Sunless Town
After meeting Yuffie, you have the opportunity to explore around again if you wish, but you should head back into the inn to turn in for the day as there is still some side content not available yet.
Respite
Everyone goes off to their own room to turn in for the night. In each of the doors along the hallway you can interact with the door, then speak with each character for a relationship interaction.
A Stranger’s Voice
As you walk by Aerith’s room there is a scene with her speaking to someone. Go near the door to listen, then you can interact after to go into her room. Make sure to interact with the door again after so you can speak to her, and then you can also find a purple chest containing the Empress’s Scepter weapon for Aerith.
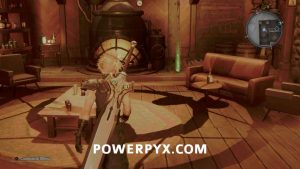
After interacting with each of the 3 characters downstairs you can head upstairs, where there is an automatic relationship interaction with Tifa. You can then go to the room at the very end of the hallway and find a Lightning Materia sitting beside a fireplace.
Well-Earned Rest
After you’ve spoken with everyone you can interact with the marked room, and then the bed to turn in.
Friends Together Again
The next morning, head back downstairs to meet a familiar face from Remake.
Priscilla’s Plan
You girl you rescued earlier has a plan to get everyone up to Junon, which will progress the story but lock you out of all of the side content here for the time being. You have some new quests available in Under Junon now, so if you want to do the side activities for the region now is the best time, as it is now all available.
Junon: Side Activities Cleanup
Note: remember to use Assess Materia on all enemies you encounter, keep doing this in all regions going forward. You need to assess a certain number of enemies to unlock Chadley’s VR Missions.
24 World Intel:
- Junon World Intel Locations – grab all 24 World Intel
5 Side Quests:
- Side Quest: Stuck in a Rut – started at Gabe’s Ranch (unlocks Chocobo, Chocobo Carriage fast travel between regions)

- Side Quest: When Words Won’t Do – started in Under Junon, available after finishing story objectives at the Inn.

- Side Quest: The Hardest Sell – started at Crow’s Nest (CAS Base Camp)

- Side Quest: Dreaming of Blue Skies – started at Crow’s Nest (CAS Base Camp). Go up the wooden ramp in the west of Crow’s Nest to go up a hill, there you find the quest giver (or accept it from the notice board at Crow’s Nest).
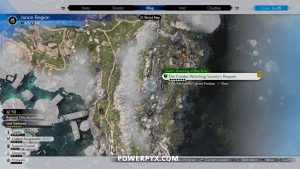
- Side Quest: Calling All Frogs – started in Under Junon, in the lower section where the beach/harbor is. Walk to the end of the beach to find an area with a pink mist, there the quest starts (or read the letter on the notice board at the town square).

Queen’s Blood:
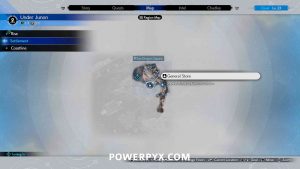
- Queen’s Blood Booster Pack: Weird & Wicked (019 Crawler, 020 Archdragon, 026 Capparwire) – purchasable at Under Junon General Store for 500 gil (contains 3 cards).
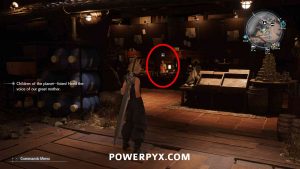
- Queen’s Blood Card: 021 Ogre – Won from The Moore Twins upstairs in the house in Under Junon, must beat both twins.
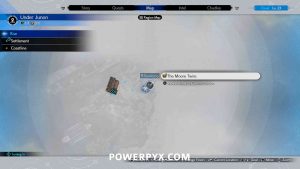
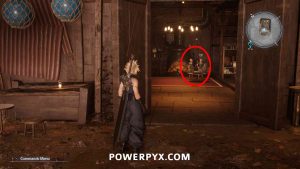
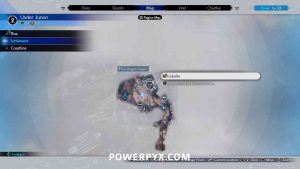
- Queen’s Blood Card: 096 Shiva – Won from Isabelle outside the bar in Under Junon.
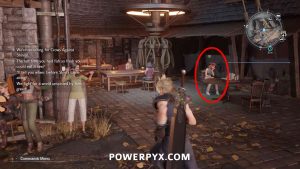
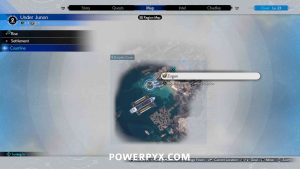
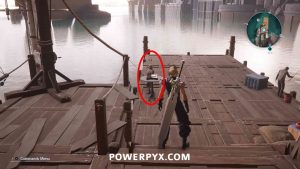
- Queen’s Blood Card: 024 Zemzelett – Won from Zoganon at the dock of the lower section in Under Junon. From the town square go down the stairs, then turn right to find him at the docks.
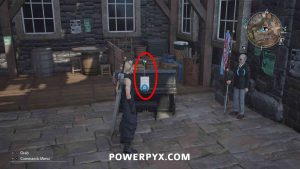
- Queen’s Blood Booster Pack: Shut Up ‘n’ Drive (022 Deathwheel, 025 Ignilisk, 028 Scrutineye, 029 Hell Rider II) – purchasable at Crow’s Nest Vending Machine for 500 gil (contains 4 cards).

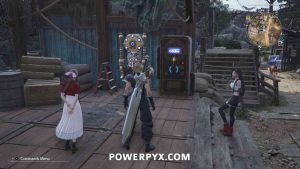
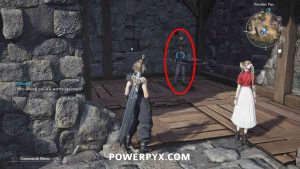
- Queen’s Blood Card: 030 Flametrooper – Won from Neil right next to the Vending Machine/Rest Spot in Crow’s Nest (available after finishing main objectives at the Inn).

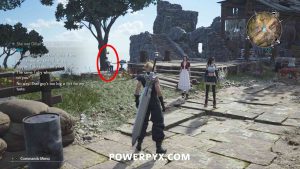
- Queen’s Blood Card: 027 Mindflayer – Won from Michaela on a platform in the southwest of Crow’s Nest (available after finishing main objectives at the Inn).

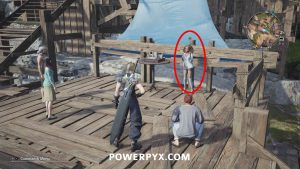
- Queen’s Blood Card: 113 Midgardsormr – Won from Cameron in a stone building in the southeast of Crow’s Nest. Must reach Queen’s Blood Rank 3 before you are able to challenge him.

Piano Song:
- Sheet Music: On Our Way – Location: Crow’s Nest – On the piano inside the Base Camp Building in Crow’s Nest. For the trophy
 Piano Virtuoso, you must at least reach A-Rank on every Piano Sheet Music (there are 6 total throughout the game).

When you are ready to continue, head back down to the water level where Priscilla is waiting on a dock.
Ready to Fly
You’re going to get help from the dolphin to reach the ship crane. You’ll be prompted before continuing, as this is the point where you’re locked into the story once you agree. Jump in the water and then swim to the dolphin when you’re ready to start.
Dolphin Show / Minigame: Dolphin Thing
This triggers a minigame, you control a dolphin and must reach the end of the race within the time limit. Swim into the balls to speed up, avoid hitting any obstacles as those slow you down. It’s best to avoid braking as this slows you down dramatically.
The Shiplift
After successfully launching to the lift, enter the room and interact with the controls. First, hold  to drop the ship for your friends to get on, then when prompted hold
  to raise it back up.
Linking Up
After the next scenes, follow the linear path through the hallways to meet back up with the rest of your party.
Infiltration
Keep following the linear path through the aerodrome until you reach the upper level.
In Search of Lost Robes
Keep following the linear path through the area, you aren’t able to do any exploring outside the path here so just keep following where you are directed, using both elevators to progress.
Fatigues
After going down the second elevator the group will split up, with Barret and Red going off on their own. Following Aerith into the room nearby.
Out of the Civvies
Hello, Old Friend
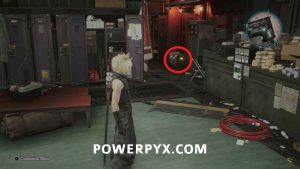
You need to swap into a soldier outfit to continue. Before grabbing the marked box, there is a chest to their left in the same room containing a Survival Vest accessory.
Rain on His Parade
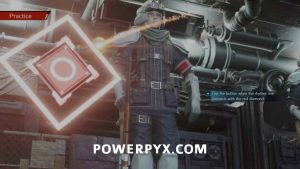
After changing, head back out of the room where you will automatically be stopped and commissioned into performing in the Junon Parade. The performance works the same as the Honeybee Inn rhythm minigame from Remake, with this first small section allowing you to practice each of the commands before continuing.
The Seventh Infantry
Now before the parade, you are required to find units from the Seventh Infantry for the performance.
No “I” in “Team”
To progress you need to find at least 5 out of 10 of the units, but for the trophy  7th, Assemble! you are required to find all 10.
Seventh Infantry Locations
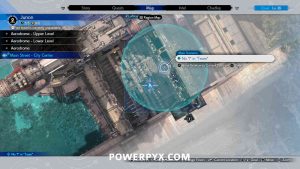
- 7th Infantry 1 – After you go outside to Larboard Junon, from where you start go left up onto the platform and go forward to find this infantry.
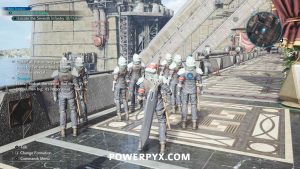
- 7th Infantry 2 – From the starting spot, follow the right side of the street and there’ll be infantry posing for a photo with a cardboard cutout of Rufus. Make sure you take a good picture (green outline) to also get the Collector’s Item.

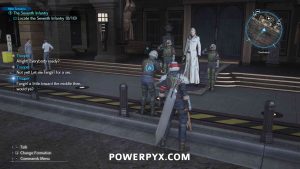
- Collector’s Item: Rufus Shinra Cutout – obtained at the same time as 7th Infantry 2 if taking a good picture (green outline).
- 7th Infantry 3 – Inside The Full Arsenal, the weapon shop (right side of street).
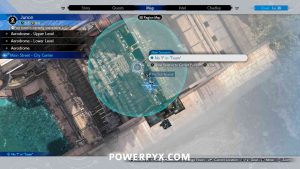
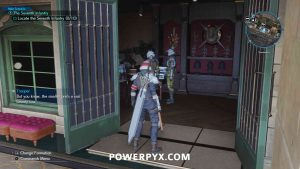
- 7th Infantry 4 – Inside The Glabrescent, the bar directly behind the weapon shop (exit weapon shop through backdoor and go straight across the alley).
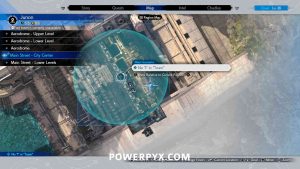
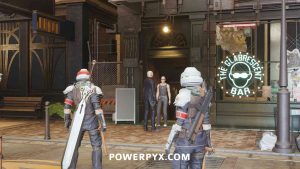
- 7th Infantry 5 – Inside Cecilia’s of Junon, the item/materia shop.
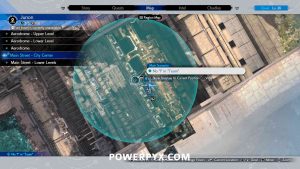
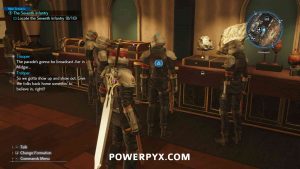
- 7th Infantry 6 – Inside Folios (Maghnata Books store), on the 3rd floor.
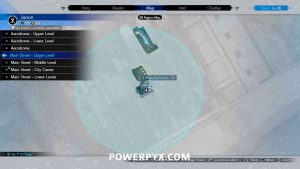
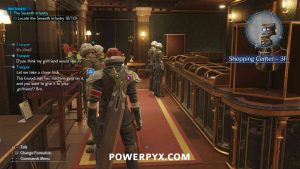
- 7th Infantry 7 – Inside Barracks – Assembly Room, upstairs (middle floor).
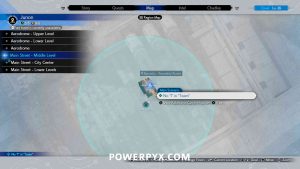
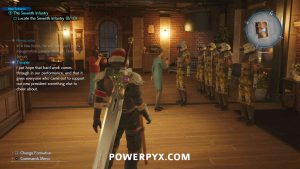
- 7th Infantry 8 – Inside Barracks – Briefing Room, one floor further up (top floor).
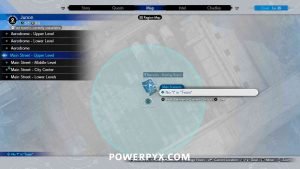
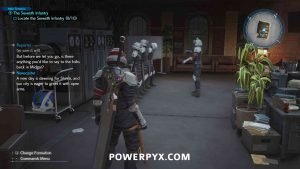
- 7th Infantry 9 – Inside Le Sourire, the bar upstairs in the northeast (last building on the right).
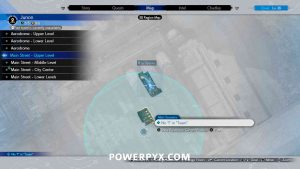
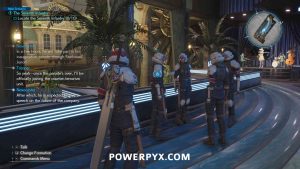
- 7th Infantry 10 – Inside Larboard Garrison – Storeroom, the last building on the left and downstairs.
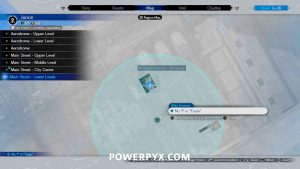
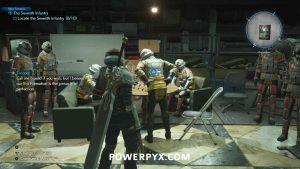
When you are ready to progress, make your way to the end of the road where you can speak with the Commander. Make sure you’ve made a save before continuing, as you need to reach a minimum score requirement in the performance ahead for the trophy  Stealing the Show.
Minigame: Junon Parade
During the Junon Parade you will need to get an “outstanding performance”, you need to score over 100,000 points total to unlock the trophy. Performing higher difficulty formations gives more points, so don’t pick the easiest 1-star formations. After assembling all 10 infantries, make a manual save, then advance to the quest marker. Before the parade you can adjust your infantry formation. You’ll want to use a formation that gives you the difficulties 3-star > 3-star > 3-star. For example, this formation works: Grenadiers > Grenadiers > Flametroopers > Riot Troopers > Riot Troopers (this gives you 3 x 3-star difficulty + 2 formation bonuses). When ready start the Parade.
You will need to hit almost everything with a “Great” rating, press the indicated button when the outline reaches the middle of the button. If things go very poorly you can immediately pause and retry but this will restart all 3 formations from the start. Hit all buttons correctly and you’ll earn over 100,000 score and unlock the trophy. My scores were 25/25 Great (19621 Likes) > 26/26 Great (48116 Likes) > 33/38 Great, 5 Bad (101,498 Likes). If done correctly the trophy will unlock after the cutscene. If it doesn’t unlock, reload the manual save and retry. 101,498 Likes is the maximum achievable. By doing the 3-star difficulty formations you get more button presses, which allows you to get away with some mistakes and still reach the highscore.
Time to Pay, Shinra
Ninja Ops
After the performance is complete, you will switch to playing as Yuffie for a short section. Follow the linear climbing path to the top where you will then have a short aiming minigame. You need to move the cursor so that it is aimed at the circle on Rufus, then hit  when the shrinking and growing portion is within the circle on Rufus. Repeat this successfully 3 times to continue.
Hue and Cry
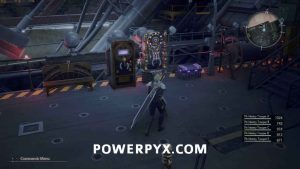
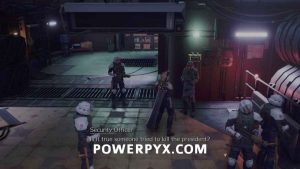
After some scenes, you’ll be playing as Cloud by himself assisted by a number of 7th Infantry Troopers. For this section, the troopers are treated like normal party members that you can use healing magic or items on if you want to keep them alive. Before continuing further make sure to use the rest spot if needed, and grab the purple chest directly to the right which contains the Ruin Blade weapon for Cloud.
SEMI-MISSABLE ITEMS: For Accessory: Speed Demon Keychain & Collector’s Item: Stuffed Stamp, you must finish the rest of this chapter without letting any of the Shinra Troopers die. Make frequent manual saves and defend them. Lower the difficulty to easy in the game settings if you’re playing on normal. If one dies you must reload the save. If all survive you will unlock these items after Chapter 4’s endboss. If missed, can still get it via Chapter Select or during the Hard playthrough (hence not fully missable).
Head down the stairs and start making your way toward the objective. Along the way you will be mostly attacked by various Shinra troops. All human Shinra troopers are weak to fire, but can also typically be taken out with quickly using Cloud’s ATB attacks. Triple Slash is useful for most groups as it does more damage when it hits multiple enemies, and since there are always more three Shinra enemies in each group it helps clean them up quickly.
After dealing with the first group make your way down the stairs to the next area. On your way, you can interact with the friendly officer in the next room who will give you a Mist Hi-potion just for speaking with him.
Progress into the dining hall to fight another group of enemies, then continue out to the next area. After the next flight of stairs, you can spot a chest that contains a Revival Earrings accessory.
In the next area, you’ll fight another set of Shinra troops, though this time with new Riot and Flamethrower variants. All are still weak to fire, but can still be dealt with by using Triple Slash. In the next room, you need to interact with the elevator on the left to continue, but first you can interact with another friendly Shinra trooper to the right who will give you 2 x Hi-potions.
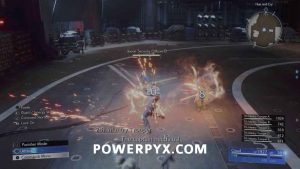
In the next large room, you will fight a new enemy, the J-Unit Sweeper. These are much stronger than any of the soldiers, so you should focus primarily on them and ignore the two soldiers on the upper level as they don’t do a lot. The Sweeper is weak to Lightning, which is the best way to quickly pressure and stagger it. Once staggered hit it quickly with Braver to do as much damage as possible. If you don’t defeat it in one stagger it will likely go into the permanent pressure state, where you can use Focused Thrust to quickly deal stagger it again.
After the Sweeper is dealt with you can deal with the two troopers above using ranged attacks, or let the 7th Infantry clean them up. Once those are dealt with another Sweeper and pair of soldiers will spawn, which you can deal with in the same way. Once all the enemies are gone interact with the elevator to go down to the next level. Here you will have another new enemy, the Deathwheel. This robot is weak to Fire, Ice, and Wind, so you can hit it with whichever elemental type you have to pressure it, then attack it from behind to stagger.
Once the Deathwheel is dealt with, head to the end of the room where there is a rest point. Make sure you’re rested before interacting with the door ahead.
Boss: Roche
- Weaknesses / Status Ailments: Fire
- Lesser Resistances:
- Greater Resistances:
- Immunities: Proportional Damage, Stone, Morphable Items
- Absorbed Elements: —
- Items Dropped: Elixir
- Rare Items Dropped: —
- Stealable Items: Elixir
- Assess Info: Exploiting his elemental weakness can pressure him. If Roche is pressured while riding the walls, he will drop to the ground and counterattack. Inflicting enough damage while he is pressured will cause him to spin out.
For all his talk, Roche is actually the easiest boss yet. Firstly, you only control Cloud for this one-on-one fight so you don’t have to faff around and manage other characters, and secondly his low HP reflects the fact you only have one outlet of attack.
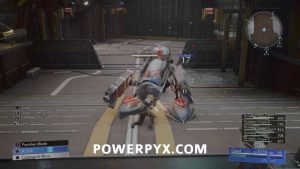
What makes this fight easy is how easily Roche is pressured. One Fire spell or fire-imbued ability is enough to pressure him, as is parrying his attacks. As the arena is fairly large and he’s on his motorcycle, it’s easy to see when he’ll turn towards you and drive straight at you. Guard with  just as he’s about to hit you and he’ll be pressured, allowing you to quickly build his Stagger bar. If you pressure him whilst he’s riding the wall, he’ll launch into the air and crash down for an AoE attack at your location, so roll out of the way with
  . His health will go down quickly and at half health he will be a little more aggressive, but it’s still very easy to pressure him, and when he’s finally Staggered you’ll whittle away most of his health by using your strongest abilities or Punisher Mode. You can even use a summon for extra help if you like, but you shouldn’t need it.
Hard Tips: On Hard, he will occasionally cast Reflect on himself, but this shouldn’t be an issue as it doesn’t last long. Use Elemental-Fire on your weapon and Elemental-Lightning in your armour. Abuse Counterstance to parry his attacks, or use regular Punisher Mode parries when you don’t have ATB. When his Reflect is down, poison him to get some extra damage on him, or launch a Fire spell when he’s on the walls.
If all your 7th Infantry Troopers survived, then after beating Roche you will unlock: “Accessory: Speed Demon Keychain” & “Collector’s Item: Stuffed Stamp” (one of Johnny’s Treasure Trove items).
Junon Harbor
After Roche is defeated, head through the next room. There are a bunch of boxes in here you can destroy which drop lots of materials and consumables, along with 3 chests containing 3,000 Gil, 2 x Phoenix Down, and ,3 x Armor-Piercing Grenades so make sure to clean up the room before continuing.
When you’re ready to continue, head out onto the large elevator and interact to head to the lower level.
Friends Await
On the lower level make your way toward the ship where your friends are waiting.
The Back Door
Head toward the now-open path on the rear of the ship for a scene with the captain to complete the chapter.
This finishes Chapter 4: Dawn of a New Era in Final Fantasy VII Rebirth.
Next Up: Chapter 5: Blood in the Water
For all other Mission Walkthroughs, check out our complete Final Fantasy 7 (VII) Rebirth Walkthrough.












Sohgin says
The Rufus Shinra cutout can only be obtained if you get a 100% picture.
Panda says
In Washed Ashore section, by the HP Up Materia, go around and behind the boats there is a chest. I think it was for an ether.