Chapter 12: A Golden Key is the 12th story mission in Final Fantasy 7 (VII) Rebirth. This walkthrough will guide you through all objectives of the A Golden Key Main Mission.
Area: The Golden Saucer
Objectives:
- Full Speed Ahead
- The Keystone’s Whereabouts
- Find Dio
- Red XIII’s Information
- Cid’s Information
- Barret’s Information
- Vincent’s Information
- Yuffie’s Information
- Tifa’s Information
- Aerith’s Inkling
- Prepare for Tomorrow
- Interlude: Episode 6
- Tending to the Sick
- A Cure for Cloud
- A Visitor, Come Again
- Loveless
- Private Moment
- The Fight for Naming Rights
- Interlopers
- Catch Your Breath
- Cait Burglar
- Scaredy Cat
- Cat and Mouse
- Hightailing It
- Tracking the Turks
Full Speed Ahead
From the start of the chapter, you’ll be piloting the new aquatic Tiny Bronco through the river. Follow the path until you reach Costa del Sol.
The Keystone’s Whereabouts
After landing, you will be prompted about a bunch of new side activities that are available throughout the game world. Now is where you will have all possible activities available to you, so if you want to clean up all side content before finishing the game you can do so now, though note you will be locked into the Gold Saucer for a bit if you go there. If you want to finish the story, Chapter selecting back to this point after is the best place to clean everything up.
When you are ready to continue the story, you can fast travel directly to the Gold Saucer at any time.
Find Dio
When you arrive at the Saucer, you’ll be stuck there for a bit before you can do other activities again. You first need to find where Dio is, and can interact with your friends spread throughout the areas of the resort. On repeat playthroughs to save time you can skip straight to Aerith where the actual objective is.
Red XIII’s Information
You can find Red by the central Kiosk in Chocobo Square.
Cid’s Information
You can find Cid near the door leading to Galactic Saviors in Speed Square.
Barret’s Information
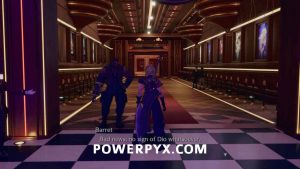
You can find Barret near the hallway leading to the theater in Event Square.
Vincent’s Information
You can find Vincent standing beside the stairs in the hotel in Ghost Square.
Yuffie’s Information
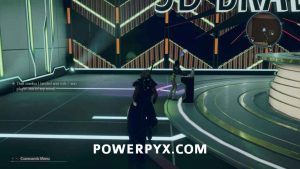
You can find Yuffie at the 3D Brawler minigame in Wonderment Square. She also has a relationship interaction related to beating her in 3D Brawler here.
Tifa’s Information
You can find Tifa standing in the middle of the entryway to Skywheel Square.
Aerith’s Inkling
Finally, you can find Aerith standing at the entrance to Battle Square. Speak with her, then follow her into the arena to speak with Dio.
Prepare for Tomorrow
You will be participating in the fight for the Golden Saucer naming in Dio’s place and can head back to the hotel to rest. This is the last opportunity you have to affect your relationship levels with party members, as the next scene that occurs will be different (the first time) based on who has the highest relationship level. You can leave the Saucer again to complete other activities as well if you want. When you are ready to continue, interact with the front desk at the hotel and choose to rest until tomorrow.
Interlude: Episode 6
Tending to the Sick
Now for a short scene with Zack, head upstairs in the house.
A Cure for Cloud
Once outside, follow the path back out toward the Sector 5 Slums.
A Visitor, Come Again
After waking as Cloud, head over and open the door to the room. In the next scene, you will be accompanied by one of your party members, with the one appearing dependent on who you had the highest relationship level with. Make a Manual Save before entering the Theater!
Loveless
With your date companion, head over to Event Square where the performance of Loveless is taking place. Getting S-Rank in Loveless unlocks trophy  Critically Acclaimed.
To get an S-Rank you must press the buttons as they appear on screen. You are allowed to make quite a lot of mistakes here and will still earn S rank. I chose the left prison cell door (9 Great, 6 Good, 2 Bad) > The Hellhound Garm (9 Great, 6 Good, 2 Bad) > Your Future with Rosa (14 Great, 6 Good, 3 Bad) > Rosa (16 Great, 6 Good, 2 Bad) = Final Result “S”.
Which girl will be Rosa will depend on who you got as your date in Chapter 12 (who you have the highest relationship with). The male characters will always be present. For the S-Rank it doesn’t matter which girl is Rosa. You will have to do Loveless a minimum of 3 times anyway, once with each girl for Johnny’s Treasure Trove items (via Chapter Select after story). This minigame isn’t available outside of this particular story event. Keep a Manual Save when the main objective turns to “Loveless” before entering the Theater, then you can retry immediately. Alternatively, you can do it via Chapter Select after the story.
Private Moment
After the performance is complete, go with your companion over to Skywheel Square for a ride to complete the date.
The Fight for Naming Rights
The next day, you can get prepared for the fights ahead. Your party will be Cloud, whoever you had a date with the night before and a third member of your choosing, so head in and use the rest point and prepare your team, then interact with the Colosseum receptionist to start the fights.
The next section is a long series of normal enemy fights, followed by a string of boss fights. You will have the opportunity to rest in between them about halfway through and receive a healing bonus between rounds, so they aren’t entirely all in a row with no rest.
The first round is against a group of Corneo Lackeys, who like most human enemies will be weak to Fire and should go down quickly.
The second ground is against a group of 3 Cacneo enemies, basically the same as the Cactuar you may have fought early in Chapter 8 with just Cloud. They run around quickly avoiding your attacks, and the best time to attack them is when they stop moving to attack you when you should try to launch ATB commands at them to deal the most damage.
The final round of normal enemies is against 2 Tonberry and a unique Donberry enemy. If you haven’t fought Tonberry earlier in the game then the main thing to be aware of is they all have a one-hit kill attack called Chef’s Knife. This is a very short-range melee attack they will use when you attack them close range with melee attack, and if they hit you it will instantly knock out the character hit by it. If you can bait and avoid Chef’s Knife though it will pressure the Tonberrys, making them quick to take out. Focus the two normal ones first if possible, then you can have an easier time avoiding the Donberry who also has a bunch of slow-moving magic attacks that are easier to deal with without the small enemies.
Boss Fight: Abzu & Don Corneo
- Weaknesses / Status Ailments: Fire
- Lesser Resistances: Ice, Stop
- Greater Resistances:
- Immunities: Proportional Damage, Slow, Poison, Silence, Petrify, Stone, Morphable Items
- Absorbed Elements: —
- Items Dropped: —
- Rare Items Dropped: —
- Stealable Items: —
- Assess Info: Inflicting enough fire damage will light them on fire and pressure them. When their HP falls below half, they will begin evading fire spells and Corneo will douse any flames. They will crash into the wall if Ferocious Charge misses, pressuing them and causing Corneo to faint.
Abzu is weak to Fire, so load your three characters with Fire Materia, equip Elemental-Fire on Cloud and make sure one character can summon Phoenix or Ifrit. You can also use your Fire-elemental abilities like Yuffie’s Fire Ninjutsu if you pick her for your party. The tried and tested method works well here; Cloud as the main damage dealer while your other characters (Tifa is recommended) buld stagger or heal. Despite Don Corneo riding Abzu, you can only target Abzu so there’s no need to worry about split targets. When pressured, make the most of the chance to build stagger by using your ‘Focused’ abilities.
After he hits half health, Abzu will have Enrage cast on him and his attacks will do more damage but the strategy remains the same. Keep exploiting his weakness, use your Limit Breaks where possible and use your Fire-elemental summon abilities since the are free unlike Magic spells. most of his attacks involve him pounding the ground around him or jumping into the air and slamming down, so your best bet is to always dodge roll to the outside of the arena rather than try and block. This is particularly important during Ferocious Charge because if you avoid his charges, he will hit the wall and be stunned for a while leaving him open to attack.
Hard Tips: First of all, the team you use for this fight will be Cloud, your Skywheel date, and a third of your choice. If you want a particular person as your date for this fight, go to System > Extra Settings > Chapter 12 Companion to pick them (you must do this before resting at Ghost Square).
With your team decided, equip everyone with Elemental-Fire in their weapons. Avoid using MP with Cloud as he will have two more boss fights after this. If you have Tifa or Aerith, they will be in the next boss fight so be wary of your MP with them too. For the most part you will just want to dodge Abzu’s attacks and get in attacks when you can, the main thing you want to be aware of is his Upheaval attack. When you see this, get as far away as possible, as he will slam down and release a shockwave covering half the arena and dealing enough damage to instakill just about any character. If you have MP to spare or characters who aren’t in the upcoming fights, feel free to throw some Firagas at him to deal heavy damage and pressure him faster.
Interlopers
Catch Your Breath
After defeating Don Corneo, you’ll be challenged to a fight by Elana and Rude. You have the opportunity to rest here and get set up again if you need, then speak with Dio to start the fight.
Boss Fight: Elena & Rude
- Weaknesses / Status Ailments: Wind (Rude), Lightning (Elena)
- Lesser Resistances: Petrify (Rude), None (Elena)
- Greater Resistances: Stop, Sleep (Both)
- Immunities: Proportional Damage, Slow, Silence, Stone, Morphable Items (Both)
- Absorbed Elements: —
- Items Dropped: Mega-Potion (Rude)
- Rare Items Dropped: —
- Stealable Items: Mega-Potion (Rude)
- Assess Info: Hitting him with multiple powerful offensive abilities while his guard is up will pressure him. Interrupting his synergy strikes will also pressure him (Rude). Landing powerful offensive abilities or interrupting her Turks’ synergy strikes will pressure her. While she’s in Rogue Stance, striking her with two powerful abilities will pressure her (Elena).
This fight is tougher than the earlier one as the two, particularly Rude, are more aggressive and it’s hard to get hits in without being interrupted. Your best opportunity is when he used Shockwave and you can dodge roll behind him for a few hits. For Rude, use your Wind magic and abilities, and on Elena use Lightning. Use Aerith as your healer, creating a Ward and using Pray/Curaga to keep health topped up while your other party members (Cloud and Tifa are good) use their abilities and physical attacks.
The main thing to watch out for is when the two bosses lose roughly a third of their health and team up to start unleashing unblockable Synergy attacks. Save up your ATB charges for this (splitting your ATB into three by Synergy Abilities greatly helps here) and use your strongest abilities like Infinity End and Starshower to interrupt their attacks and pressure them. Also try to raise your Limit level and save them for when the bosses finally stagger, ideally at around the same time. If not, focus on Rude first as he is the most dangerous.
Hard Tips: Just like the previous Rude & Elena fight, you will have the same team and will want to adopt the same strategies. Equip one member with Elemental-Wind and Lightning on their weapon, then Elemental-Wind and Elemental-Lightning on the other members so they can all take advantage of Rude & Elena’s weaknesses. Whenever Elena uses her Rogue Stance, try to hit her with two offensive abilities quickly to pressure her.
The biggest threat is when they start preparing for their synergy ability, Turk Two-Step. If they manage to unleash this attack without either being interrupted, they will likely kill your entire party or bring them all to 1 HP if you have Reprieve active. Try and avoid the shockwaves and stun grenades that preempt this move as they will stun you, then unleash all your abilities on each of them to try to pressure them before they release their assault.
If you defeat one, the other will eventually revive them with about 20% HP with a Phoenix Down. Given they don’t do this immediately, it is still worth finishing one off so you can focus on the remaining Turk and whittle their health down as much as possible before the first is revived.
Boss Fight: Rufus
- Weaknesses / Status Ailments:
- Lesser Resistances:
- Greater Resistances: Posion, Sleep (Both Darkstar only)
- Immunities: Proportional Damage, Berserk, Slow, Stop, Poison, Silence, Sleep, Petrify, Stone, Morphable Items (Both except Poison and Slep for Darkstar)
- Absorbed Elements: —
- Items Dropped: —
- Rare Items Dropped: —
- Stealable Items: —
- Assess Info: Striking him while he is reloading or landing an ATB command after he attacks will pressure him. ATB commands will leave him open longer than basic attacks. Hitting him with certain attacks while he is reloading or after he attacks will stagger him instantly (Rufus). Inflicting enough damage or severing its link with Rufus will pressure it (Darkstar).
You’ll only have Cloud for this fight but if you played Remake this is almost exactly the same fight so you shouldn’t have any issues if you know what you’re doing. The first thing to note is that Darkstar won’t appear until Rufus is down to a third of his health.
Rufus is a little tricky to get used to if this is your first time fighting him, and the Assess blurb doesn’t give us much of a clue. Only using ‘a certain ability’ will Stagger him. Luckily, using powers of deduction, the only ability Cloud has had since the start that wouldn’t require any mastery of other abilities is Braver. Therefore, your aim should be to build ATB and use Braver whenever Rufus reloads or finishes using an ability. Never try to attack him physically unless he is Reloading or he will just counter attack you for significant damage.
Thankfully, hitting him with Braver at the right time will Stagger him instantly, and by this point you should also have a limit break so hit him with a Cross Slash to do huge damage, then maybe an Infinity’s End if you have the ATB for it.
When Darkstar appears, Rufus will use Heel which binds the dog to him. This connection acts as a shield and powers up their attacks so immediately make it a priority to cut this bond and defeat Darkstar first by using your stronger ATB abilities against it. Once he’s down, another Braver on Rufus and Stagger should finish the fight.
Hard Tips: Immediately after the Rude & Elena fight, make sure to hold  during the cutscene to be able to change Cloud’s materia, as this fight will start right after. Unfortunately these changes won’t be saved, so if you need to retry this fight at all you will need to make these changes every time. It is recommended that you have a non-MP method of healing alongside Curaga (like Prayer or Chakra), as well as ATB Boost and Haste to increase how often you get ATB. For your accessory, you can use either the Enhanced Expeditionary Medal to have a level 3 limit break, or the Corsair’s Compass to increase the ATB to 3 segments when using 5 types of commands.
This will probably be the most annoying fight on Hard so far, as it’s completely different to every other fight. You will need to play very defensively by blocking and dodging all of Rufus’ attacks until he reloads, then use an offensive ability on him to pressure him. You can stagger him instantly if you manage to land a Braver on him as he reloads, but in order to even hit this you need to anticipate when he will reload while also being close enough to him to land it, because if you even see the text “Reload” above his head, it is too late for Braver to hit him. Personally I found it easier to simply use Triple Slash whenever he reloads or after him doing a special attack and slowly stagger him this way, rather than trying to anticipate the reloads to get instant staggers with Braver.
At half health, his hound Darkstar will join in the fight. Deal with Darkstar as quickly as possible, as fighting both of them can be very overwhelming. The best way to pressure it is by blocking when it does Corkscrew, or just unleashing multiple offensive abilities on it (but don’t use Triple Slash for this as you’ll inadvertently attack Rufus who will simply counter you). With any luck you will have a full limit break ready after the first section that you can unleash on Darkstar as soon as he’s pressured to stagger him, then immediately follow up with Infinity’s End to just about kill it entirely.
Once Darkstar is defeated, it will be back to how it was at the start of the battle, so just continue using the same tactics you did initially to finish him off. Try and keep Haste up where you can, healing with Curaga if necessary, and resorting to Chakra/Prayer if you run out of MP or want to conserve it for Haste casts.
Cait Burglar
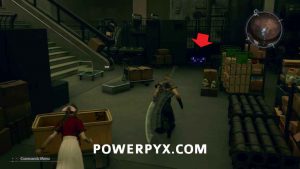
After the fights are over, you need to look for Cait Sith. In the arena lobby first go left near Tifa, which will cause Cait to run across the lobby into the gift shop. You can then interact with the spot on the souvenir shelf to cause him to run away again.
Scaredy Cat
Follow the path leading out of the arena back toward the central area of the park.
Cat and Mouse
Keep following Cait down the steps into the central park area. Here you’ll need to run around for a short period, then you can run up the steps near the Event Square entrance to find Vincent. This will cause Cait to run by again just by the stairs, where you can interact with him hiding with his Moogle.
Hightailing It
You can then follow Cait into the side area he’s knocked the barrier over going into. Follow the linear path to the end, but before going up the set of stairs leading back to the central area of the park you can find a purple chest that contains the Crystalline Cross weapon for Yuffie. You can then follow out to the main area to progress the story.
Tracking the Turks
Now when you’re ready, you can head back to the Tiny Bronco at Costa del Sol. When you are ready to continue, speak with Cid at the dock to complete the chapter. The start of Chapter 13 will be your last chance to clean up remaining side content, more on that in the next chapter.
This finishes Chapter 12: A Golden Key in Final Fantasy VII Rebirth.
Next Up: Chapter 13: Where Angels Fear to Tread
For all other Mission Walkthroughs, check out our complete Final Fantasy 7 (VII) Rebirth Walkthrough.














Dan says
Tip for hard mode Rufus if you have the Enemy Skill materia levelled enough to have “plasma discharge” unlocked and pair it with steadfast block levelled up and you managed to earn an ATB bar from blocking his attacks in close range the plasma blast will go off and pressure him
Nav says
I’m very late to this but I think it would be good to indicate that a side content cleanup will be completed at the start of the next chapter.
The way it’s written in the “The Keystone’s Whereabouts” section made me think that I needed to complete it all then.