
Absence of a Sign is a side quest in Final Fantasy 7 (VII) Rebirth. This walkthrough will guide you through all objectives of the Absence of a Sign Side Mission (Odd Job). It’s also known as Skywatcher’s Request. It requires you to visit three spots in Cosmo Canyon Region, defeating a strong fiend and taking a photograph of a celestial phenomenon in each.
Absence of a Sign becomes available after completing the story events in Cosmo Canyon in Chapter 10, when you get main objective “The Wild, Blue Yonder”.
Side Quest: Absence of a Sign
Chapter: 10
Area: Cosmo Canyon – Planetology Assembly
Quest Giver: Caesar
Requirement: Complete the story events in Cosmo Canyon in Chapter 10, when you get main objective “The Wild, Blue Yonder”. Then check the Noticeboard in Cosmo Canyon village.
Reward: Accessory: Tarot Cards, Aerith Relationship Strengthened, 10 Party EXP, Player EXP (scaled to your level)
Mission Info: Portents of calamitous ruin have been sighted in the vale of late – dreadful fiends whose very presence heralds doom. But all is not yet lost, for in times past we have observed celestial phenomena indicative of the great mother’s triumph over such forces. We request assistance with spotting and photographing said phenomena; seek out the mentor Caesar for more information.
Objectives:
- Photograph celestial phenomena (1/3)
- Photograph celestial phenomena (2/3)
- Photograph celestial phenomena (3/3)
- Report to Caeser
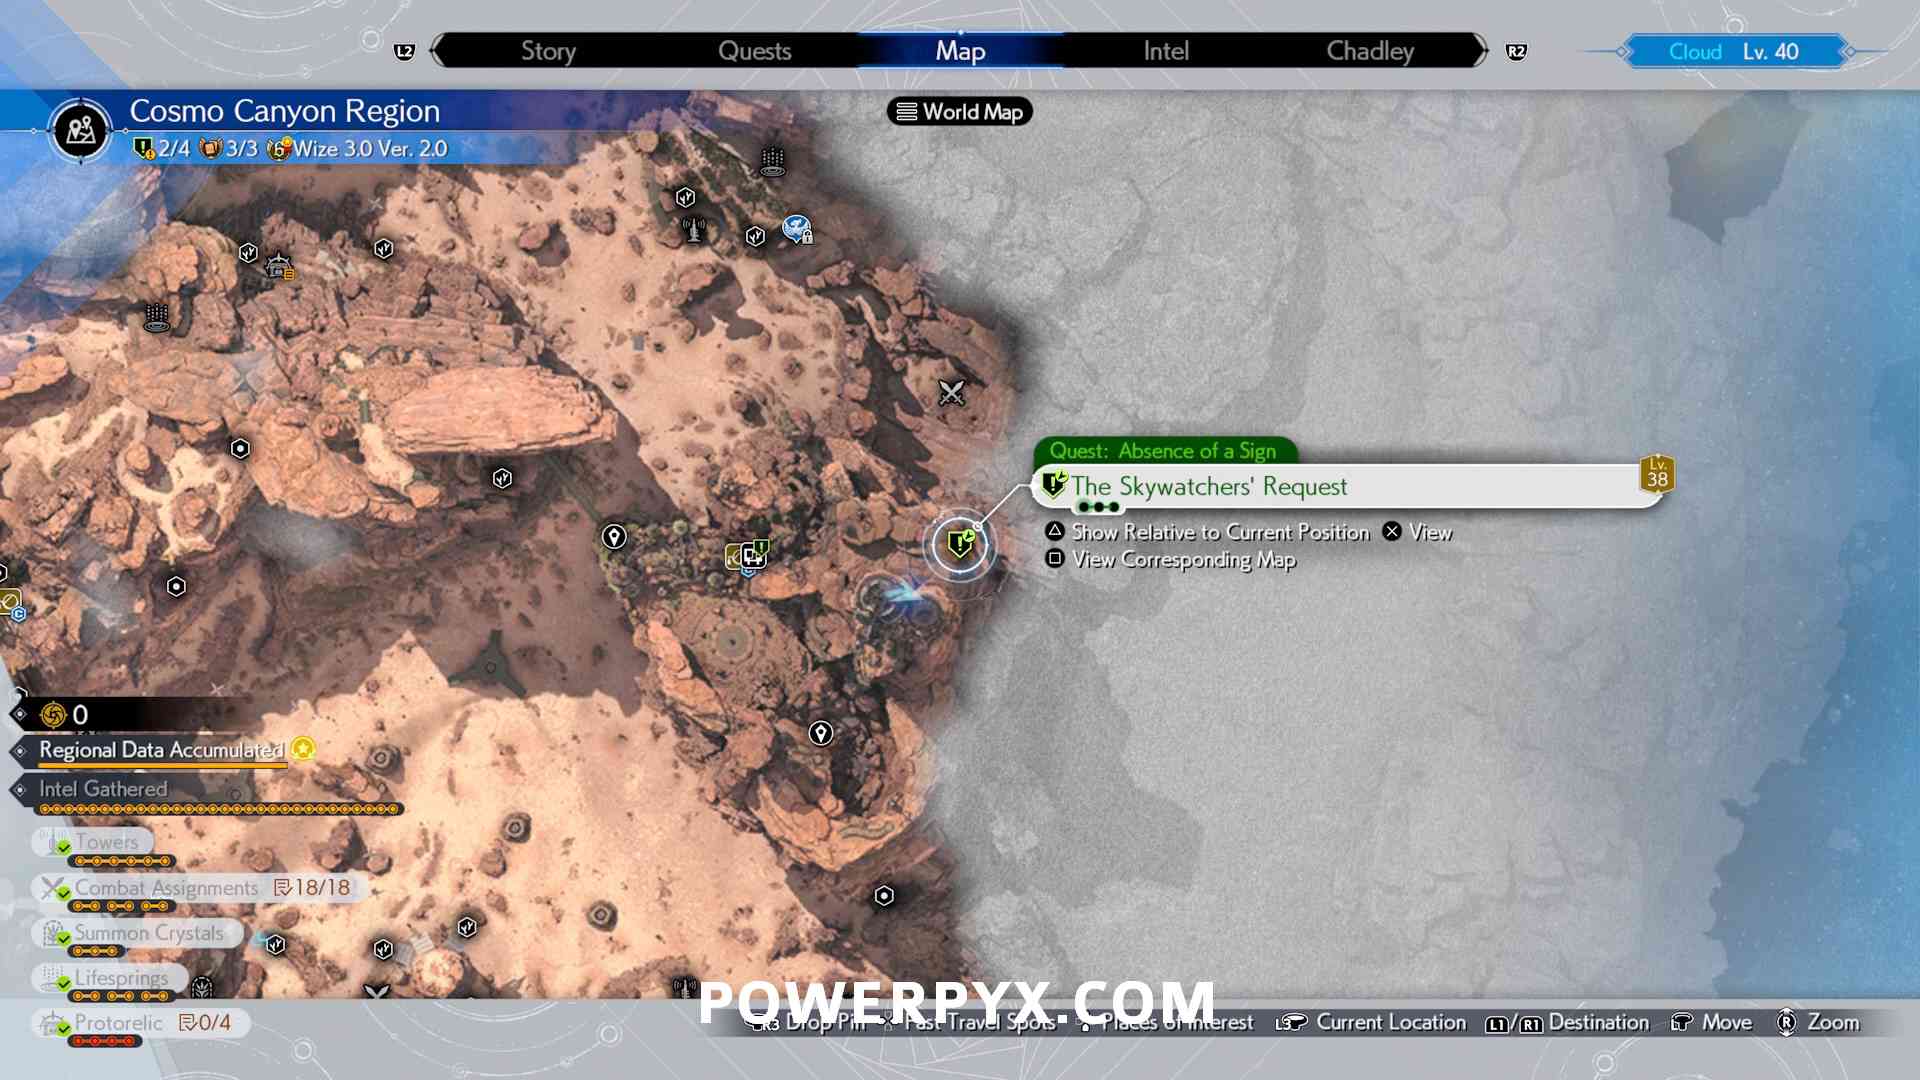
Starting Location: Absence of a Sign (Skywatcher’s Request)
Fast travel to the “Planetology Assembly” in Cosmo Canyon village to find this quest giver. Alternatively, you can also accept it from the quest noticeboard near the town entrance and then proceed to the quest giver.


Photograph celestial phenomena (1/3)
You are tasked with going to three Celestial Phenomena locations around the Cosmo Canyon region and defeating a strong fiend before taking a picture of the sky.
For the first location, fast travel to the Airstrip in the south-west of the region. Slightly east of the Airstrip is a path leading uphill, follow this path.


There you’ll find a big scorpion enemy called “Reapertail”. It is weak to Ice, so use Ice Materia (Blizzard Spell) to quickly pressure and stagger it. After the fight, you are prompted to take a photo.
Use  to cycle through the photos until you get to Note 1/3 (the one with the archway and stars in the top-right corner). You can press
  for a closer look. Then, press
  to enter camera mode and use and
  to zoom in and out until the image is 80% and the outline turns green, then press
  to take it.
You’ll need to aim at the archway.

Photograph celestial phenomena (2/3)
The next marker is further south-east of the Airstrip. To get to this area, you can either take the elevator in Cosmo Canyon town’s marketplace and then head west, or get the chocobo from Side Quest: Bonds of Trust and then fly down the ramp at Kamaria’s Ranch.


Approach the location from the east, go up the hill path. At the very top you find another Reapertail Scorpion. Use Ice Materia to pressure and quickly stagger it.
After the fight, use to cycle through the photos until you get to Note 3/3 (the one with two hills and stars in the top center). You can press for a closer look. Then, press to enter camera mode and use and to zoom in and out until the image is 80% or above and the outline turns green, then press to take it.
You must aim slightly below the bottom star of the constellation and just a tiny bit to the right of it. Start by putting the cursor on the bottom star, aim downward in a straight line until the % is at the highest, then very slightly aim to the right and zoom in until it goes to 80%.

Photograph celestial phenomena (3/3)
The last photo is found on the plateau where Activation Intel 6 is.


If you already activated this intel you can fast travel there. If not, you must fly to it from Gliding Range No. 16 on a mountain top south-east of Activation Intel 6. Getting up there requires jumping over many gliding range ramps: to start, go directly south of Activation Intel 6 through the lower desert area until you reach the southern border of the map. When you hit the south end of the map turn left and you’ll see a path leading uphill. Follow this path and jump from one ramp to the next until you reach the top, then glide over to the tower. The map below shows the path. From the Activation Intel Tower you can head north, and jump into a gust of wind to fly up to the photo location. Another Reapertail awaits there, defeat it.

Look at Note 2/3 and pull out the camera. You need to aim slightly above the left mountain peak and very slightly to the right of it.

Report to Caeser
Head back to the Planetology Assembly and speak to Caesar to complete the quest.
After completing the third course, dialogue will take place and the quest will automatically conclude.

For all other Side Quest Walkthroughs, check out our complete Final Fantasy 7 (VII) Rebirth Walkthrough.
LynnSATX says
Thanks for taking the time to share! I didn’t realize I had to go in order until I reached the 3rd location without the ability to access the celestiograph!
LynnSATX says
Having already explored the canyon prior to this side quest, I was able to travel straight to the chocobo stop closest to each location!
Li says
Heh, my chocobo got me stuck half-descension near the third location. All the characters were just floating awkwardly in the air wile Aponi had her head halfway into a clifface ?