
In Deathloop you need to find 4 Pictogram Locations during Objectives Search Fia’s Fortress and Find the Pictogram of the Afternoon Delight Questline. This takes place on Fristad Rock at Noon.
It is random for every player on each playthrough which pictograms are the correct ones, so this guide includes all of them. The pictograms are always in the same location. Only which ones you need in particular (and the order in which you need them) will be different from one player to the next. So just run through them all one by one to find all pictograms you need.
All the Pictograms are inside Fia’s Bunker. None of them are outside this bunker. The Pictograms look like red spraypaints with green and white icons on them. They are found on walls and floors, and one is on the underside of a truck.
For this guide we’ll enter Fia’s bunker via the bunker door at the top of the cliffs. From where you spawn in the tunnels, you need to head to the right and then reach the end of the path with all the laser mines where a turret is placed above the bunker. Below that turret is the entrance we’re taking. There is an alternate path that accesses the bunker from below near the shoreline, but taking it would confuse the order mentioned here.

So before starting, please make sure you take the entrance shown above to have an easier time following along. If you took the other path in it’s best to do a little bit of backtracking and going to that particular entrance.
IMPORTANT: If you alert Fia in the bunker, she will trigger the nuclear reactor to self-destruct after about a minute which will end your loop. Try to take her out in stealth first (she’s at the end of the hallway on the floor above the reactor room), then you can explore the bunker more freely.
Pictogram Locations
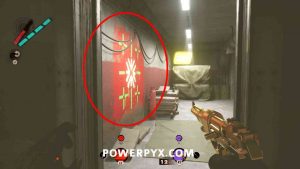
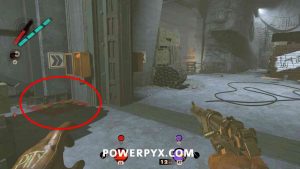
- Immediately after entering the bunker (via the upper bunker entrance, see description above), a pictogram is on the left wall in the first room you enter.
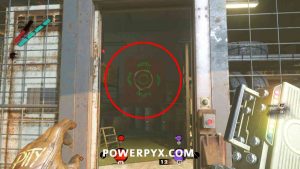
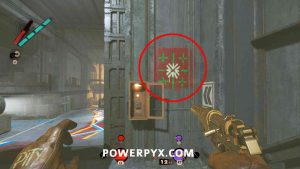
- Inside the elevator shaft, halfway down.

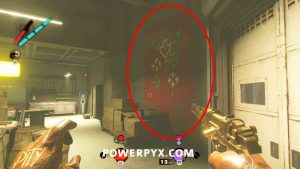
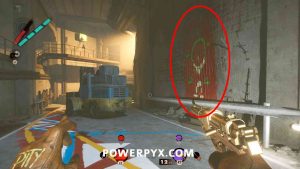
- Jump down the elevator and enter the next room to the left. In that room on the right wall is a new pictogram.
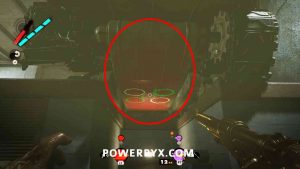
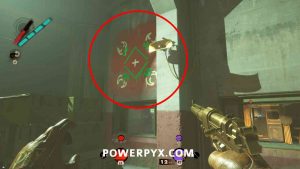
- Stay in the room of the previous pictogram and look for batteries on the table in the center of the room. Grab one and charge it up via the battery charger, found in the corner of the same room. Carry it with you and leave the room, turn slightly to the right in the direction where the elevator shaft was. There you see a fenced area with red laser mines above it. Insert the charged battery at the door and press the red button to open it. Straight ahead you can now see the next pictogram.
- Exit this fenced area and immediately turn right. You will see a big green armored truck that has wheels like a tank. Go down the stairs next to this truck and look underneath the truck. There’s a pictogram painted on the underside of the truck (look up to see it).
- Straight behind the armored truck is a big entrance/exit gate of the bunker. Go there and look down to the right to see another pictogram on the floor.
- From the previous pictogram, enter the next entrance/exit gate to the immediate left (looks identical to the one where the previous pictogram was, just 7 meters/yards left of it). In there is another art pictogram on the wall, above a red button.
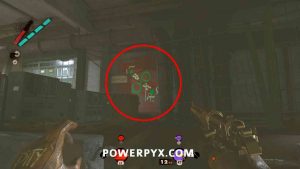
- Now head straight down the long tunnel that has some graffiti sprayed along the floor. On the right side of the tunnels is another pictogram on the wall that looks like an alien figure. It’s just before a yellow/blue forklift.
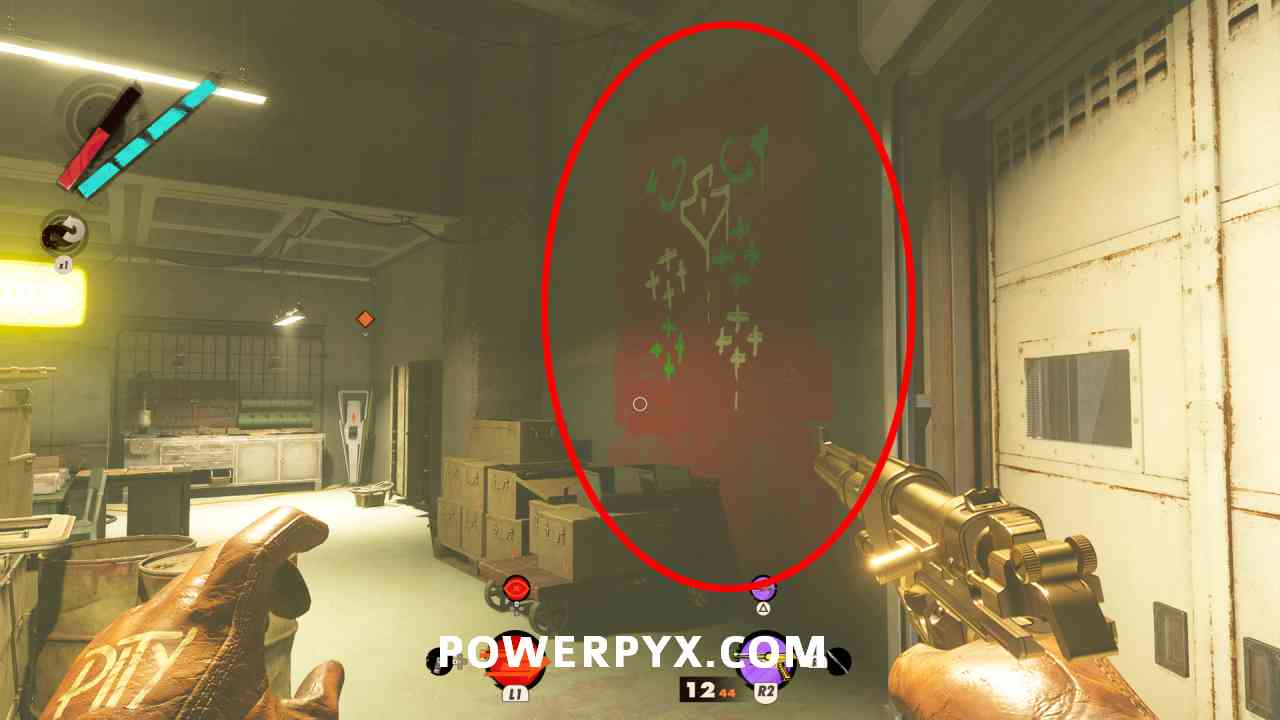
- Straight across from previous pictogram (turn around), you will see a door upstairs. Head there. It leads into a small room with a workbench and munitions station. Shoot out the small windows on the right side of the room and climb through. Then immediately in front of you on the floor will be another pictogram paint.

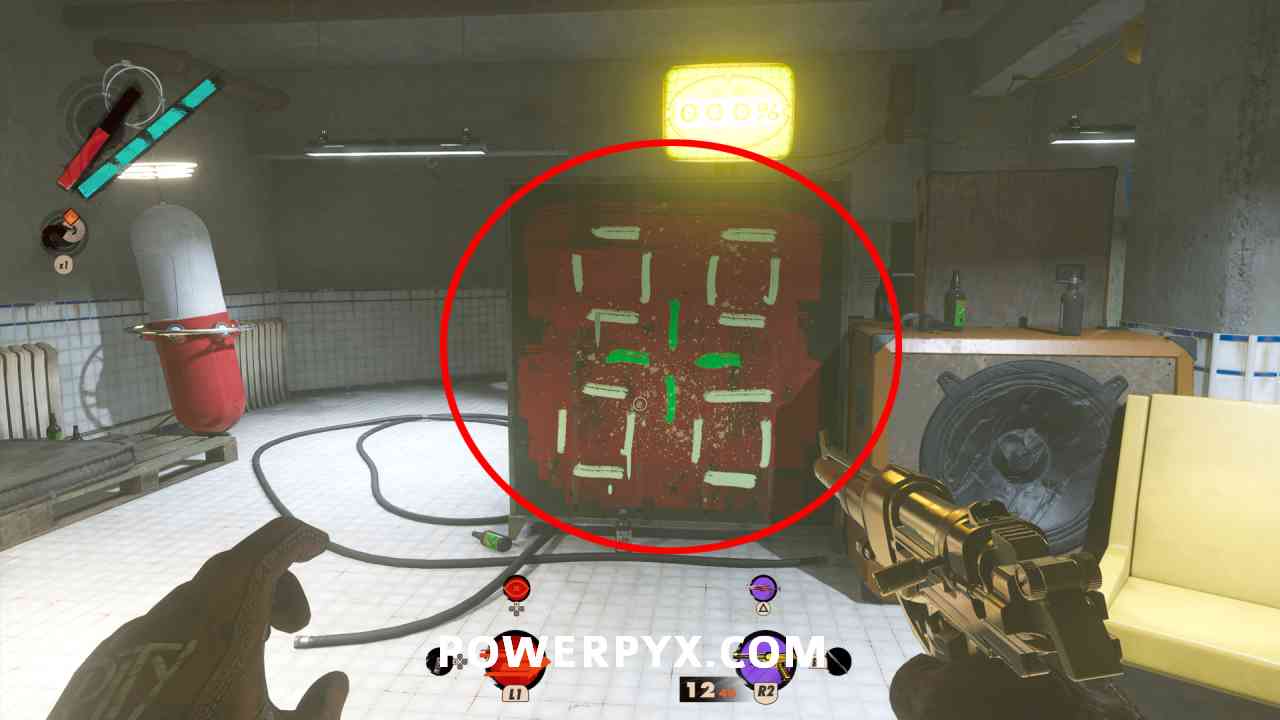
- Exact same area, stand on the pictogram we just saw and turn around, back towards the room where we just came from through the window. Above the window on the wall is a big pictogram.
- Straight across from the previous pictogram (turn around), is a hallway leading to the locker room (do not head outside the bunker). If you haven’t been there before, there should be a camera at the entrance to the locker room and 2 enemies inside. On the last locker on the right you can see another painted pictogram, still inside the locker room before leaving it.

- Straight across from the previous pictogram (turn around), head through the door into the reactor room of the bunker. The reactor is the big structure in the middle. Remember that if you alert Fia or her goons, she will trigger the reactor to explode within a short time. Do not get detected here! You have two options, either take out Fia silently, she’s found in the 2nd last room in the upstairs area. Or disarm the reactor by hacking the panel on its backside of the reactor and cutting the colored wires in the correct order. The correct wire order is learned from the blueprint found in same room as pictogram #3 (next to battery charging station there). An easy method would be to enter the vent in the fenced area where pictogram #4 was, which leads you to a ventilation shaft that comes out at the back of the reactor where enemies won’t notice you, then you can disarm the reactor from there. After the area is safe, look for the pictogram on the wall behind the reactor.
- Straight across from the previous pictogram is another pictogram on a wall, on the other end of the room (the path that leads back into the tunnel where the alien pictogram was).

- Still in the reactor room, there’s one last pictogram sprayed on the floor in the corner of the room, where a lot of green computing equipment is.


That’s all of the Pictograms. They are used later during objective “Return to the Machine” of the Afternoon Delight questline. You need them to solve the cassette puzzle in the secret bunker where Fia and Charlie meet. Each pictograph represents one cassette number, which you can figure out by looking at the blueprint on the cassette puzzle console. After getting the Pictograms the story will want you to head back to the cassette puzzle. Below is the blueprint which pictogram stands for which number:

If you need assistance with any other story part, refer to the complete Deathloop Walkthrough.
More Deathloop Guides:
- Deathloop Trophy Guide & Roadmap
- Deathloop Walkthrough
- Deathloop How to Solve ‘Search the Fristad Shore’ (Photograph Location)
- Deathloop All Door Codes & Lock Combinations
- Deathloop All Mostly Naked Character Locations
- Deathloop How to Get All Deaths (Spice of Life Trophy)
Leave a Reply