
The Family Jewel is the 14th main story mission in Borderlands 3 (BL3). This walkthrough will guide you through all objectives of the The Family Jewel Main Quest.
The Family Jewel is unlocked when you complete The Guns of Reliance.
Planet: Eden-6
Area: Floodmoor Basin
Quest Giver: Hammerlock
Requirement: Complete The Guns of Reliance
Recommended Level: 27
Reward: 5392$ / 19725XP Omniloader pistol unique weapon
Mission Info: Montgomery Jakobs left a final message for his son, Wainwright, with a clue to find the Eden-6 Vault Key fragments. Hopefully they’re just in a safety deposit box or something and not nestled deep in the primeval heart of an untamed jungle. Fingers crossed…
Objectives:
- Talk to Hammerlock
- Take record
- Play record
- Go to Voracious Canopy
- Locate the Family Jewel
- Find BALEX
- Kill tyrant
- Pick up pink plushie
- Locate the Family Jewel
- Climb to panel
- Melee panel
- Cut hydraulic lines
- Enter the Family Jewel
- Open door
- Go through medical bay
- Grab wires
- Go through medical bay
- Knock off EMS bot’s head
- Install BALEX
- Get to security bay
- Defend BALEX
- Check out freight entrance
- Get to security bay
- Clear security
- Defend BALEX
- Go to high security door
- Kill jabber
- Retrieve BALEX
- Get to the bridge
- Get to container
- Disconnect container
- Install BALEX
- Kill ratch
- Get to bridge
- Kill GenIVIV
- Collect Vault Key fragment
- Collect BALEX
- Return to Sanctuary
- Get to the Bridge
- Install BALEX
- Pick up hard drive
- Give hard drive to Marcus
- Give Vault Key fragment to Tannis
Starting Location: The Family Jewel

Talk to Hammerlock
After completing the previous mission, fast travel back to Knotty Peak and speak to Hammerlock waiting inside the house.

Take Record
Wainwright has got his record player working now, and asks you to do to honors. Head over and grab the record back from him.

Play Record
Head over to the back of the room and place the record on the record player by the chair.

Go to Voracious Canopy
Wainwright asks you to go check out The Family Jewel, which was his families ship, while they check the other two locations. Head to the North-East part of the map to get to the travel point for Voracious Canopy.

Locate the Family Jewel
When you enter the area, continue walking forward to the objective.
Find BALEX
Shortly after you’ll here someone over your communicators calling for help. They say that their name is BALEX and they’re the navigator for The Family Jewel. Head to the marked location on the map to find them.
Kill Tyrant
Once you reach the ship entrance, a Tyrant will come out to the area to attack you. Take it down to progress.

Pick up Pink Plushie
The tyrant drops a stuffed bear when it’s killed, go grab it.

Locate The Family Jewel
BALEX says he’ll help you find the ship if you bring him along, keep heading toward the objective.

Climb to Panel
Head over to the marked panel beside the door.
Melee Panel
Hit the panel to knock the cover off.

Cut Hydraulic Lines
A ratch swarms flies out of the panel when you break it off, deal with them then go melee the newly revealed hydraulic lines to get the door open.

Enter the Family Jewel
Now that the door is open you can finally head inside the ship.
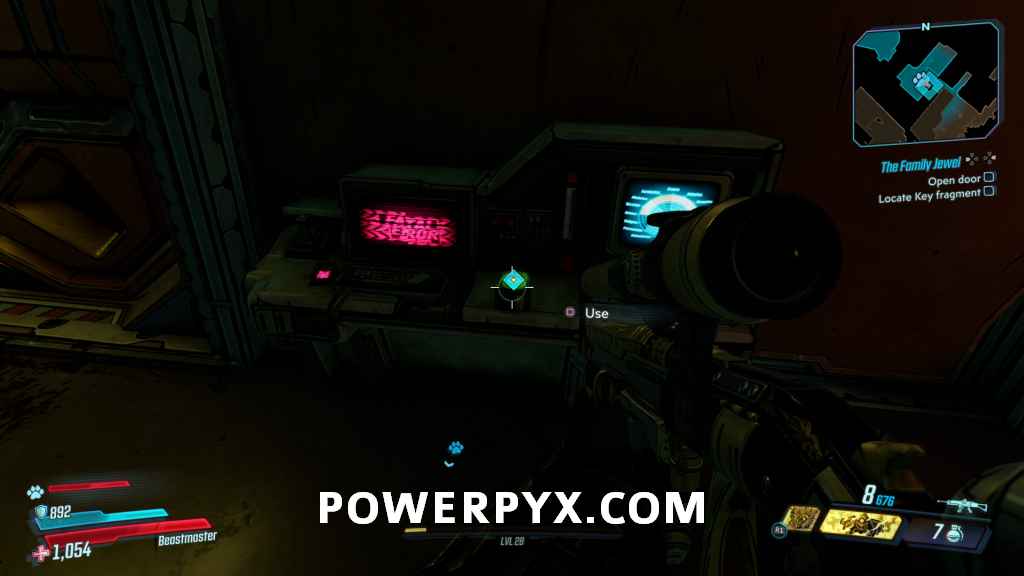
Open Door
There is a door just ahead, hit the button on the marked panel to get it open.
Go Through Medical Bay
BALEX says to head to the medical bay. There will be a few ratch on your way, but nothing overly dangersou.
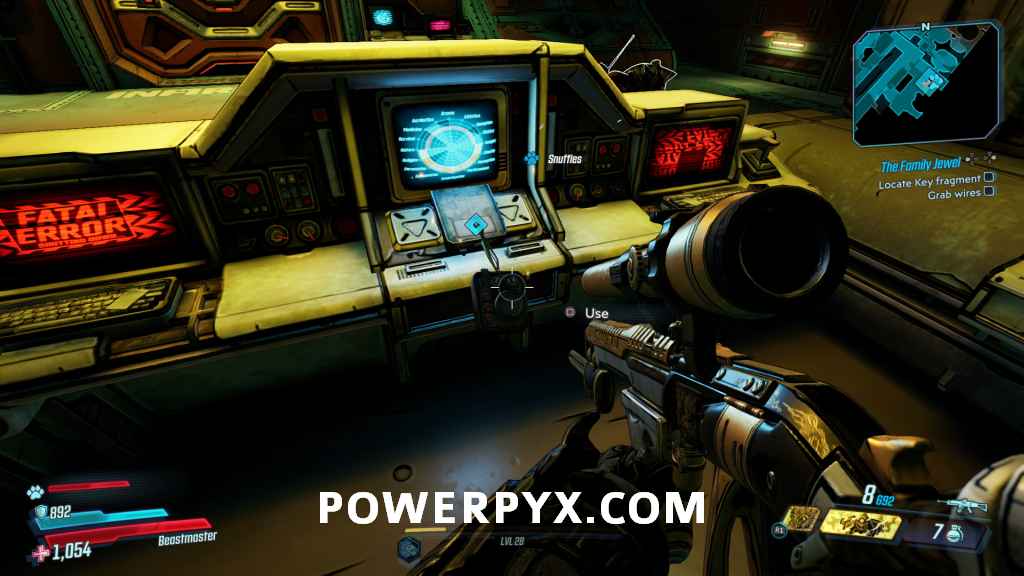
Grab Wires
GenIVIV locks the door before you’re able to head through, so BALEX asks you to head over to the nearby console and grab the wires so he can hotwire it.
Go Through Medical Bay
That gets the door open, painfully. So you can keep heading through the medical bay now.
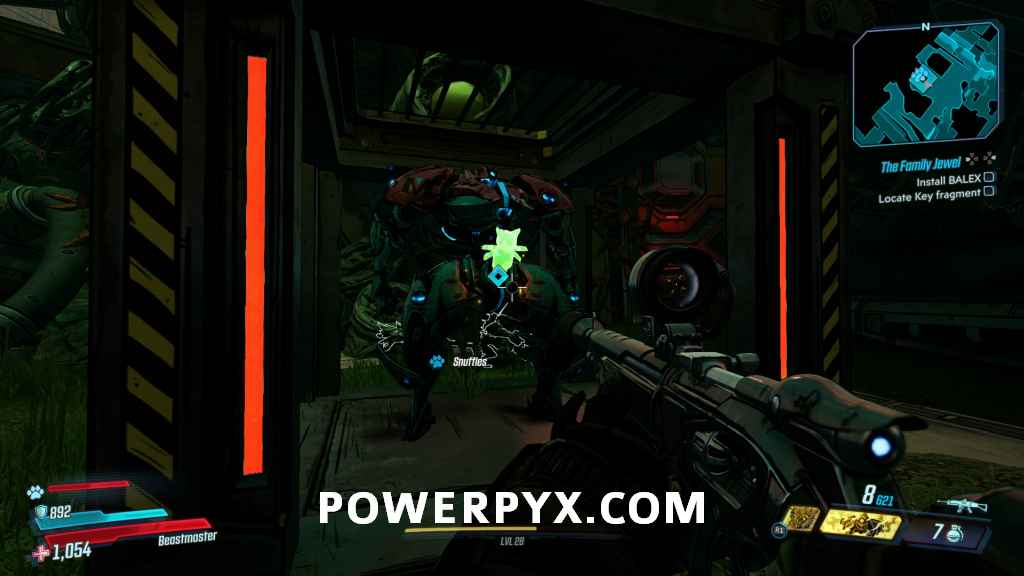
Knock Off EMS Bot’s Head
GenIVIV has done some more tinkering to stop you getting through the door, so to bypass it BALEX wants you to knock the head off the nearby EMS bot by meleeing it.

Install BALEX
Place BALEX on the now vacated head cavity of the EMS bot.

Get to Security Bay
Now mobile, BALEX opens the door and starts heading to the security bay. Follow him there. Once he opens the next door, you’ll be in a large room full of Ravagers, take them out to proceed.

Defend BALEX
Once you reach the security bay, GenIVIV barricades the door. You’ll need to defend the area from security bots while BALEX is working to get it open.
Check Freight Entrance
BALEX can’t actually get through the barricaded door, but he has another way in. Head over to the marked location.
Go to Security Bay
BALEX can get this door open though, so you can continue forward again to security. Watch out for the turrets in this first room, then keep going.
Clear Security
There will be more bots in the next room that you need to take out to keep going.

Defend BALEX
Once all the bots are dealt with BALEX will go over to work on the console again. GenIVIV summons a bunch of Jabbers that you now need to fight off. BALEX summons some turrets early in the fight to help you out.
Go to High Security Door
Once all the enemies are dead, BALEX heads over to the door that the Vault Key fragment is through. Go over there too.
Kill Jabber
A Badass Jabber comes through and knocks BALEX off his robot, take it out.

Retrieve BALEX
Head over and pick up the BALEX bear again off the ground.

Get to the Bridge
GenIVIV has moved the Key Fragment to the bridge, and you’ll have to go fight her to get it. BALEX wants to install himself in a mech like she has so that he can help fight her. Head to the objective.
Get to Container
When you get to engineering you’ll walk in on a bunch of bots fighting a bunch of animals.

Take out all the enemies, then head up to the walkway on the opposite side of the room. On top you should see the yellow marked crates you can jump on to get across to the bot container.

Disconnect Container
Hit the switch on top to drop the container.

Install BALEX
Now you need to insert BALEX into the mech, wherever he’ll fit.
Kill Ratch
Some more ratch will now come into the room, take them out with BALEX’s help.
Get to Bridge
BALEX blasts off without meaning to, and says you should head over to the bridge yourself. When you’re ready to proceed to the boss fight, jump down the hole.

Kill GenIVIV

BALEX drops in from above, taking out the shield around GenIVIV and starting the boss fight. GenIVIV is basically a bigger version of the mechs you fought back on Skywell-27, with some extra moves and the ability to summon enemies. She’ll zip around the room frequently launching green mines out that you should avoid. Sometimes when she is zipping around she’ll leave trials behind that function like walls that you don’t want to go through. She will also summon slow moving seeker drones that you can shoot, along with small mechs that will try to attack you with melee. Keep on the lookout for these, and keep tossing damage into her. If you go into Fight for your Life, you can actually shoot the red drones if there are any up and that will bring you back up off the ground.
Collect Vault Key Fragment
Once she’s been destroyed, grab your loot then head over and pick up the Vault Key fragment she dropped.

Collect BALEX
Then go over and collect BALEX one more time from where he was dropped when his mech exploded.

Return to Sanctuary
Head over into the fast travel room to grab one final chest, then fast travel to Sanctuary.
Get to the Bridge
Once you’re on Sanctuary, it appears GenIVIV has managed to get into the ships computer and taken it over. Get yourself up to the bridge. You can get there by heading below to the hanger, then up the stairs on the opposite side, then up the ladder in the middle of the area.
Install BALEX
Up on the bridge, BALEX says you need to plug him into the computer so he can go after GenIVIV himself. Insert him into the slot on the front left console.

Pick up Hard Drive
BALEX says he’s somehow managed to stick GenIVIV into a hard drive from inside the computer, grab it out of the console.

Give Hard Drive to Marcus
Marcus says he has a use for the hard drive GenIVIV is on, head over to him.

Give Vault Key Fragment to Tannis
Finally head over to Tannis lab, and give her the vault key fragment to complete the mission and get your reward – a rare pistol.

This finishes The Family Jewel main mission in Borderlands 3. Now the next quest Going Rogue becomes available.
Next Up: Going Rogue
For all other Mission Walkthroughs, check out our complete Borderlands 3 Walkthrough.
Mario says
Is there a bug where you drop in the hole and geniviv doesn’t spawn? I see the shield but nothing happens, once you hop in the hole you can’t climb out.
Ben says
Same thing is happening to me. Did you find a fix?
TheRealMeridian says
Happened to me too. Fix it by walking back to the spot where you dropped and the mission updates and you see GenIVIV spawn. Just have to wait before Balex progresses the mission before dropping in the hole.
Breval Alexander says
After killing the jobbers that Genviv calls Balex is in a the floor, only see his head moving around. He just rolls round in a circle. I can’t proceed any further.
Bobby Crawford says
I beat geneiviv and balex is not laying anywhere.