
AI Limit has a total of 3 endings and 7 NPC questlines related to the endings or other trophies. 1 of the endings is mutually exclusive of the other 2, and triggering it causes an unfinished NPC questline to be unfinishable in the current playthrough. Two NPC questlines are related to boss fights earlier in the game, then NPC questlines related to the endings can all be completed up to the point of no return when you reach the Branch Hagios Patir – Upper Level > Path of Epitome. With planning it is possible to set up the endings before the point of no return and use save backups to complete all 3 in the first playthrough, only requiring fighting the final boss each time (see recommended steps below).
Endings and NPC questlines are related to the following trophies:
 The End of Childhood – Terminate the rule of the Church and face doomsday with mankind.
 Boundless Stars – Accept the invitation of the Sphere Gods and step into the stars.
- Second Dawn – Decline the invitation of the Sphere Gods and explore the future with mankind.
 Blooming Life – Help Delpha grow plants and obtain the Azure Branch.
- Last Promise – Promise Shirley that you will build a new home with her.
- Farewell to the Past– Help Shirley discard the Bunny Doll Arrisa.
- Friends Reunited – Help Stone find his friend Hubert.
- The Battlefield of Humanity– Encourage Vikas to return to the Hunters Guild.
- Brilliance of the Tree – Find the Courtyard of the Tree and enter it.
- Fair Fight – Fight alongside Feylia and defeat the Resplendent Bishops.
- A Deadly Joke – Reveal the true identity of Assis.
Recommended Steps
Below are the recommended steps to complete all questlines and set up all endings within the first playthrough. As long as you hit the two mentioned points for Stone and Feylia, then don’t progress past Path of Epitome you can complete everything in the playthrough without missing anything.
- Play until reaching Hagios Patir – Lower Level > Cleansing Stairs, complete Shirley and Vikas Interaction #4.
- Play until reaching Branch Sunken City Underground – Underground Parish > Parish Station, complete Stone Interaction #6 defeating the boss with his help.
- Continue until reaching Branch Sunken City Underground – Underground Parish > Trial Hall, complete Feylia Interaction #4 defeating the boss with her help.
- Continue until reaching Branch Hagios Patir – Upper Level > Path of Epitome, DO NOT PROGRESS FURTHER. Complete all questlines but DO NOT give Delpha the Living Seed yet.
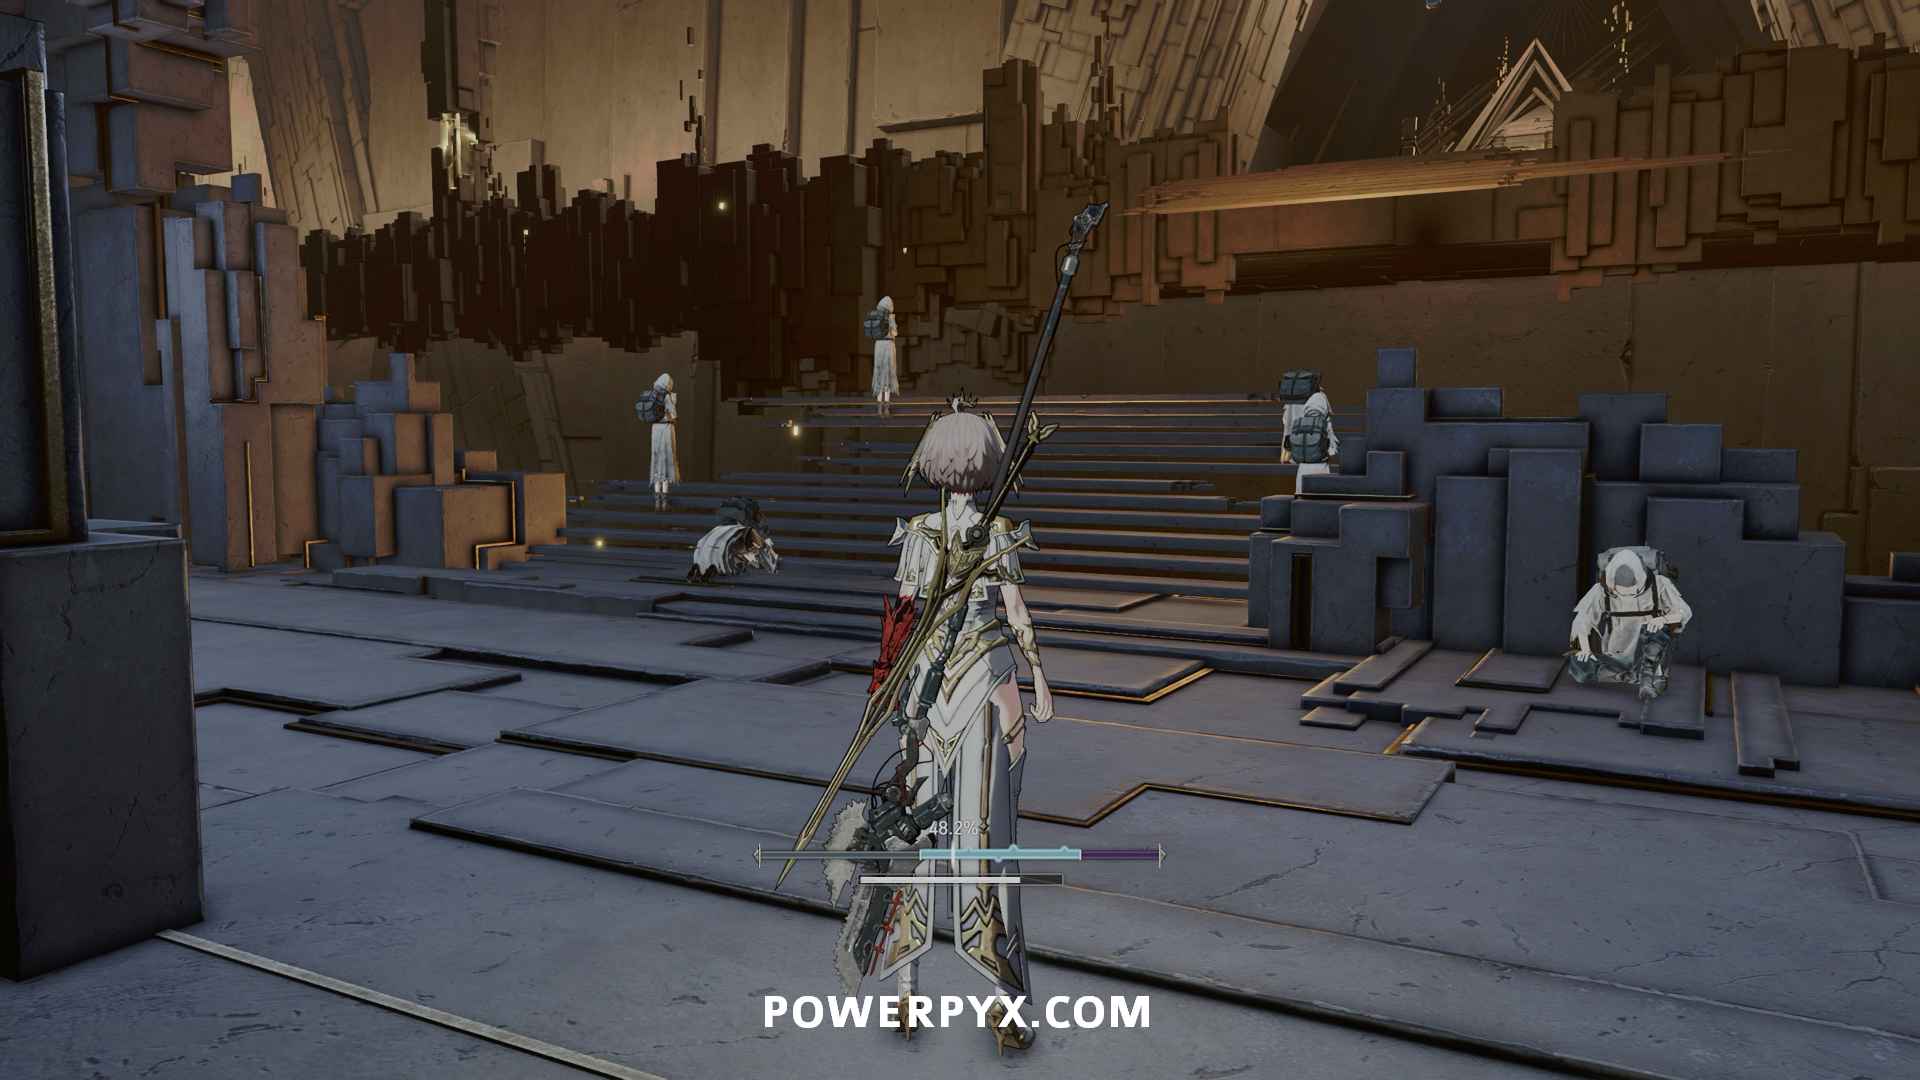
- Once you have completed all questlines aside from giving Delpha the Living Seed, continue into the next area and fight Loskid, the Blade of Judgment. DO NOT talk to her after the fight yet.
- If you aren’t using save backups to complete all endings this playthrough, skip to next step. If you are then make one now, then speak to Loskid to receive the Golden Branch, locking you into The End of Childhood ending. Proceed through the portal past Loskid, beat the final boss then revert your save.
- Complete remaining steps to set up both Boundless Stars and Second Dawn endings, then speak with Loskid. Go to Couryard of the Tree to enter Elysium.
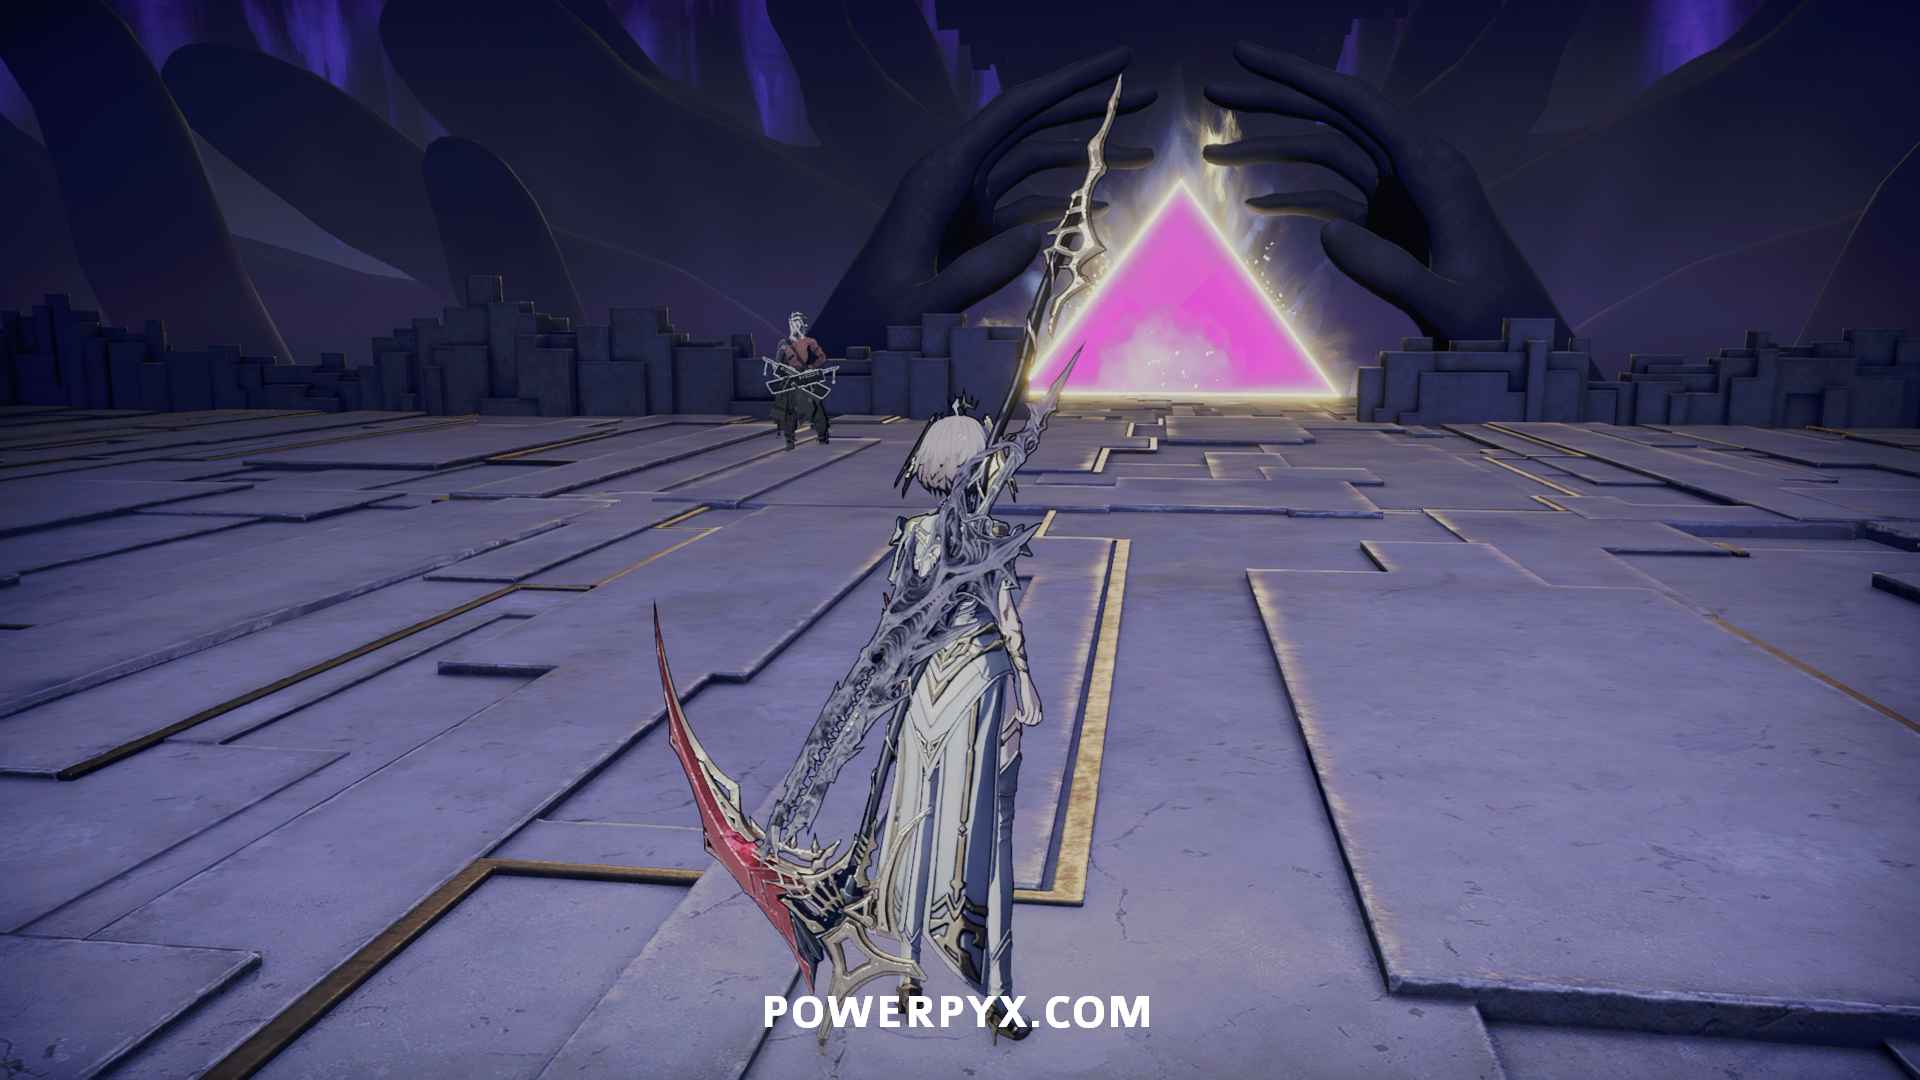
- If you aren’t using save backups to complete all endings this playthrough, skip to next step. If you are, make one when you reach the Branch The Sphere – Elysium > Gate of the Sphere (the purple void immediately before the final boss). Complete the Boundless Stars ending by choosing “Accept the Invitation” after defeating the final boss, revert your save.
- Complete the Second Dawn ending by choosing “Decline the Invitation” to trigger the hidden boss fight against Charon.
- Second playthrough you can ignore Shirley, Vikas, and Assis. Complete the steps again to trigger the Boundless Stars ending. Completing the steos for Stone and Feylia is still recommended for their help in boss fights.
- Third playthrough ignore all characters from Stone and Feylia, complete The End of Childhood ending.
Endings
Ending 1: The End of Childhood
Trophy/achievement The End of Childhood
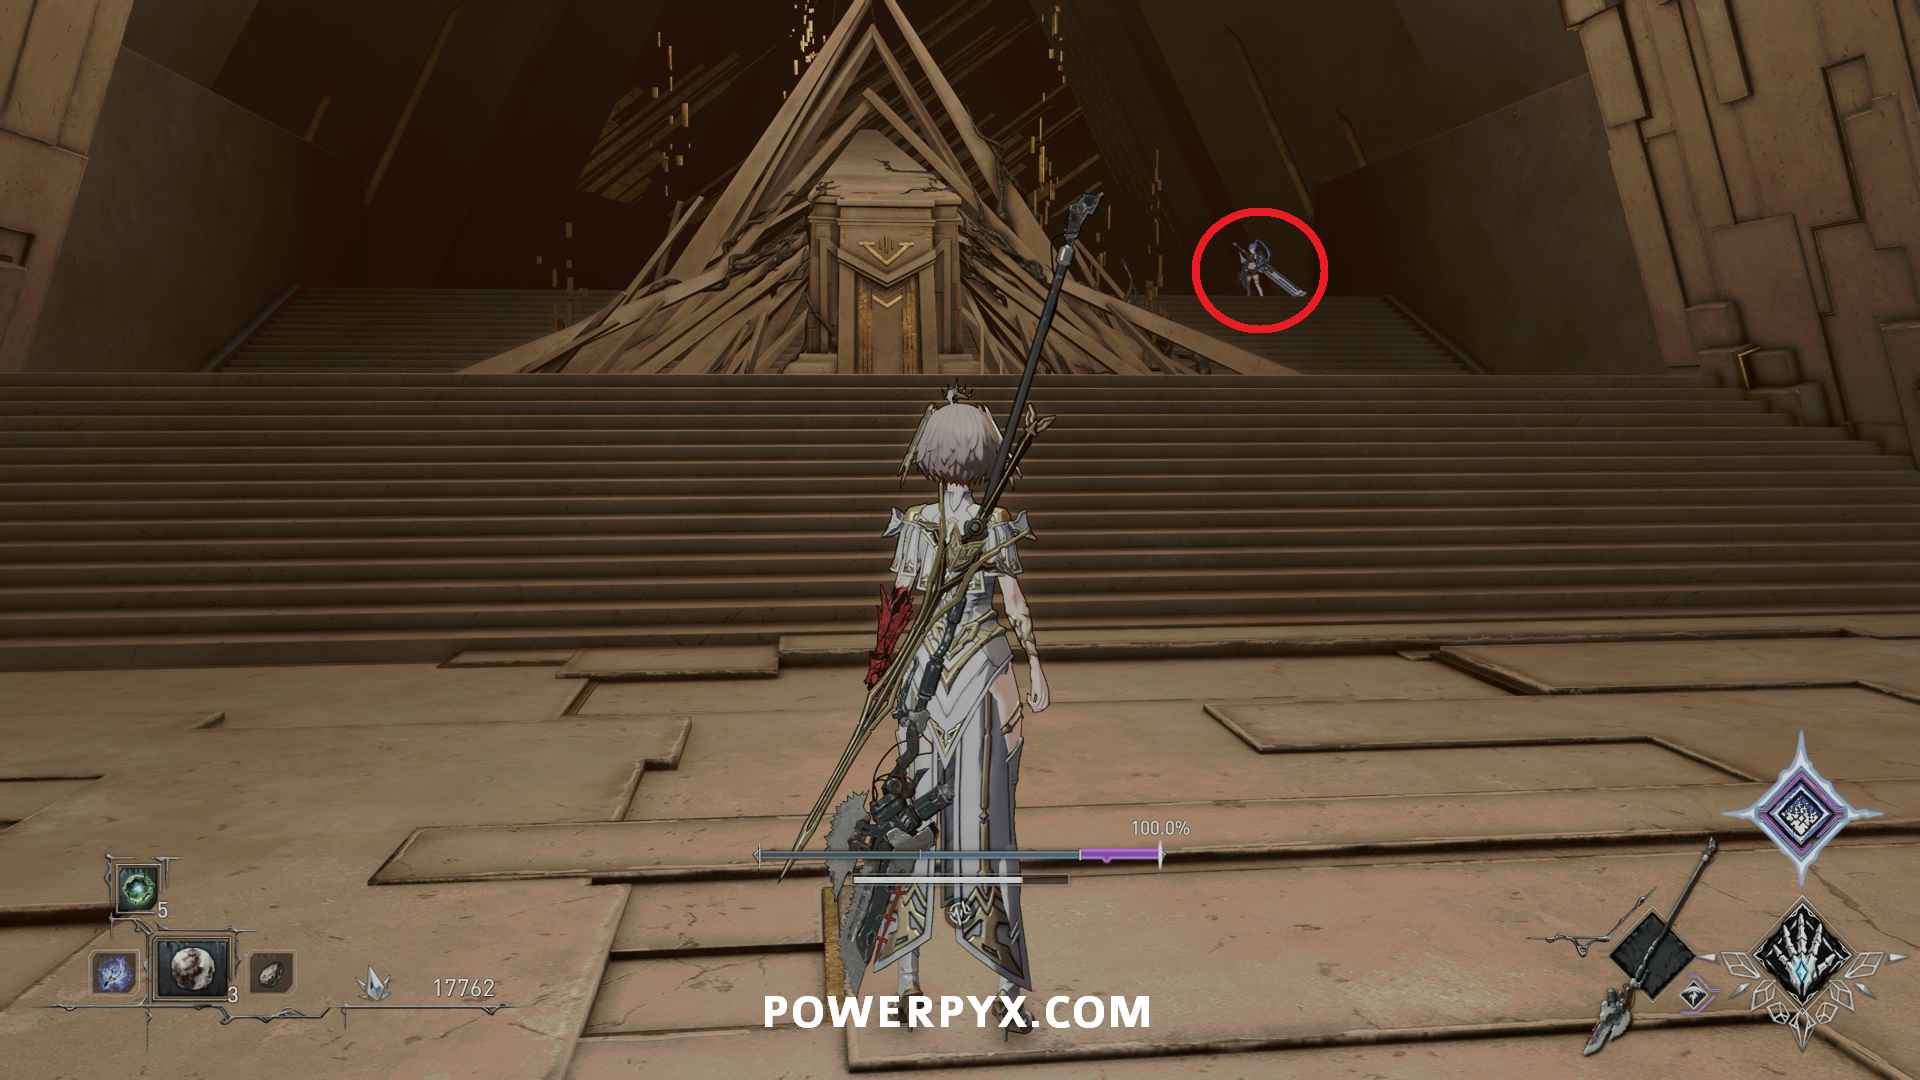
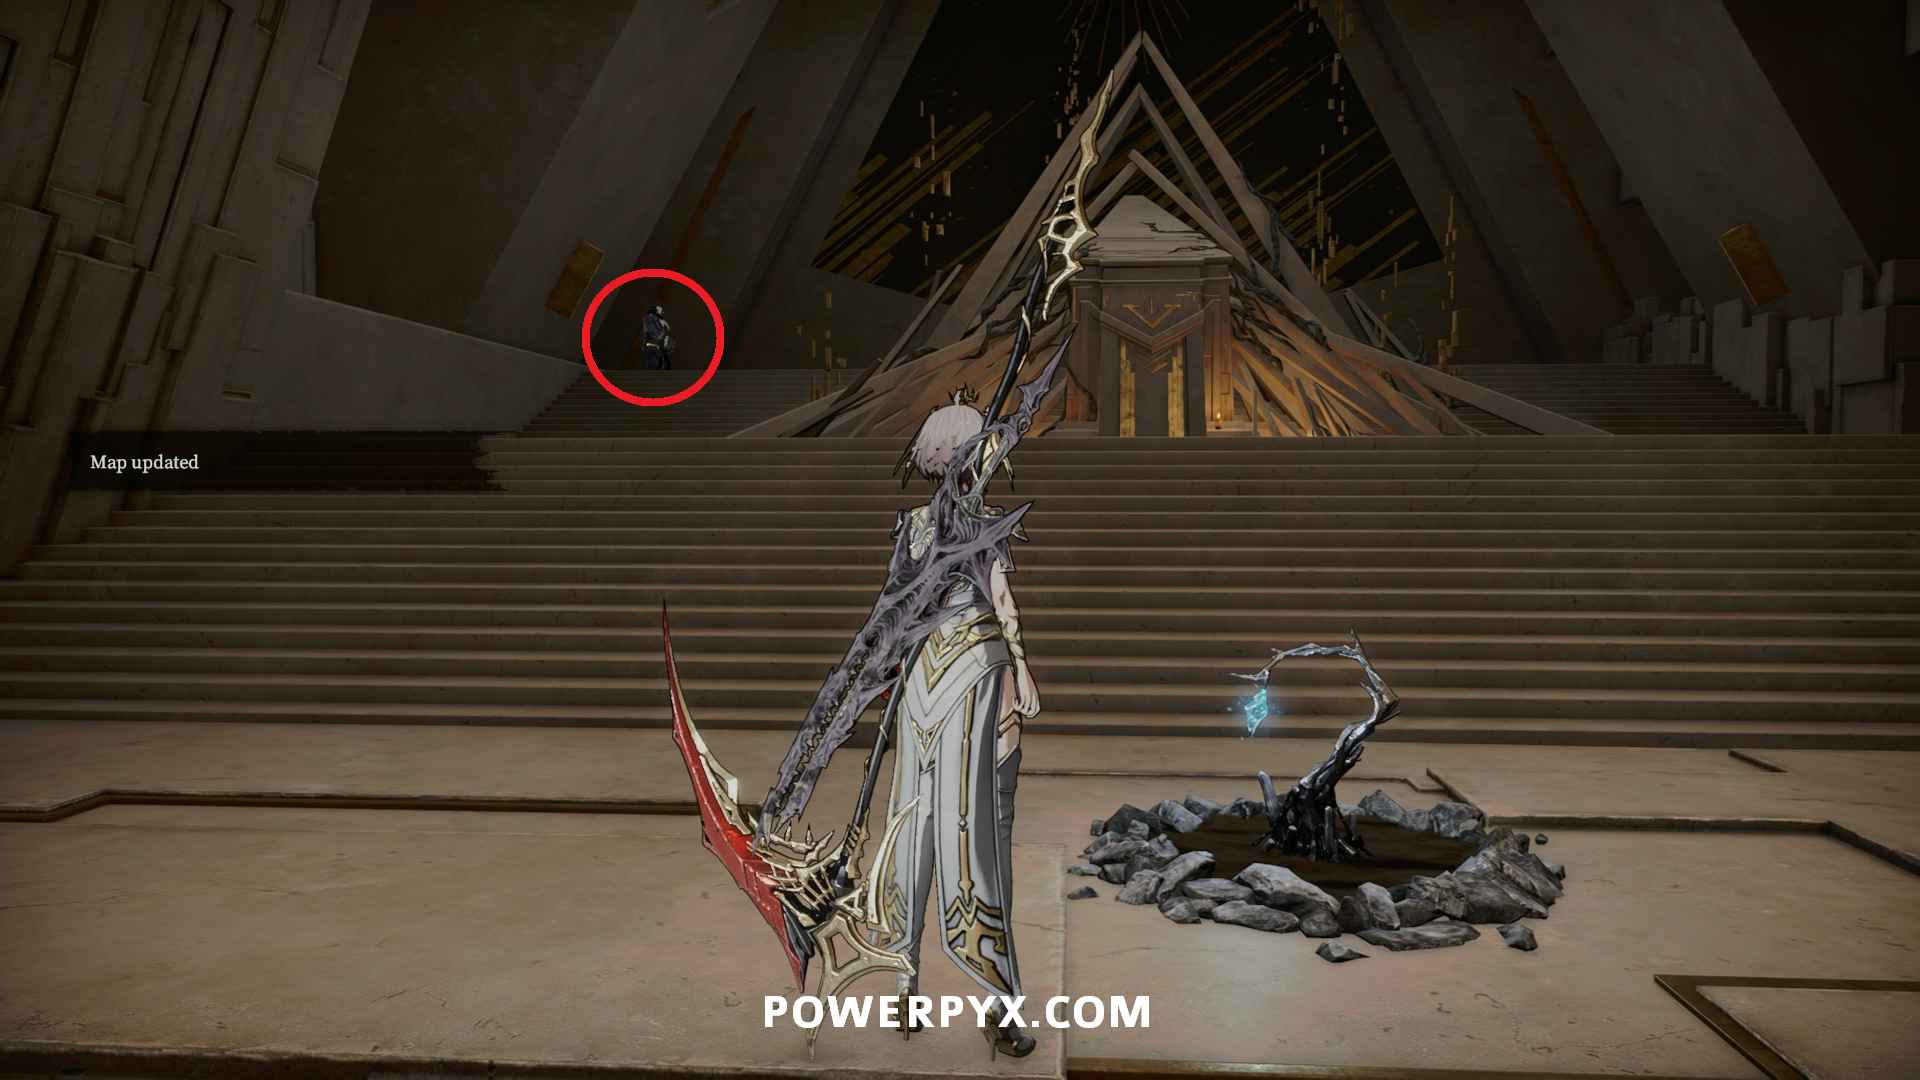
This is the “normal” ending of the game, which is triggered if you do not complete Delpha’s questline to obtain the Azure Branch. To trigger it, speak with Loskid after defeating her at the Branch Hagios Patir – Upper Level > The Altar. Exhausting her dialogue causes her to give you the Golden Branch key item, locking you out of complete the other quests related to the ending. You can then proceed to the final area where you defeat the final boss Aether, the Father and receive this ending immediately after.
Ending 2: Boundless Stars
Trophy/achievement Boundless Stars
This is the “good” ending of the game, which is triggered if you have completed Delpha’s questline to obtain the Azure Branch before speaking with Loskid. Once you do this you can still also complete the Second Dawn ending, but are locked out of The End of the Childhood ending.
Delpha’s questline is completed first by bringing him the 7 Soil Samples, one found in each main area in the game. This is also how you obtain the Purified Soil to cultivate the Branch and increase your Life Dew charges. See All Soil Sample Locations.
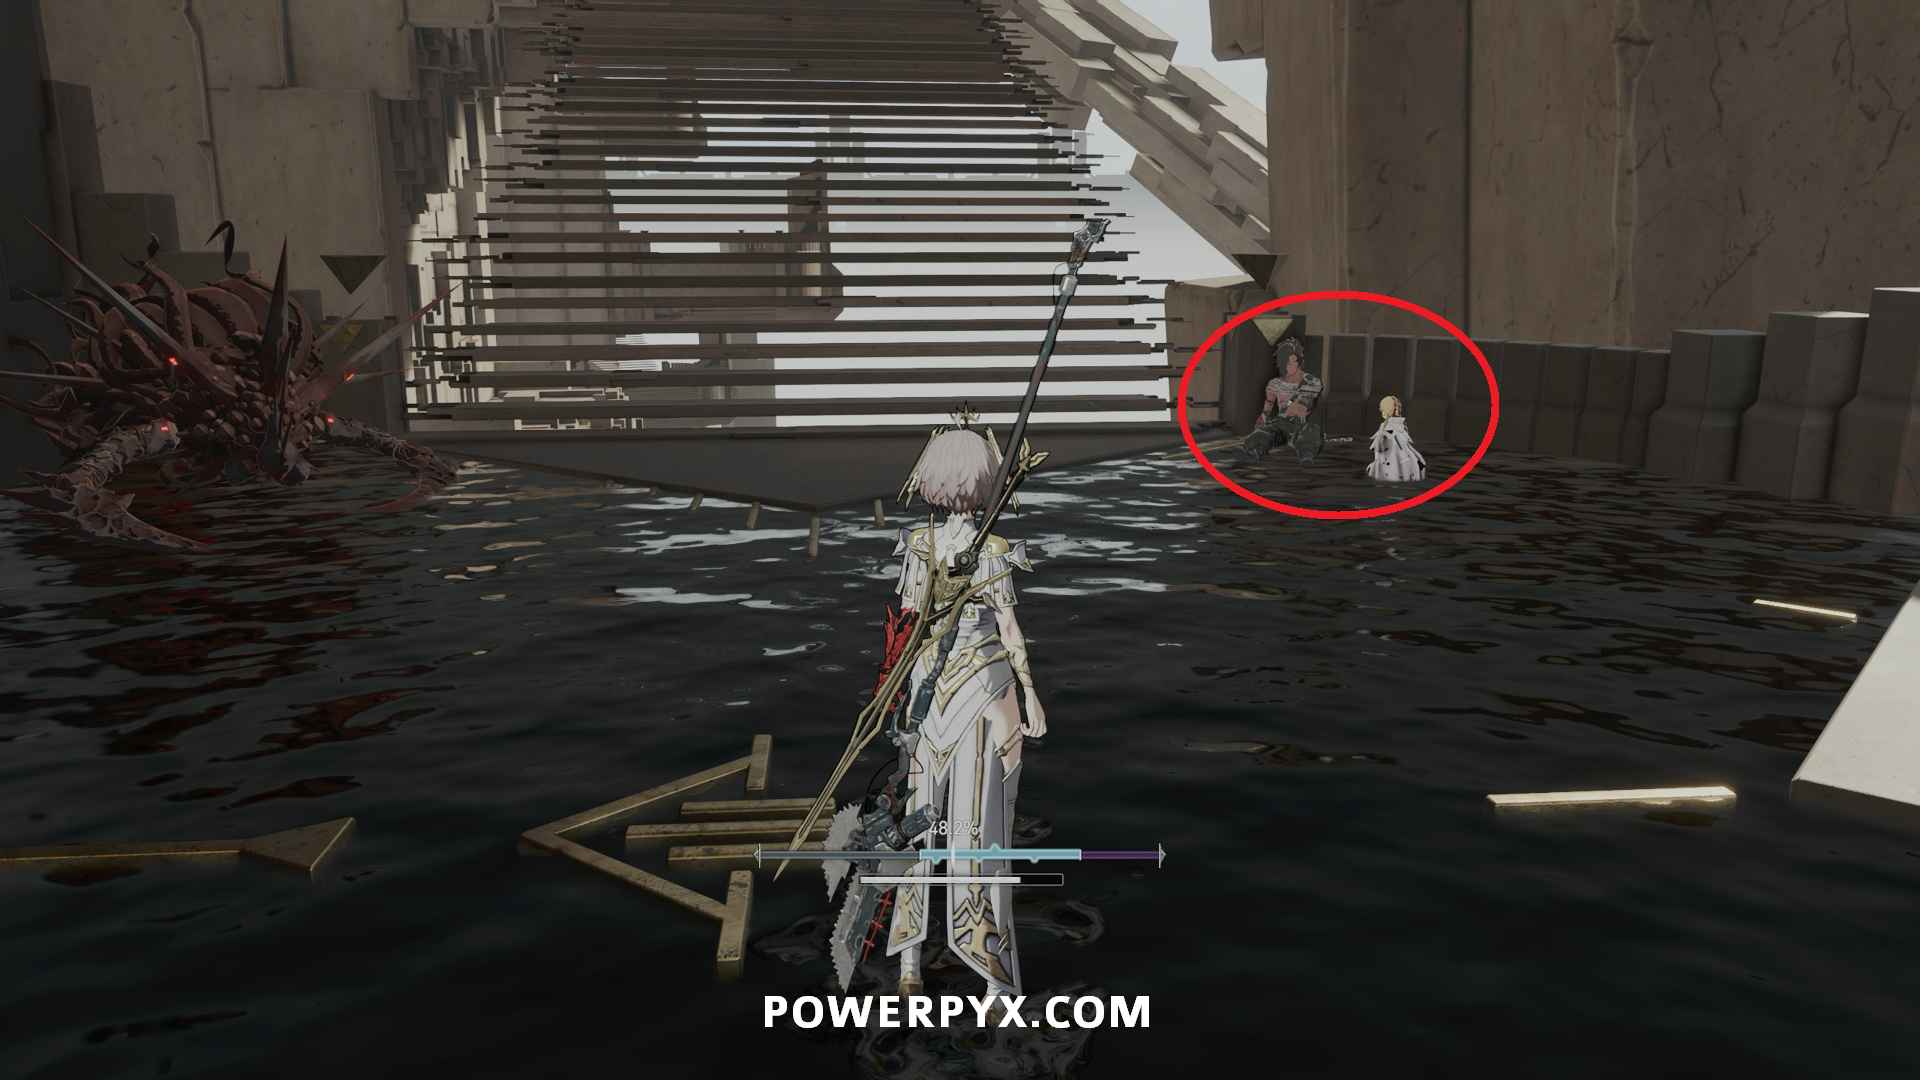
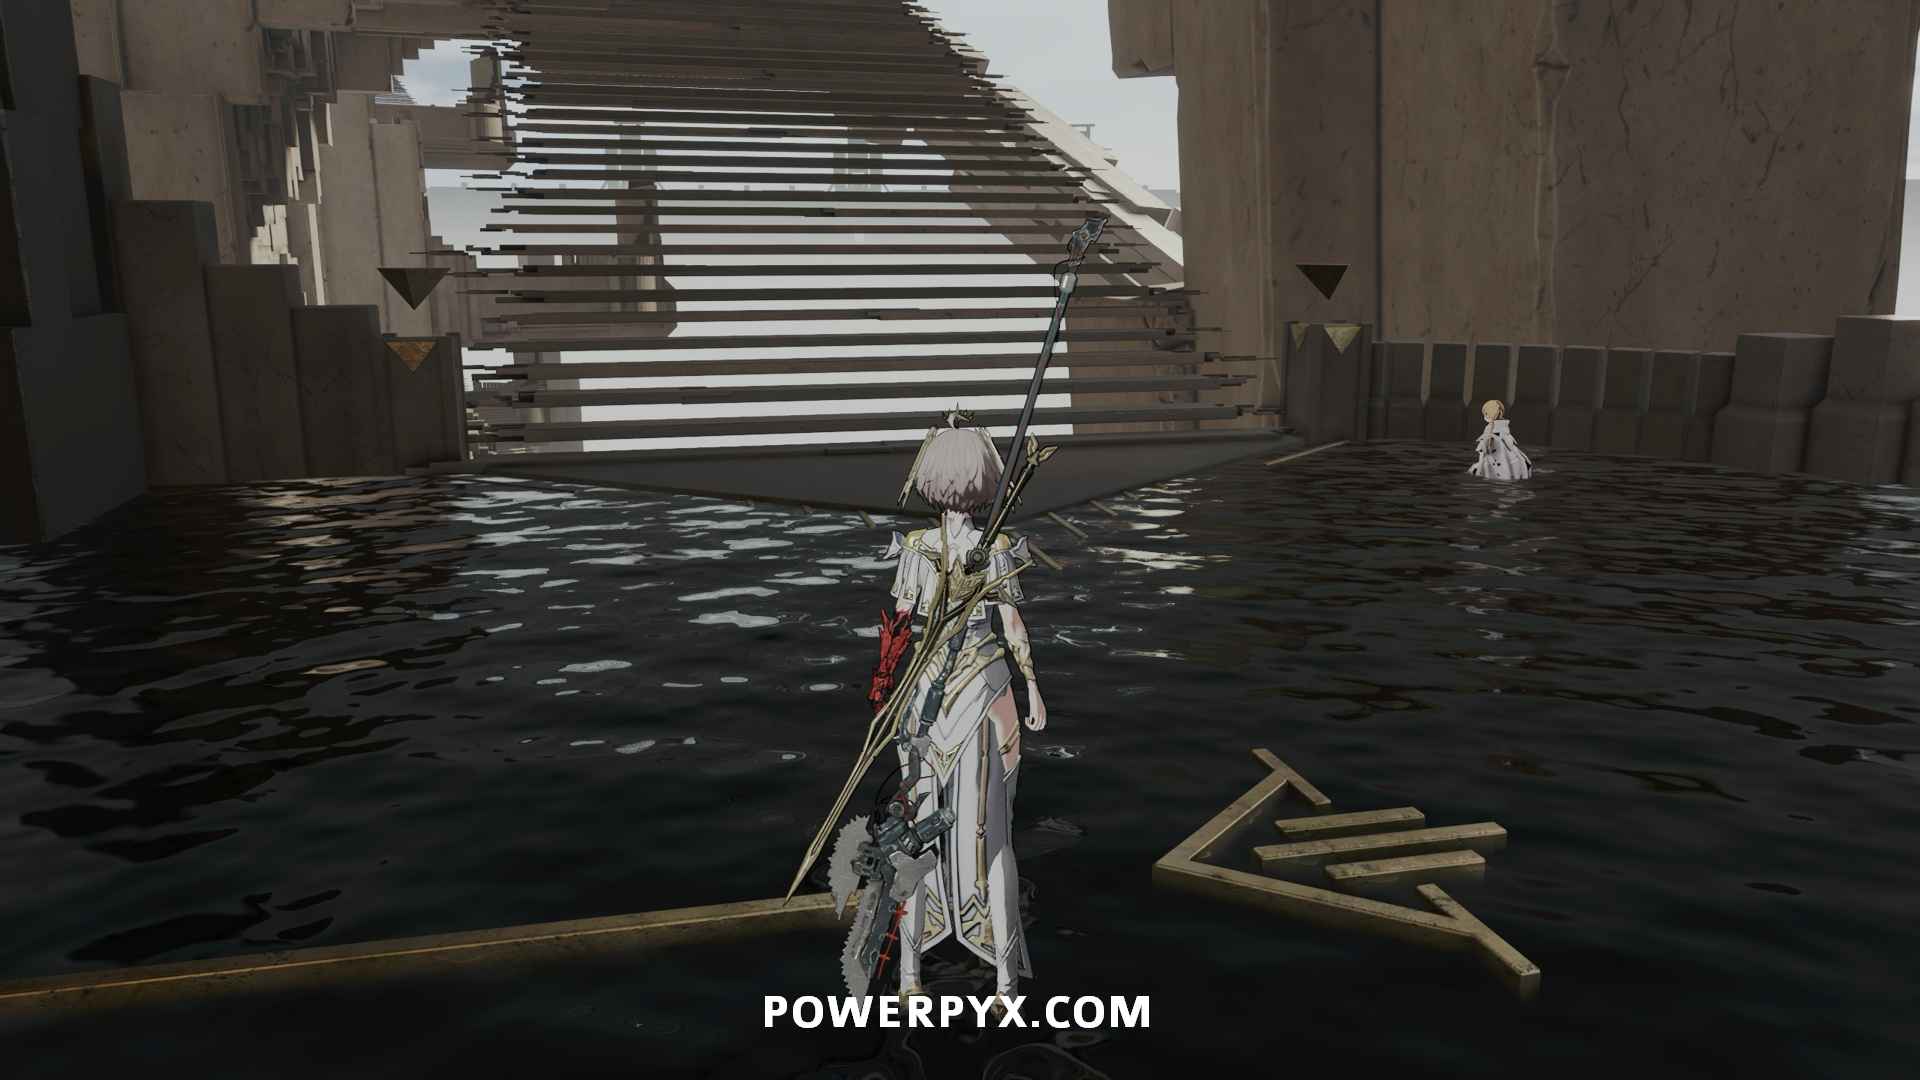
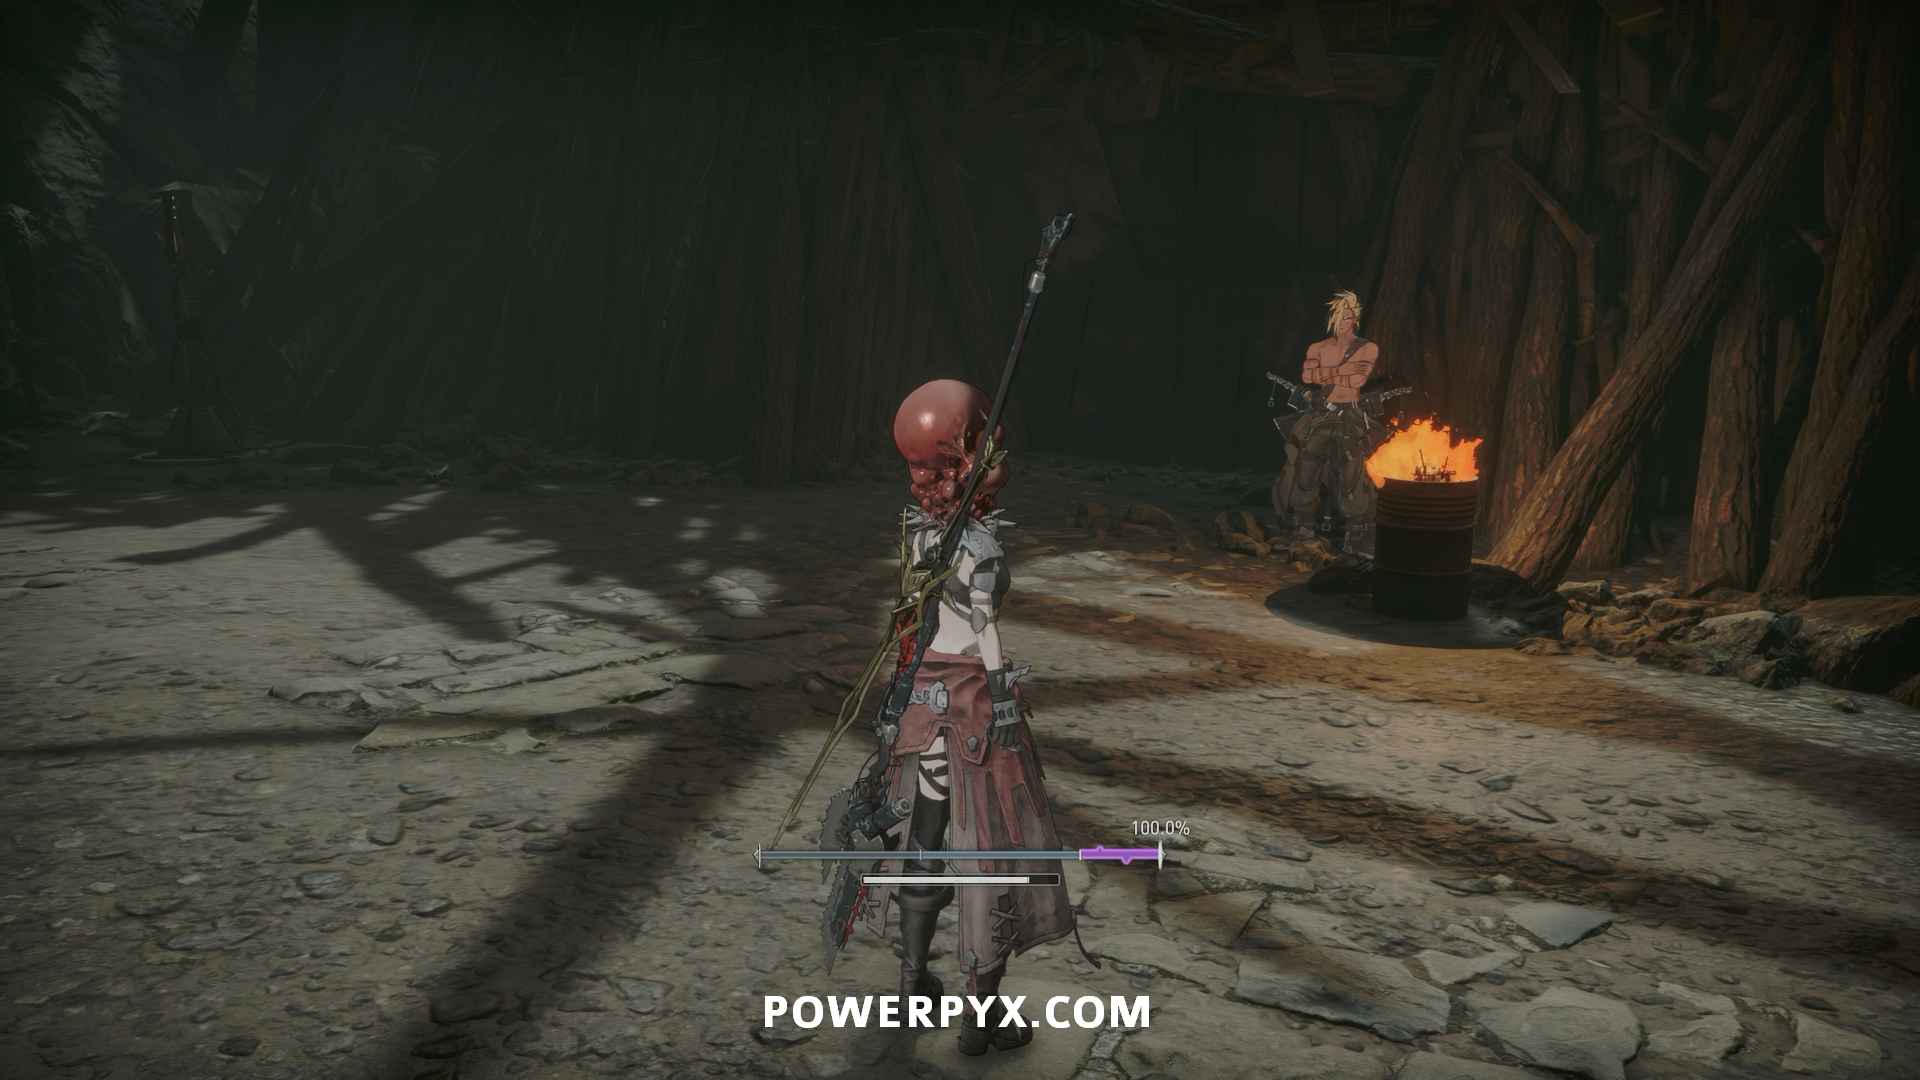
Once you have done this, you need to bring him the Living Seed item which is done by defeating the hidden boss Ursula, the Mutated in a hidden area of Outer-Wall Ruins – Ancient Machine Works. To find this location, start from either Assembly Hall or Shirley’s Room branches and go to the long walkway over the pit that is behind the large laser firing robot. Go to the end of the walkway opposite the door by the robot and look below to spot an item on a pipe. You need to jump out to the closer pipe, then down to the pipe with the item, then jump down to the platform below. Make sure to heal in between drops so you don’t die on the way down. You can then follow the short path to where you fight Ursula, the Mutated. After defeating her speak with her at the Branch, exhausting her dialogue to receive the Living Seed.

Now return to Delpha who will have moved to Twilight Hill – Withered Forest > Arboretum from receiving the Arboretum soil. Speak with him and he will plant the seed at the Branch, causing you to receive the Azure Branch item.
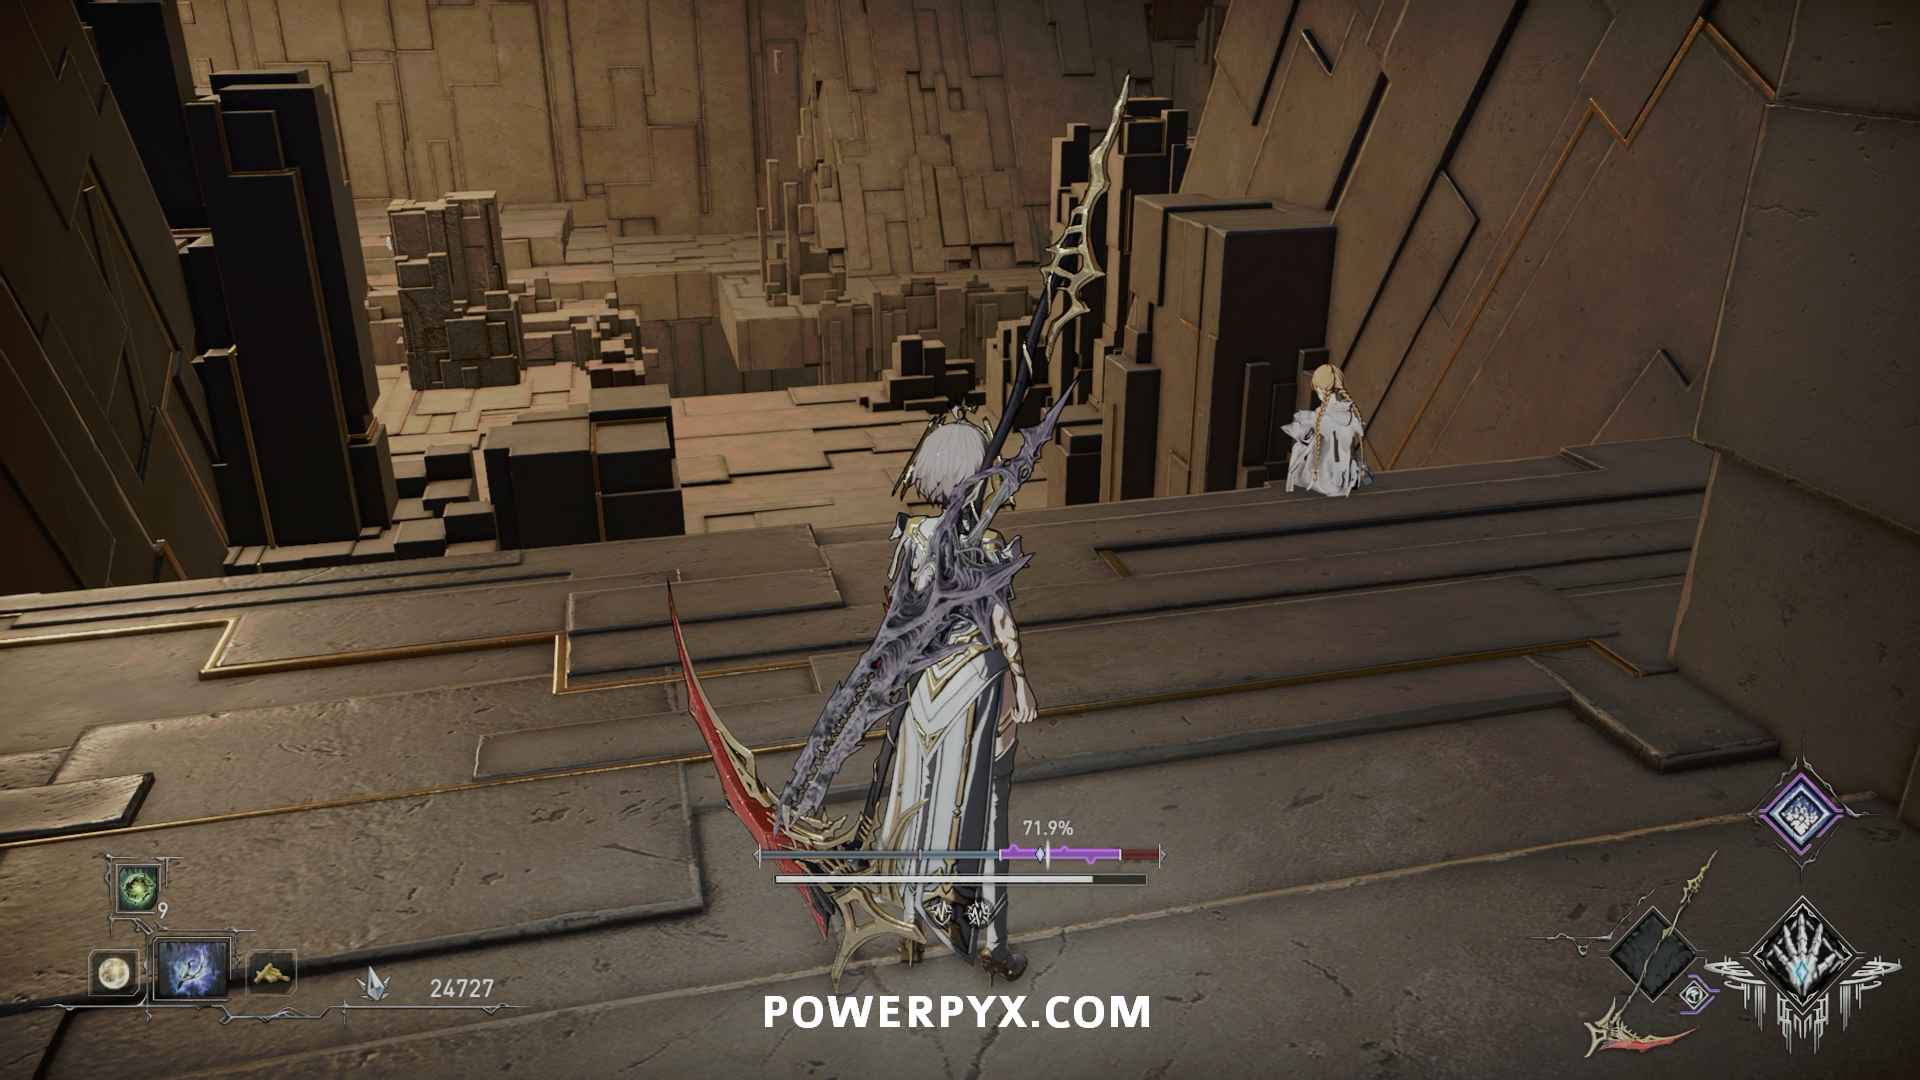
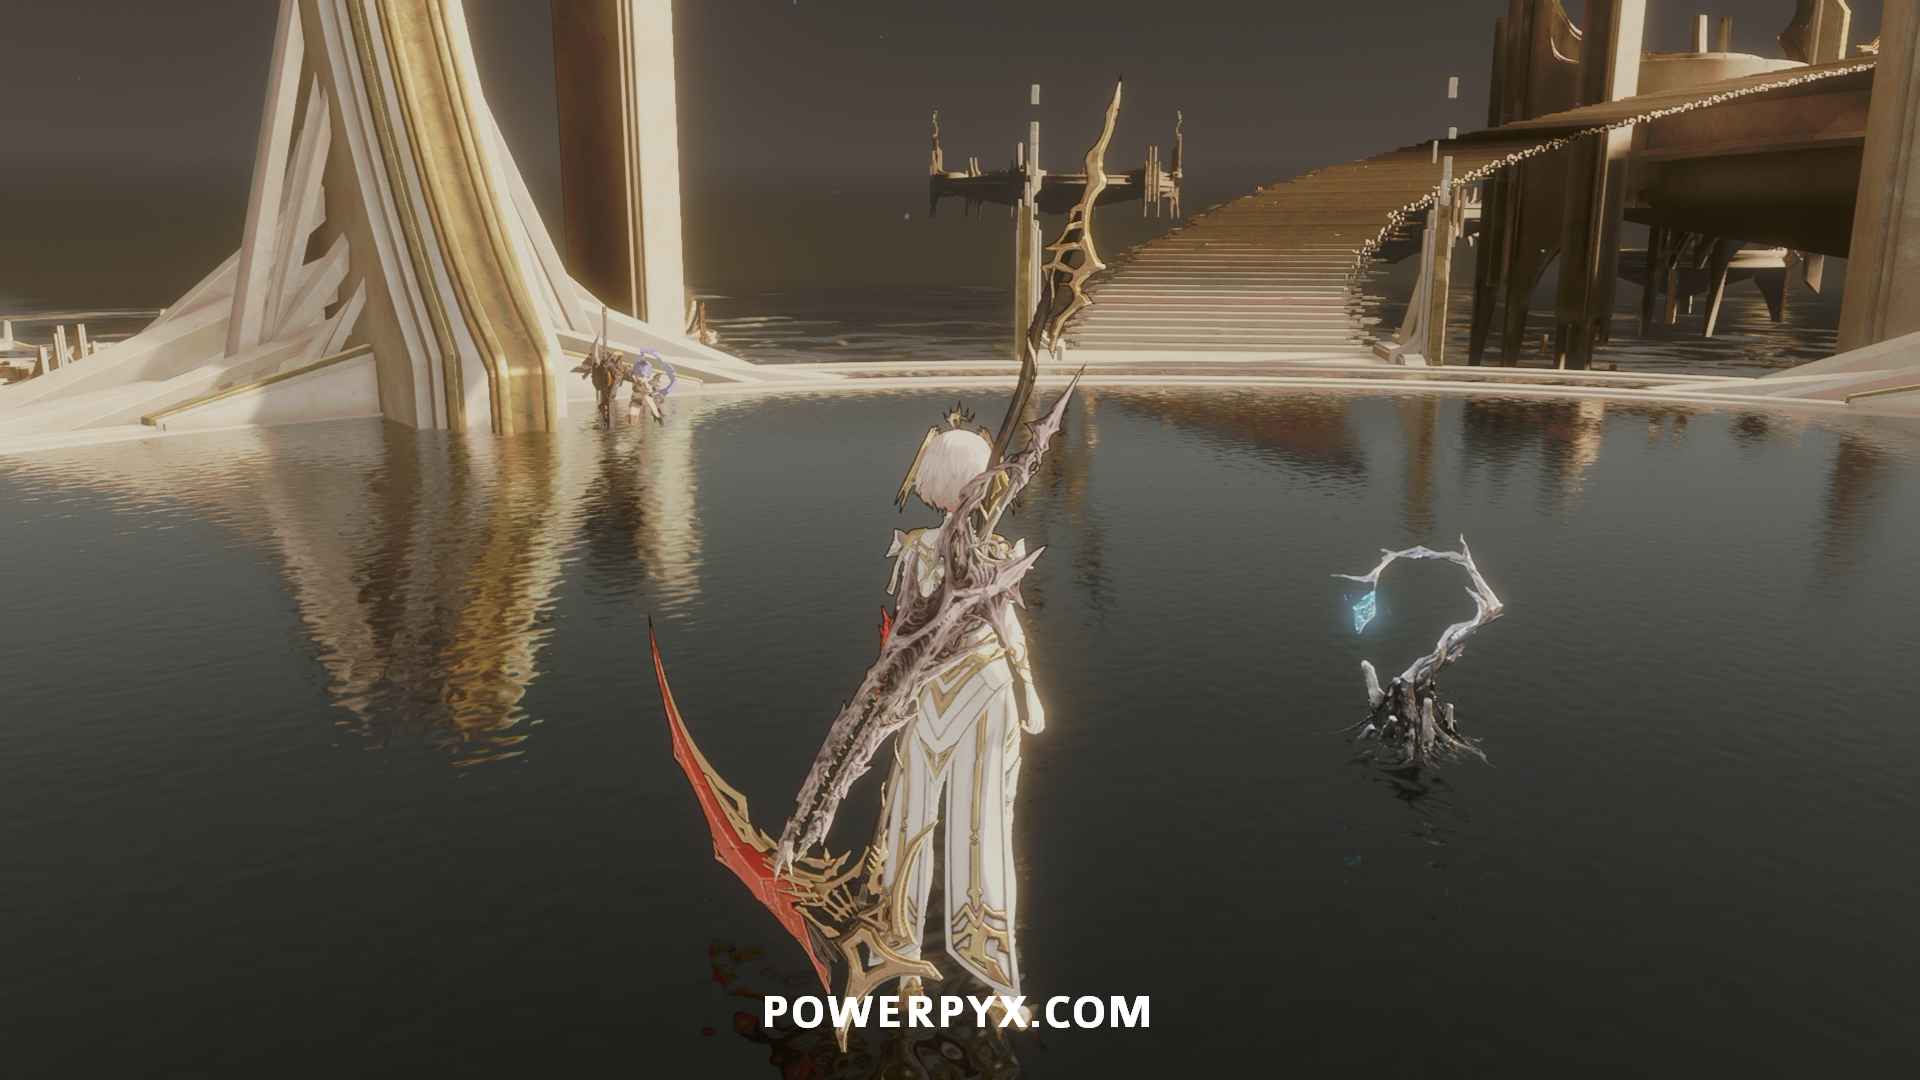
Next you will need to have access to the Sewer Town – Courtyard of the Tree area. This is another hidden area that is related to Millaire’s questline. To find the area, start from the Sewer Town – Center > Central Station Branch and proceed along the main path until you drop down the hole in the floor. Follow the path through the subway car to find the Branch Underground Shaft. Follow the path dropping down the shaft to the bottom to find the Branch Gate of the Tree. Interact with the Memory beside the Branch to receive the Main Seal Seal of the Tree.

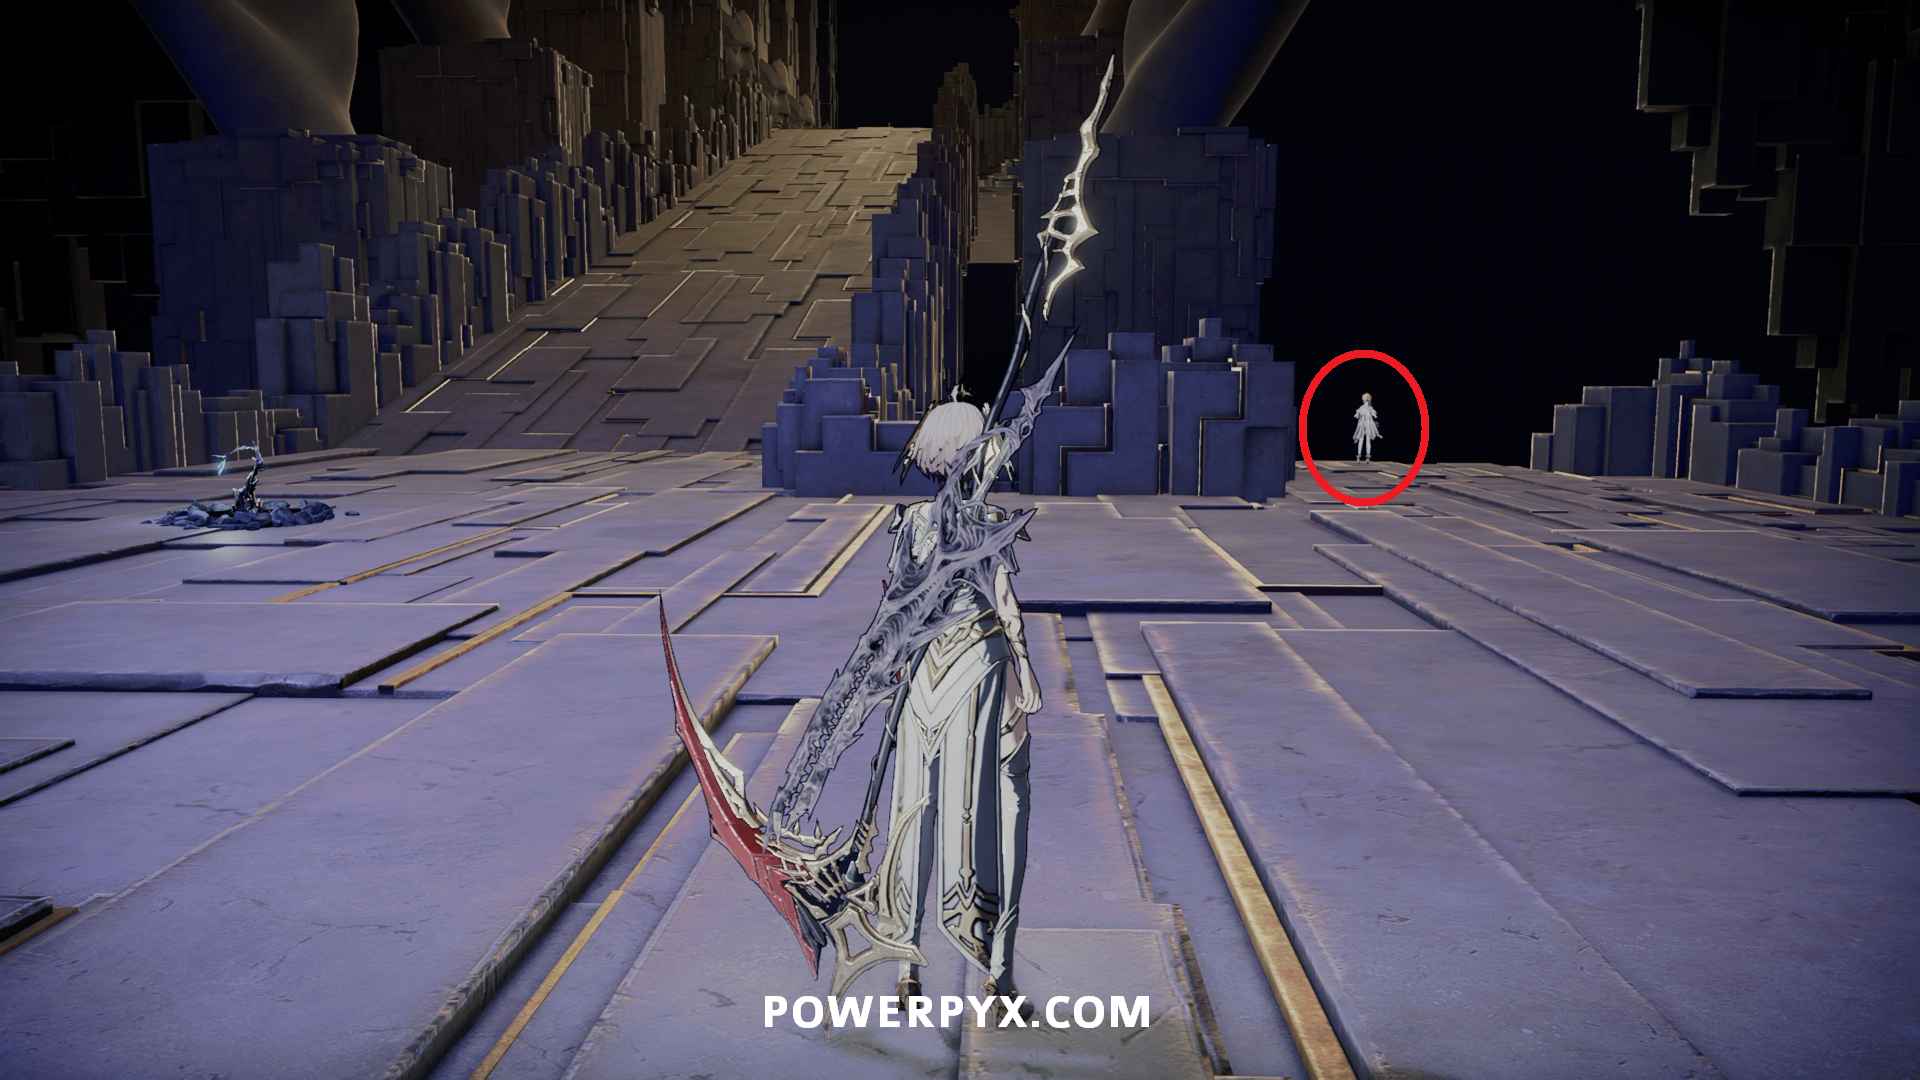
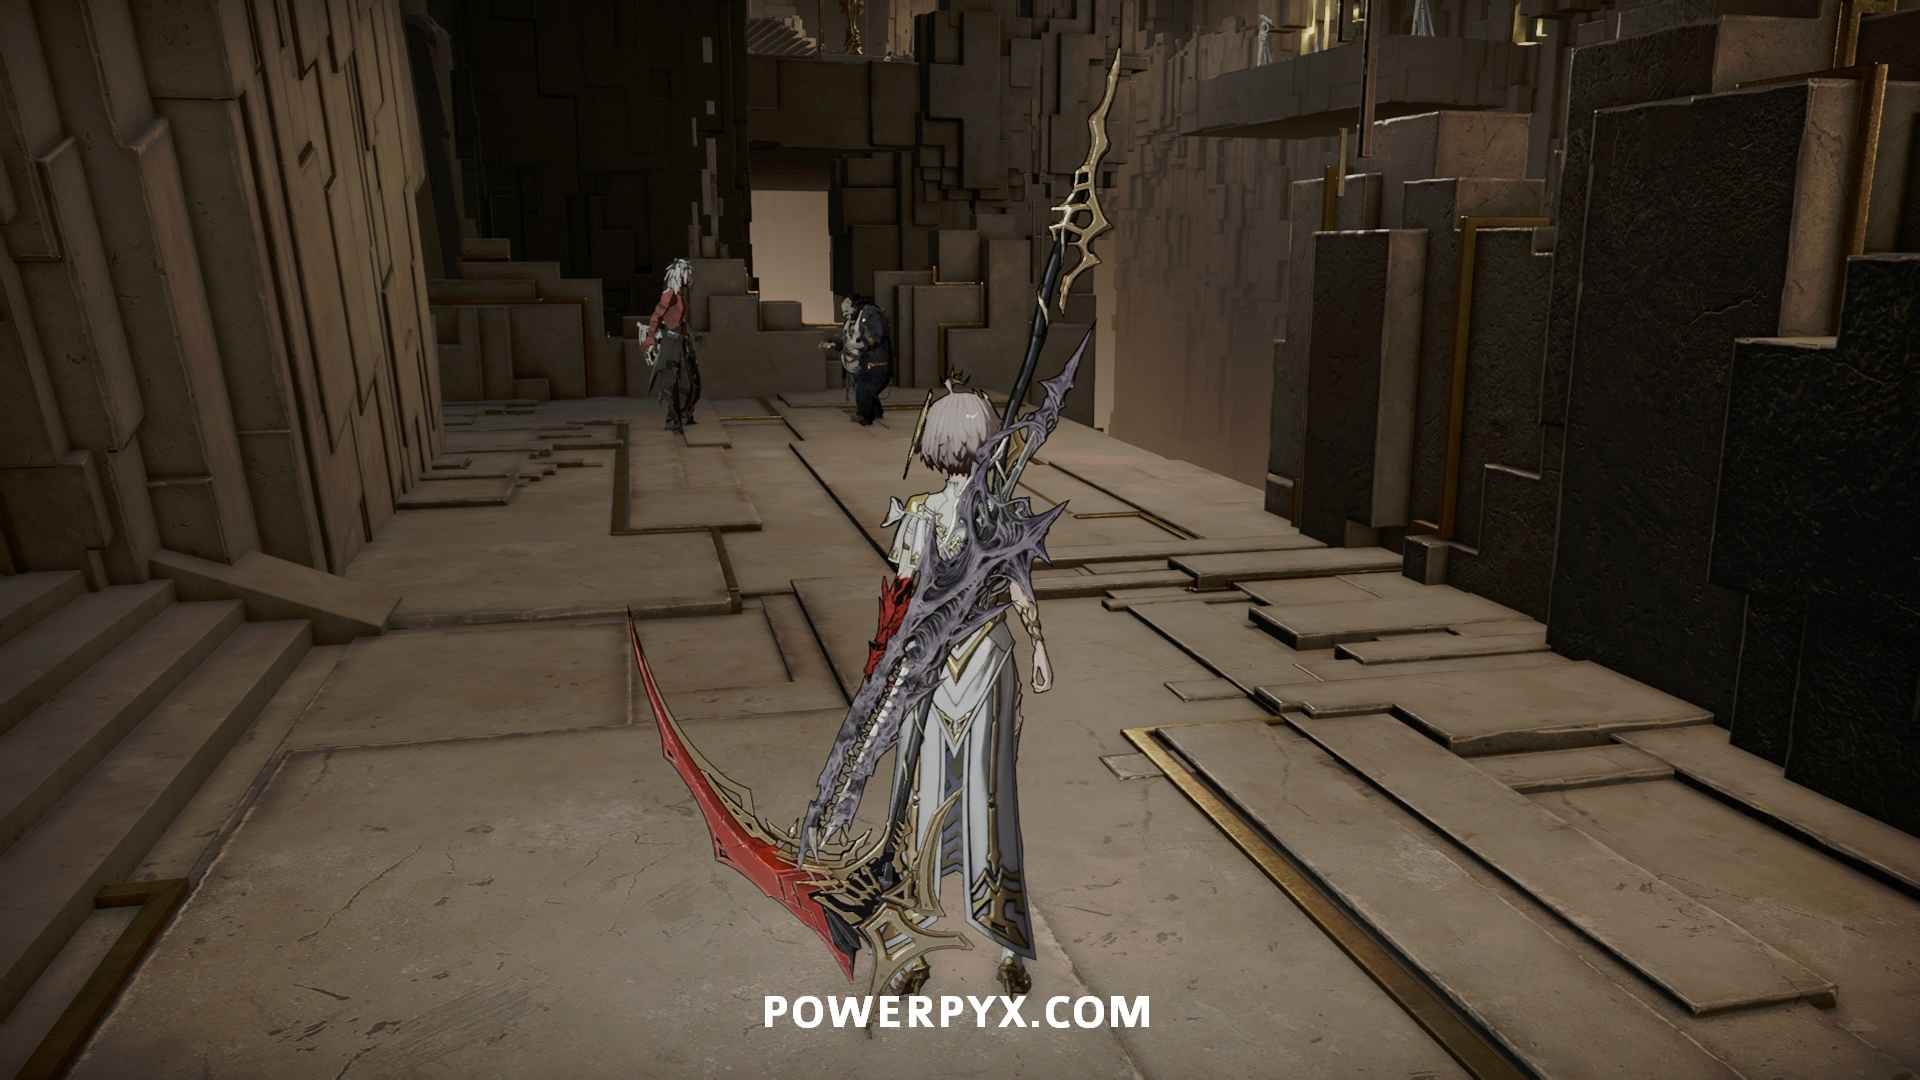
Now go back to the Temporary Campsite and speak with Millaire to show her the Seal, and she will agree to meet you at the door. Go back to the Gate of the Tree and speak with her, then she will open the door so you can fight the hidden boss Guardians of the Tree with her help. After defeating the boss, jump off the far ledge toward the tree in the distance to be transported to the Courtyard of the Tree area. Go forward and repair the Branch, then go up the stairs and speak with Charon.
You can now return to Loskid and speak with her to obtain the Golden Branch. Now travel back to the Central Garden Branch and go back up the stairs. Interact with the pool in the middle to be transported to Elysium. Proceed to defeat the final boss Aether, the Father and you will be presented with a dialogue choice. If you didn’t complete the additional step for the Second Dawn ending you will only have the option “Accept the Invitation” which triggers this ending.
Ending 3: Second Dawn
Trophy/achievement Second Dawn
This is the “true” ending of the game, which triggered with the same steps as Boundless Stars, but with the additional step of completing Shirley’s questline.
Once you have completed Shirley’s questline and have received the Azure Branch from Delpha, speak with him again (you must leave or rest at the Branch if you just got the branch) and he will then give you the Nameless Flower. Return to Shirley’s final spot at Hagios Patir – Upper Level > Path of Epitome Branch and speak with her once more to give her the flower.
You can then complete the same steps as before to speak with Loskid to obtain the Golden Branch, go to the Central Garden Branch and enter Elysium through the pool. This time after defeating Aether, the Father you will have two choices. To trigger the Second Dawn ending choose “Decline the Invitation”. This will then trigger the fight against the hidden final boss Charon, the Nurturer, after which you will receive this ending.
NPC Questlines
Questline 1: Delpha
Delpha’s questline is primarily related to bringing him all Soil Samples, which he exchanges for Purified Soil to cultivate the Branch. See All Soil Sample Locations.
Interaction #1 – Branch: Outer-Wall Ruins – Slums > Temporary Campsite
Speak with him and exhaust his dialogue to receive the first Purified Soil. He stays in this location until you bring him Soil: Arboretum where he will move to the next location.

Interaction #2 – Branch: Twilight Hill – Withered Forest > Aboretum
After he has moved here and you have given him all Soil Samples, give him the Living Seed as above for the Boundless Stars ending to receive the Azure Branch.
Trophy/Achievement Blooming Life
Interaction #3 – Branch: Twilight Hill – Withered Forest > Aboretum
After having completed Shirley’s questline up to Interaction X, speak with Delpha again to receive the Nameless Flower, which allows you to finish the last step of Shirley’s questline, required for the Second Dawn ending.
Questline 2: Shirley
Shirley’s questline involves speaking with her in 7 locations through the game. Most locations are along the main path, but you need to also complete a specific step in Vikas’ questline in Hagios Patir – Lower Level to have her quest continue. You can still complete both characters’ questlines before the point of no return near the end of the game.
Interaction #1 – Branch: Outer-Wall Ruins – Slums > Temporary Campsite
Speak with her and exhaust her dialogue, this is required to proceed out of the area as she gives you the Seal of the Pilgrim that the person blocking the exit needs to see before you can pass.

Interaction #2 – Branch: Sunken City Overground – Rooftop Street > Viewing Balcony
Shirley is sitting on a box beside the Branch, speak with her here.
Interaction #3 – Branch: Sunken City Underground – Underground Parish > Parish Avenue
Follow the main path up the two sets of stairs and the large scaffolding structure, then instead of going up the third set go around the path behind the scaffolding where you can see two subway cars. Drop down and go into the second car to find Shirley.


Interaction #4 – Branch: Hagios Patir – Lower Level > Cleansing Stairs
On the main path between the portal and the Branch you can find Shirley and Vikas. This step requires you have completed Vikas’s questline up to Interaction 3 so that he will show up here with her. If this interaction is missed then Vikas will no longer be present with Shirley’s questline continue to the remaining spots.
Interaction #5 – Branch: Hagios Patir – Lower Level > Cleansing Stairs
After defeating the Choirmaster and having completed Interaction 5 of Vikas questline where you talk to Slarm, go back to the balcony and now only Shirley will be present, speak with her again.
Interaction #6 – Branch: Twilight Hill – Spirit Depths > Dormant Array
Along the path between the entrance to the area and the Branch, Shirley is found looking at a glowing wall on the right side.

Interaction #7 – Branch: Twilight Hill – Spirit Depths > Watch Tower
Once you reach the bottom level and the hallway covered in spike traps, Shirley can be found along the wall on the right side.

Interaction #7 – Branch: Hagios Patir – Upper Level > Evolving Palace
From the Branch follow the main path to the point where you drop down some large platforms to a lower area. Shirley is sitting on the edge of the first ledge.
Key Item: Bunny Doll Arrisa – Branch: Outer-Wall Ruins – Ancient Machine Works > Shirley’s Room
This item is on a bench next to the Branch. You will have reached this area either by dying to the Hunter of Bladers boss, or by going down the side path after the laser robot from Outer Wall Ruins – Ancient Machine Works > Assembly Hall.

Interaction #8 – Branch: Hagios Patir – Upper Level > Path of Epitome
To the right of the stairs you can find Shirley looking over the ledge. Having previously found Bunny Doll Arrisa key item you will give it to Shirley, then she will give it back. There will be an interact prompt on the edge to her right where you will throw it into the void.
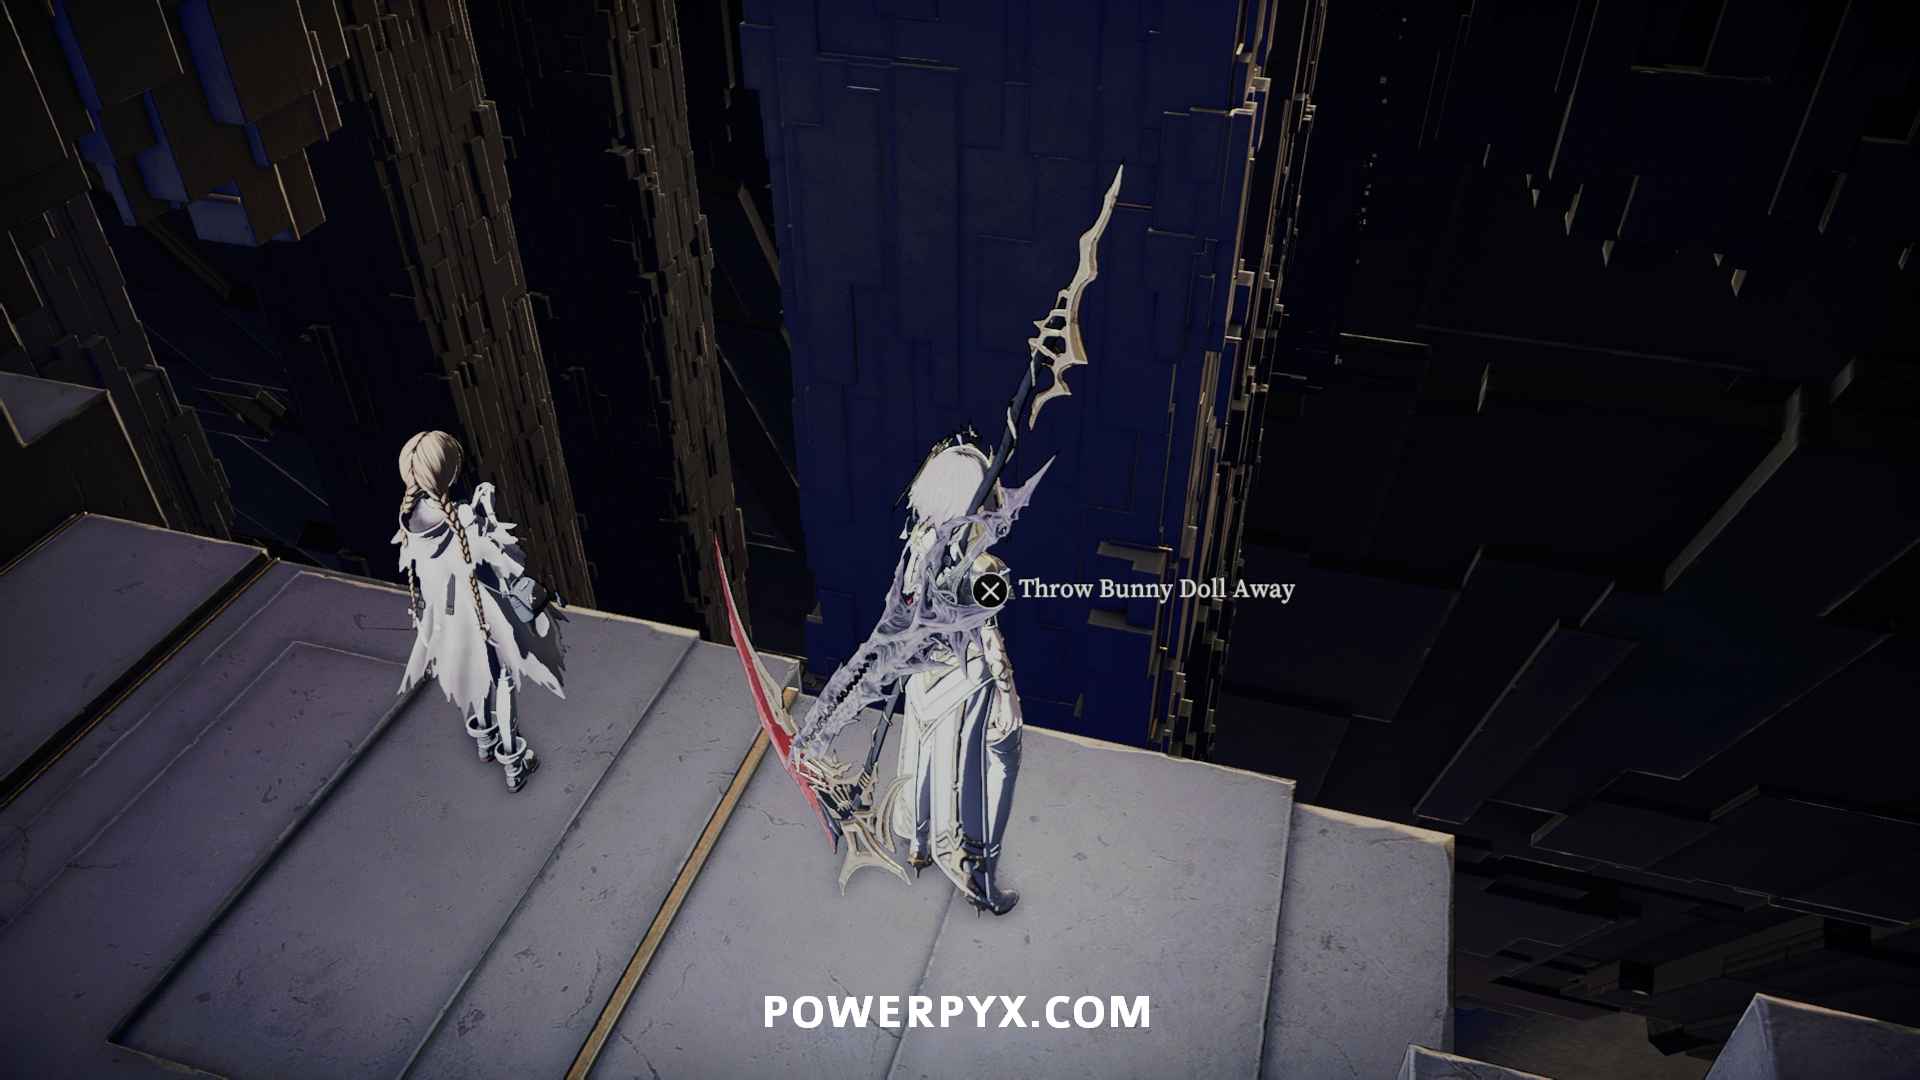
Trophy/achievement Farewell to the Past
Key Item: Nameless Flower – Branch: Twilight Hill – Withered Forest > Arboretum
Complete the steps as laid out in Delpha’s questline to receive the Nameless Flower.
Interaction #9 – Branch: Hagios Patir – Upper Level > Path of Epitome
Return to Shirley and interact with her again to give her the Nameless Flower, along you to receive the Second Dawn ending.
Trophy/achievement Last Promise
Questline 3: Millaire
Millaire’s questline is related to accessing the Courtyard of the Tree hidden area. Her first 3 interactions are optional, and if you miss interacting with her in those locations she will start out at the Temporary Campsite after you defeat the Hunter of Bladers boss where she stays for the rest of the game.
Interaction #1 (optional) – Branch: Sunken City Overground – Flooded Street > High Street
From the Branch go along the left edge near the note and jump the small gap. Follow the path up the ladder, then drop down to the other side where you can find the Millaire as she could be seen through the window.


Interaction #2 (optional) – Branch: Sunken City Underground – Underground Parish > Parish Avenue
Millaire is on the platform immediately after the Branch near the body of a Church enemy.

Interaction #3 (optional) – Branch: Outer-Wall Ruins – Ancient Machine Works > Before Shirley’s Room
If you die to the Hunter of Bladers boss you are automatically transported to a jail cell in the Ancient Machine Works. Speak with Millaire to get her help escaping the area.


Interaction #4 – Branch: Outer-Wall Ruins – Slums > Temporary Campsite
After either escaping the Ancient Machine Works or defeating the Hunter of Bladers boss Millaire will now be at the Temporary Campsite, where she stays for the rest of the game.

Key Item: Seal of the Tree – Branch: Sewer Town – Center > Gate of the Tree
Complete the steps as described for the Boundless Stars ending to reach the Gate of the Tree Branch, and interact with the Memory to receive the Seal of the Tree.
Interaction #5 – Branch: Outer-Wall Ruins – Slums > Temporary Campsite
Return to Millaire at the Temporary Campsite and speak with her to show her the Seal of the Tree.
Interaction #6 – Branch: Sewer Town – Center > Gate of the Tree
Now go back to the Gate of the Tree where Millaire will be waiting. Speak with her to open the door and she will help with the next boss fight.
Trophy/achievement Brilliance of the Tree
Interaction #7 – Branch: Outer-Wall Ruins – Slums > Temporary Campsite
After defeating the main story boss Eunomia, the Resplendent Bishop speak with Millaire to give her the Vessel Remains you received. You can then purchase a Hereditary Resonance from her for 10 Adaptive Fragments.
Millaire’s questline is finished at this point and some of her dialogue implies she is leaving, but she will stay at this location for the rest of the game so you can trade for spells.
Questline 4: Stone
Stone’s questline isn’t related to any endings and has mostly optional steps, but one step is intended to help with a main story boss and is required to complete the overall questline.
Interaction #1 – Branch: Outer-Wall Ruins – Slums > Entryway
Beside the Branch, interact with Stone as he is smashing the ground to receive the Ore Bell key item.

Interaction #2 (optional) – Branch: Sunken City Overground – Rooftop Street > Lounge
Exit the Branch room and go left twice, through the sky bridge that enemies break through the windows. Go into the next room where Arrisa will comment on the Pilgrims. Use the Ore Bell to call Stone, then return and interact with the Branch. Come back to the room again and speak with Stone to receive 3000 Crystals.


Interaction #3 (optional) – Branch: Sunken City Underground – Underground Parish > Parish Avenue
From the Branch follow the main path to the top of the scaffolding go to the right past the large sculpture where Arissa will comment on the group of Pilgrims. Use the Ore Bell to call Stone, then return and interact with the Branch. Come back to the location and speak with Stone to receive 5000 x Crystals and 5 x Pure Crystals.

Interaction #4 (optional) – Branch: Hagios Patir – Lower Level > Cleansing Stairs
Along the path between the entrance portal and the Branch you will reach a spot where Arrisa will comment on the group of Pilgrims looking at the far wall. Use the Ore Bell to call Stone, then return and interact with the Branch. Come back to the location and speak with Stone to receive 6000 Crystals.
Interaction #5 (optional) – Branch: Twilight Hill – Spirit Depths > Watch Tower
Stone is standing at one of the consoles in the Watch Tower.

Interaction #6 – Branch: Sunken City Underground – Underground Parish > Parish Station
In the hallway immediately after the Branch you will have a text popup saying “The ore bell is ringing.” If you didn’t interact with Stone at the prior locations you will first need to use the Ore Bell to call him, then go back at the Branch. Continue down the hallway to where you can find Stone hanging from a beam, speak with him and exhaust his dialogue. Go back to the left path from the Branch and follow it up the ladder to the platform above Stone and interact with the chain to drop him down and speak with him again, then agree with his help in the boss fight. Speak with him again after the fight to receive 5 x Luminous Silica


Key Item: Nutrition Cube – Branch: Sunken City Underground – Underground Parish > Living Pond
From the right side of the center pillar go up the small ramp to the right, then follow the hallway past the large Church enemy and take the elevator to reach the upper level of the room. Follow the path of beams and jump across to the middle area to pick this up.

Interaction #7 – Branch: Sunken City Underground – Underground Parish > Living Pond
Go down to the lower pond area and at the back interact with the Gargantuan Sinner (pink flesh blob) and give it the Nutrition Cube. This causes it to break through the wall to the left, where you can find Stone waiting. Go nearby to trigger a conversation, then speak with Stone after to receive 50,000 Crystals. You can go back to the Branch, then return to this spot and interact with the group of NPCs to receive 1 x Hereditary Resonance.

Trophy/achievement Friends Reunited
Questline 5: Feylia
Feylia’s questline isn’t related to any endings and is easy to miss her interactions as she is typically in out of the way spots. One of her steps involves her helping with a boss which is required for a trophy/achievement, so it still helpful to do her questline in every playthrough. You need to make sure you have interacted with her in all prior steps before fighting the boss Eunomia, the Resplendent Bishop.
Interaction #1 – Branch: Sunken City Overground – Rooftop Street > Lounge
Follow the main path through the area until you zipline to the opposite platform from the Branch. Go through the metal fence and left, then into the room on the right to find Feylia leaning against the wall. She will give you the Main Seal Standard Seal of Bladers.

Interaction #2 – Branch: Sunken City Underground – Underground Parish > Mural Terrace
From the Branch go past the mural (not toward the portal) and climb the ladder to find Feylia.

Interaction #3 – Branch: Hagios Patir – Lower Level > Cleansing Stairs
From the Branch go up the stairs toward the boss room, but go right and to the far end. On the left in the final room you can find Feylia in the corner.
Interaction #4 – Branch: Sunken City Underground – Underground Parish > Trial Hall
Feylia is standing against the wall right beside the Branch, accept her help to fight the boss ahead, then speak with her again to start the fight.

Trophy/achievement Fair Fight
Interaction #5 – Branch: Hagios Patir – Upper Level > Welkin
Speak with Feylia to the left of the Branch to receive a Sacred Blood Crystal. Note she must survive the fight against Eunomia to appear here.
Questline 6: Vikas and Sklarm
Vikas’s questline technically isn’t related to endings, but you need to complete one step to progress Shirley’s questline. You also need to interact with the NPC Sklarm who has three steps that are related to Vikas two of the times he appears in the Hagios Patir area.
Interaction #1 – Branch: Sunken City Overground – Rooftop Street > Top Apron
Vikas is on the ledge of the building near the Branch.

Interaction #2 – Branch: Sunken City Overground – Flooded Street > Eastern Square
Vikas is lying on the ground beside the statue, speak with him and give him Mud Balls.

Interaction #3 – Branch: Twilight Hill – Withered Forest > Hunters’ Trestle
Vikas is on the right side of the path after defeating the boss.
Interaction #4 – Branch: Hagios Patir – Lower Level > Cleansing Stairs
On the main path between the entrance portal and the Branch you can find Vikas with Shirley learning against a pillar. You much have completed Interact #3 in Shirley’s questline to have them both appear here. If this interaction is missed then Vikas will no longer be present with Shirley’s questline continue to the remaining spots.
Interaction #5 – Branch: Hagios Patir – Lower Level > Cleansing Stairs
Go up the set of stairs where the large group of enemy Pilgrims is, then head left down the walkway. Past another group of four you can go up the stairs on the right to find Sklarm in the corner. Speaking with him is required to have Vikas leave the spot he was with Shirley and continue Shirley’s questline.

Interaction #6 – Branch: Hagios Patir – Upper Level > Faultage Corridor
Sklarm is in the back left corner past the Branch.
Interaction #7 – Branch: Hagios Patir – Upper Level > Faultage Corridor
Rest at the Branch, then Sklarm and Vikas will now be nearby. If they don’t appear here after resting try coming back after activating the Evolving Palace Branch or the shortcut elevator before the Seraphim Absolver boss.
Interaction #7 – Branch: Hagios Patir – Upper Level > Uncharted Realm
Vikas is standing just past the Branch before the next portal.
Interaction #8 – Branch: Hagios Patir – Upper Level > Path of Epitome
Vikas appears in your way ascending to the upper level and challenges you to a fight. Beat him and then speak with him after while he is lying on the ground.
Trophy/achievement The Battlefield of Humanity
Questline 7: Assis
Assis functions largely as a vendor that you can trade Nuclei for weapons. He has two interactions points, the second of which is at the Temporary Campsite where he will stay for the rest of the game once he moves there.
Interaction #1 – Branch: Sunken City Underground – Underground Parish > Mansion Ground Floor
On the path immediately after the Branch you encounter Adrammelech and Assis. Assis stays in this location until you speak with Adrammelech again or defeat the boss Hunter of Bladers where he moves to the Temporary Campsite.

Key Item: Observation Report – Branch: Outer-Wall Ruins – Ancient Machine Works > Research Center
This item is in the room with the Branch. This is the Branch before the Ursula, the Mutated boss which you can reach using the method explained above in the steps for the Boundless Stars ending.

Interaction #2 – Branch: Outer-Wall Ruins – Slums > Temporary Campsite
Go back to the Temporary Campsite and speak with him to show him the Observation Report.
If he isn’t triggering the dialogue option make sure you have purchased the available items from him first, or he may not trigger the dialogue that allows you to give him the Observation Report.
Trophy/achievement A Deadly Joke
Rome says
Note: Feylia needs to survive the fight against Eunomia or else she won’t appear in *Interaction #5.
Gage says
Thanks added a note about that for Feylia Interaction 5
eman says
nah, it is not necessary. her death will not affect anything
Jow says
Going for Boundless Stars in NG+ but I already had cultivate branch to max level so I can skip the part that I need to bring Soil Samples to Delph, right?
Gage says
No you need to bring him all the soil samples again and having him move to Arboretum to plant the seed. You keep your upgrades but unfortunately need to do that for the quest again
SayuriUliana says
Delpha’s quest still requires you to bring soil samples to him, since those are what’s required for his quest and not the branch cultivation level.
g-man says
>You may need your LIFE at around 30 or higher not to die from the jumps. You can then follow the short path to where you fight Ursula, the Mutated.
You don’t need to level up LIFE at all.
This jump and others in tall vertical pipe area of the game that only leave you with sliver of HP left are doable at base LIFE with 10 points in it.
Fall damage is % based, not absolute.
Tested before doing a base level run.
Gage says
Thank you for confirming, I removed that line from the locations it’s mentioned.
John Doe says
We need to talk to Assis, when Adrammelech tell you “Assis went to Temporary Campsite”.
This has time limit, maybe before reaching Hagios Patir.
If we don’t, Assis won’t be our friend and we can’t show him Observation Report.
Braydon says
So, I’ve followed every step for vikas and sklarm, but vikas won’t appear, pls help I need one achievement to plat
spurdo says
for me he didn’t appear because i accidentally talked to the fat guy before finishing the girl’s interactions, so he was permanently removed from my game.
4Dragons says
In order to get Shirley to move from location 3 you need to have done some of Stone’s questline as well. Otherwise she’ll just sit there forever.
Divinicator says
You have to buy a certain amount of goods/weapons from Assis before he will refer to you as anything other than “Stranger”, and is required to trigger the conversation with him about the Observation Record.
Some on the steam forum reported this as well. For me, while Assis was at the Temporary Campsite, it wasn’t until I bought 2 weapons (Scrap Lance & Knight’s Lance, but might not need to be that specific) & the Monitor Hood that the conversation triggered.
mo says
how do i make manual saves for it though?
giga says
If you haven’t done Vikas’ line up to interaction 4, do not talk to Sklarm at all. I spoke to Sklarm before I got Shirley to Hagois Patir, and Vikas is nowhere to be found now, along with Sklarm.
chiptune says
Delpha left for me after defeating loskid even before I spoke to her. Couldn’t find him at the arboretum or the the temporary camp.
Arrisa says
Vikas is not appearing at Faultage Corridor for me. I talked to Skarlam, then did Shirley quests until she was near stairs where Vikas supposed to be lying hurt but I hadn’t done his quest past giving him mudballs, he told me that going to the Withered Forest is wrong way.. I talked to him in Hunter’s Tresle later but he didn’t reappear next to Shirley and now he is not appearing at Hagos Patir. I’m at Evolving Palace branch and also activated shortcut elevator… I guess his story ends here for me.
It’s so easy to miss interactions, I should have been following a guide from earlier on.