The Cradle of Centuries is Chapter 11 in A Plague Tale Requiem. This walkthrough will guide you through all objectives of Chapter 11: The Cradle of Centuries.
Sub-Chapters and Objectives:
- Emergence Aftermath
- Reach the Ruins at the Centre of the Island
- Back to the Map
- Find a Way Inside the Ruins
- Sealed Passage
- Explore the Underground Area
- Byzantine Technology
- Explore the Underground Area
- Shoot at the Tank
- Explore the Underground Area
- Defence System
- Explore the Underground Area
- Aelia
- Open the Gate
- Rat Tank
- Explore the Rest of the Underground Area
- The Well
- Explore the Rest of the Underground Area
- Ancestral Corruption
- Explore the Rest of the Underground Area
- Flee the Prison of the Carrier
Emergence Aftermath
Amicia, Hugo, and Sophia reached the fort. There, slavers were sacrificing innocent people in their own version of the Child of Embers. Milo, their leader, was planning to secure his place by the Child’s throne and bring down the Count, but Hugo used his power to punish the fanatics, which led to tensions with Amicia. In the crypt of an antique chapel, Amicia unveiled Aelia’s legacy, Basilius’ Protector, including the location of the former Carrier. After Sophia kills Milo to save the siblings, Hugo disobeys Amicia again, destroying the fort by unleashing the rats on it. The trio head back to the island map after Sophia scolds them for being too reckless.
Reach the Ruins at the Centre of the Island
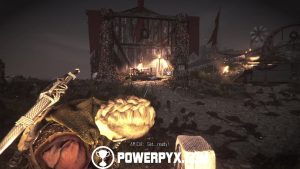
Back on the island, the rats have invaded the fields near the windmills. Proceed through the rat swarms, throwing ignited pots in unlit areas or using Sophia’s prism. Then, when there are no more fire sources in front of you, grab a stick from the stash behind the wall and ignite it to make it to the next lantern, then ignite this as well.
Now grab the upgrade materials from the chest behind it. Now ignite the haystack halfway and run downhill to the next lantern.
Next, throw an ignited pot to make it safely to the next fire source.
Some people are still alive, but not for long as new swarms of rats come hurtling from the ground, devouring whoever’s left alive. Grab the pieces from the chest and you should see a cart in front of you with a brazier on it. However, there’s a beam in front of it that makes the cart unmovable. Thankfully though, there’s some rope on it and an anchor point on the other side. To make it out alive, here’s what you need to do: cast a fire bolt on the plank in front of you and an ignited pot on the rats at your feet, then proceed to the anchor point.
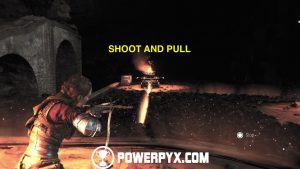
The bolt on the plank will keep burning and you won’t die. Alternatively, you can ask Sophia to refract the light of the fire using her prism. Now interact with the anchor point and shoot the crossbow at the rope on the beam, then pull to move it.
Now get ready to chase the cart as it’ll come rolling down the slope.
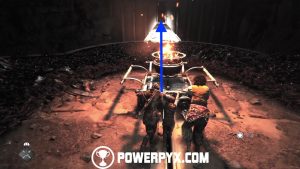
Now push the cart up the hill, through the flower arches and sea of rats until it comes to an automatic stop.
Now ignite the haystack to your left and run to the next lantern.
From here, ignite the lantern in the distance and then an ignited pot at the rats at your feet to make it across safely.
Now, depending on what you have in your inventory, you can cast another ignited pot at the rats or Odoris on both your left and right sides to lure the rats away and make it across the next lantern.
Alternatively, you can ask Sophia to refract the light of the fire using her prism. Now up the crate and the ledge and we’re back at the island map.
Back to the Map
Find a Way Inside the Ruins
Access the ruins, but don’t go back to the map. Instead, before the last drop that gets you the map, there’s a column you can interact with on your left. Push it to destroy the floor that gives you underground access.
Sealed Passage
Explore the Underground Area
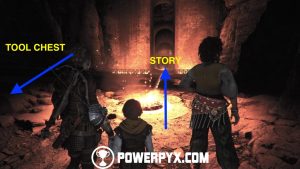
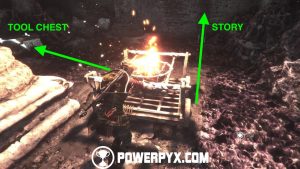
Continue down the tunnels until you see a brazier you can ignite. Igniting the brazier will give light to the entire tunnel. Before moving on, left of the bonfire, in a dark tunnel, is a tool chest with upgrade materials.
Now continue down the lit tunnel and when you reach the Order symbol on the ground, look to your right to find a chest with upgrade materials.
Now continue down the slope until you see a crack in the right wall you can squeeze through.
Byzantine Technology
Explore the Underground Area
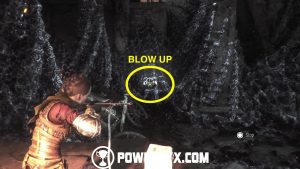
Continue dropping down until you get to a locked door. However, there’s nothing in our gear we can use to bring it down, but thankfully Sophia points out that the barrels in one of the corners are explosive and can be used to blast the door open.
Shoot at the Tank
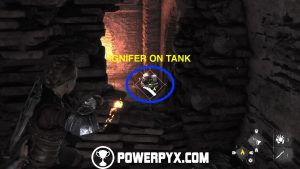
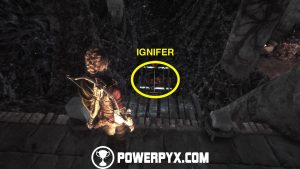
Wait for Sophia to place one copper barrel in front of the door and then simply shoot Ignifer at it to blast the door open.
Explore the Underground Area
Continue on and enter the new room. From the entrance, head for the upper right-hand corner. Blast the copper barrel and crouch under the opening. On the other side is Hugo’s Herbarium #10/12 / Feather #6/7 European Goldfinch.
Now go back to the room with the workbench and crouch under the other hole. Climb up and shoot the copper tank to blast the door open from the hole in the wall.
Go back, go through the door and grab the pieces from the skeleton in the corner.
Continue on, but make a right detour at the intersection to grab a knife from the skeleton’s skull in the corner.
Now continue to the left and crouch under the hole in the portcullis. Now interact with the crank to lift the portcullis, which will release the cart with the explosive tanks and blast the tunnel open on the other side.
Continue to the other side and you’ll arrive at a huge area with a sunlit gate at the end.
Defence System
Explore the Underground Area
Continue down the stairs and the room will soon be teeming with rats. Immediately cast Ignifer at the brazier in front of you. +
In this room there are three carts you can pull toward you using the anchor point next to the brazier. For walkthrough purposes, we will number them #1 to #3. Facing the brazier, #1 is the one on the left, #2 is the one closest to the middle, and #3 the one on the right. Interact with the anchor point and shoot your crossbow at cart #3 and pull it towards you.
Now push it until your reach the track junction and then resume pushing it in the new direction until it stops near a broken cart.
Next, switch the handle again and push it in the direction of the chest until it comes to an automatic stop.

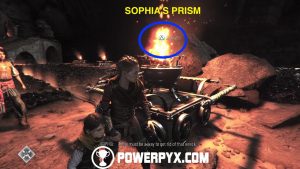
Now instruct Sophia to use her prism on the brazier and make it to the chest area.
Drop down the ledge and interact with the map on the table to unlock Souvenir #19/21 The Chateau d’Ombrage.

Now cast a fire bolt on the crate near the white-painted ledge, open up the chest, and make it back to the brazier cart.
Now push it all the way up and you now should be back at the anchor point.
Now interact with it again and aim for cart #1 and pull it towards you. Cart #1 is currently inaccessible, but that’s okay.
Repeat the same for cart #2. Go now to cart #2 and push it as far as possible.
However, the track is damaged and the cart cannot be pushed further.
We now need to make it to cart #1. Instruct Sophia to refract light on the brazier using her prism and make it to cart #1. Near cart #1 is a chest that you can open by sticking a fire bolt on the crate next to it or by moving the cart in its direction. Now push the cart in the direction of the sunlit door until it comes to a full stop.
From here, use Ignifer on the copper tank near the broken cart.
The explosion will blow the cart up and free the tracks. Now push cart #2 back to the anchor point and next cart #3 to the junction.
From the junction, push cart #3 in the direction of the sunlit door. You should now be able to reach the door risk-free.
Enter the room and you’ll find Aelia’s corpse and a huge green gate we need to open.
Aelia
Open the Gate
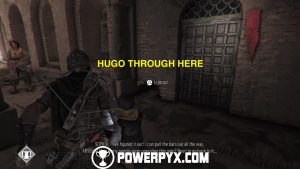
After the cutscene, turn around and head for the left corner where there is a door with a red banner on its side. The door is locked, but you can have Hugo crawl under the opening in the wall, left of the door. He will open the door for you, so you can access the room. Inside it, on the table, is Souvenir #20/21 His Toys….
Now go back into the main room, stand in the middle and face the gate. There are five main interaction points we need to solve the puzzle. From left to right, the anchor point cart is #1, the lever in the upper left-hand corner is #2, the left wall lever is #3, the right wall lever is #4, the lever in the upper right-hand corner is #5. Instruct Sophia to operate the wheel in the left alcove and then pull the cart out of the room until it comes to an automatic stop.
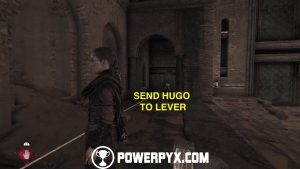
Now instruct Sophia to man #3, go to #1 and shoot your crossbow at #2, then ask Hugo to go to #2. Now, interact with the anchor point again to get #2 locked in place. Now you can tell Sophia to let go of #3. That’s half of the puzzle done.
Now instruct Sophia to operate #4 and Hugo #5. This will lock the second set of iron bars in place. Now, while Hugo is still holding #5 down, Sophia will automatically join you in rotating the crank in the middle, thereby opening the gate.
Rat Tank
Explore the Rest of the Underground Area
Ignite the brazier and continue through the century-old rat nest. When you get to the heart of the nest, shoot the chain to release a bridge.
Walk up the first half of the bridge and then drop down the ledge on the left for a new cutscene. Amicia will fall down into the heart of the nest, awakening the rats.
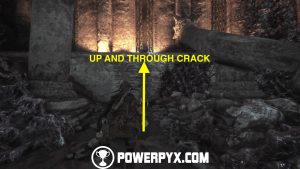
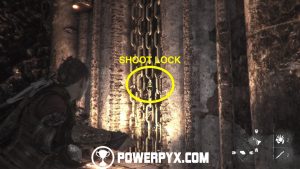
Now run to the ladder to make it to safety. Squeeze through the chains and destroy the lock on the chains on your right to release the counterweights and continue on through the new crack.
Light up the brazier below and drop down. Now cast a fire bolt on the plank in the distance and Odoris on the nearby pillars to make a path amongst the rats.
Now grab a stick from the stash, use it on the fire bolt and make it to the next brazier.
Open the chest here and climb up the two ledges. Now squeeze through the chains on your left for some upgrade materials. Now destroy the chains to release the counterweights, squeeze through them and then through the ones on your left to access Secret Chest #9/10.
Go back outside and ignite the brazier cart.
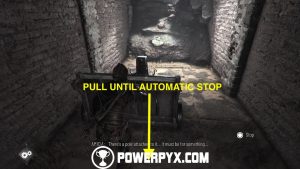
Now push it all the way through the nest to the other side until it comes to a stop. Grab the bolt here and climb over the ledge.
Shoot Ignifer at the brazier in front of you and then a fire bolt on the crate in the left corner.
Now interact with the anchor point and shoot Ignifer at the copper tank Sophia sent your way. Now blow it up to be able to push the cart further to the ladder.
Make sure to stop when you see the tool chest on your left. If the brazier isn’t bright enough to disperse all rats, cast tar on it. Finally, climb up the ladder to reunite with the others.
The Well
Explore the Rest of the Underground Area
Continue down the linear path, into and down the infested cathedral until a new cutscene begins.
Ancestral Corruption
Explore the Rest of the Underground Area
Here we find the corpse of Basilius, imprisoned and chained up, in the very birthplace of the Plague. As it turns out, Basilius decided to give in to his curse after Aelia failed him, but Amicia reassures her little brother that she won’t leave him. However, being in the birthplace of the Plague and surrounded by rat nests all over the place, you can expect things to go south.
Flee the Prison of the Carrier
After the cutscene, run upstairs, following Sophia. In a visually striking sequence, Hugo, Amicia, and Sophia make it out of the prison alive.
Amicia and Sophia reassure Hugo that nothing as bad as what happened to Basilius will happen to him, as long as he trusts in the people that love him.
This concludes Chapter 11 “The Cradle of Centuries” in A Plague Tale: Requiem. Now Chapter 12 “The Life We Deserve” starts.
For all other chapters in A Plague Tale: Requiem check out the full A Plague Tale: Requiem Walkthrough.

 The Cradle of Centuries

























Leave a Reply