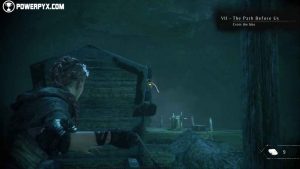
The Path Before Us is Chapter 7 in A Plague Tale: Innocence. This walkthrough will guide you through all objectives of Chapter 7 “The Path Before Us”.
Objectives:
- Follow Melie
- Cross the River
- Reach Melie’s Hideout
- Escape the Inquisition
- Save Lucas
- Find and Enter the Aqueduct
- Cross the Lake
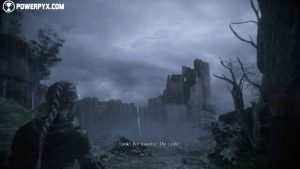
- Find the Castle
- Reach the Castle
- Reach the Living Quarters
- Repel the Rats into the Pit
- Reach the Living Quarters
- Repel All the Rats into the Pit
Follow Melie
Amicia, Hugo, and Melie managed to escape the camp alive. There’s a hideout nearby Melie and Arthur know about which is on the way of the Chateau. For your first objective simply walk with Melie until you reach a river and a watermill.
Cross the River
To cross the river we need to solve a simple watermill puzzle. First, let Melie unlock the door to access the watermill puzzle area. To solve the puzzle you have to maneuver 4 different handles to allow Amicia, Hugo, and Melie to cross. To facilitate things, we’re going to name the handles with letters. The one closest to the entrance is A, the one to the right of the entrance is B, the once opposite A is C and the one to the right of C is D.
Start by turning handle A with Amicia. This will slow down the water current, but it’s not enough for either Hugo or Melie to cross.
Ask Hugo to operate handle B. This will stop the mill and allow Melie to cross. Have Melie interact with handle D. Interacting with handle D allows Amicia to let go of handle A. Let go of handle A.
Now operate handle C to allow Hugo to cross. If done correctly, an icon above Hugo’s head should appear signalling that it’s okay to let go of handle B. While Melie and Amicia keep their handles locked down, Hugo will cross without too much trouble. Puzzle solved.
Reach Melie’s Hideout
Before moving on, there’s a collectible (Curiosity 13 – Horseshoe) we need to grab. To the right of the workbench you can see an opening. Use your sling to bring down the lock of the door on the other side. Then, retrace your steps and climb the window with Melie. The horseshoe hangs on a wood plank to the left of the room.
Now, let’s continue by kicking the beams opposite the workbench.
When we get to the rubbled village, there’s another collectible (Herbarium 4 – Hawthorn) we need to pick up. Go north, to the last shattered house in the distance. Inside you will find the collectible.
Rejoin Melie and walk uphill to reach a hatch and enter Melie’s and Arthur’s hideout.
In the hideout, Melie and the orphans get to know each other better. Melie expects payment for rescuing Amicia and Hugo. She got word from Lucas that the orphans are rich. However, compassionate of the situation they found themselves in, Melie soon desists. Melie invites Amicia and Hugo to get some rest. Safety is not to last, though. The Inquisition is on us again. Time to quietly escape.
Escape the Inquisition
Follow Melie through the tunnels. Shortly after, you’ll see a guard blocking the path ahead. The guard has a helmet and there are no rats, so our current equipment won’t serve any purpose. Fortunately, Melie has Devorantis, a concoction that burns your face and melts steel, perfect to get past the guard. Take Devorantis from Melie, craft some and aim at the guard’s helmet. As the guard takes off his helmet, equip a rock and aim for the head. When the guard stops moving, release to kill him.
Continue on and to get to the next section. This section is split into a first small wood area and a second bigger one. Both sections area heavily patrolled and to get across alive you’ll have to take down some of the guards. To do that, use simple rocks for guards with no helmet and Devorantis + rocks for those wearing one. When casting Devorantis, use  +
+  to avoid being spotted and remain in the grass. To get across the first area, you can either use stealth and get across undetected or dispose of the two guards by using distraction means and a mix of Devorantis and rocks. Choose your strategy and move on to the second bigger area.
In the second area, Melie will suggest you go first and take down some of the enemies while she and Hugo remain hidden in the grass. If you choose to follow Melie’s plan, press  to let go of Hugo, but remember not to go too far away from him or otherwise he’ll start panicking. To avoid additional problems, I personally found it easier to have Hugo stick with Amicia the whole time. It’s up to you, though. Now, the guards will split and go search for Hugo.
While taking down some of the guards with the above-mentioned strategy, using stealth is a lot more important here because if one guard is alerted, all guards will storm towards you, guaranteeing you or your associates certain death.
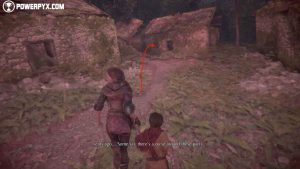
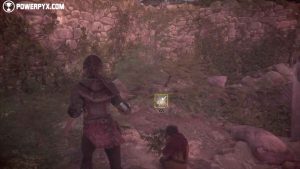
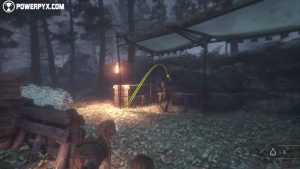
Before heading for the portcullis in the distance, we need to make a brief detour for a collectible (Curiosity 14 – Map) found under a tent in the north-east side of the area. However, the area is well guarded, so we need to take out the two enemies patrolling the area. When you get to the patch of grass in the first picture below you’ll have reach a checkpoint.
Silently move to the patch of grass in front of you, craft some Somnum and equip it. Silently walk behind the guard that’s closest to you and use it to knock him down. Using other means, including Devorantis, will alert the guard nearby.
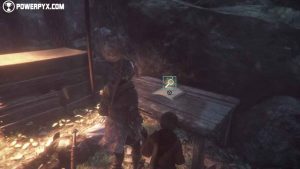
As for the remaining guard, you can use Devorantis and rocks or craft another Somnum and take him down this way. Whichever way you prefer. Then, approach the table to grab the collectible.
After taking down the last few guards at the end of the area, approach the portcullis which is regrettably down. Luckily for us, there’s a side entrance. Lucas has been taken prisoner.
Save Lucas
To save Lucas, simply use a Devorantis + rocks combo.
Find and Enter the Aqueduct
After saving Lucas, follow Melie who doesn’t seem to be in the mood for dilly-dallying.
Shortly after, you’ll meet a small group of rats, but there’s no way for us to get across with our current equipment. Luckily for us, Lucas has a new piece of equipment for us: Luminosa, a bomb, a by-product of Ignifer. Now, before moving on, a couple of words on Luminosa: Luminosa is a the most expensive weapon to craft in the game, but is mandatory to get to most carts in the game. Ensure you always have enough resources to craft one and ONLY use it to access cart areas. Luminosa doesn’t really serve any other purpose in the game as most rat-infested areas can be gotten past by using the environment or other ammunition types. With the exception of Ignifer and a few other ammunition types, remember that most of your crafting materials should go for your Sling and Equipment upgrades. Now, craft Luminosa in your inventory and cast it at the rats.
The rats will burn, allowing you to cross.
Make sure to enter the Alchemist Cart (1/5) before moving on for  Resource Sharing. When you’re done with your crafting in the Alchemist Cart, continue on the pathway to the “ackyduck”. Climb up the ledge and when you reach the ladder, equip a rock to bring it down and be able to climb it. Go through the secret entrance to enter the aqueduct.
Cross the Lake
In the cave, equip a rock to unchain the drawbridge and cross over.
To get across the lake, have Melie and Lucas operate the handles. These will bring the boat to your side of the lake. Get on the boat and when you’re on the other side of the lake, operate the second handle to bring the boat back to Lucas and Melie and allow them to cross.
Find the Castle
Now, have Melie lockpick the door to enter yet another rat-infested area. In this area you have to use the handles to move the braziers to trap the rats into the pit. When you first enter the room, turn left and push the first brazier to trap the first swarm of rats into the pit.
Then, climb down the ladder and approach the white pain on the opposite wall to boost Melie up. You will need her to unlock a door to help Lucas and Hugo through.
After climbing up with Melie, go right and use Ignifer to light a second brazier, then retrace your steps and with the help of Melie push down the drawbridge using :triangle:.
Now, walk back to the other side and Melie will automatically take care of the door. Now Hugo and Lucas will cross over. Lastly, push the second brazier to trap the second group of rats in the pit. Now, use the ladder opposite you to climb down and proceed onward.
Keep going forward until you get to large wooden door. Push it open to reveal the castle in the distance.
Reach the Castle
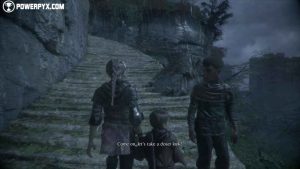
Start by going up the stairs.
When you reach the crossroads after the first set of stairs, take a sharp left. There’s a collectible (Gift 7 – Vinegar) we need to get before continuing on. Go up the stairs and ask Melie to lockpick the door for you. The collectible is sitting on a wooden table inside the room.
For the next section, you’ll have to time your pace with the lightning bolts. Rats are scared of anything that is light. Lighting bolts are a source of light. So, every time lightning hits, quickly get across.
Sometimes you’re going to have to use Ignifer to be able to make it.
Make sure that your travelling companions are always close to you. It’s easy to see them being devoured. Help Hugo climb the ledge and then crouch to walk beneath the beams and make it inside the castle.
We’re not safe yet. We need to reach the living quarters, but the place is strewn with rats. Start by lighting the brazier found on the right of the pit. Then, have Melie unlock the door behind you and walk upstairs and back out.
After going back outside, Hugo and Lucas will leave Melie and Amicia to solve the puzzle and create a safe way for all of them to get to the living quarters.
Reach the Living Quarters
Operate the previously lit brazier. Now, climbing down the ladder is safe.
Grab a stick from, use the brazier to light it and go right amongst the rats to approach another brazier and light it up. Next, climb the ladder to the left of the brazier you’ve just lit.
Repel the Rats into the Pit
Use the contraption to repel the rats into the pit and then release. With no rats on her way, Melie will join you.
Reach the Living Quarters
Now, use Melie’s assistance to push down the drawbridge and access the new contraption.
The rats are regrettably on the wrong side of the brazier, but Melie offers to help us once more. Use Ignifer to light the brazier and then climb down the ladder to instruct Melie to operate the contraption for you.
Now, since you need light to make it across, move when the brazier moves. When the brazier stops, use Ignifer to light the brazier you see in front of you.
Once you’ve lit it up, look to the left to see another brazier to light up. Approach the newly lit brazier and climb up the wall where you see white paint.
Repel All the Rats into the Pit
Push the newly lit brazier to clear the outer area. This will push some of the rats from the outer area into the inner area.
Then, point the camera at Melie to ask her to release the contraption. Now, more rats will be repelled into the pit. However, there’s still a few rats left before we can call it a day.
Use the very last brazier to bring it back to its original position.
Now, climb down the ladder and join Melie at a new climbing point. Climb the wooden ledge and lower the drawbridge with Melie.
Now, climb back down the way you came from and as soon as you approach the brazier that’s closest to you, Melie will operate the contraption. Run along with it and the use Ignifer on the unlit brazier in the outer area of the yard.
Then, grab a stick, light it and use it to get through the rats and to another ladder.
Drop the stick and climb the ladder and go push the brazier to draw more rats closer to the pit.
Climb down the ladder and go back where you saw paint on the wall. Climb these walls again and push the brazier to repel even more rats closer to the pit.
Then, Melie will automatically release the contraption to send the final swarm of rats into the pit. We’re finally safe and can enjoy a good night sleep and some warm fire.
This concludes Chapter 7 “The Path Before Us” in A Plague Tale: Innocence. Now Chapter 8 “Our Home” starts.
For all other chapters in A Plague Tale: Innocence check out the full A Plague Tale: Innocence Walkthrough.
















Charlie says
Thank you for such a great walkthrough’
FranciRoosters says
Glad it helped.