Chapter 6: Light the Way is the 6th story mission in Final Fantasy 7 (VII) Remake. This walkthrough will guide you through all objectives of the Light the Way Main Mission.
Light the Way starts when you complete Dogged Pursuit.
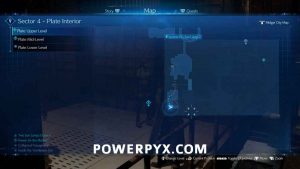
Area: Sector 4 – Plate Interior
Requirement: Complete Chapter 5: Dogged Pursuit
Objectives:
- Head for Section G
- Head to the Control Room
- Secure a Power Source
- Head for Section H
- Discovery: Collapsed Passageway
- The Way to Section H
- Discovery: Inside the Ventilation Fan
- Power for the Platform
- One Sun Lamp Down
- Console Online
- Two Sun Lamps Down
- Three Sun Lamps Down
- To the Cargo Platform
Head for Section G
From the start of the chapter there is a nearby vending machine you can use to stock up if needed, then follow Tifa and Barret down the nearby ladder. To the right just at the bottom of the ladder, there is a chest containing a Hi-Potion.
Continue forward towards the gate where Tifa and Barret are and interact with the door controls.
Head to the Control Room
You need power to get through the door, so follow Tifa and Barret to the nearby control room.
Secure a Power Source
You need to disable one of the plate suns to get power to the door. Go back down and climb up the ladder to the left. At the top grab the nearby chest that contains 3 Potions, then pull the switch to the right to deactivate the plate sun. With the plate turned off you can now activate the door to proceed.
Head for Section H
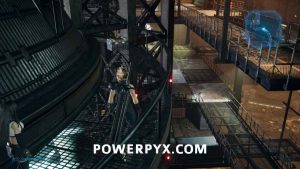
Continue forward and you’ll need to deal with a couple of Grashtrikes. Follow the catwalks then before going down the set of stairs continue around to find a chest containing a Hazardous Material.
Discovery: Collapsed Passageway
If you look ahead you can see a blue Materia on the opposite side of some collapsing catwalk. If you try and walk over there it falls, so you need to find a way around to it after reaching Section H proper.
Go around the lower area but not up the stairs yet. Go across the other part of collapsing catwalk to reach an area with three more Grashtrikes. Kill them, then go around the other side of the central pillar to find a chest containing a Remedy.
Head back to the prior platform then up the stairs to continue.
The Way to Section H
At the top of the ladder the group determines they need to get to the wall to be able to get over to Section H. Before going to the next section with enemies, there is a chest just around the corner of the central pillar containing 2 Antidotes.
Go over to the next platform where there will be a Grashtrike, along with some new enemies named Blugu. These are weak fish-like enemies that will cast spells that inflict Sleep if they hit you, so don’t be near them when they are shown to be about to perform a move.
Continue forward along the path and follow the group over the pipe.
Discovery: Inside the Ventilation Fan
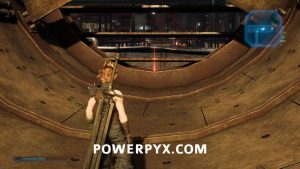
One the way by the second fan Tifa points out something inside, which appears to be a red Materia orb, which is another item you can reach in a bit.
Power for the Platform/One Sun Lamp Down
You reach the lift, but you now need to turn off three more of the sun lamps to get it running. There is a nearby Vending Machine and a Bench you can rest at if you need, then you can progress towards the first objective. Go up the stairs and deal with the group of three Grashtrikes, then go to the lamp platform. If you run around it all the way counter-clockwise you can find a chest containing a Phoenix Down, then go back and pull the switch to turn the lamp off.
Console Online/Two Sun Lamps Down
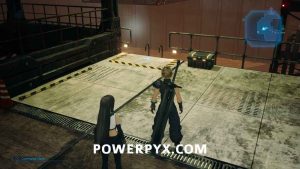
Turning off this lamp enables a number of Security Turrets, but also routes power to a number of other devices in the area allowing you to get around some more. Go to the marked console after destroying the turrets and it allows you to move a catwalk. Instead of moving it slightly to progress, move it all the way to the gates on the right. Go across and grab the chest in the corner, which contains a Turbo Ether.
 |
 |
Go back to the console and move the catwalk towards the proper gate to progress. On the next platform there will be two more turrets, and two new monsters named Terpsicolts. These monsters are weak to ice, but will spin around to block melee attacks, so use magic to stagger them more easily.
After this group is defeated go over to the nearby sun lamp and pull the switch to shut it off.
Three Sun Lamps Down
Go down the nearby ladder, then use the lift to get back to the first platform. Right now instead of progressing, you should go back over to where the main lift is and use the one going West towards the wall.
In this area you’re going to go and get the Materia you spotted behind the fan earlier. Climb up the ladder going into the wall, but don’t interact with the console yet. Nearby there is a vending machine, where you can buy disc 18. Electric de Chocobo.
When ready you can interact with the console to turn off the fans. After doing so you have a time limit of 1 minute to do what you need in the area before the fans turn back on. Head inside, and immediately left there is a chest that contains a Hi-Potion.
Continue into the room proper and there will be a Queen Grashtrike and two Sentry Ray turrets you need to deal with as quick as possible. Remember the Grashtrike is weak to ice attacks, and you can switch to Barret to quickly deal with the turrets. Assuming you didn’t manage to deal with the enemies in under a minute, go back out to the first room and interact with the console again. Enter the room again and this time it will only spawn three regular Grashtrikes, which are much easier to deal with in under a minute. After they are dead, go to the other nearby console and interact with it to turn off the time lock and open the next door. Head into the vent room to pick up the Chocobo & Moogle Materia, also earning the trophy Cleanup Crew.
Go back to the main platform and follow the objective again, using the lift leading East. On the next platform, the correct way to go is further East, but first you’re going to get the other Materia you spotted before. Grab the nearby chest that contains a Moogle Medal, then go down the ladder.
On the next platform you will have to deal with two Queen Grashtrikes before proceeding. When they’re dead go over to the console to move down the catwalk. Instead of stopping to cross, first move it all the way down. This lets you grab an MP Up Materia.
Move the catwalk back up so you can cross, then go all the way around to grab an Elemental Materia.
You can then proceed back to the upper area and continue to the third Sun Plate. Use the console, and this time you can control the lift in going both horizontal and vertical. Before moving it into place you can use it to push some Shinra crates down on the right side which drop a number of items when destroyed, then move it into position to get across to the Sun Plate. On this final platform you will have two more turrets and two more Terpsicolts to deal with before you can turn off the plate. Before turning it off there is one more chest you can grab to the right, containing a Mesmeric Armlet.
To the Cargo Platform
Go back to the main platform and interact with the console, allowing you to get on the cargo platform. Rest at the bench if needed before continuing, then interact with the console to take the platform across.
On the next platform you’ll have a number of turrets to deal with, two of each type for six total. When they’re all destroyed proceed up the ladder and through the vent, then up the second ladder. Go to the right first to find a chest that contains a Moogle Medal.
Proceed along the catwalks to the end where you’ll meet up with Biggs. He provides you some key items, and then the chapter is complete.
This finishes Chapter 6: Light the Way in Final Fantasy VII Remake. Now the mission A Trap is Sprung starts.
Next Up: Chapter 7: A Trap Is Sprung
For all other Mission Walkthroughs, check out our complete Final Fantasy 7 (VII) Walkthrough.


larry says
IN HARD MODE
the book of tifa in this section is found in the ventilation system instead of the summoning materia (is in a chest)
Mannyack says
You’ll also get a grappling gun but what for??? I wonder…
BodyChipper says
The room before also spawns a queen grashtrike and two lesser ones on HARD, not three normal grashtrikes
BodyChipper says
If you fail the 1:00 countdown the first time that is
InsaneCaterpilla says
The first time you fight it it spawns the queen and 2 sentries, the second it spawns the queen and 2 gash strike, the third it only spawns the queen. Equip blizzard and use your MP, no boss to save it for on this chapter.
Jon DuPont says
There is another moogle medal here! The moveable platform that is used to get to the final lamp can be brought up and to the right to knock down the shinra boxes on top of the cargo racks, containing the moogle medal and lots more.