Borderlands 3 (BL3) has 57 Red Chest Locations. Red Chests contain some of the best gear in the game, often epic or legendary rarity. They are not needed for any trophies or achievements and are completely optional. They can be useful during the story to get some good weapons, but also once you’ve reached level 50 to get some good endgame gear without much hassle.
Two of the Red Chests are missable (1 in The Droughts, 1 in Athenas) as they’re quest rewards for completing optional objectives. However, you can still get them when joining a friend’s game who did the optional objectives. The Red Chests also count as collectibles for 100% completion.
You can keep track of how many you found by pressing L3 / Left Stick in the map view. Zoom out to the planet or Orbit view to see how many you got per planet / in total. Again, these are entirely optional but if you want to complete the game 100% it’s good to know the locations as they can be tricky to find. Other than the rest of collectibles, the red chests are the only items not marked on the map.
It’s also good to know that you can open these repeatedly! Just fast travel to another map and come back, then the same chest can be opened again. This way they can be farmed. Initially, the item level is scaled to the region, but after the story you can activate Mayhem Mode to make scale the chests to your level. It’s one of the quickest way to farm endgame gear.
The guide below shows all red chests by planets.
Quick Select:
Pandora
Pandora has 18 Red Chest Locations.
The Droughts (3 Red Chests)
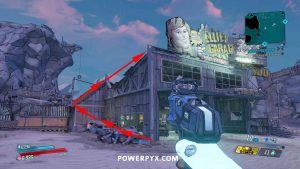
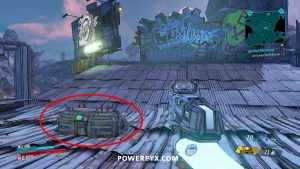
The Droughts Red Chest #1: On the rooftop of Ellie’s garage. When coming from the Droughts fast travel point, you can climb up the roof on the left side.
The Droughts Red Chest #2: On top of a tall enemy building, shoot the 2 red targets. This powers on a trap door at the end of the electrified yellow wire. Fall through the trap door to find the red chest at the bottom.
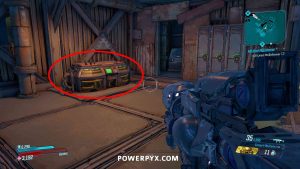
The Droughts Red Chest #3: THIS IS MISSABLE! You have to complete the optional objectives during Side Mission: Powerful Connections. If you do so, at the end of the mission a floor board will open up behind the red “Guns” machine. Drop down and you’ll find the red chest in a cellar. If you missed it, you can get it in New Game+ (True Vault Hunter mode) or join someone else’s game in co-op, e.g. have a friend start a new story and invite you to the quest.
Ascension Bluff (1 Red Chest)
Ascension Bluff Red Chest #1: You find this automatically during Side Mission: Pandora’s Next Top Mouthpiece (during your 2nd visit to Planet Pandora near the end of the story). It’s not available during your first visit in the main story. After you defeat the new Mouth Piece during that Side Mission, you’ll get an objective to find this secret stash in a new room that gets unlocked.
Devil’s Razor (2 Red Chests)
Devil’s Razor Red Chest #1: First climb up the scaffold to the purple-marked unique car in Devil’s Razor. See the location screenshots below for the exact point where to start climbing (see the yellow ledges of the scaffold in screenshot 3). Jump off the side of the building onto the big pipes (screenshot 4) and from the second big pipe you can see the red chest (screenshot 5).
Devil’s Razor Red Chest #2: At the very top of the building shown in the location below. Climb the ladders and boxes inside to reach the red chest at the very top.
The Splinterlands (2 Red Chests)
The Splinterlands Red Chest #1: On the roof above the Catch-a-Ride vehicle station. You can climb up on the side.
The Splinterlands Red Chest #2: For this you must ride the rollercoaster and shoot all red targets during a single ride. Afterward, an electric door will unlock in the rollercoaster booth (where you get in the rollercoaster cars). If you shot all red targets during the ride, you’ll see the open door & red chest straight in front of you after getting out. It can take a few tries – be sure to use a precise fast-shooting long range weapon. Rifles work well. To start the rollercoaster you must get in the cart by pressing the reload button and shoot the little red target on the right side (screenshot 3). If you don’t shoot all targets during a single ride you can retry as often as you want.
Carnivora (2 Red Chests)
Carnivora Red Chest #1: On top of some trailers. You need to fight your way to the top of the area and go across a bridge. Then stick to the wall at the edge of the area to get to the chest (see screenshot 3 for the path).
Carnivora Red Chest #2: In a garage, simply crouch under the garage door.
Guts of Carnivora (2 Red Chests)
Guts of Carnivora Red Chest #1: In a long room with rotating machines, head upstairs to the top floor. There is a long bridge with flamethrowers shooting at the floor, but before it is an air vent you can jump on (screenshot 3). The air will make you fly up to the red chest.
Guts of Carnivora Red Chest #2: This is found just before stepping into the elevator where you choose your theme song for the boss fight against The Agonizer. Do NOT press the 3 green buttons in the elevator yet. BEFORE even stepping into that elevator, jump over the chams directly to the left of the elevator entrance (screenshot 3). On the other side you find the red chest (screenshot 4). This is on a high floor after fighting through a room with many enemies.
Konrad’s Hold (1 Red Chest)
Konrad’s Hold Red Chest #1: This is only found during / after Side Mission: Childhood’s End (see linked mission walkthrough if you get stuck). After the side mission, you can go back to the mission unqiue area and shoot two red targets (the same you shot during that side mission) to turn on the power (yellow cables light up with electricity). Then a secret door at the end of the yellow cables on the ground floor opens up, behind that secret door is a red chest.
Sandblast Scar (1 Red Chest)
Sandblast Scar Red Chest #1: Found in a enemy camp / village area near the exit to Devil’s Razor. The red chests simply sits in a side building, go to the exact location of the below waypoint marker to find it in that building.
Cathedral of the Twin Gods (2 Red Chests)
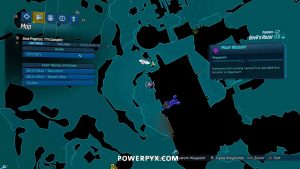
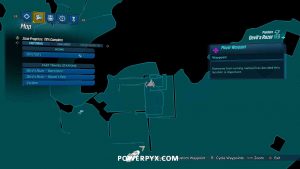
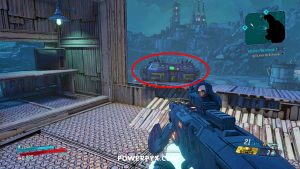
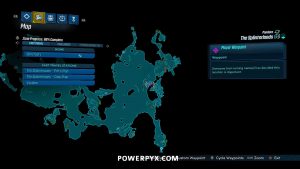
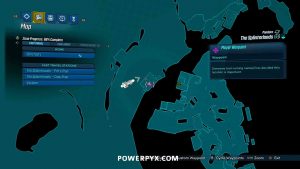
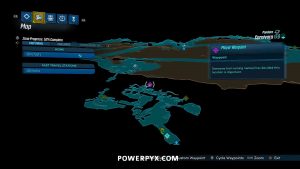
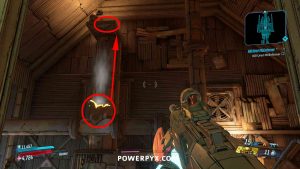
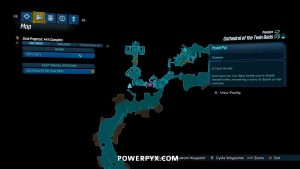
Cathedral of the Twin Gods Red Chest #1: Go to the marked location (screenshot 1-2) and find a door with wooden barricades on the side of the path (screenshot 3). Melee that barricade and follow the path behind it to run straight into the red chest (screenshot 4).
Cathedral of the Twin Gods Red Chest #2: Go to where the Crushjaw Target of Opportunity Challenge takes place (screenshot 1-2). Defeat the target. Where he spawned you can drop down a purple hold (screenshot 3). Down there in the cellar you find the red chest (screenshot 4). Note: this is on the same level as the exit to “The Great Vault” area.
Destroyer’s Rift
Destroyer’s Rift Red Chest #1: Inside the vault after the final boss fight. There are two red chests next to each other in this final vault.
Destroyer’s Rift Red Chest #2: Same as above, in final vault after endboss.
Promethea
Promethea has 15 Red Chest Locations.
Meridian Outskirts (1 Red Chests)
Meridian Outskirts Red Chest #1: Go to the marked spot (screenshot 1-2). There’s an elevator on the ground level, press the green button in the elevator to get upstairs (screenshot 3). When exiting the elevator you’re on the upper deck. Stick to the left side of the deck and you’ll come by a purple-lit room you can jump into, which contains the red chest (screenshot 4).
Meridian Metroplex (3 Red Chests)
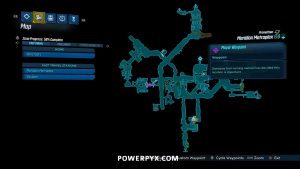
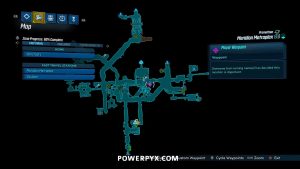
Meridian Metroplex Red Chest #1: You will run into this during main mission Hostile Takeover before dropping down into the weapons depot. In plain sight.
Meridian Metroplex Red Chest #2: Go to the location shown below (screenshot 1-2). Climb the path shown in screenshot 3 and at the end of it you’ll find the red chest (screenshot 4).
Meridian Metroplex Red Chest #3: After defeating Gigamind, a door opens up on the left side, revealing the chest.
Lectra City (3 Red Chests)
*To access Lectra City you need Side Mission: Kill Killavolt (you can still return after that side mission).
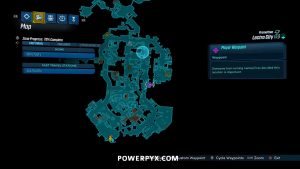
Lectra City Red Chest #1: On top of the crane in the harbor area, see screenshot 3 for the climbing path up there.
Lectra City Red Chest #2: Go to the marked location and the chest will be sitting in plain sight, nothing special needed here.
Lectra City Red Chest #3: AFTER defeating Killavolt, backtrack to the room before the boss fight. A door will now be unlocked that leads to the red chest.
Skywell-27 (2 Red Chests)
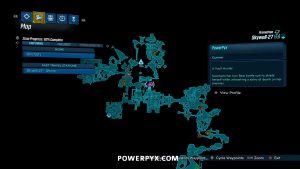
Skywell-27 Red Chest #1: In the “Katagawa Pleasure Pit” (where the slot machine is on the map). It’s a somewhat hidden side area you can drop down to (screenshot 3 shows dropdown point).
Skywell-27 Red Chest #2: Sits right beside the “Laser Control Room” Fast Travel Point after defeating Katagawa Ball (Boss Fight).
Atlas HQ (3 Red Chests)
Atlas HQ Red Chest #1: After defeating Katagawa Jr. boss, in the next room after that where you also find the “Atlas HQ Rooftop” fast travel point (immediately after boss fight). If you missed it on first visit and return later, you must take the elevator up in the lobby to reach the CEO office and then drop down to the Katagawa boss area, defeat the boss and then you can grab the two red chests.
Atlas HQ Red Chest #2: Exact same area as previous chest, sitting behind the elevator in the next room.
Atlas HQ Red Chest #3: At the very end of Side Mission: Ratch’d Up. During that side mission you unlock the lab area – in the final room (bottom floor of lab) you find the red chest.
Neon Arterial (1 Red Chest)
Neon Arterial Red Chest #1: In an area with some shops, behind the kitchen grills (to the left of the main path).
The Forgotten Basilica (2 Red Chests)
The Forgotten Basilica Red Chest #1: Inside the vault after defeating Rampager boss (2 red chests in there).
The Forgotten Basilica Red Chest #2: Same as above chest (vault after Rampager boss).
Athenas
Planet Athenas has 2 Red Chest Locations.
Athenas Red Chest #1: THIS IS MISSABLE! During Side Mission: Holy Spirits you must complete the optional objectives. Then a door (see location in screenshot 1-2) unlocks to the red chest. If you failed to do the optional objectives, you can join a friend’s game who did them to get the chest.
Athenas Red Chest #2: In the area behind Captain Traunt boss fight.
Eden-6
Planet Eden-6 has 15 Red Chest Locations.
Floodmoor Basin (3 Red Chests)
Floodmoor Basin Red Chest #1: In camp Reliance – you go there during Main Mission: Guns of Reliance.
Floodmoor Basin Red Chest #2: Found in Fort Sunshine – you go there automatically during Main Mission: Guns of Reliance. During that mission you’ll get to jump on some moving containers at a sawmill and ride them to the fort, from there you can drop down to the fort below. If you want to return later, you can climb on the moving containers (screenshot 1-2 for location, see screenshot 3 for container). Drop down over the fort at the end of the line and fine the red chest there (screenshot 4-5).
Floodmoor Basin Red Chest #3: Where you fight the Chonk Stomp Legendary Hunt takes place.
The Anvil (3 Red Chests)
The Anvil Red Chest #1: In Central Security, go upstairs and into the vents (screenshot 1-3). Take the first right turn in the vents (screenshot 3) and at the end you find an electric generator (screenshot 4). Activate the generator so the yellow cable connected to it gets electrified. Then you must follow the yellow cable outside (screenshot 5) and a door will now be unlocked to the red chest (screenshot 6).
The Anvil Red Chest #2: In the prison room with the Sky Bullies Target of Opportunity, you can find this on the very top. Jump to the room shown in screenshot 3 (top floor with red number 25 next to door).
The Anvil Red Chest #3: After killing The Warden boss, in the room after the boss fight where the “Ultramax Spire” fast travel point is in.
Jakobs Estate (2 Red Chests)
Jakobs Estate Red Chest #1: In the area you unlock during Side Mission: Witch’s Brew. You can still return after that mission. The red chest is sitting in plain sight (screenshot 1-2 marks the spot).
Jakobs Estate Red Chest #2: After defeating Billy, the Anointed Goliath in the Theater, drop down the ladder in the theater and go through the bedrooms (normal story path). Then the red chest will be in plain sight on the main path (can only go in one direction here). But before dropping down to the grotto.
Voracious Canopy (3 Red Chests)
Voracious Canopy Red Chest #1: In the Science Outpost, in a house on the side of the outpost (screenshot 1-2). You must shoot a red target on the upper floor of that building (screenshot 3) to open the locked door (screenshot 3). Then you can find the red chest behind that door. In order to shoot the target, climb on the roof of the nearest building.
Voracious Canopy Red Chest #2: At the end of the long building complex in Voracious Canopy, you can climb up a yellow ledge behind an ammo dump & meds vending machine. Shoot the red target at the start of a yellow electric cable (location in screenshot 1-2, target in screenshot 3). Then follow the electrified cable to the end (screenshot 4) to find the chest (screenshot 5).
Voracious Canopy Red Chest #3: After defeating GenIVIV boss, a door in the boss fight area opens up to the “Bridge of the Jewel” fast travel point (screenshot 3). The chest is in there, sitting beside the fast travel (screenshot 4).
Ambermire (3 Red Chests)
Ambermire Red Chest #1: Under some wooden stairs. Walk under the stairs and crouch under the wooden barricade, the chest is behind this.
Ambermire Red Chest #2: Sits next to the Crimson Radio (Crew Challenge – screenshot 4). At the top of a tower, must climb up there via the ladders (screenshot 3 for ladder to start climbing).
Ambermire Red Chest #3: On the crane.
Blackbarrel Cellars (1 Red Chest)
Blackbarrel Cellars Red Chest #1: In the fifth room of the Blackbarrel Cellars, on a balcony. Climb up via the boxes on the side (screenshot 3).
Nekrotafeyo
Nekrotafeyo has 7 Red Chest Locations.
Desolation’s Edge (3 Red Chests)
Desolation’s Edge Red Chest #1: During Side Mission: Homeopathological you get the objective to “open the box of tranquility” which is the red chest. It’s an unmissable objective. Just do the side mission and you’ll get it.
Desolation’s Edge Red Chest #2: During Side Mission: Bad Vibrations when you ride the steam jet (air that lifts you up).
Desolation’s Edge Red Chest #3: On top of some stone pillars (screenshot 3 shows the path).
Tazendeer Ruins (2 Red Chests)
Tazendeer Ruins Red Chest #1: You need to jump over a tree branch (screenshot 3) to find the red chest at the end of the path (screenshot 4).
Tazendeer Ruins Red Chest #2: Where you fight the Sylestro & Atomic Targets of Opportunity.
The Pyre of Stars (2 Red Chests)
The Pyre of Stars Red Chest #1: When you jump up some pillars, there’s a hidden section on the right side you can jump to.
The Pyre of Stars Red Chest #2: On the left side of the Wet Well area, behind a mini waterfall.
That’s all 57 Red Chests in Borderlands 3 (BL3)!
For more Guides and Collectibles, check out our full Borderlands 3 Wiki & Strategy Guide.




























Paul Fischbach says
Thanks
Ed Sans says
Thanks, helped with the stupid one – Konrad’s Hold #1