This Final Fantasy VII Rebirth Collectible Locations Guide shows all collectable items in chronological order (including all that are needed for trophies).
For individual Collectible Pages see these (all of them are included here in an All-in-One format):
- Materia – Spells you can use in combat, they are glowing orbs you find on the floor
- Accessories – Equipment found in Chests and as rewards
- Armor – Equipment found in Chests and as rewards
- Summons – Special Summoning Materia
- Queen’s Blood Cards – Playing Cards for Minigame
- Collector’s Items (Johnny’s Treasure Trove) – Rewards from Minigames and Rewards, for 7-Star Hotel

- Minigames – Needed for Johnny Items
- Weapons (Weapon Abilities) – From Chests, Quest Rewards, Merchants, for Well-Rounded

- Piano Songs – Found on Pianos, for Piano Virtuoso

- World Intel (Protorelics etc) – Open World Collectibles, for Materia Completionist

- Manuscripts – Grants SP to buy skills, from Quest Rewards, Bosses, Vendors
Nothing in Final Fantasy 7 Rebirth is missable. After beating the story on any difficulty you unlock Chapter Select. This allows you to replay any chapter and get missing items. Everything carries over via Chapter Select, too! Everything in the open world is still accessible at the start of Chapter 13 via Chapter Select.
Note: Chests not listed here only contain consumables, which can be infinitely crafted and purchased.
Chapter Select:
- Chapter 1
- Chapter 2
- Chapter 3
- Chapter 4
- Chapter 5
- Chapter 6
- Chapter 7
- Chapter 8
- Chapter 9
- Chapter 10
- Chapter 11
- Chapter 12
- Chapter 13
- Chapter 14
Chapter 1
Note: All chests not specifically mentioned below are just consumables that can be infinitely crafted/purchased.
- Materia: Wind Materia – After you walk around with Tifa and fight through several groups of enemies, you will eventually come to a dead-end with a broken bridge and Tifa calls out “Hey! Not That Way!”. When you turn around to head back to Tifa, you can spot the green materia on a ledge to the right. Simply walk up the rocks or climb up with
 to reach it.


- Materia: Level Boost Materia – Immediately after entering the Shinra facility, go up the first flight of stairs and you’ll see this blue materia to the right.


- Materia: HP Up Materia – After getting a tutorial prompt about resting at benches, this is directly beside the bench.


- Materia: Empowerment Materia – Just after the previous Materia, defeat the next group of enemies and you’ll get a tutorial on how to change party leaders. Then follow the path into the cave and hug the right wall. In the large open dead end on the right you can find this green materia.


- Materia: Spare Change Materia – From the previous Materia keep heading down into the cave until you get a cutscene. Afterward keep following the main path past the next two enemies. Before climbing up the large ledge, look up to the right where this is sitting on a slightly higher ledge, next to a crooked tree. You can climb up on the right.


- Materia: Magnify Materia – After walking over the wooden planks on the cliff edge, jump down the cliff edge to the immediate left. This blue materia is down there.


- Materia: Precision Defense Focus Materia – After fighting the Zu, go up the first flight of stairs and then climb the ledges to the immediate left to reach a platform with this purple materia.


- Materia: Auto-cast Materia – After you climb up a ladder, go up a short flight of stairs immediately to the left to find this blue materia.


- Materia: Comet Materia – In the next area where you suck up Mako gas, before going in the elevator, go to the northwest corner of the platform where there is a slightly lower platform you can jump to. The materia is hidden inside the pile of boxes.


Chapter 2
- Queen’s Blood Starter Deck (01 Security Officer, 04 J-Unit Sweeper, 05 Queen Bee, 07 Levrikon, 08 Grasslands Wolf, 09 Mu, 11 Elphadunk, 111 Magic Pot): automatically unlocked at the start of the chapter when leaving the room.
- Relationship Interaction: Talk to Aerith in the south-east of Kalm at the blue objective marker, outside of Maghnata Books, pick “Sure. Let’s.” (ignore the date with her for now, it’ll automatically be done during a story objective, continue with the collectibles below).


- Relationship Interaction: Talk to Tifa in the center of Kalm, pick “The place I made that promise to you.”


- Relationship Interaction: Talk to Barrett in the bar in the north-west of Kalm, pick “First one’s on me.”


- Queen’s Blood Card: 013 Crystalline Crab – Won from Ned just outside Kalm Inn. Refer to How to Win at Queen’s Blood: Best Decks & Strategies.


- Queen’s Blood Card: 012 Cactuar – Won from Nene located on a raised area slightly south of the center of Kalm.


- Queen’s Blood Booster Pack: Suppressive Strikers (002 Riot Trooper, 006 Toxirat, 016 Devil Rider, 018 Flan) – purchasable at Kalm Item Vendor for 500 gil, on the eastern side of the river (contains 4 cards).


- Queen’s Blood Booster Pack: Ruffians (003 Genadier, 010 Mandragora, 014 Quetzalcoatl, 015 Zu) – purchasable at Kalm Item Vendor for 500 gil, on the eastern side of the river (contains 4 cards).


- Queen’s Blood Card: 017 Screamer – Won from Zahira, located in the northeast corner of Kalm next to the river. She’s in the downstairs area, if you approach from the bridge upstairs you can climb down the red ladder.


- Accessory: Headband – South corner of Kalm, in a chest on a small walkway on the opposite side of the river from the main town area.


- Relationship Interaction: Talk to Red XIII in the south of Kalm, pick “I knew I could count on you”.


- Weapon: Sleek Saber (Cloud) – Objective: Abandoned Dock – Location: Abandoned Dock: After you exit Kalm and enter the open world, advance to the next objective to visit Oliver’s Farm. Then you get the objective to visit the Abandoned Dock. Go to the blue main quest marker at the Abandoned Dock and you’ll see this purple chest in plain sight. You practically can’t miss this as it’s directly in front of the main story objective.


- Accessory: Aureate Pinion – Objective: Bill’s Chocobo Ranch – Location: Bill’s Ranch – Located in a chest along the fence behind (east) of the main chocobo stable building.


- Weapon: Timeless Rod (Aerith) – Objective: Shopkeeper Chloe – Location: Bill’s Ranch – Purple chest located directly right of Chloe’s shop desk.


- World Intel (Chocobo Intel: All-Rounders of the Grasslands) – automatically obtained from story. When you talk to Chadley for the first time this will automatically count as completed on the map. He will mark 6 other Intel Locations on the map too (yellow tower icons). Then after talking to him a second time he adds another 4 World Intel to the map.
- World Intel (Activation Intel 1: Bill’s Ranch Tower) – automatically obtained from story, after you finish talking to Chadley.
- Materia: Fire and Ice Materia – Develop at Chadley for 10 Grasslands Data Points (obtained by completing World Intel).
- Materia: Auto-Cast Materia – Develop at Chadley for 10 Grasslands Data Points.
- Materia: Morph Materia – Develop at Chadley for 10 Grasslands Data Points.
- Materia: Auto-Unique Ability Materia – Develop at Chadley for 10 Grasslands Data Points.
- 14 x Materia: Titan (Summon), First Strike, Vitality Up, Provoke, Healing, Enemy Skill: Sonic Boom, Enemy Skill: Plasma Discharge, HP Up, Fire, Lightning, Ice, Wind, MP Up, Steadfast Block – Rewards from Chadley’s Combat Simulator challenges. Talk to Chadley at Bill’s Ranch. The unlock requirements for each challenge are shown when you scroll over it.
- IMPORTANT: You need to assess 16 different enemy types in the Grasslands to unlock the Combat Simulator Challenge “Biological Intel: Blinded by Light”. If you were to forget about this it could get problematic as some enemies only show up once during Side Quests and World Intel events. Going forward remember to assess every new enemy type you encounter using Assess Materia. You can view the progress by pressing Touchpad > Chadley (R2) > Combat Simulator (R1) > Biological Intel.
- Chocobo Race: Hustle de Chocobo – automatic story-related. You can repeat it by talking to Billy again, in front of Bill’s Ranch at the chocobo sign. Make sure you finish in under 00:31:00 to beat Rank 3. Double-tap R2/R3 to speed up.
- Accessory: Crescent Moon Charm – from Chocobo Race: Hustle de Chocobo, if you reach Rank I (finish in 0:40:00).
- Side Quest: Flowers from the Hill – at Bill’s Ranch (available after playing the first Chocobo Race).

- → 30 x World Intel – you should collect all 30 World Intels now. They are all marked on the map by yellow icons. Activate the towers first to mark all other icons on the map. The World Intel is covered in its own dedicated guide, see Grasslands World Intel Locations. When you are done with these, continue below.
- Accessory: HP Up Materia Earrings (Accessory), The Art of the Swordplay Vol. 1 (Manuscript), Way of the Fist Vol. 1 (Manuscript) – purchasable from Moogle Emporium for 6 Moogle Medals. You unlock this shop by completing the World Intel “Moogle Intel: Prairie Moogle”, found east of Bill’s Ranch (marked on map by yellow icon). You get Moogle Medals from some yellow chests and from destroying breakable boxes, scattered all over the open world. If you don’t have enough medals to buy the items here don’t worry, you can save up your medals and buy everything later.
- Side Quest: Livestock’s Bane – started at Oliver’s Farm

- Side Quest: Lifeline in Peril – started in Kalm, by talking to the man in the town center.

- Side Quest: Where the Wind Blows – started in Kalm, inside the Inn west of the town center. (also unlocks Accessory: Whistlewind Scarf)

- Side Quest: A Rare Card Lost – started in Kalm, in The Rusty Arrow north from the town center.

- Queen’s Blood Card 098: Titan – Purchase from Thorin’s Card Shop for 500 gil, must progress A Rare Card Lost side quest to access him.

- Queen’s Blood Card 108: Fat Chocobo – Purchase from Thorin’s Card Shop for 500 gil, must progress A Rare Card Lost side quest to access him.

- Queen’s Blood Card 101: Chocobo & Moogle – Won from Thorin during A Rare Card Lost side quest.

- Armor: Beastman Armband – Location: Mistveil Reservoir – from the Abandoned Dock use the Chocobo to swim across the swamp to the south-west. Then go up the metal stairs in the west corner of the swamp to find this in a chest upstairs. The location gets marked by a treasure chest icon when nearby.


- Materia: Cleansing – Location: Windmill Settlement – after repairing the Windmill in Side Quest: Where the Wind Blows, this will fall down from the windmill. You can find it north of the spinning windmill, can still return after the side quest anytime.


- Materia: Item Master Materia – Location: Grasslands Port – Located on the dock at the port, in a cave to the far west of Kalm and a little bit south, just below the Midgar Checkpoint.

- PLAY ARTS Rest Spot – RANDOM LOCATION FROM DIGGING UP RABBIT BURROWS – Found by excavating rabbit burrows with a chocobo in the grasslands, it’s completely randomized where you’ll find it (this is one of the items needed for Treasure Trove later). Below is where I personally found it, if it’s not there ride around and dig up other burrows, or make a save before picking it up and reboot game until it spawns there.


- Vending Machine (Bill’s Ranch): Healing Materia, Fire Materia, Ice Materia, Lightning Materia, Wind Materia, Chakra Materia, Assess Materia, Steal Materia, HP Up Materia, Precision Defense Materia, Hunter’s Bangle (Armor), Bone Bracelet (Armor), Power Wristguards (Accessory), Bulletproof Vest (Accessory), Earrings (Accessory), Talisman (Accessory), Revival Earrings (Accessory)
- NOTE: Before continuing with the story, now is a good time to complete all available Chadley’s Combat Simulator Challenges. If you haven’t unlocked any yet, take note of the unlock requirements. If you haven’t assessed 16 enemies in Grasslands, the ones in Chapter 3 still count towards it. Chadley’s Combat Simulator remains usable later, he reappears throughout the game. You will also still be able to return to the Grasslands later via Chocobo Carriages.
- Weapon: Hi-Caliber Rifle (Barret) – Objective: Through the Swamplands – Location: Swamp area – advance towards the next story objective now by using a chocobo to swim through the swamp in the south of the map. As you see a cutscene while swimming through the swamp, this purple box will be on the island in front of you.


Chapter 3
- Materia: AP Up Materia – Objective: Where They Lead – Location: Northern Quarry Storage – after meeting the shadowy figure in a black robe, go forward and either go over the catwalk on the right or jump down the left and climb the ladder. You’ll find a blue materia at the end of the catwalk, in plain sight when you enter the area.


- Weapon: Sylph Gloves (Tifa) – Objective: Where They Lead – Location: Tunnel No. 1 – from the previous materia climb down the ladder and this purple box will be next to the second ladder, next to a Crystalline Crab enemy.


- Weapon: Renegade’s Collar (Red XIII) – Objective: Escape the Depths – Location: Subterranean Terrace – right in front of you when you take control of Barret.


- Materia: MP Up Materia – Objective: Climbers – Location: Subterranean Terrace – in the room with the large root you must climb to continue, go through the water to the right of the root to find this materia in an area in the back.


- Accessory: Bulletproof Vest – Objective: Escape the Depths – Location: Eastern Quarry – when you reach a mine cart you must push forward, push it to the left (don’t flick the switch) and climb up to find this in a box.


- Materia: Lightning Materia – Objective: Exit – Location: Mythril Cavern – after pushing a minecart off a cliff as Barret, a gate will be opened for you and this will be directly on your path in plain sight.


Chapter 4
- Materia: Magic Efficiency Materia – Develop at Chadley for 30 Junon Region Data Points.
- Materia: Lightning and Wind Materia – Develop at Chadley for 30 Junon Region Data Points.
- Materia: Item Economizer Materia – Develop at Chadley for 30 Junon Region Data Points.
- Materia: ATB Stagger Materia – Develop at Chadley for 30 Junon Region Data Points.
- IMPORTANT: You need to assess 10 different enemy types in Junon to unlock the Combat Simulator Challenge “Biological Intel: Breath of Life”. Remember to scan each unique enemy type you encounter in this region. You can view the progress by pressing Touchpad > Chadley (R2) > Combat Simulator (R1) > Biological Intel.
- Side Quest: Stuck in a Rut – started at Gabe’s Ranch (unlocks Chocobo, Chocobo Carriage fast travel between regions)
- Armor: Queensguard Bangle – reward from Stuck in a Rut side quest.
- Queen’s Blood Booster Pack: Weird & Wicked (019 Crawler, 020 Archdragon, 026 Capparwire) – purchasable at Under Junon General Store for 500 gil (contains 3 cards).
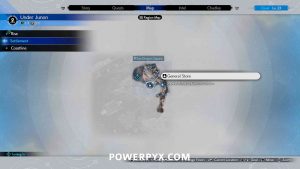
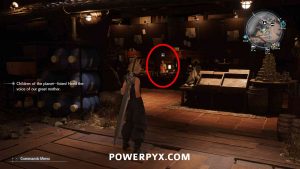
- Queen’s Blood Card: 021 Ogre – Won from The Moore Twins upstairs in the house in Under Junon, must beat both twins.
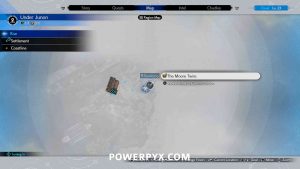
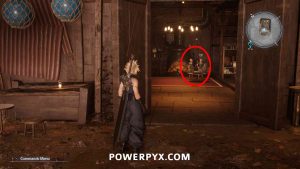
- Queen’s Blood Card: 096 Shiva – Won from Isabelle outside the bar in Under Junon.
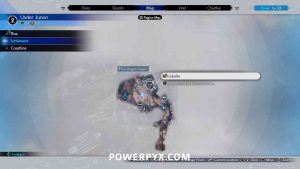
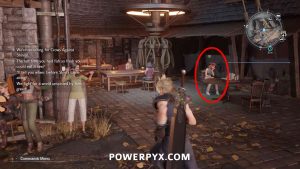
- Queen’s Blood Card: 024 Zemzelett – Won from Zoganon at the dock of the lower section in Under Junon. From the town square go down the stairs, then turn right to find him at the docks.
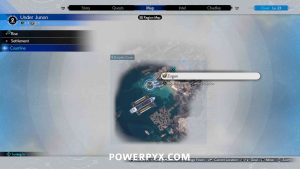
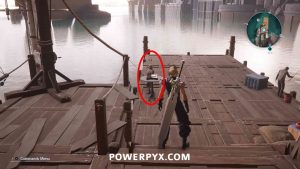
- Materia: HP Up Materia – Across from the card player Zoganon, follow the beach and go left up the wooden ramp to find this in a dockyard area.


- Relationship Interaction: Barret – After everyone is in the Inn, knock on the first door on the right (before Aerith’s room). Pick “Your Autograph”.


- Relationship Interaction: Aerith – After everyone is in the Inn, knock on Aerith’s door after the scene where Red leaves her room. Pick “You shoved a flower at me”.

- Weapon: Empress’s Scepter (Aerith) – Objective: Respite – Inside Aerith’s room in the Inn, can enter after the cutscene.


- Relationship Interaction: Red XIII – After everyone is in the Inn, knock on Red’s door after the scene where he leaves Aerith’s room (across from Aerith’s room). Pick “Huh. Not good.”

- Relationship Interaction: Tifa (Automatic) – Occurs automatically when you go upstairs in the Inn. Pick “Only person from the village I remember is you”. (regardless of your choice the resulting scene is the same)
- Materia: Lightning Materia – in the Under Junon Inn, second floor, in the living room. From Tifa’s room go to the end of the hallway.


- (After finishing up at the Inn, clean up everything else in Junon before talking to Priscilla. Talking to Priscilla would lock you out of Junon for a while.)
- Side Quest: When Words Won’t Do – started in Under Junon, available after finishing story objectives at the Inn.
- Sharpshooter Companion Vol. 1: Reward from When Words Won’t Do side quest
- Side Quest: The Hardest Sell – started at Crow’s Nest (CAS Base Camp)
- Side Quest: Dreaming of Blue Skies – started at Crow’s Nest (CAS Base Camp). Go up the wooden ramp in the west of Crow’s Nest to go up a hill, there you find the quest giver (or accept it from the notice board at Crow’s Nest).
- Materia: Warding Materia – Reward from Dreaming of Blue Skies side quest
- Side Quest: Calling All Frogs – started in Under Junon, in the lower section where the beach/harbor is. Walk to the end of the beach to find an area with a pink mist, there the quest starts (or read the letter on the notice board at the town square).
- Accessory: Enfeeblement Ring x3 – Rewards from the Leapfrog Minigame, available after Calling All Frogs side quest.
- Queen’s Blood Booster Pack: Shut Up ‘n’ Drive (022 Deathwheel, 025 Ignilisk, 028 Scrutineye, 029 Hell Rider II) – purchasable at Crow’s Nest Vending Machine for 500 gil (contains 4 cards).
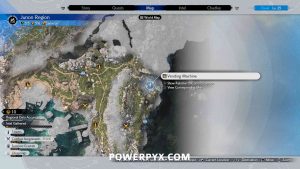
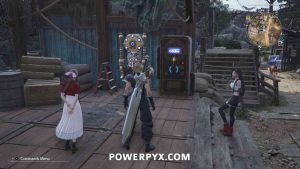
- Queen’s Blood Card: 030 Flametrooper – Won from Neil right next to the Vending Machine/Rest Spot in Crow’s Nest (available after finishing main objectives at the Inn).
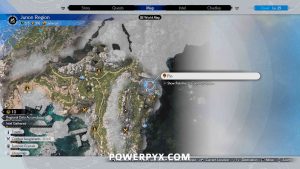
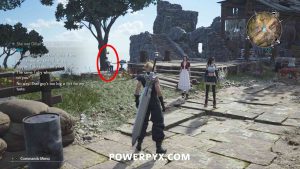
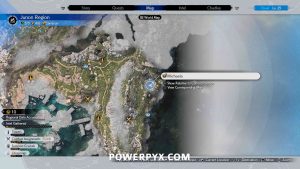
- Queen’s Blood Card: 027 Mindflayer – Won from Michaela on a platform in the southwest of Crow’s Nest (available after finishing main objectives at the Inn).
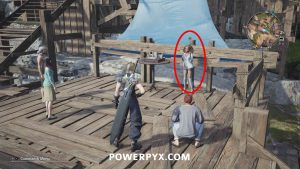
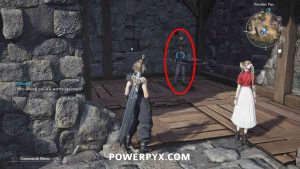
- Queen’s Blood Card: 113 Midgardsormr – Won from Cameron in a stone building in the southeast of Crow’s Nest. Must reach Queen’s Blood Rank 3 before you are able to challenge him.

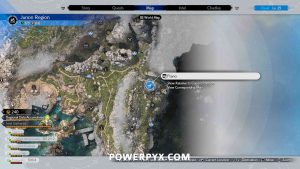
- Sheet Music: On Our Way – Location: Crow’s Nest – On the piano inside the Base Camp Building in Crow’s Nest. For the trophy
 Piano Virtuoso, you must at least reach A-Rank on every Piano Sheet Music (there are 6 total throughout the game).
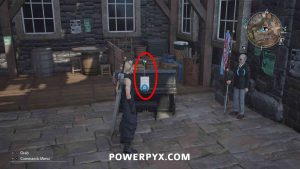
- Materia: HP Up Materia – Reward from Dorian for achieving A Rank on On Our Way. He stands next to the piano in Crow’s Nest.
- Materia: Level Boost Materia – Found in a crater southwest of “Activation Intel 2: Buffeted Cape Tower” location.


- Accessory: Salvation Badge – Location: Cargo Shipwreck – In a chest on the very top level of the shipwreck (1 of 3 chests for this cache location).


- → 24 x World Intel: Now is a good time to clean up all 24 World Intel in this region. Refer to Junon World Intel Locations. When you are done, continue here.
- Precision Defense Focus Materia Earrings (Accessory), Telluric Scriptures Vol. II (Manuscript), Tale of the Red Warrior Vol. I (Manuscript) – Bought from Moogle Emporium after completing the Moogle Intel.
- Chadley Combat Simulator Challenges Materias: Phoenix (Summons), Elemental Materia, Spirit Up Materia, Enemy Skill: Soothing Breeze, Lightning Materia – rewards from Chadley’s Combat Simulator Challenges.
- Vending Machine (Gabe’s Ranch): Poison Materia, Luck Up Materia, Item Master Materia, Elphadunk Bangle (Armor), Wisefox Bracelet (Armor).
- Collector’s Item: PLAY ARTS Sweeper – RANDOM LOCATION FROM DIGGING UP RABBIT BURROWS – Found by excavating rabbit burrows with a chocobo in Junon, it’s completely randomized where you’ll find it (this is one of the items needed for Treasure Trove later). Below is where I personally found it, if it’s not there ride around and dig up other burrows, or make a save before picking it up and reboot game until it spawns there.


- (When you are done with everything above, talk to Priscilla in Junon to advance the story. Doing so will lock you out of Junon for a while.)
- Accessory: Survival Vest – Objective: Out of the Civvies – Location: Larboard Passage – when you need to change into soldier fatigues, this can be found in a chest by the corridor of lockers. To the left of the clothes you must pick up.


- [SEMI-MISSABLE TROPHY –
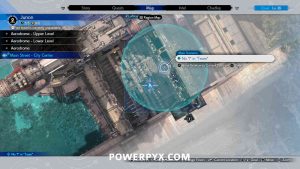
 7th, Assemble!] – Objective: No “I” in “Team” – Location: Larboard Junon – After changing outfits and completing the Parade tutorial, you’re tasked with recruiting 7th Infantry Members for your Parade performance. You must recruit all 10 of them for trophy
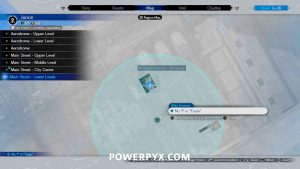
  7th, Assemble!. When you head outside to Larboard Junon, the blue search radius will be marked on the map. Their locations are listed below.
 - 7th Infantry 1 – After you go outside to Larboard Junon, from where you start go left up onto the platform and go forward to find this infantry.
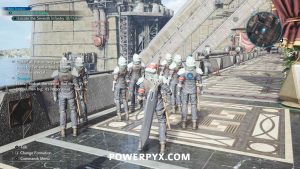
- 7th Infantry 2 – From the starting spot, follow the right side of the street and there’ll be infantry posing for a photo with a cardboard cutout of Rufus. Make sure you take a good picture (green outline) to also get the Collector’s Item.

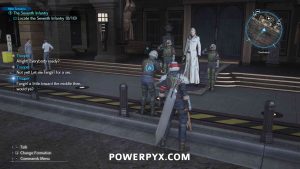
- Collector’s Item: Rufus Shinra Cutout – obtained at the same time as 7th Infantry 2 if taking a good picture (green outline).
- 7th Infantry 3 – Inside The Full Arsenal, the weapon shop (right side of street).
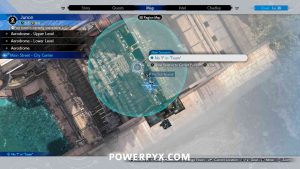
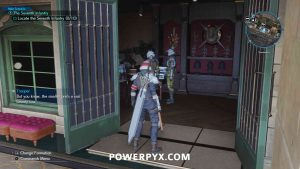
- 7th Infantry 4 – Inside The Glabrescent, the bar directly behind the weapon shop (exit weapon shop through backdoor and go straight across the alley).
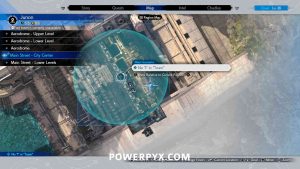
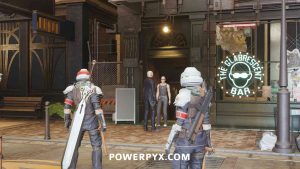
- 7th Infantry 5 – Inside Cecilia’s of Junon, the item/materia shop.
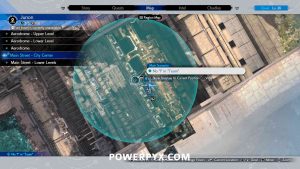
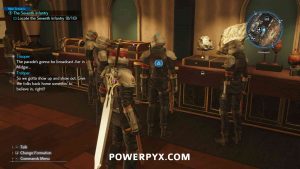
- 7th Infantry 6 – Inside Folios (Maghnata Books store), on the 3rd floor.
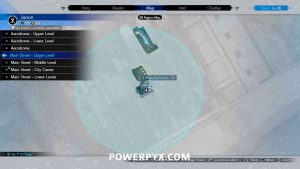
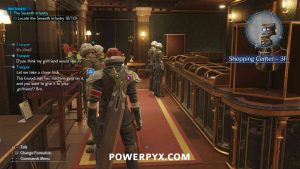
- 7th Infantry 7 – Inside Barracks – Assembly Room, upstairs (middle floor).
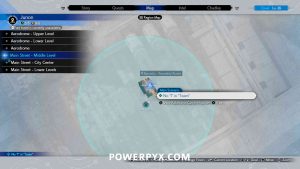
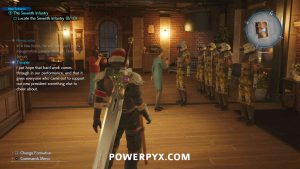
- 7th Infantry 8 – Inside Barracks – Briefing Room, one floor further up (top floor).
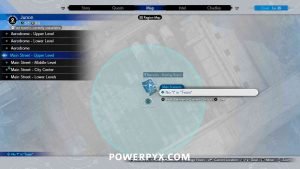
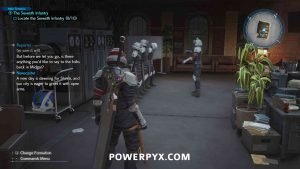
- 7th Infantry 9 – Inside Le Sourire, the bar upstairs in the northeast (last building on the right).
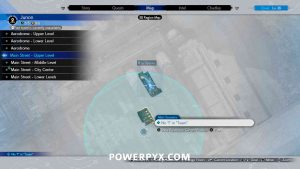
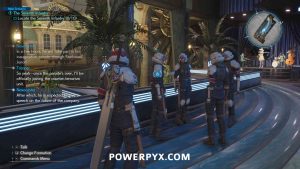
- 7th Infantry 10 – Inside Larboard Garrison – Storeroom, the last building on the left and downstairs.
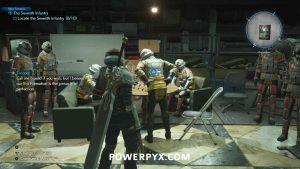
- [SEMI-MISSABLE TROPHY –
 Stealing the Show] – During the Junon Parade you will need to get an “outstanding performance”, you need to score over 100,000 points total to unlock the trophy. Performing higher difficulty formations gives more points, so don’t pick the easiest 1-star formations. After assembling all 10 infantries, make a manual save, then advance to the quest marker. Before the parade you can adjust your infantry formation. You’ll want to use a formation that gives you the difficulties 3-star > 3-star > 3-star. For example, this formation works: Grenadiers > Grenadiers > Flametroopers > Riot Troopers > Riot Troopers (this gives you 3 x 3-star difficulty + 2 formation bonuses). When ready start the Parade. You will need to hit almost everything with a “Great” rating, press the indicated button when the outline reaches the middle of the button. If things go very poorly you can immediately pause and retry but this will restart all 3 formations from the start. Hit all buttons correctly and you’ll earn over 100,000 score and unlock the trophy. My scores were 25/25 Great (19621 Likes) > 26/26 Great (48116 Likes) > 33/38 Great, 5 Bad (101,498 Likes). If done correctly the trophy will unlock after the cutscene. If it doesn’t unlock, reload the manual save and retry. 101,498 Likes is the maximum achievable. By doing the 3-star difficulty formations you get more button presses, which allows you to get away with some mistakes and still reach the highscore.
 - Weapon: Rune Blade (Cloud) – Objective: Hue and Cry – Location: Starboard Connecting Passage – as soon as you have control of Cloud after the parade, this will be in front of you next to a vending machine and bench.


- SEMI-MISSABLE ITEMS: For Accessory: Speed Demon Keychain & Collector’s Item: Stuffed Stamp, you must finish the rest of this chapter without letting any of the Shinra Troopers die. Make frequent manual saves and defend them. Lower the difficulty to easy in the game settings if you’re playing on normal. If one dies you must reload the save. If all survive you will unlock these items after Chapter 4’s endboss. If missed, can still get it via Chapter Select or during the Hard playthrough (hence not fully missable).
- Accessory: Revival Earrings – Objective: Hue and Cry – Location: Weapons Depot – after going through the dining hall and down a flight of stairs this chest will be right in front of you.


- Accessory: Speed Demon Keychain – Objective: Hue and Cry – obtained from the boss fight in this section if you kept all Troopers alive throughout this section
- Collector’s Item: Stuffed Stamp – Objective: Hue and Cry – obtained from the boss fight in this section if you kept all Troopers alive throughout this section
Chapter 5
- Materia: Fortification Materia – Objective: King of Queen’s Blood – Location: Royal Lounge 1F – when in the lounge where you start the Queen’s Blood tournament, go out the southern door to find this on the deck.


- [SEMI-MISSABLE TROPHY –
 Card Royalty] – As part of this Chapter’s main objectives it’s mandatory to play the Queen’s Blood Tournament on board the Shinra-8. To earn this trophy you have to WIN the tournament by defeating all 5 opponents. If you lose a match you can challenge the same opponent again before reporting your results for the round. If you challenged all previous Queen’s Blood opponents in the game you should already have a good deck and will know the rules. You can also buy 4 card packs from the receptionist on the left if you haven’t bought them in earlier chapters. For tips see How to Win Queen’s Blood & Best Decks.
 - Queen’s Blood Card: 095 Ifrit – Win the Queen’s Blood Tournament.
- Queen’s Blood Card: 115 Terror of the Deep – Win the Queen’s Blood Tournament.
- Accessory: Assess Materia Earrings – Win the Queen’s Blood Tournament.
- Weapon: Kaiser Knuckles (Tifa) – Objective: In His Footsteps – Location: 1st Freight Room – when you enter the cargo hold area, after the first fight this purple box will be right in front of you.


Chapter 6
- Accessory: Headband – Ride 2000m on Wheelies and claim at the help desk in Costa del Sol.


- Accessory: Pedometer Pin – Ride 4000m on Wheelies and claim at the help desk in Costa del Sol.
- Materia: Gravity Materia – Develop at Chadley for 15 Corel Region Data Points.
- Materia: HP Absorption Materia – Develop at Chadley for 15 Corel Region Data Points.
- Materia: ATB Boost Materia – Develop at Chadley for 15 Corel Region Data Points.
- Materia: Auto-Weapon Ability Materia – Develop at Chadley for 15 Corel Region Data Points.
- IMPORTANT: You must assess 25 different enemy types in Corel region to unlock Chadley’s Combat Simulator challenge “Biological Intel: At Any Cost”. Assess all enemies going forward. You can track the progress under Touchpad > Chadley (R2) > Combat Simulator (R1) > Biological Intel.
- Queen’s Blood Booster Pack: High Seas Horror (033 Shoalopod, 034 Crown Lance) – purchasable at Queen’s Blood Vendor in Costa del Sol for 500 gil (contains 2 cards).


- Relationship Interaction: Yuffie – in Costa del Sol, interact with her slightly east of Maghnata Books, in front of a food truck (marked by purple dot on map). Pick “Yeah. Obviously.”


- Materia Vendor (in north-west corner of Costa del Sol): Barrier Materia, Empowerment Materia, Fortification Materia, Steadfast Block Materia
- Weapons Vendor (in north-west corner of Costa del Sol): Abyssal Bangle, Oldebeast Bracelet
- Materia: Time Materia – Earn 15000 points on Brigantine stage of Pirate’s Rampage in Costa del Sol (main objective after visiting Johnny’s Inn).
- Queen’s Blood Card: 023 Fleetwing – Reward from completing Round 1 of Card Carnival at Costa del Sol. → For all Card Carnival solutions see All Card Carnival Challenge Solutions.
- Queen’s Blood Card: 109 Posh Chocobo – Reward from completing Round 2 of Card Carnival at Costa del Sol.
- Queen’s Blood Card: 110 Moogle Trio – Reward from completing Round 3 of Card Carnival at Costa del Sol.
- Queen’s Blood Card: 031 Spearhawk – Reward from completing Spears and Needles (Card Carnival) at Costa del Sol.
- Queen’s Blood Card: 032 Sea Devil – Reward from completing Sea Devil by Night (Card Carnival) at Costa del Sol.
- Queen’s Blood Card: 035 Tonberry King – Reward from completing A Kingly Clash (Card Carnival) at Costa del Sol.
- Weapon: Silver Collar (Red XIII) – Place 1st in Run Wild’s Free-For-All Challenge. You will automatically participate in this as part of main objective “Run Wild”, while playing as Tifa/Aerith.


- Sheet Music: Tifa’s Theme – on the piano at The Royal Crown Hotel. You will automatically pick it up as part of main objective “Royal Coast Concert”, while playing as Tifa/Aerith.


- For the other two main objectives “Cactuar Caper” refer to All Cactuar Locations & for “Wheelie Rendezvous” refer to All Wheelie Locations.
- Relationship Interaction: Tifa – After the boss fight on the beach, interact with her at the bar left of the stairs. Pick “Lot’s Happened Since Then”.

- Relationship Interaction: Barrett- After the boss fight on the beach, interact with him on the stairs. Pick “This is on Hojo”.

- Relationship Interaction: Red XIII – After the boss fight on the beach, interact with him on beach near the stage, to the right of the stage. Pick “We had no choice”.

- Relationship Interaction: Aerith – After the boss fight on the beach, interact with her on the beach, down by the water. Pick “They’re just thoughts”.

- (at the end of the chapter you will get to choose whether you want to accept Yuffie into your team or not, what you pick here doesn’t matter, she will join you at this point even if you tell her to go away)
Chapter 7
- Side Quest: The Saga of the Seaside Inn – started at Johnny’s Inn. Note that you can’t complete the entire quest during Chapter 7, it can only be completed after reaching Chapter 9 when all of Corel Region is accessible.
- Side Quest: Rendezvous in Costa del Sol – started at the beach of Costa del Sol.
- Armor: Abyssal Bangle – Score 18000 points on Ghost Ship stage of Pirate’s Rampage. Will unlock this stage during Rendezvous in Costa del Sol side quest.
- Accessory: Wind Materia Earrings – Score 22000 on Ghost Ship stage of Pirate’s Rampage. Must be done after the Rendezvous in Costa del Sol side quest, beating the score during it won’t give you it.
- Armor: Oldebeast Bracelet – Complete the Run Wild’s Time Trial in under 3:00 minutes. Will unlock this stage during Rendezvous in Costa del Sol side quest.
- Accessory: Platinum Earrings – Complete the Run Wild’s Time Trial in under 2:30 minutes. Must be done after the Rendezvous in Costa del Sol side quest, beating the time during it won’t give you it.
- Side Quest: Bodybuilders in a Bind – started at the Training Gym, on a hill along the roads going south-west from Cost del Sol (available after Side Quest: Rendezvous in Costa del Sol).
- Collector’s Item: PLAY ARTS Wheelie – RANDOM LOCATION FROM DIGGING UP RABBIT BURROWS – Found by excavating rabbit burrows with a chocobo in Corel, it’s completely randomized where you’ll find it. Below is where I personally found it, if it’s not there ride around and dig up other burrows, or make a save before picking it up and reboot game until it spawns there.


- Accessory: Supernatural Wristguards – Beat Ronnie in Crunch-Off at the Training Gym, must complete Bodybuilders in a Bind side quest to access.

- Accessory: Circlet – in a chest at Seabreeze Storehouse cache location, directly next to the Chocobo Rental outside of Costa del Sol.

- Accessory: Healing Carcanet – in a chest under the dock at Cape Del Amor cache location, south of Activation Intel 2: Seashell Coast Tower.

- Materia: Chakra Materia – Beat Jay in Crunch-Off at the Training Gym
- Accessory: Champion Belt – Beat Jules in Crunch-Off at the Training Gym
- → World Intel: Now is a good time to collect all World Intel you have access to (2 Towers, 2 Fiend Intel, 1 Divine Intel, 1 Lifesprings). Note that you can’t reach the south of Corel Region, the full region becomes accessible in Chapter 9. So grab what you can now, then grab the rest in Chapter 9. See Corel Region World Intel Locations.
- Fire Materia Earrings (Accessory), Sharpshooter’s Companion Vol. II, Secrets of the Ninja Vol. I – bought from Moogle Emporium (after completing Moogle Intel)
- Weapon: Wizard’s Rod (Aerith) – Objective: Split Up – Location: Ascent – after the cutscene where half your party scouts ahead and you’re walking with Aerith, this will be in a purple box just to the left of the rest bench & shop.


- Materia: Enervation Materia – on a rock right next to the weapon. Swim in the water and climb up to it.


- Materia: MP Up Materia – Objective: Split Up – Location: Second Trail – When you reach the 2nd yellow arrow Yuffie left behind, instead of going in the direction of the arrow turn right and drop down what looks like a broken ski lift. This leads to an open side area, go to the end to find this purple materia on a ledge.


- Weapon: Twin Viper (Yuffie) – Objective: Reach the Control Panel – Location: Preparation Plant 1F – when playing as Yuffie and when the story forces you to use the grappling hook for the first time, this weapon box will be right next to the switch (main objective).


- Armor: Illusionist’s Armband – Objective: Continue Your Search – Location: Railway Control Tower 2F – when you first encounter a Cockatrice (enemy), climb up the wall to the right of it and throw your shuriken to lower a ladder. Climb up and swing across the multiple grapple points to find this in a chest.


- Weapon: Barrage Blaster (Barret) – Objective: Continue Your Search – Location: Railway Control Tower 1F – after going downstairs and fighting two Cockatrice, take the right path to spot this on the edge of a cliff.


- Materia: Empowerment Materia – Objective: Continue Your Search – Location: Railway Control Tower 3F – after activating the generator and going up two yellow/red poles, this materia will be in front of you on the left.


- Accessory: Safety Bit – Objective: Set Their Route – Location – Mining Railway Mountain Track – When you control Cloud again and come by a lever on the train tracks, use the lever to change the tracks. Then follow the right track for just a little bit and climb the ladder on the left to find this in a building.


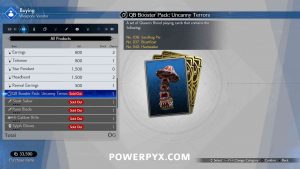
- Queen’s Blood Booster Pack: Uncanny Terrors (036 Sandhog Pie, 037 Bloatfloat, 040 Heatseeker) – purchasable at Weapon Vendor in North Corel for 500 gil (contains 3 cards).
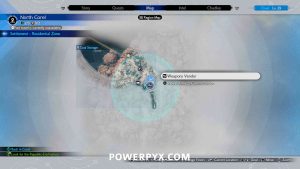
- Materia: Revival Materia – Head up the stairs labeled Ropeway and drop down to this materia on a raised area.


- Queen’s Blood Card: 039 Cockatrice – Won from Rolf upstairs in North Corel.
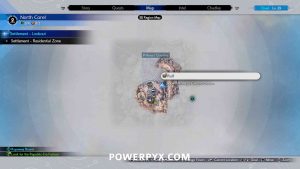
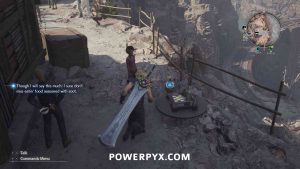
- Queen’s Blood Card: 041 Bomb – Won from Biff inside the bar upstairs in North Corel.
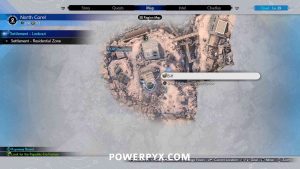
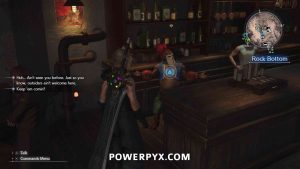
- Sheet Music: Barret’s Theme – on the piano inside the bar.
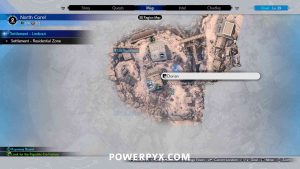
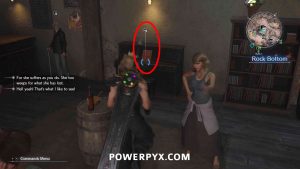
- Materia: MP Up Materia – Reward from Dorian for achieving A Rank on Tifa’s Theme.
- Materia: Warding Materia – Reward from Dorian for achieving A Rank on Barret’s Theme.
- Side Quest: Of Robed Men and Ransoms – started in the North Corel settlement
- Weapon: Amethyst Collar (Red XIII) – inside the Old South Corel Mine, directly on your right as you enter. You will have to progress into Of Robed Men and Ransoms side quest to access this (the door to the mine is closed until you accept the quest). The 1st image below shows the quest starting point. The 2nd image shows the mine entrance, the 3rd/4th show the location inside the mine.
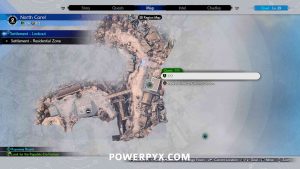
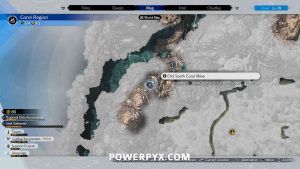
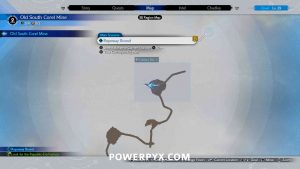
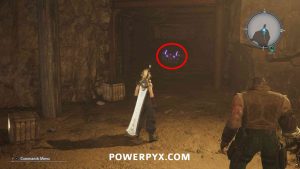
- Materia: Binding Materia – Further inside the same cave as the weapon, in the Central Colliery, this is found up on a platform in the northwest of the room, take the path from the southwest to reach it. (requires Of Robed Men and Ransoms side quest).


Chapter 8
- Materia: Healing Materia – Objective: Gilded Paradise – Location: Cast Break Room – Immediately in front of you in the Staff Room as you begin the chapter (green materia).


- IMPORTANT: Advance the story until you slept at the Haunted Hotel. Afterward you get the objective “Paint the Town Red” and must play some minigames throughout the Gold Saucer. Be sure to collect everything listed below BEFORE completing all main objectives as you’ll get locked into another area when you’ve completed them all (if missed, can still go back and do everything at start of Chapter 9). There will be another red note below when you can continue the main objectives. Stick to the exact order here and you’ll get everything:
- Materia: Steadfast Block Materia – From Park Central, go up the stairs in the middle that have a sign pointing to Speed Square, then go across the bridge to the right to find it.


- Materia: HP Up Materia – Inside Golden Theatre in Event Square (going there is a main objective).


- Accessory: Silver Brawler’s Gloves – Beat Dio in 3D Brawler in Wonderment Square (this is an optional minigame not part of main objective).

- Queen’s Blood Card: 114 Mythril Golem – Complete Support Card: Luxury Real Estate at Queen’s Blood in Wonderment Square (this is an optional minigame not part of main objective).

- Queen’s Blood Card: 116 Grastropod – Complete Support Card: Succulent Succor at Queen’s Blood in Wonderment Square (this is an optional minigame not part of main objective).
- Queen’s Blood Card: 117 Custom Valkyrie – Complete Gimmick Battlefield: Behind Enemy Lines at Queen’s Blood in Wonderment Square (this is an optional minigame not part of main objective).
- Note: for the other 3 Queen’s Card Challenges you must be Rank 5, you will only be Rank 4 at this point and must return later to do these (can come back at start of Chapter 9).
- Manuscript: Secrets of the Ninja Vol. III – Beat Two-Person Bout: Devil-May-Care Desperados at Musclehead Colosseum in Battle Square (this minigame is a marked main objective).
- Manuscript: Tale of the Red Warrior Vol. IV – Beat Two-Person Bout: Ghoulish Delights at Musclehead Colosseum in Battle Square (this minigame is a marked main objective). This is high-level, if you don’t want to deal with this now you can do it later in Chapter 12 to make it easier.
- Vending Machine (Gold Saucer – Battle Square): Cleansing Materia
- Accessory: Space Ranger Service Medal – Score 35000 Points on Galactor Saviors in Speed Square (this minigame is marked as a main objective).
- Accessory: Whistlewind Scarf – Score 30000 Points on G-Bike in Wonderment Square (this minigame is marked as a main objective).
- The following items are rewards purchased with “Gold Saucer Points” that you earn from winning minigames. You won’t be able to afford everything just yet. Some minigames only unlock later in Chapter 12, feel free to buy what you can and buy the rest later in Chapter 12. Then advance with the main story objectives:
- Collector’s Item: Stuffed Chocobo – Purchased from GP Exchange (Chocobo Square) for 30GP
- Manuscript: The Art of Swordplay Vol. III – Purchased from GP Exchange (Chocobo Square) for 100GP
- Queen’s Blood Card: 135 Chocobo Jockey – Purchased from GP Exchange (Chocobo Square) for 150GP
- Collector’s Item: PLAY ARTS Starfighter – Purchased from GP Exchange (Speed Square) for 30GP
- Manuscript: Sharpshooter’s Companion Vol. III – Purchased from GP Exchange (Speed Square) for 100GP
- Collector’s Item: Space Ranger PLAY ARTS Figure – Purchased from GP Exchange (Speed Square) for 30GP
- Queen’s Blood Card: 136 Space Ranger – Purchased from GP Exchange (Speed Square) for 150GP
- Collector’s Item: Stuffed Bomb – Purchased from GP Exchange (Battle Square) for 30GP
- Manuscript: Way of the Fist Vol. II – Purchased from GP Exchange (Battle Square) for 100GP
- Queen’s Blood Card: 141 Dio – Purchased from GP Exchange (Battle Square) for 150GP
- Materia: Level Boost Materia – Purchased from GP Exchange (Battle Square) for 2500GP
- Collector’s Item: Loveless Poster – Purchased from GP Exchange (Event Square) for 30GP
- Collector’s Item: Stuffed Fat Chocobo – Purchased from GP Exchange (Event Square) for 30GP
- Manuscript: Telluric Scriptures Vol. III – Purchased from GP Exchange (Event Square) for 100GP
- Queen’s Blood Card: 139 Loveless – Purchased from GP Exchange (Event Square) for 150GP
- Collector’s Item: PLAY ARTS G-Bike – Purchased from GP Exchange (Wonderment Square) for 30GP
- Collector’s Item: Queen’s Blood Playboard – Purchased from GP Exchange (Wonderment Square) for 30GP
- Collector’s Item: 3D Brawler Cloud Figurine – Purchased from GP Exchange (Wonderment Square) for 30GP
- Manuscript: Tale of the Red Warrior Vol. III – Purchased from GP Exchange (Wonderment Square) for 100GP
- Queen’s Blood Card: 140 Saucer Squad – Purchased from GP Exchange (Wonderment Square) for 150GP
- Collector’s Item: Stuffed Tonberry – Purchased from GP Exchange (Ghost Square) for 30GP
- Manuscript: Secrets of the Ninja Vol. II – Purchased from GP Exchange (Ghost Square) for 100GP
- Queen’s Blood Card: 137 Haunted Hotel – Purchased from GP Exchange (Ghost Square) for 150GP
- Collector’s Item: Save Crystal – Purchased from GP Exchange (Skywheel Square) for 30GP
- Collector’s Item: Stuffed Cactuar – Purchased from GP Exchange (Skywheel Square) for 30GP
- Queen’s Blood Card: 138 Skywheel – Purchased from GP Exchange (Skywheel Square) for 150GP
- Collector’s Item: 3D Brawler Pugilist Figurine – Purchased from GP Exchange (Wonderment Square) for 30GP, available after beating the Pugilist
- Collector’s Item: 3D Brawler Moogle Figurine – Purchased from GP Exchange (Wonderment Square) for 30GP, available after beating the Moogle
- Collector’s Item: 3D Brawler Dio Figurine – Purchased from GP Exchange (Wonderment Square) for 30GP, available after beating Dio
- Note: Complete the main objectives in Gold Saucer now. Everything below is after you advance the story and reach the Dust Bowl area. Do everything here BEFORE feeding Piko 3 greens (if you miss anything can still come back at start of Chapter 9):
- Weapon: Umbral Blade (Cloud) – Objective: Meeting Your Mount – Location: Solemnitude Manor 1F – immediately on front of you when you go downstairs


- Weapon: Dragon Claws (Tifa) – Score 42000 Points at Desert Rush in the Dustbowl.


- Queen’s Blood Booster Pack: Heavy Hitters (044 Landworm, 045 Sandspitter, 046 Chimera, 054 Grandhorn) – purchasable at Queen’s Blood Vendor in The Dustbowl for 500 gil (contains 4 cards).


- Queen’s Blood Card: 042 Thug – Won from Dax in Card Casino.


- Queen’s Blood Card: 047 Joker – Won from Pietro in Card Casino.
- Queen’s Blood Card: 043 Death Claw – Won from Mary in Card Casino.
- Accessory: Noble Thief’s Gloves – Reward from Beast Battleground – “Prison Tourney: Subterranean Terrors” (go down the ladder in Dustbowl)


- Manuscript: Way of the Fist Vol. III – Reward from Beast Battleground – “Prison Tourney: Chicken or the Egg-splosive” (go down the ladder in Dustbowl)
- Accessory: Beastkiller Badge – Reward from Beast Battleground – “Prison Tourney: Proof of Life” (go down the ladder in Dustbowl)
- Materia: Poison Materia – Objective: Feed for Piko / The Bartender’s Untended Garden – Location: Marauderlands – When you have to find food for Piko, go talk to the Bartender at the Dustbowl, he will give you a key that you can use on the gate. It will trigger the optional objective “The Bartender’s Untended Garden” where you must chase a Cactuar. When chasing the Cactuar, after swinging across multiple grapple hooks and fighting some Death Claws and Sandhog Pies, take the right path to find this at the end.


- Materia: HP Up Materia – Objective: Feed for Piko / The Bartender’s Untended Garden – Location: Marauderlands – Take the left path this time and instead of following the Cactuar across the pipe, drop into a hole on the left for this.


- Now feed Piko the 3 greens to do the first Chocobo Race and advance the story.
- Weapon: Vulcan Cannon (Barret) – Objective: Prisoner – Location: Scrapyard – after you finished the Chocobo Race, keep following the main objectives. You’ll have to follow a bird through a rocky desert, then you get a cutscene with a tornado. After the cutscene, this chest will be straight in front of you, on your main path in plain sight.


Chapter 9
- Materia: Magnify Materia – Equipped to Cait Sith at the start of the chapter.
- → You now have access to the rest of Corel Region. This is the best time to clean up any remaining World Intel, see: Corel Region World Intel Locations. When you’ve completed all World Intel, continue below.
- Side Quest: Mr. Birdie – unlocks at the start of the chapter in North Corel
- Queen’s Blood Card: 038 Bagnadrana – Won from Navalan in the lower section of North Corel. Must reach Queen’s Blood Rank 5 before you are able to challenge him.
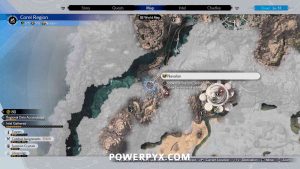
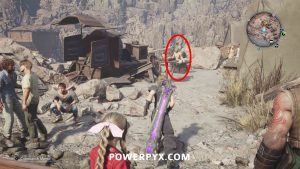
- Armor: Swallongsong Bracer – found in a chest at the open world cache location “Rustladen Reservoir” in the north of Corel desert.


- Accessory: Ice Materia Earrings – found in a chest at the open world cache location “Sundappled Storehouses” near the center of Corel desert.


- Healing Materia Earrings (Accessory), Vibrodetector (quest item), The Art of Swordplay Vol. IV, Fortunes Untold Vol. II – bought from Moogle Emporium in south Corel (after completing Moogle Intel).
- Queen’s Blood Card: 134 J-Squad – Reward from completing Side Quest: The Saga of the Seaside Inn
- Accessory: Crescent Moon Charm – Score 2500 Points on Cactuar Crush – Reactor 1 (Protorelic 1)
- Accessory: Item Master Materia Earrings – Score 2500 Points on Cactuar Crush – Reactor 2 (Protorelic 2)
- Manuscript: Fortunes Untold Vol. I – Purchased from GP Exchange (Skywheel Square) for 100GP
- Queen’s Blood Card: 118 Gigatrice – Complete Support Card: Chadley the Callous at Queen’s Blood in The Gold Saucer (Wonderment Square)
- Queen’s Blood Card: 112 Materia Guardian – Complete Gimmick Battlefield: Ifrit’s 32-Bit Flames at Queen’s Blood in The Gold Saucer (Wonderment Square)
- Queen’s Blood Card: 143 Sephiroth – Get Bronze on Boot Camp at Queen’s Blood in The Gold Saucer (Wonderment Square)
- Accessory: White Cape – Beat Six-Person Bouts: The Befouled at Musclehead Colosseum in Battle Square
- Accessory: Steadfast Block Materia Earrings – Beat Six-Person Bouts: Scratch That at Musclehead Colosseum in Battle Square
- Accessory: Lightning Materia Earrings – Beat Six-Person Bouts: League of Reprobates at Musclehead Colosseum in Battle Square
- Accessory: Spectral Cogwheel – Beat Six-Person Bouts: Access Denied at Musclehead Colosseum in Battle Square
- (Advance the story now by driving through the water in the south of Corel region to reach Gongaga region)
- Vending Machine (Rugged Shoals – Corel Shore, in north of Gongaga region): Revival Materia, Binding Materia, Subversion Materia, Disempowerment Materia, Enervation Materia, MP Up Materia, Outlaw Bangle (Armor), Crocodile Bracelet (Armor), Star Pendant (Accessory), Headband (Accessory)
- Relationship Interaction: Red XIII – Objective: The Village of Gongaga – Location: Laurel Hill – After the scene at the monument in Gongaga, Red is directly beside it before leaving the area. The correct answer is “The Right Patch”.


- Relationship Interaction: Tifa – Objective: The Village of Gongaga – Location: Laurel Hill – Tifa is outside directly west of the building with the piano. Pick “Gonna go with the pot roast”.


- Relationship Interaction: Barret – Objective: The Village of Gongaga – Location: Laurel Hill – Barret is located just south of the rest spot building. Pick “Mushrooms”.


- Relationship Interaction: Yuffie – Objective: The Village of Gongaga – Location: Laurel Hill – Inside the Rest Spot building on the couch. Pick “I’d love an encore”.


- Weapon: Bird of Prey (Yuffie) – Objective: The Village of Gongaga – Location: Felicia Commons – Inside the Gongaga Inn where Yuffie is located, there is a purple box in the corner.


- Weapon: Red Megaphone (Cait Sith) – Objective: The Village of Gongaga – Location: Gongaga Village – Go to the bridge in the south of Gongaga Village. Then look down at the water to see the purple chest in a cave. You must jump down the cliff to the left of it to land in the water, then swim to the little cave where the chest is. One of the best hidden weapons in the game as it’s not directly on the story path.


- Music Sheet: Cinco de Chocobo – Objective: The Village of Gongaga – Location: Laurel Hill – on the piano in the building south of Memorial Hill in Gongaga.
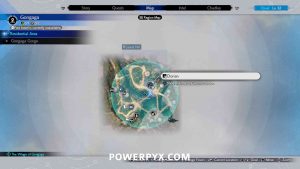

- Materia: Steadfast Block Materia – reward from Dorian for getting A Rank on Cinco de Chocobo.
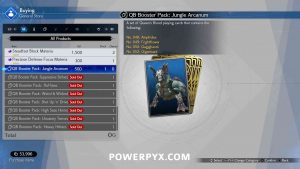
- Queen’s Blood Booster Pack: Jungle Arcanum (048 Amphidex, 049 Frightflower, 050 Gagighandi, 052 Gigantoad) – purchasable at General Store in Gongaga for 500 gil (contains 4 cards).
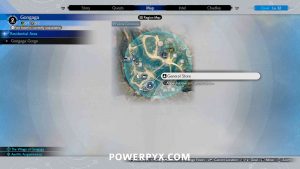
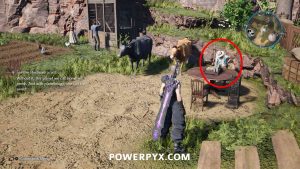
- Queen’s Blood Card: 059 Griffon – Won from Oscar in Gongaga.
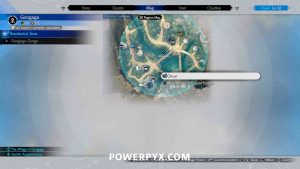
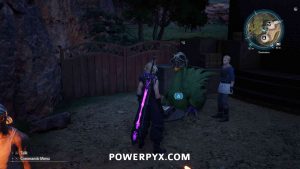
- Queen’s Blood Card: 055 Great Malboro – Won from Zhijun in Gongaga.
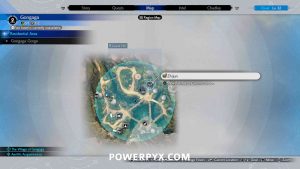
- Materia: Petrify Materia – Develop at Chadley for 40 Gongaga Region Data Points.
- Materia: Magic Focus Materia – Develop at Chadley for 40 Gongaga Region Data Points.
- Materia: Limit Siphon Materia – Develop at Chadley for 40 Gongaga Region Data Points.
- Materia: Synergy Support Materia – Develop at Chadley for 40 Gongaga Region Data Points.
- IMPORTANT: You must assess 14 different enemies in Gongaga region to unlock Combat Simulator Challenge “Biological Intel: Head Case”. Keep assessing all enemies you encounter going forward.
- Relationship Interaction: Aerith – Automatically occurs during the story. Pick “You’re too hard on yourself”.


- Weapon: Crystal Sword (Cloud) – Objective: The Shadows Beckon – Location: Gongaga Reactor – As soon as you go downstairs into the Freight Corridor of the reactor, in the back room before you squeeze through a door.


- Armor: Sage Armband – Objective: The Shadows Beckon – Location: Coolant Control B4 – once you enter Coolant Control, you’ll be in a large room full of water, swim through and climb onto a broken platform for this.


- Weapon: Golden Collar (Red XIII) – Objective: Water Level – Location: Coolant Control Room – You will need to pull a cart to be able to free a power cable, pull it all the way and climb up to access a vent that leads to the weapon.


- Materia: Subversion Materia – right next to the Rest Spot as you continue, reached automatically on main story path. The materia will be in plain sight.


- Weapon: Tiger Fangs (Tifa) – Objective: Rescue Effort – Location: Output Regulation B1 – When you reach a flooded room that you must grapple out of to advance, after grappling upstairs turn around to see this chest behind you. Then grapple to the beams on the side of the room to reach it. This one isn’t directly in your path and out of sight so it’s easy to overlook.


- IMPORTANT: After you finish the Reactor section you’ll be back in Gongaga Village and the south gate opens. You can now explore the full map and get all Intel / Side Quests. Clean up the remaining side quests etc. in this region before advancing to main objective “Freeflier Pilot” (this objective ends the chapter).
- → Now that you have access to all of Gongaga region, it’s the best time to clean up any remaining World Intel, see: Gongaga Region World Intel Locations. When you’ve completed all World Intel, continue below.
- Side Quest: The Pursuit of Perfection – can be accepted from the quest board in Gongaga Village (note that you must advance the story until fast travel unlocks, as you can’t walk north out of Gongaga Village).
- Weapon: Fafnir Rifle (Barret) – Reward from The Pursuit of Perfection side quest.
- Side Quest: O Chicken, Where Art Thou – unlocked when getting objective “Freeflier Pilot”, can accept it from Gongaga Village notice board.
- Side Quest: Teach Me, Great Warrior – unlocked when getting objective “Freeflier Pilot”, can accept it from Gongaga Village notice board.
- Side Quest: The Spice of Life – unlocked after Side Quest: Teach Me, Great Warrior, can accept it from Gongaga Village notice board.
- Materia: Level Boost Materia, Manuscript: Way of the Fist Vol. IV, Manuscript: Fortunes Untold Vol. III – Purchasable from Moogle Emporium for 6 Moogle Medals after Moogle Intel: Woodland Moogle
- Collector’s Item: PLAY ARTS Buggy – RANDOM LOCATION FROM DIGGING UP RABIBT BURROWS – Found by excavating rabbit burrows with a chocobo in Gongaga, it’s completely randomized where you’ll find it. Below is where I personally found it, if it’s not there ride around and dig up other burrows, or make a save before picking it up and reboot game until it spawns there.


- Accessory: Poison Materia Earrings – In a chest at Reactor Construction Site, east of Fiend Intel 5: A Two-Pronged Assault

- Accessory: Protective Boots – In a chest at Cliffside Storehouse at the southern docks of Gongaga Region, next to Phenomenon Intel 1: Training Facility V-B.

- Armor: Big Horn Bracelet – In a chest in Watchman’s Lookout, north of Gongaga village.


- Chadley Combat Simulator: do any remaining Combat Challenges – Rewards: Kujata Materia (Summon Entity: Kujata), Vitality Up Materia (Corel Battle Intel: Oh, Skewer It), Strength Up Materia (Corel Battle Intel: Sand Slitherers), AP Up Materia (Corel Battle Intel: Badlands Beasts), Spirit Up Materia (Gongaga Battle Intel: Lethal Combo), Speed Up Materia (Gongaga Battle Intel: Rooted in the Planet), Elemental Materia (Gongaga Battle Intel: Distant Tremors), Poison Materia (Gongaga Region Intel: Level 1), Enemy Skill: Mind Blast (Biological Intel: Head Case)
- Weapon: Resounding Megaphone (Cait Sith) – Objective: Telephone Booth – Location: Gongaga Airstrip – advance to the main objective at Gongaga Airstrip. Once there, you will see a phone booth. Before interacting with the Phone Booth, check the area directly behind the Phone Booth to find this purple chest.


- When done with everything, interact with the phone booth to start the next chapter.
Chapter 10
- Collector’s Item: PLAY ARTS Tiny Bronco – RANDOM LOCATION FROM DIGGING UP RABIBT BURROWS – Found by excavating rabbit burrows with a chocobo in Cosmo Canyon, it’s completely randomized where you’ll find it. Below is where I personally found it, if it’s not there ride around and dig up other burrows, or make a save before picking it up and reboot game until it spawns there.


- Materia: Synergy Materia – Develop at Chadley for 80 Cosmo Canyon Region Data Points.
- Materia: Poison and Petrify Materia – Develop at Chadley for 70 Cosmo Canyon Region Data Points.
- Materia: Jump Materia – Develop at Chadley for 70 Cosmo Canyon Region Data Points.
- Materia: Skill Master Materia – Develop at Chadley for 80 Cosmo Canyon Region Data Points.
- IMPORTANT: You must use Assess Materia on 15 enemies in Cosmo Canyon region to unlock Chadley’s Combat Challenge “Biological Intel: That’s the Smell”. Assess all enemies going forward.
- Side Quest: Bonds of Trust – available from the start of Chapter 10, at the Kamari’s Ranch (slightly south of Activation Intel 1).
- Weapon: Crescent Sickle (Yuffie) – Score 3600 Points on Glide de Chocobo Training Course No. 1 (unlocked as part of Bonds of Trust side quest)
- Accessory: Barrier Materia Earrings – Score 9600 Points on Glide de Chocobo Training Course No. 3 (unlocked as part of Bonds of Trust side quest)
- Vending Machine (Kamaria’s Ranch): Time Materia, Warding Materia, Prayer Materia, Road Warrior Bangle (Armor), Snailshell Bracelet (Armor)
- Queen’s Blood Card: 051 Insectoid Chimera – Objective: Welcome Back, Nanaki – Location: Water Grotto – Won from Robin in the Inn at Cosmo Canyon.
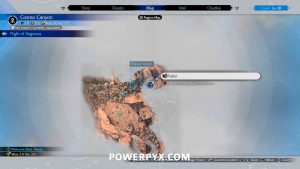
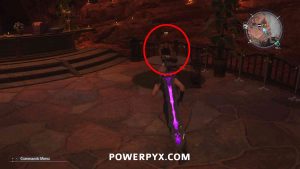
- Music Sheet: Two Legs? Nothin’ To It – Objective: Welcome Back, Nanaki – Location: Water Grotto – On the piano at the Inn.
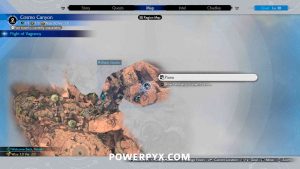
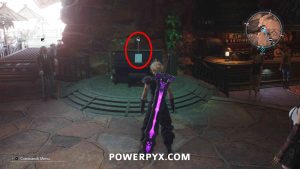
- Materia: Disempowerment Materia – Reward from Dorian for achieving A rank on Two Legs? Nothin’ To It.
- Materia: Chakra Materia – Objective: Welcome Back, Nanaki – Location: Water Grotto – outside the Inn, in the northeast most room.


- Queen’s Blood Booster Pack: Chimerical Creatures (057 Amalgam, 058 Skeeskee, 060 Basilisk, 065 Stone Golem) – purchasable at Items Vendor at Cosmo Canyon for 500 gil (contains 4 cards).
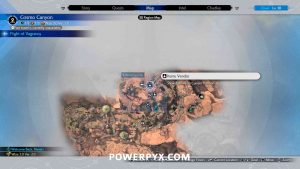

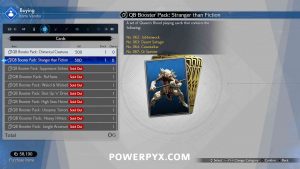
- Queen’s Blood Booster Pack: Stranger than Fiction (062 Jabberwock, 063 Desert Sahagin, 064 Cavestalker, 067 Gi Specter) – purchasable at Items Vendor at Cosmo Canyon for 500 gil (contains 4 cards).

- Queen’s Blood Card: 066 Two Face – Won from Ka’dina upstairs at Cosmo Canyon.
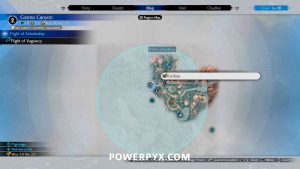
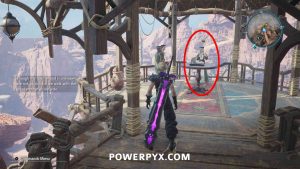
- Queen’s Blood Card: 061 Reapertail – Won from Bernard upstairs at Cosmo Canyon.
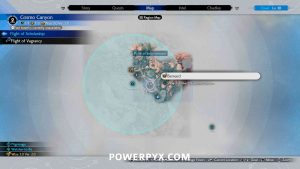
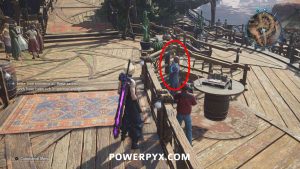
- Weapon: Crystal Megaphone (Cait Sith) – Objective: Higher Learning / Location: Cosmo Observatory – After finishing the main objectives inside the Observatory, when you go back outside you will automatically be greeted by a man. This starts the Discovery “Parting Gfit”. Follow the man to the storeroom entrance, to the right of the Observatory main entrance. Go inside the storeroom and you’ll find the purple weapon chest at the bottom floor.


- Relationship Interaction: Barret/Tifa/Red/Yuffie/Aerith – Objective: The River of Lights / Location: The Torch – At the River of Lights ceremony, speak with the 4 others first before speaking with Aerith, which is required to progress the story. Tifa: “You did good.” / Barret: “No, we fight” / Red XIII: “I’ll lend an ear” / Yuffie: “Pretty much” / Aerith: “Encourage Her”.


- Accessory: Revival Earrings – Objective: Let the Trials Begin – Location: Cave of the Gi > Chamber of Deception > Tomb of Betrayal – After learning how to climb walls as Red, continue to the next room where you encounter two “Stinger” enemies (spider-like enemies). After defeating them, climb the left wall to find this.


- Armor: Celestial Bangle – Objective: Let the Trials Begin – Location: Cave of the Gi > Chamber of Deception > Ascent of Ridicule Upper Flight – From the previous location, go through the next room and open the big gate by cutting the rope. Then go down a set of stairs and climb the wall on the left to reach this chest (you will already see the chest straight in front of you when entering the room).


- Accessory: Timeworn Talisman – Objective: Let the Trials Begin – Location: Cave of the Gi > Chamber of Folly > Ascent of Ridicule Lower Flight – Continue down to the bottom floor and there’ll be a box across another wall climb.


- Weapon: Mystic Collar (Red XIII) – Objective: The First Trial – Location: Cave of the Gi > Chamber of Folly > Hall of Diversion – When you need to collect artifacts around the statue room and bring them to Bugenhagen, one of them will be this materia, on the right side up the wall.


- Materia: Healing Materia – Objective: The First Trial – Location: Cave of the Gi > Chamber of Folly > Hall of Diversion – another of the artifacts you need to grab, on the right side up the wall.


- Accessory: Gi Warrior’s Charm – Objective: The First Trial – Location: Cave of the Gi > Chamber of Folly > Hall of Diversion – another artifact in this room, on the right side on the floor.


- Materia: Fortification Materia – Objective: The Voice Within – Location: Cave of the Gi > Chamber of Observance > Shrine of Enmity – in the room with the four altars, when crossing the first wall on the right intentionally drop off halfway across to fall into the water, the materia is here.


- Weapon: Calamitous Bazooka (Barret) – Objective: To Thine Own Self Be True – Location: Cave of Gi > Chamber of Sacrifice > Gate of Anger – After leaving the room with 4 altars through the opened gate, advance through the next room until you reach another closed gate. Directly across from this gate drop onto the lower platform for this weapon.


- Materia: Empowerment Materia – Objective: To Thine Own Self Be True – Location: Cave of the Gi > Chamber of Sacrifice > Gate of Grief – Before reaching the third gate, follow the path up and to the right where you reach a higher platform with 4 Two Face enemies, with the materia in the back corner.


- Weapon: Ceremonial Staff (Aerith) – Objective: An Unquenchable Thirst – Location: Village of the Gi > Outcasts’ Shore – On the shore when you arrive at the Village of the Gi, immediately after a cutscene, next to the rest spot.


- Region Cleanup: After finishing main objective “Uninvited Guests” you unlock new Side Quests and can fully explore Cosmo Canyon. Do everything you have left here before returning to the Airstrip (before main objective “The Wild, Blue Yonder”).
- → World Intel: Now is the best time to get all of the World Intel in Cosmo Canyon. See Cosmo Canyon World Intel Locations. When you’re done, continue below.
- Accessory: Empowerment Materia Earrings, Manuscript: Telluric Scriptures Vol. IV, Manuscript: Tale of the Red Warrior Vol. V – Bought from Moogle Emporium for 6 Moogle Medals after Moogle Intel: Highlands Moogle.
- Side Quest: Absence of a Sign – Accepted from quest board in Cosmo Canyon.
- Accessory: Tarot Cards – Reward from completing Absence of a Sign side quest.
- Side Quest: From Whence Life Flows – Accepted from quest board in Cosmo Canyon.
- Manuscript: Fortunes Untold Vol. IV – Reward from From Whence Life Flows side quest.
- Accessory: Mythical Amulet – Reward from Promises to Keep side quest.
- Side Quest: Promises to Keep – Accepted from quest board in Cosmo Canyon.
- Chadley Combat Simulator: do any remaining combat simulator challenges – Rewards: Bahamut Arisen Materia (Summon Entity: Bahamut Arisen), First Strike Materia (Cosmo Battle Intel: Flower of Destruction), Magic Up Materia (Cosmo Battle Intel: Antediluvian Memories), Level Boost Materia (Cosmo Battle Intel: Nature’s Vengeance), Barrier Materia (Cosmo Canyon Region Intel: Level 1), Enemy Skill: Rancid Breath (Biological Intel: That’s the Smell).
- Armor: Backbone Bracelet – Location: The Celestica (Open World Cache) – Found in a chest in the “Celestica” cache location (open world, in north-west of Cosmo Canyon).


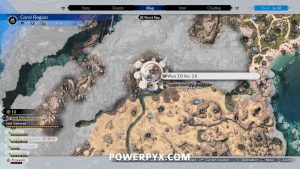
- Queen’s Blood Card: 056 Grangalan – Won from Wize 3.0 Ver. 2.0 back at The Dustbowl in Corel Region, must be Rank 7 to face him (can fly back there from Airstrip).
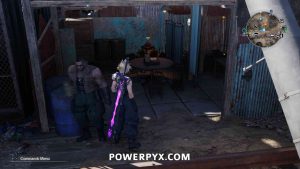
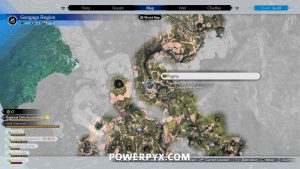
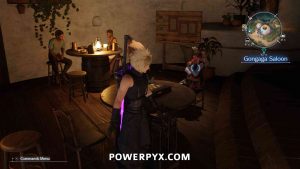
- Queen’s Blood Card: 053 Maloceros – Won from Regina in Gongaga Village in Gongaga Region, must be Rank 8 to face her (can fly back there from Airstrip).
Chapter 11
- IMPORTANT: You must assess 16 different types of enemies in Nibel region to unlock Chadley’s VR Combat Challenge “Biological Intel: Stony Stare”. Assess one of each enemy type you see in this region.
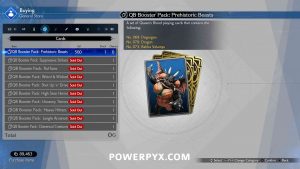
- Queen’s Blood Booster Pack: Prehistoric Beasts (069 Disgorgon, 070 Dragon, 073 Bahba Velamyu) – Objective: A Village Changed – Location: Water Tower Square – purchasable at General Store in Nibelheim for 500 gil (contains 3 cards).

- Garm Bangle (Armor), Varvados Bracelet (Armor), Platinum Earrings (Accessory), Timeworn Talisman (Accessory) – bought from General Store in Nibelheim.
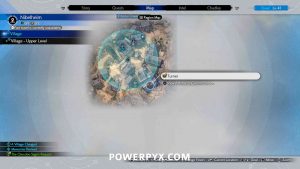
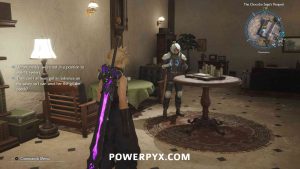
- Queen’s Blood Card: 068 Valron – Objective: A Village Changed – Location: Water Tower Square – Won from Turner in the Town Hall in Nibelheim.
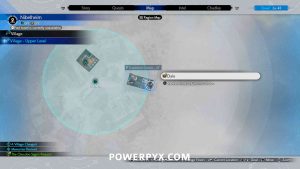
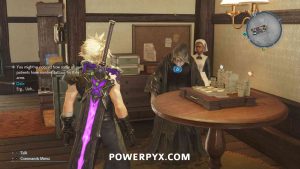
- Queen’s Blood Card: 071 Twin Brain – Objective: A Village Changed – Location: Water Tower Square – Won from Dale in Tifa’s House (Treatment Center) in Nibelheim. It’s the house in the north-east of Nibelheim, he’s upstairs.
- Relationship Interaction: Aerith – Objective: A Village Changed – Location: Water Tower Square – While Cait Sith is using the terminal, talk to Aerith in front of the water tower in the middle of the blue search area. Climb the tower after her, pick “What? No way.”


- Relationship Interaction: Yuffie – Objective: A Village Changed – Location: Water Tower Square – While Cait Sith is using the terminal, talk to Yuffie at the northern end of Nibelheim village (slightly north of the blue search area, by the staircase leading out of Nibelheim). Pick “Yup”.


- Relationship Interaction: Red XIII – Objective: A Village Changed – Location: Water Tower Square – On the stairs above where Yuffie is standing. Pick “I never liked that place either”.


- Relationship Interaction: Tifa – Objective: A Village Changed – Location: Water Tower Square – While Cait Sith is using the terminal, talk to Tifa in the house in the east of the blue search area, upstairs in her old bedroom (next to the rank 7 Queen’s Blood player “Dale”). Pick “Have I helped you get through it all?”.


- Relationship Interaction: Barret – Objective: A Village Changed – Location: Water Tower Square – While Cait Sith is using the terminal, talk to Barret in the Inn, the house in the west of the blue search area, ground floor. Pick “Hell yeah you’re right. Screw them”.


- After you talked to all your teammates, do the next main objectives and leave for the reactor.
- Weapon: Crystal Gloves (Tifa) – Objective: The Rebuilt Bridge / To the Reactor – Location: Garm Pass – After leaving Nibel to go to the Reactor, go over the first bridge and this purple chest will be on the main path, just before walking over the second bridge.


- Materia: HP <> MP Materia – Objective: To The Reactor – Location: Gnipahellir Ravine – Located on the ground directly beside the Mako spring where the cutscene occurs, in plain sight. After the cutscene must turn around.

- Weapon: Igneous Saber (Cloud) – Objective: To the Reactor – Location: Northern Ridge 160 m – When you reach the large climbing wall with paths up the right or left side, take either path and then drop midway onto the metal structure to find this chest.


- Accessory: Fortification Materia Earrings – Objective: To the Reactor – Location: Northern Ridge 300 m – Same area as above, climb the right path 3 levels, then there is a chest near some boards you can shimmy along containing this.


- Materia: Warding Materia – Objective: To the Reactor: Location: Northern Ridge – 300 m – At the top of the climbable cliffs, go to the right instead of progressing forward to find this on the cliff ledge.


- Weapon: Golden Megaphone (Cait Sith) – Objective: Buds Behind Bars – Location: Mako Research Facility – Section W – When you are given the tutorial on throwing boxes while playing as Cait Sith in the old manor, use the same technique to open the other door in the room to reach this chest. Press
 to call the moogle,
  to lift boxes and
 to throw.


- Accessory: Revival Earrings – Objective: Escape Plan – Location: Mako Research Facility – Section W – After going through the first small hallway and fighting the two Black Bat enemies, turn left instead of going toward the objective and roll (
 ) into the closed cell to find a chest with this.


- Materia: Barrier Materia – Objective: Escape Plan – Location: Mako Research Facility – Section N – After going through the long hallway with all the breakable boxes, turn left in the next room and look near where you can pick up the Mako boxes.


- Materia: ATK <> MATK Materia – Objective: Escape Plan – Location: Mako Research Facility – Section E3 – When you reach a room where you must throw a box down onto the switch to open the red vent, before doing that go through the blue vent on the left to reach this.


- Armor: Hades Armlet – Objective: Escape Plan – Location: Mako Research Facility Section E5 – After going through the red duct, look immediately left for a chest.


- Collector’s Item: Stuffed Fat Moogle – Objective: Board the Elevator – Location: Mako Research Facility – Section E6 – After fighting the Yin and Yang boss there’ll be an elevator minigame, hit 10 crates to unlock this. Save beforehand so you can reload if needed. The best method is to aim two lights ahead of the moving boxes (the little lights below the moving boxes). Throw exactly two lights to the right of a moving box and it will get hit. You must hit 10 within the time limit, it’s okay if you miss several throws in between, the time limit is relatively lenient here.
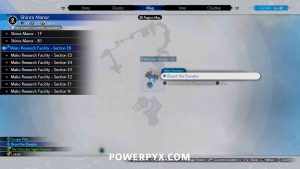
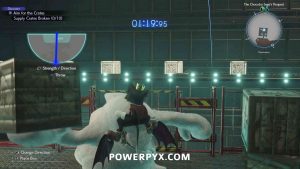
- Vault Password: You will come to a vault that requires a 4 digit password to open (main objective). The password can be found by pulling the movable boxes on teh left side of the room, the numbers are written on the wall behind them. The password is: 36-10-59-97.
- Region Cleanup: After returning to Nibel town it’s the best time to clean up all side quests and World Intel in this region.
- Side Quest: Esoteric Secrets of the Elders (unlocks Chocobo) – accept from quest board in Nibel village.
- Materia: Comet Materia – Develop at Chadley for 40 Nibel Region Data Points. Chadley is found at Chocobo Sage’s Manor (where Side Quest: Esoteric Secrets of the Elders starts).
- Materia: MP Absorption Materia – Develop at Chadley for 40 Nibel Region Data Points. Chadley is found at Chocobo Sage’s Manor (where Side Quest: Esoteric Secrets of the Elders starts).
- Materia: Darkside Materia – Develop at Chadley for 40 Nibel Region Data Points. Chadley is found at Chocobo Sage’s Manor (where Side Quest: Esoteric Secrets of the Elders starts).
- Materia: ATB Assist Materia – Develop at Chadley for 40 Nibel Region Data Points. Chadley is found at Chocobo Sage’s Manor (where Side Quest: Esoteric Secrets of the Elders starts).
- Side Quest: My White-Haired Angel – accept from quest board in Nibel village.
- Sheet Music: Aerith’s Theme – Acquired during the My White-Haired Angel side quest.
- Materia: Binding Materia – Reward from Dorian downstairs for achieving A Rank on Aerith’s Theme.
- Materia: Healing Materia – Reward from Dorian for achieving A Rank in all 6 songs.
- Sheet Music: Let the Battles Begin! – Reward from Dorian for achieving A Rank in all 6 songs.
- → World Intel: See All Nibel Region World Intel Locations. After you got all Intel continue below.
- Chadley Combat Simulator: complete any remaining combat challenges, Chadley is found at the Chocobo Sage’s Manor, if you struggle with Odin do him later, can buy/equip Revival Earrings from Vending machines to autorevive when he uses Zantetsuken, keep evading all his attacks and spam him with ATB abilities to prevent him from using Zantetsuken – Rewards: Odin Materia (Summon Entity: Odin), VIT <> SPR Materia (Nibel Battle Intel: Death’s Harbingers), AP Up Materia (Nibel Battle Intel: Chthonian Rondo), Time Materia (Nibel Region Intel: Level 1), Enemy Skill: Gorgon Shield (Biological Intel: Stony Stare).
- Materia: Level Boost Materia – Upstairs in Chocobo Sage’s Manor


- Collector’s Item: PLAY ARTS Shinra Box – RANDOM LOCATION FROM DIGGING UP RABIBT BURROWS – Found by excavating rabbit burrows with a chocobo in Nibel, it’s completely randomized where you’ll find it. Below is where I personally found it, if it’s not there ride around and dig up other burrows, or make a save before picking it up and reboot game until it spawns there.


- Armor: Valkyrian Bangle – Found in a chest at Nidhogg Grotto Cache Location, right next to Fiend Intel 4: Stone-Cold Spitter.

- Accessory: Moogle’s Amulet, Manuscript: Sharpshooter’s Companion Vol. IV, Manuscript: Secrets of the Ninja Vol. V, Collector’s Item: Stuffed Moogle – Bought from Moogle Emporium for 6 Moogle Medals after Moogle Intel: Highland Moogle.
- Accessory: Otherworldly Crystal – Turn in 40 Chocograss at the Tack Shop (Chocograss Collector Discovery, unlocked from Esoteric Secrets of the Elders side quest).
- Weapon: Gjallarhorn (Cait Sith) – Turn in 45 Chocograss at the Tack Shop (unlocked from Esoteric Secrets of the Elders side quest).
- Accessory: Cleansing Materia Earrings – Turn in 50 Chocograss at the Tack Shop (unlocked from Esoteric Secrets of the Elders side quest).
- Armor: Chocobo Armband – Beat the Chocobo Sage in Zoom de Chocobo.
- Accessory: Disempowerment Materia Earrings – Found inside the submarine that you go investigate during Phenomenon Intel 2: Airstrip Amblers.


Chapter 12
This chapter will unlock new Side Quests, Minigames, Queen’s Blood Players in all regions, as well as a new area, Meridian Ocean, so there is a lot that can be done before you continue. You will lose access to Cait Sith after doing the story content at Gold Saucer but he’s not required for any open world content. If you don’t want to spend time on 100% completing all minigames at this time, you can advance to finish the main story, then use chapter select to go back to Chapter 12 and clean up everything in the open world from there.
- The Pirate’s Treasure Map – In a shining purple chest the moment you get off the Tiny Bronco (the plane) at Costa del Sol. To complete this you must finish all 4 Pirate King’s Grottos (see below).


- Pirate King’s Grotto a, b, d, y: accessed from the ocean. The first is in the east of Gongaga, the second is in south of Junon, the third is north-east of Corel, the fourth is further north-east from the third.
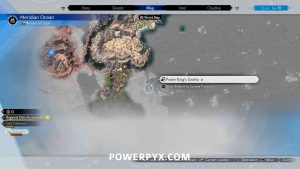
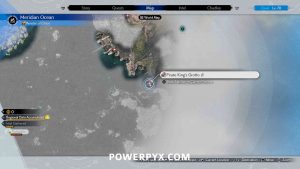
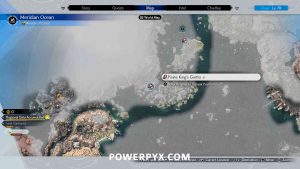
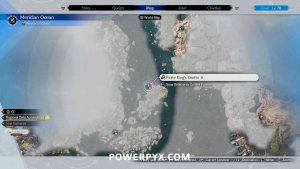
- Queen’s Blood Booster Pack: Carnival of Carnage (072 Black Bat, 075 Adjudicator, 076 Yin & Yang) – Purchase from Queen’s Blood Vendor at Costa del Sol for 500 gil (contains 3 cards).
- Queen’s Blood Card: 119 Dyne – Complete One Shot, One Kill at Card Carnival in Costa del Sol.
- Queen’s Blood Card: 123 Gi Nattak – Complete Curse of the Gi at Card Carnival in Costa del Sol.
- Queen’s Blood Card: 086 Cloud – Complete Collector’s Card: Cloud at Card Carnival in Costa del Sol.
- Queen’s Blood Card: 087 Barret – Complete Collector’s Card: Barret at Card Carnival in Costa del Sol.
- Queen’s Blood Card: 088 Tifa – Complete Collector’s Card: Tifa at Card Carnival in Costa del Sol.
- Queen’s Blood Card: 089 Aerith – Complete Collector’s Card: Aerith at Card Carnival in Costa del Sol.
- Queen’s Blood Card: 090 Red XIII – Complete Collector’s Card: Red XIII at Card Carnival in Costa del Sol.
- Queen’s Blood Card: 091 Yuffie – Complete Collector’s Card: Yuffie at Card Carnival in Costa del Sol.
- Queen’s Blood Card: 092 Cait Sith – Complete Collector’s Card: Cait Sith at Card Carnival in Costa del Sol.
- Queen’s Blood Card: 093 Cid – Complete Collector’s Card: Cid at Card Carnival in Costa del Sol.
- Queen’s Blood Card: 094 Vincent – Complete Collector’s Card: Vincent at Card Carnival in Costa del Sol.
- Queen’s Blood Card: 077 Diabolic Variant – Won from Riana in Costa del Sol.
- Queen’s Blood Card: 074 Rictus – Won from Dokaccha in Costa del Sol.
- Queen’s Blood Card: 079 2-C SOLDIER Operator – Won from Maahir in Costa del Sol.
- Relationship Interaction: Yuffie – Speak with Yuffie in the Wonderment Square area after first returning to the Saucer. Beat her at 3D Brawler. You can make it easier by pausing whenever she pulls back her arm, then you can see which strike she’ll use, evade until she gets groggy, then strike her.


- Dio (main objective): is found at Battle Square, after talking to Aerith there.
- Trophy: Critically Acclaimed (Receive a review of S or higher for your performance in Loveless at the Gold Saucer) – during the theater play, press the buttons as they appear on screen. You are allowed to make quite a lot of mistakes here and will still earn S rank. I chose the left prison cell door > The Hellhound Garm (9 Great, 6 Good, 2 Bad) > Your Future with Rosa (14 Great, 6 Good, 3 Bad) > Rosa (16 Great, 6 Good, 2 Bad) = Final Result “S”.
- Accessory: Chocoking’s Cape – Win the Gold Cup, must do Gold Cup or Bust side quest to access.
- Accessory: Hermes Shoes – Win The Titan Slam Grade II Chocobo Race.
- Accessory: Time Materia Earrings – Win The Bahamut Skirmish Grade II Chocobo Race.
- Accessory: Space Ranger Medal of Honor – Score 45000 Points on Galactic Saviors Expert mission
- Accessory: Limit Booster – Score 31000 on G-Bike Expert course.
- Accessory: Golden Brawler’s Gloves – Beat Ifrit in 3D Brawler.
- Collector’s Item: 3D Brawler Shiva Figure – Buy from GP Exchange (Wonderment Square) for 30GP after beating Shiva in 3D Brawler.
- Collector’s Item: 3D Brawler Ifrit Figure – Buy from GP Exchange (Wonderment Square) for 30GP after beating Ifrit in 3D Brawler.
- Queen’s Blood Card: 121 Specimen H1024 – Win Gimmick Battlefield: High Ground.
- Queen’s Blood Card: 120 Anuran Suppressor – Win Support Card: Don’t Fear, MAI’s Here.
- Queen’s Blood Card: 122 Crimson Mare Mk. II – Win Gimmick Battlefield: Vertical Integration.
- Queen’s Blood Card: 124 Forgotten Specimen – Win Gimmick Battlefield: High Ground.
- Queen’s Blood Card: 132 Rufus – Win Gimmick Battlefield: Back to the Wall.
- Queen’s Blood Card: 102 Leviathan – Achieve Bronze on Extreme Survival.
- Queen’s Blood Card: 097 Ramuh – Won from Lidrehl at Ghost Square, must be Rank 8 to face him.
- Accessory: Enfeeblement Ring – Win Two-Toad Bout: Ribbit Me This at Musclehead Colosseum.
- Manuscript: Telluric Scriptures Vol. V – Win Two-Person Bout: Disorderly Peacekeepers at Musclehead Colosseum.
- Manuscript: The Art of Swordplay Vol. V – Win Six-Person Bouts: Gourmands Are We at Musclehead Colosseum.
- Accessory: Boxcrusher Keychain – Score 55000 Points on Gold Rush in The Dustbowl.
- Queen’s Blood Card: 144 Emerald Witch – Won from Vincent at Shinra Manor in Nibelheim, must be Rank 9 to face him.
- Materia: Item Master Materia – Complete Preliminary Trial: Bioselected Specimens in Shinra Combat Simulator, must start Lament of the Damned side quest to access.
- Accessory: Subversion Materia Earrings – Complete Evaluation: Forsaken Specimens in Shinra Combat Simulator, must finish Lament of the Damned side quest to access.
- Accessory: Enchanted Ring – Same room.
- Queen’s Blood Card: 145 Shadowblood Queen – Won from Shadowblood Queen at Gongaga Ruins, must be Rank 11 to face her.
- Queen’s Blood Card: 104 Bahamut – Achieve Bronze on Nightmarish Survival at Queen’s Blood at Gold Saucer, must be the highest Queen’s Blood rank before you can play this.
- Weapon: Crystalline Cross (Yuffie) – Objective: Hightailing It – Location: Park – 1F > Utilidor – When chasing Cait through the employee corridor, this will be by the exit stairs (in plain sight on the main story path, practically can’t miss it).


- Phenomenon Intel 3: Modular Reactor 3 in Corel Region will become available after completing Objective “Hightailing It” (must have completed Phenomenon Intel 1+2 too). Do this and then also do Phenomenon Intel 4. Then in Chapter 13 you will gain access to Gilgamesh, the Superboss in the game.
- Side Quest: Hustle and Grind – started in Grasslands
- Side Quest: Beneath Still Waters – started in Junon
- Side Quest: Tides of War and Worry – started in Junon
- Side Quest: Gold Cup or Bust – started in Corel
- Side Quest: Trouble in Paradise – started in Corel
- Side Quest: Sand and Circuses – started in Corel
- Side Quest: Escape from Endless Writer’s Block – started in Gongaga
- Side Quest: Woodland Vigil – started in Gongaga
- Side Quest: Victim of Circumstance – started in Cosmo Canyon
- Materia: Magnify Materia – Reward from Victim of Circumstance Side Quest in Cosmo Canyon Region.
- Side Quest: Lament of the Damned – started in Nibel
- Side Quest: Can’t Stop Won’t Stop – final side quest in the game, started in Corel after doing all other 35 side quests
- Weapon: Plumose Rod (Aerith) – In Hojo’s Secret Lab (Nibel) after completing all combat simulations at the Shinra Combat Simulator. Must finish Side Quest: Lament of the Damned to access this in Nibel region. A fast travel point will let you get back there immediately. After you cleared all challenges in the Shinra Combat Simulator a door opens up with a purple chest that contains this.


- Queen’s Blood Card: 142 Ultimate Party Animal – Won from Shinra Middle Manager during Can’t Stop Won’t Stop side quest.
- Materia: Gambler Materia – Reward from completing Can’t Stop Won’t Stop side quest.
- Accessory: Ribbon – Beat Sephiroth in 3D Brawler, available after Can’t Stop Won’t Stop side quest.
- Collector’s Item: Masamune Replica – Buy from GP Exchange (Wonderment Square) for 2,000GP after beating Sephiroth in 3D Brawler.
Chapter 13
- Queen’s Blood Booster Pack: The Turks (128 Reno, 129 Rude, 130 Elena, 131 Tseng) – Purchasable from the Costa del Sol Queen’s Blood Card Vendor at the start of Chapter 13.
- Gilgamesh & Meridian Ocean Phenomenon Intel 1-4: If you completed all other Protorelics (Phenomenon Intel), then you’ll be able to access Gilgamesh from the start of Chapter 13. The entrance to him is found in the east of Meridian Ocean, you’ll then have to beat 3 Phenomenon Intel which consist of double bosses you encountered before in VR. See Meridian Ocean Intel Locations. This is very challenging, and Gilgamesh himself in Level 70. You will likely be in the mid Level 40’s at this point, it will be much easier if you keep this for later. You can use Chapter Select after the story to clean up all other side tasks, in the process you’ll automatically reach Level 70. When you’re level 70 clean up the Phenomenon Intel in Meridian Ocean and beat Gilgamesh. For now continue with the story by going to the north of Meridian Ocean, and gather the next collectibles.
- 4 x Materias: Swifcast Materia, Reraise Materia, Spare Change Materia, Limit Support Materia – Developed at Chadley at any of his locations, after unlocking Gilgamesh Island.
- Weapon: Slipstream Saber (Cloud) – Objective: Into the Labyrinth – Location: Labyrinth Ceiling – After rotating the gravity, continue until you climb a vine wall and this will be in front of you.


- Accessory: Whistlewind Scarf – Objective: Into the Labyrinth – Location: Sage’s Tower – When reaching the third gravity gear, turn it upside down and you’ll be able to grab this.


- Armor: Cetran Bangle – Objective: Into the Labyrinth – Location: Path of Delusion – After jumping down a waterfall, continue until you have two gravity gears to choose from, use the Mauvestar Gear, then climb up the vines and follow the path to find the armor.


- Materia: EXP Up Materia – Objective: Into the Labyrinth / One Step Ahead – After rotating the Amberstar Gear, head up the stairs and this will be in front of you.


- Weapon: Járngreipr (Tifa) – Objective: Divergent Paths – Location: Corridor of Currents – After getting split from half your team, continue forward and this will be in the same room as some stairs leading down.


- Weapon: Gambanteinn (Aerith) – Objective: Keep Trying – Location: Order’s Altar – After learning to use the lifestream to move objects as Aerith, after using the lifestream 3 times you will head downstairs and this will be at the bottom of the stairs.


- Materia: Steadfast Block – Objective: Keep Trying – Location: Order’s Altar – When you reach the section where you can charge 5 different lifestream fonts, progress through until the third one and this will be in the room in the back left.


- Armor: Cetran Armband – Objective: Keep Trying – Location: Order’s Altar – After charging the fourth font, climb up the stairs and this will be at the top.


- Weapon: Battle Cry (Barret) – Objective: Crossing the Rapids – Location: Corridor of Catastrophe – After pushing a box into the Rapids and watching some shinra troopers across a gap run ahead, in the building next to you.


- Accessory: Circlet – Objective: Forging Ahead – Location: Corridor of Catastrophe – Go up the stairs, when you see a tower with a lever you can turn, drop off the ledge to the left.


- Accessory: Revival Earrings – Objective: Forging Ahead – Location: Fellowship Room – After knocking down the tower, go across and down to the left (this is just before a rest bench).

- Materia: Subversion Materia – Objective: The Hunt Begins Anew – Location: Salvation’s Altar – When playing as Aerith again, in the room to the right of the next lifestream font.


- Weapon: Brisingamen (Red XIII) – Objective: The Hunt Begins Anew / Practice Makes Perfect – Location: Salvation’s Altar – Go into the left room for this weapon.


- Armor: Cetran Armlet – Objective: The Hunt Begins Anew – Location: Salvation’s Altar – Go forward and left into another room with this armor.


- Armor: Cetran Bracer – Objective: The Materia Awaits – Location: Shrine of Ambition – After completing the trials continue forward and go down the stairs, then go down the stairs into the room on the right for this.


- Weapon: Fuma Shuriken (Yuffie) – Objective: The Materia Awaits – Location: Shrine of Ambition – leave the previous room and this be right in front of you before you continue down the hallway.


Chapter 14
- No Collectibles in this Chapter!
Post-Game
After finishing the story, you will unlock Chapter Select. Select Chapter 13 for the Cleanup. You’ll have to get all of Johnny’s Treasure Trove Items for  7-Star Hotel. This basically requires 100% completion and getting the highscore in all minigames (including their hard versions), except Piano Songs which only require A-Rank. Some new collectibles also become available after the story, which are listed below. More challenges also unlock in the Musclehead Museum, all of which must be beaten for
  Are You Not Entertained?. If you haven’t yet, remember to finish the Phenomenon Intel in Meridian Ocean and defeat Gilgamesh after finishing all Protorelics. After beating Gilgamesh, you unlock a new set of Chadley’s Combat Simulator Challenges: Brutal & Legendary. You must finish these and all other Chadley Combat Simulator Challenges for
  Virtually Renowned.
- Queen’s Blood Booster Pack: Ancient Stewards (080 Kelzmelzer, 081 Panthera Protector, 082 Hecteyes, 083 Floating Death) – Purchasable from any item shop for 500 gil after completing the game.
- Queen’s Blood Booster Pack: Chthonic Sentinels (084 Ironclad, 085 Moss-Grown Adamantoise, 126 Red Dragon, 127 Demon Gate) – Purchasable from any item shop for 500 gil after completing the game.
- Queen’s Blood Booster Pack: Endgame Buddies (078 Special Forces Operator, 125 Don Corneo & Abzu, 133 Roche) – Purchasable from any item shop for 500 gil after completing the game.
- Queen’s Blood Cards: 095 Ifrit, 099 Kujata, 100 Odin, 103 Alexander, 105 Bahamut Arisen, 106 Gilgamesh, 115 Terror of the Deep – Purchasable from Thorin’s Card Shop in Grasslands. These cards become gradually available after you’ve unlocked every Summon in VR, all of which are available after having reached Chapter 11. Except Gilgamesh who is only available in Chapter 13 after having found all Protorelics. After defeating Gilgamesh you can buy his card here. Thorin’s Card Shop was unlocked through Side Quest: A Rare Card Lost in Chapter 2 (if you haven’t done this yet do it now).

- Manuscript: Fortunes Untold Vol. V – Win Two-Person Bout: Popularity Contest at Musclehead Colosseum.
- Accessory: Enervation Materia Earrings – Win Two-Person Bout: Sedition at Musclehead Colosseum.
- Manuscript: Sharpshooter’s Companion Vol. V – Win Six-Person Bouts: War of the Mascots at Musclehead Colosseum.
- Accessory: Fury Ring – Win Six-Person Bouts: The Archfiends at Musclehead Colosseum.
- Materia: AP Up Materia – Win Six-Person Bouts: Ululating Quartet at Musclehead Colosseum.
- Accessory: Fortitude Ring – Win Six-Person Bouts: Four-Way Deadlock at Musclehead Colosseum.
- Accessory: Transference Module – Win Six-Person Bouts: Riotous Feast at Musclehead Colosseum.
- Collector’s Item: Dio’s Autograph – Purchased from GP Exchange (Battle Square) for 2,000GP after completing all Musclehead Colosseum bouts.
- Accessory: Binding Materia Earrings – Reward from Brutal Challenge: Army of the Damned.
- Materia: Elemental Materia – Reward from Brutal Challenge: Requiem for the Scorned.
- Materia: Prayer Materia Earrings – Reward from Brutal Challenge: Unending Nightmare.
- Materia: Magnify Materia – Reward from Brutal Challenge: Hellions’ Intonement.
- Accessory: MP Up Materia Earrings – Reward from Brutal Challenge: The Seventh Seal
- Accessory: Gotterdammerung – Reward from Brutal Challenge: Rulers of the Outer Worlds.
- Accessory: Ribbon – Reward from Legendary Bout: Bonds of Friendship.
Miscellaneous Rewards / Purchasables / Transmutation Items
Combat Simulator Challenges – Rewards
- Summon Entity: Titan (Level Sync) = Titan Materia (Chapter 2)
- Summon Entity: Phoenix (Level Sync) = Phoenix Materia (Chapter 4)
- Summon Entity: Alexander (Level Sync) = Alexander Materia (Chapter 6)
- Summon Entity: Kujata (Level Sync) = Kujata Materia (Chapter 9, after reaching Gongaga village)
- Summon Entity: Bahamut Arisen (Level Sync) = Bahamut Arisen Materia (Chapter 10)
- Summon Entity: Odin (Level Sync) = Odin Materia (Chapter 11)
- Grasslands Battle Intel: Horror on the Range (Level 19) = First Strike Materia ★ (Chapter 2)
- Grasslands Battle Intel: Plains Stalkers (Level 20) = Vitality Up Materia ★ (Chapter 2)
- Grasslands Battle Intel: Natural Order (Level 20) = Provoke Materia ★ (Chapter 2)
- Junon Battle Intel: Conqueror of the Skies (Level 24) = Elemental Materia ★ (Chapter 4, defeat Fonadu & Stormwing)
- Junon Battle Intel: White Squall (Level 23) = Spirit Up Materia ★ (Chapter 4, defeat Whymzelett & Lavalisk)
- Corel Battle Intel: Oh, Skewer It (Level 31) = Vitality Up Materia ★ (Chapter 7, defeat Shankhalopod & Saberhawk)
- Corel Battle Intel: Sand Slitherers (Level 32) = Strength Up Materia ★ (Chapter 7, defeat Duneworm & Bladefin)
- Corel Battle Intel: Badlands Beasts (Level 32) = AP Up Materia ★ (Chapter 7, defeat Helopora Terpsicolt & Silver Chimera)
- Gongaga Battle Intel: Lethal Combo (Level 35) = Spirit Up Materia ★ (Chapter 9)
- Gongaga Battle Intel: Rooted in the Planet (Level 36) = Speed Up Materia ★ (Chapter 9)
- Gongaga Battle Intel: Distant Tremors (Level 36) = Elemental Materia ★ (Chapter 9)
- Cosmo Battle Intel: Flower of Destruction (Level 39) = First Strike Materia ★ (Chapter 10)
- Cosmo Battle Intel: Nature’s Vengeance (Level 40) = Level Boost Materia ★ (Chapter 10)
- Cosmo Battle Intel: Antediluvian Memories (Level 40) = Magic Up Materia ★ (Chapter 10)
- Nibel Battle Intel: Death’s Harbingers (Level 42) = VIT <> SPR Materia ★ (Chapter 11, defeat Pyretail & Carnifex)
- Nibel Battle Intel: Chthonian Rondo (Level 43) = AP Up Materia ★ (Chapter 11, defeat Marquis Valron & Suevite Disgorgon)
- Grasslands Region Intel: Level 1 (Level 17) = Healing Materia ★★ (Chapter 2)
- Grasslands Region Intel: Level 2 (Level 45) = Ice Materia ★★ (battle 24 enemies in Grasslands region)
- Junon Region Intel: Level 1 (Level 22) = Lightning Materia ★★ (Chapter 4, battle 7 enemies in Junon region)
- Junon Region Intel: Level 2 (Level 45) = Cleansing Materia ★★ (battle 15 enemies in Junon region)
- Corel Region Intel: Level 1 (Level 30) = Wind Materia ★★ (Chapter 6, battle 20 enemies in Corel region)
- Corel Region Intel: Level 2 (Level 46) = Fire Materia ★★ (battle 38 enemies in Corel region)
- Gongaga Region Intel: Level 1 (Level 35) = Poison Materia ★★ (Chapter 9, battle 12 enemies in Gongaga region)
- Gongaga Region Intel: Level 2 (Level 45) = HP Up Materia ★★★ (battle 20 enemies in Gongaga region)
- Cosmo Canyon Region Intel: Level 1 (Level 39) = Barrier Materia ★★ (Chapter 10, battle 15 enemies in Cosmo Canyon region)
- Cosmo Canyon Region Intel: Level 2 (Level 45) = MP Up Materia ★★★ (battle 22 enemies in Cosmo Canyon region)
- Nibel Region Intel: Level 1 (Level 42) = Time Materia ★★ (Chapter 11, battle 20 enemies in Nibel region)
- Nibel Region Intel: Level 2 (Level 45) = Revival Materia ★★ (battle 24 enemies in Nibel region)
- Biological Intel: Know Thine Enemy (Level Sync) = Enemy Skill Materia ★, Enemy Skill: Sonic Boom (Chapter 2)
- Biological Intel: Blinded by Light (Level Sync) = Enemy Skill: Plasma Discharge (Chapter 2, assess 16 Grasslands enemies and reach Enemy Skill Materia Level 2)
- Biological Intel: Breath of Life (Level Sync) = Enemy Skill: Soothing Breeze (Chapter 4, assess 10 enemies in Junon region and reach Enemy Skill Materia Level 2)
- Biological Intel: At Any Coast (Level Sync) = Enemy Skill: Self-Destruct (Chapter 6, assess 25 enemies in Corel region and reach Enemy Skill Materia Level 3)
- Biological Intel: Head Case (Level Sync) = Enemy Skill: Mind Blast (Chapter 9, after reaching Gongaga village, assess 14 enemies in Gongaga region and reach Enemy Skill Materia Level 3)
- Biological Intel: That’s the Smell (Level Sync) = Enemy Skill: Rancid Breath (Chapter 10, assess 15 enemies in Cosmo Canyon region and reach Enemy Skill Materia Level 4)
- Biological Intel: Stony Stare (Level Sync) = Enemy Skill: Gorgon Shield (Chapter 11, assess 16 enemies in Nibel region and reach Enemy Skill Materia Level 5)
- Brutal Challenge: Army of the Damned (Level 70) = Binding Materia Earrings (Accessory) (unlocked after beating Gilgamesh)
- Brutal Challenge: Requiem for the Second (Level 70) = Elemental Materia ★ (unlocked after beating Gilgamesh)
- Brutal Challenge: Unending Nightmare (Level 70) = Prayer Materia Earrings (Accessory) (unlocked after beating Gilgamesh)
- Brutal Challenge: Hellions’ Intonement (Level 70) = Magnify Materia ★ (unlocked after beating Gilgamesh)
- Brutal Challenge: The Seventh Seal (Level 70) = MP Up Materia Earrings (unlocked after beating Gilgamesh)
- Brutal Challenge: Rulers of the Outer Worlds (Level 70) = Gotterdammerung (Accessory) (unlocked after beating Gilgamesh)
- Legendary Bout: Cloud vs. The Warriors (Level 70) = Manuscript: The Art of Swordplay Vol. XV
- Legendary Bout: Barret vs. The Colossi (Level 70) = Manuscript: Sharpshooter’s Companion Vol. XVI
- Legendary Bout: Tifa vs. The Martialists (Level 70) = Manuscript: Way of the Fist Vol. XVI
- Legendary Bout: Aerith vs. The Magi (Level 70) = Manuscript: Telluric Scriptures Vol. XVI
- Legendary Bout: Red XIII vs. The Beasts (Level 70) = Manuscript: Tale of the Red Warrior Vol. XVI
- Legendary Bout: Yuffie vs. The Wronged (Level 70) = Manuscript: Secrets of the Ninja Vol. XVI
- Legendary Bout: Caith Sith vs. The Abominable (Level 70) = Manuscript: Fortunes Untold Vol. XVI
- Legendary Bout: Bonds of Friendship (Level 70) = Ribbon (Accessory)
- Legendary Bout: To Be a Hero(Level 70) = Manuscript: The Art of Swordplay Vol. XVI
- Combat Training: Beginner’s Hall (Level Sync) = HP Up Materia ★ (Chapter 2)
- Combat Training: Cloud (Level Sync) = Fire Materia ★ (Chapter 2)
- Combat Training: Barret (Level Sync) = Lightning Materia ★ (Chapter 2)
- Combat Training: Tifa (Level Sync) = Ice Materia ★ (Chapter 2)
- Combat Training: Aerith (Level Sync) = Wind Materia ★ (Chapter 2)
- Combat Training: Red XIII (Level Sync) = MP Up Materia ★ (Chapter 2)
- Combat Training: Yuffie (Level Sync) = Precision Defense Focus Materia ★ (Chapter 7)
- Combat Training: Cait Sith (Level Sync) = Luck Up ★ (Chapter 9)
- Combat Training: Synergy (Level Sync) = Steadfast Block Materia ★ (Chapter 2)
Vending Machines / Vendors:
- Chapter 2 – Vending Machine (Bill’s Ranch): Healing Materia, Fire Materia, Ice Materia, Lightning Materia, Wind Materia, Chakra Materia, Assess Materia, Steal Materia, HP Up Materia, Precision Defense Materia, Hunter’s Bangle (Armor), Bone Bracelet (Armor), Power Wristguards (Accessory), Bulletproof Vest (Accessory), Earrings (Accessory), Talisman (Accessory), Revival Earrings (Accessory)
- Chapter 4 – Vending Machine (Gabe’s Ranch): Poison Materia, Luck Up Materia, Item Master Materia, Elphadunk Bangle (Armor), Wisefox Bracelet (Armor)
- Chapter 6 – Materia Vendor (in north-west corner of Costa del Sol): Barrier Materia, Empowerment Materia, Fortification Materia, Steadfast Block Materia
- Chapter 6 – Weapons Vendor (in north-west corner of Costa del Sol): Abyssal Bangle, Oldebeast Bracelet
- Chapter 8 – Vending Machine (Gold Saucer – Battle Square): Cleansing Materia
- Chapter 9 – Vending Machine (Rugged Shoals – Corel Shore, in north of Gongaga region): Revival Materia, Binding Materia, Subversion Materia, Disempowerment Materia, Enervation Materia, MP Up Materia, Outlaw Bangle (Armor), Crocodile Bracelet (Armor), Star Pendant (Accessory), Headband (Accessory)
- Chapter 10 – Vending Machine (Kamaria’s Ranch): Time Materia, Warding Materia, Prayer Materia, Road Warrior Bangle (Armor), Snailshell Bracelet (Armor)
- Chapter 11 – General Store (Nibelheim): Garm Bangle (Armor), Varvados Bracelet (Armor), Platinum Earrings (Accessory), Timeworn Talisman (Accessory)
Moogle Emporium:
- Grasslands Moogle Emporium = HP Up Materia Earrings, The Art of Swordplay Vol. I, Way of the Fist Vol. I
- Junon Moogle Emporium = Precision Defense Focus Materia Earrings, Telluric Scriptures Vol. II, Tale of the Red Warrior Vol. I
- Corel Moogle Emporium (North) = Fire Materia Earrings, Shartshooter’s Companion Vol. II, Secrets of the Ninja Vol. I
- Corel Moogle Emporium (South) = Healing Materia Earrings, Vibrodetector (quest item), The Art of Swordplay Vol. IV, Fortunes Untold Vol. II
- Gongaga Moogle Emporium = Level Boost Materia, Way of the Fist Vol. IV, Fortunes Untold Vol. III
- Cosmo Canyon Moogle Emporium = Empowerment Materia Earrings, Telluric Scriptues Vol. IV, Tale of the Red Warrior Vol. V
- Nibel Moogle Emporium = Moogle’s Amulet, Sharpshooter’s Companion Vol. IV, Secrets of the Ninja Vol. V
Chadley World Intel Rewards (Craft with Data Points):
- Fire and Ice Materia = Grasslands Intel
- Auto-Cast Materia = Grasslands Intel
- Morph Materia = Grasslands Intel
- Auto-Unique Ability Materia = Grasslands Intel
- Magic Efficiency Materia = Junon Intel
- Lightning and Wind Materia = Junon Intel
- Item Economizer Materia = Junon Intel
- ATB Stagger Materia = Junon Intel
- Gravity Materia = Corel Intel
- HP Absorption Materia = Corel Intel
- ATB Boost Materia = Corel Intel
- Auto-Weapon Ability Materia = Corel Intel
- Petrify Materia = Gongaga Intel
- Magic Focus Materia = Gongaga Intel
- Limit Siphon Materia = Gongaga Intel
- Synergy Support Materia = Gongaga Intel
- Synergy Materia = Cosmo Canyon Intel
- Poison and Petrify Materia = Cosmo Canyon Intel
- Jump Materia = Cosmo Canyon Intel
- Skill Master Masteria = Cosmo Canyon Intel
- Comet Materia = Nibel Intel
- Mp Absorption Materia = Nibel Intel
- Darkside Materia = Nibel Intel
- ATB Assist Materia = Nibel Intel
- Swifcast Materia = Meridian Ocean Intel
- Reraise Materia = Meridian Ocean Intel
- Spare Change Materia = Meridian Ocean Intel
- Limit Support Materia = Meridian Ocean Intel
GP Exchange (Gold Saucer Points):
- Gil Up Materia = Bought at Chocobo Square for 3000 GP
- Level Boost Materia = Bought at Battle Square for 2500 GP
- Resplendent Robe (Accessory) = Bought at Battle Square for 700 GP
Item Transmuter – Armor Crafting:
- Copper Bracer
- Woodsprite Armlet
- Sailor’s Bracer
- Gold Coral Armlet
- Fortress Bracer
- Beguiling Armlet
- Crucible Bracer
- Witch’s Armlet
- Commander’s Bracer
- Spiritbound Armlet
- Resplendent Bracer
- Yggdrasill Armlet
Item Transmuter – Armor Upgrades:
- Enhanced Copper Bracer
- Enhanced Hunter’s Bangle
- Enhanced Bone Bracelet
- Enhanced Woodsprite Armlet
- Enhanced Sailor’s Bracer
- Enhanced Elphadunk Bangle
- Enhanced Wisefox Bracelet
- Enhanced Gold Coral Armlet
- Enhanced Fortress Bracer
- Enhanced Abyssal Bangle
- Enhanced Oldebeast Bracelet
- Enhanced Beguiling Armlet
- Enhanced Crucible Bracer
- Enhanced Outlaw Bangle
- Enhanced Crocodile Bracelet
- Enhanced Witch’s Armlet
- Enhanced Commander’s Bracer
- Enhanced Road Warrior Bangle
- Enhanced Snailshell Bracelet
- Enhanced Spiritbound Armlet
- Enhanced Resplendent Bracer
- Enhanced Garm Bangle
- Enhanced Varvados Bracelet
- Enhanced Yggradsill Armlet
Item Transmuter – Accessory Crafting:
- Power Wristguards
- Bulletproof Vest
- Earrings
- Talisman
- Supernatural Wristguards
- Survival Vest
- Platinum Earrings
- Timeworn Talisman
- Malboro Orb
- Star Pendant
- Headband
- Protective Boots
- Expeditionary Medal
- Draconic Ring
- Camaraderie Earring
- Psychic’s Charm
- Jeweled Ring
- White Cape
- Safety Bit
- Karmic Cowl
- Corsair’s Compass
- Genji Gloves (Breaks 9,999 damage limit)
- Genji Earrings (Increases damage dealt by 15%, but also increases damage taken by 15%)
- Genji Ring (Reduces damage taken by 15%, but also reduces damage dealt by 15%)
- Revival Earrings
- Healing Carcanet
Item Transmuter – Accessory Upgrades:
- Hi-Power Wristguards
- Bulletproof Vest Mk. II
- Magical Earrings
- Talisman of Focus
- Full Throttle Wristguards
- Riot Vest
- Sorcerer’s Earrings
- Cetra Talisman
- Enhanced Cameraderie Earrings
- Enhanced Psychic’s Charm
- Enhanced Karmic Cowl
- Enhanced Malboro Orb
- Enhanced Draconic Ring
- Enhanced Expeditionary Medal
Muscle Colosseum Rewards:
- Two-Person Bout: The Zoomies = Mega-Potion, 50 GP
- Two-Person Bout: Devil-May-Care Desperados = Secrets of the Ninja Vol. III, 60 GP
- Two-Person Bout: Exemplary Exterminators = Hi-Ether, 80 GP
- Two-Person Bout: Ghoulish Delights = Tale of the Red Warrior Vol. IV, 100 GP
- Two-Toad Bout: Frogjutsu = Elixir, 140 GP
- Two-Toad Bout: Ribbit Me This = Enfeeblement Ring, 160 GP
- Two-Person Bout: Birds of a Feather = X-Potion, 120 GP
- Two-Person Bout: Disorderly Peacekeepers = Telluric Scriptures Vol. V, 140 GP
- Two-Person Bout: Into the Woods = Turbo Ether, 160 GP
- Two-Person Bout: Popularity Contest = Fortunes Untold Vol. V, 180 GP
- Two-Person Bout: Silent or Silenced = Elixir, 200 GP
- Two-Person Bout: Sedition = Enervation Materia Earrings, 230 GP
- Six-Person Bouts: The Uncouth = 3 Mist Mega Potion, 50 GP
- Six-Person Bouts: The Befouled = White Cape, 55 GP
- Six-Person Bouts: Peas in a Pod = 3 Ruby, 60 GP
- Six-Person Bouts: Scratch That = Steadfast Block Materia Earrings, 70 GP
- Six-Person Bouts: Match Made in Pain = 3 Emerald, 80 GP
- Six-Person Bouts: League of Reprobates = Lightning Materia Earrings, 90 GP
- Six-Person Bouts: Pecking Order = 3 Sapphire, 100 GP
- Six-Person Bouts: Access Denied = Spectral Cogwheel, 110 GP
- Six-Person Bouts: Harmony of Discord = Transmuter Chip: Ultimate Accessories, 120 GP
- Six-Person Bouts: Gourmands Are We = The Art of Swordplay Vol. V, 130 GP
- Six-Person Bouts: Primordial Protectors = 5 Mist Giga-Potion, 140 GP
- Six-Person Bouts: Out of the Shadows = X-Potion, 150 GP
- Six-Person Bouts: War fo the Mascots = Sharpshooter’s Companion Vol. V, 160 GP
- Six-Person Bouts: The Archfiends = Fury Ring, 170 GP
- Six-Person Bouts: Legendary Showdown = Turbo Ether, 180 GP
- Six-Person Bouts: Ululating Quartet = AP Up Materia, 190 GP
- Six-Person Bouts: The Boss and the Hound = Astral Remnant, 200 GP
- Six-Person Bouts: Four-Way Deadlock = Fortitude Ring, 210 GP
- Six-Person Bouts: Dragon Warrior = 2 Elixir, 230 GP
- Six-Person Bouts: Riotous Feast = Transference Module, 250 GP
Rewards from importing Saves
- Leviathan Materia = import Final Fantasy VII Remake save to unlock
- Ramuh Materia = import FF7R INTERmission save to unlock
Pre-Order DLC
- Moogle Trio = Pre-Order Exclusive Bonus DLC
- Accessory: Reclaimant Choker = Deluxe Edition DLC
- Armor: Orchid Bracelet = Deluxe Edition DLC
For more guides check out Final Fantasy VII Rebirth Wiki.

falsaai says
This is such an impressive work! I’m planning to just depend on this page and ignore all other pages, I hope it will still get me all the trophies in the game (aside from the difficulty trophies, of course).
Thank you guys. You’re absolute beasts!
Sam1989 says
I’m actually wondering the same…
Does following this page will be enough for the platinum trophy?
credge says
Wait a sec, obviously I can’t play the game yet, but Chapter 1 is just the flashback right?
If the stuff is on the list, is it just for the sake of the activity of looting, or do you actually keep the stuff you collect there?
I would have figured at most you’d only get enemy Intel from it, if anything.
credge says
It appears that while you don’t get to keep the Materia from the flashback (as expected) you do keep monster intel.
However: if you skip the allowed part from doing the demo all the monsters from the flash-back are auto-assessed anyway, so no potential progress is lost afaik.
So the only difference is you’d have no staggers or kill counters on the Intel.
PowerPyx says
None of the Chapter 1 items carry over to the rest of the game. It’s okay if you skip them, as you don’t keep them anyway. Only from Chapter 2 onward you keep all your stuff.
DarkHitman82G says
Another Awesome Collectable Guide Thank You for all your hard work PowerPyx!
Pierre Queiroz says
Relationship Interaction have a specific trophy? I think it’s better to do it on my own, so if I don’t have a trophy I won’t do this part.
PowerPyx says
Relationship Interactions don’t matter for trophies. I just put the “best” dialogue options that will give the best outcome but it won’t impact any trophies if you pick something else or skip them entirely.
theharlotfelon says
Chapter 4: I’m pretty sure in order to get the Speed Demon Keychain and Stuffed Stamp from the boss fight, you have to have all 5 7th Infantry troopers survive the section.
Context: I had one die the first time and only got the elixir and after the Chapter I made sure I didn’t have the items. I redid the final section just in case with all troopers and when the “gift” is given after the boss fight, I finally got the items.
Urabraska says
This. I’m already well past this as the guide didn’t say anything about keeping them all alive and I was wondering why I was missing it in ch. 7. Now I need to go back in ch select and hope it carries over into the main save or I’ll need to redo the whole guide for it.
PowerPyx says
You can grab it via Chapter Select or in the Hard playthrough. No worries, nothing is missable.
I updated that it comes from keeping all troopers alive. Everyone on my team got it automatically because no troopers had died for us.
BridgeToClarity says
Not sure it was said. You can assess the enemies in the simulator and they count for the 16. I redid all of the sims to assess them there. I hadn’t done any in the world. I went from 0 to 14-16 and got the last two at the end of chapter 2 – start of chapter 3.
Sean says
Hey in ch. 2 there is a Precision Defense Focus Materia just north of the Fiend Intel 1: Voracious and Venomous on a small landmass you can swim to from the beach.
Keerah says
I’m not sure if this is random but I’ve been able to get moogle medals consistently from boxes at the top of intel towers.
There’s always been boxes at the top of these that have 1-2 moogle medals in them in the first region so far.
TriplEEE13 says
The Resounding Megaphone can be found in a Purple Chest in the Gongaga Airstrip behind the telephone (next to a tree in front of some pallets). Just an FYI. Thanks!
Freyjia says
Ch 9 Red Megaphone can be found in Gongaga village in a cave in the SE corner of the river (below item store), ramp down is just to the left of the 3 triangle bridges in the middle (behind noticeboard / north of maghnata / south of piano)
you can see the chest from the bridge to the left of the tack shop
Ruffio says
So if I don’t care about getting the Barrier Materia Earring from the final Glide De Choco course in Chapter 10, I can skip it, right? No trophy for getting those. I wish this guide had an “optional” tag for anything not needed for a trophy.
(Choco De Glide mechanics need serious work)
PowerPyx says
You need to fully finish all minigames with the highscore for platinum. It’s a requirement for all of Johnny’s Treasure Trove Items. If it’s in the game you need it for Platinum, there are no optional minigames.
Fenny says
Really appreciate these guides! Just wanted to add you can get the Red Megaphone for Cait Sith in chapter 9 gongaga, by jumping in the water and going south into a cave. It’s east of the queens blood player Oscar.
Found this completely on accident lol but the only mention I saw of this item in the guide was purchasing it for 5000 gil so figured I’d comment about it.
PowerPyx says
Updated, thanks!
Vin says
Amazing job with this guide, thank you so much!!
starkills26 says
Materia: Gravity Materia – Objective: Escape Plan – Location: Mako Research Facility – Section W
Elevator/Pipe room. Located next to the box dispenser, inside a Shinra box on the top shelf. Throw a box at it.
Meison says
If I already obtained a particular collectible (i.e. materia, armor, accessory) from previous chapters, do I have to buy it again from shops or collect it again in free roam for the platinum?
Moe says
There is a Warding Materia in Gongaga village. You need a chocobo, you pass the jumping mushroom just before the suspension bridge but can’t do it on your first pass because you haven’t unlocked the chocobo yet.
oogabooga says
Orb of steal materia max level after winning chocobo race and entering gus room in chapter 8 not really needed at this point but just to let you know