This walkthrough for Chapter 1 in Resident Evil 4 Remake will guide you through all objectives. This also includes Collectibles, Trophies and Key Items.
For other Chapters see Resident Evil 4 Remake Walkthrough.
Objectives:
- See what’s taking so long
- Escape from the hunter’s lodge
- Head for the lake
See what’s taking so long
After the initial cutscenes at the start of the game, you’ll be controlling Leon, and need to find where the police officer went. Follow the path ahead until you reach a house and enter the front door.
You can look around the house a bit if you want, but to progress head all the way to the end of the hallway to the door at the end for another cutscene.
After the scene, pick up the Hunter’s Lodge Key that’s dropped on the ground beside you.
Head back out into the hallway and use the Hunter’s Lodge Key on the door to the right with the red paint on it.
Head down the stairs and follow the path to the end of the basement for another cutscene.
Escape from the hunter’s lodge
After the scene, head back out of the basement. When you reach the hall again some enemies will have walked out of the door that was previously blocked on the right. Head through and up the stairs for another scene.
Head for the lake
After the scene, you’ll be back outside the lodge. Follow the path forward to another building. Outside you’ll see your first destructible barrel, which you can break either by interacting with them with  or by hitting them with your knife by pressing
  without aiming.
Head inside the house to find your first Typewriter of the game. These are used to make manual saves (and are the only way you can save on Professional difficulty).
Keep following the path and you’ll run into your first enemies. Most normal human enemies are easily dealt with by shooting them in the head to stun them, then following up with the  melee prompt.
Keep following the path and you can check the small hut on the left for supplies. Then keep following the path to the big gate at the end to enter the first main area of the village.
The next area will be your first big combat encounter, ripped right from the original game, with largely the same environment.
There are a few ways you can approach this section, though you will always have to fight the enemies to some extent and wait a certain amount of time until they are all automatically called away by the bell ringing. You can stay outside and uses the paths to avoid enemies or use the buildings. The classic method is to head inside the second building on the left.
Weapon: W-870 Shotgun
In this building you can block the lower window with the bookshelf, then head upstairs where you can pick up the W-870 Shotgun off the wall.
 |
 |
Using this and the other supplies you can fend off the enemies as they come in the windows and up the stairs. Note that if you defeat the Chainsaw Villager they’ll drop an Emerald. This applies for most of the “miniboss” style enemies in the game, but these aren’t counted as treasures so aren’t mentioned otherwise, and if you don’t manage to defeat them before the bell calls them away you aren’t locked out of anything.
After a certain amount of time the bell rings and all the enemies head through the locked door of the east building, leaving you alone in the Village. You can go around the area to pick up supplies, but the main thing to make sure you grab before progressing are the two treasures.
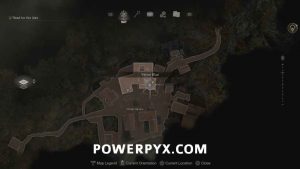
Treasure: Velvet Blue
In the building where you could pick up the W-870 Shotgun the is a window you can break through. Hop out onto the rooftop and go to the right where you can find a Velvet Blue sitting on the peak of the roof.
 |
 |
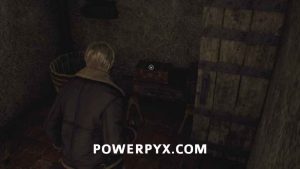
Treasure: Ruby
Hop down and when you’re ready to continue and follow the path to the northeast leading towards the objective. In the last shed on the left before you reach the gate you can find a Ruby sitting in a chest just to the right of the door.
 |
 |
Now head through the gate to reach the Farm area. The building immediately on the right when you enter has a typewriter you can save at, then work your way through the farm. There are a number of normal Villager enemies in the area who aren’t aware of you when you enter but will start moving toward you once you alert them. Deal with them, then head to the left side of the farm through the barn.
Treasure: Pearl Pendant
To the left of the shed you can spot a windmill with a silver cage hanging off of it. When you see these they always contain treasure and can be located with their distinctive creaking. To obtain this one you want to wait until the windmill has spun and the cage is to the right, then shoot it to drop the Pearl Pendant. If you drop it on the left it falls in the dirty well, where you can still pick it up but then it sells for a lot less.
 |
 |
Merchant Request: Destroy the Blue Medallions
Head towards the gate to the north and you can spot a blue paper stuck to the wall. This is your first Merchant Request, which is basically a side objective you can do and turn in later for extra rewards at the Merchant. Note that for most of these you aren’t actually required to pick up the request before working on the objective, so if you shot some of the Blue Medallions for this objective earlier you aren’t unable to complete it.
 |
 |
This request requires shooting the 5 Blue Medallions in the farm area (locations below). When you pick up the Request paper the locations of the Medallions are marked on your map, so you can find them more easily. This rewards you with 3 x Spinel when turned in later at a Merchant.
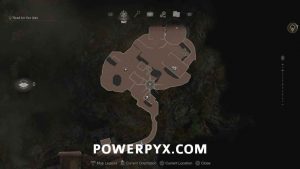
Blue Medallion 1
Head back near the entrance to the area and this is found on the north corner of the building with the typewriter.
 |
 |
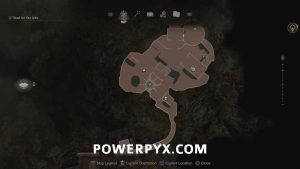
Blue Medallion 2
Hop the fence to be beside the barn and look into the window where you can see the second one.
 |
 |
Blue Medallion 3
Go into the hut to the right of the windmill and you can spot this one up in the rafters.
 |
 |
Blue Medallion 4
Now go towards the gate again and look above the closed barn door where you can spot this one.
 |
 |
Blue Medallion 5
Finally, walk to the left of this barn and look over the fence towards the large windmill building and you can spot this one hanging under the balcony on the other side of the fence.
 |
 |
Now head back to the large gate where you grabbed the Request and go through the metal door inside. Watch out for the tripwire bomb (you can crouch under it and use it to help defeat enemies in a bit or disarm it by interacting with it).
Climb to the second floor where you’ll need to find a gear to place in the wall and open the gate. First though you want to go out the southeast door and jump off the balcony to the spot below.
Treasure: Flagon
Just ahead in this area, there is a chest where you can pick up the Flagon, and you’ll also receive a tutorial about placing Gemstones in Treasures.
 |
 |
Just ahead there is a door with a lock on it. You can break these locks to open doors either by shooting them or hitting them with your knife.
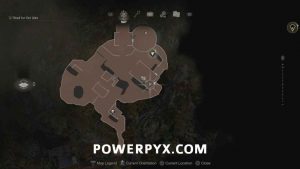
Treasure: Ruby,
Just inside in the left corner is a drawer you can open which will contain a Ruby.
 |
 |
Key Item: Wooden Cog, Weapon: Kitchen Knife
You can also pick up the Wooden Cog from the table on the right which you need to open the gate, along with your first Kitchen Knife. This is a weak knife you can use in place of your Combat Knife if it breaks.
 |
 |
Once you’ve entered this area a Hammer Brute breaks through the door to attack you along with a couple of other enemies. The Hammer Brutes are stronger than normal enemies, though not as strong as the Chainsaw Villager. You can stun and melee them in a similar way, but if you didn’t disarm the tripwire in the windmill building you can run over there and lead the Brute into it for huge damage.
When they’re all dealt with, head back up into the windmill and interact with the empty spot in the wall to place the Wooden Cog, then pull the lever to open the gate to the next area.
You don’t do anything at the large house ahead yet, but you can run around the left to find some supplies. To progress go to the right of the house and push the cart to open up the next path.
On the path ahead watch out for some rubble that will be blown down, then some enemies that run and drop down to the left. Deal with them then continue along the path to the “Lakeside Settlement” area.
In this area there will be some more enemies throwing explosives, most notably the one standing in the house ahead of you and one up on the platform to the left. If you have good aim you can shoot the explosives in the enemy’s hand to kill them, or shoot them a few times when they light them and they’ll drop them.
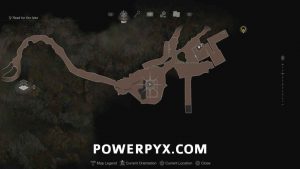
Castellan 1
Deal with the enemies around the bouse then go around to the other side where you can climb into a window. Go to the right into the second room and look up into the rafters to spot the first Castellan. There are one of these per chapter to destroy, and they can be found by listening for their ticking and clanking noise. Destroying this first one also awards the trophy/achievement Revolt Against the Revolting  .
.
 |
 |
Proceeds towards the house where your objective is, watching out for some more enemies as you go. Break the lock to get inside and proceed through the building, watching out for the tripwire in the hallway which you will need to disarm to get past without damage.
You’ll then need to hold  on the bookshelf to push it out of the way and get to the next room. Deal with the enemy then go through the trap door. Interact with the item at the end of the path to complete the chapter.
This finishes Chapter 1 in Resident Evil 4 Remake.
Next Chapter: Chapter 2 Walkthrough
For all other chapters refer to the Resident Evil 4 Remake Walkthrough.












Brandon says
Hey thanks for the walkthrough I’m currently going through the game and found a sapphire in chapter 1 not mentioned in the walkthrough up in a tree before the last house in chapter 1. It’s in a bronze cage near the top of the tree.
Ross says
Those are from the “Expanded” Treasure Map, which I’m not sure is DLC oor not. But they aren;t counted towards the required collectibles for the achievement. You probably found loads more throughout the game after this considering your comment was almost a year ago now.