The Quest for Tyr is the second main quest (path) in God of War Ragnarok. This walkthrough will guide you through all objectives of The Quest for Tyr Main Quest (Path).
Requirement: Complete Surviving Fimbulwinter
Reward: 750 Kratos XP, 375 Atreus XP
Quest Info: We have arrived in Svartalfheim. The Dwarves have left us far from Niðavellir. We will journey by boat.
Objectives:
- Journey to Nidavellir
- Explore Nidavellir
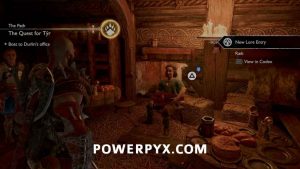
- Boat to Durlin’s office
- Exit Durlin’s office to the port
- Reach the mine beyond the mountain
- Reach the front of the broken train
- Fix the broken train
- Ride the train to the mines
- Search the mines for Tyr
- Pursue Tyr
- Exit the mines with Tyr
- Escape through the Mystic Gateway
- Confer privately with Mimir
Journey to Nidavellir
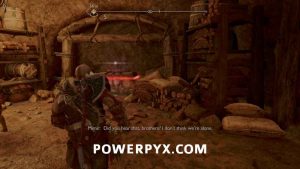
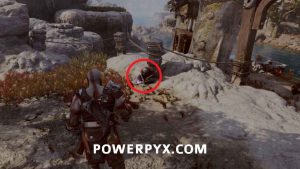
After passing through the portal to start this story quest, you’ll be in Svartalfheim for the first time. Follow the path a short distance, then you can spot the first of Odin’s Ravens on top of the rock to the left. Throw your Axe at it to kill it, and start the Favor The Eyes of Odin. Like the first game, you will need to kill all Ravens over the course of the game for trophies and completion (though there isn’t a trophy specifically for all Ravens this time).
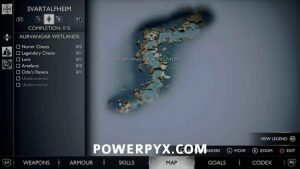
Note that if you check the map, this whole first area (Aurvangar Wetlands) has all collectibles counted together, so keep that in mind if you miss any there’s going to be a few places you need to check if you have to backtrack later.
After Atreus pushes the boat over, you’ll have your first encounter with Wretches. These small enemies typically appear in large numbers but are mostly a nuisance.
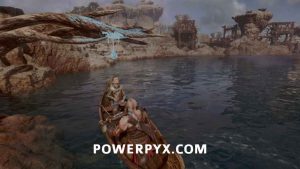
After they’re all dealt with, interact with the boat Atreus was moving to hop in and start journeying down the river.
As you progress down the river you’ll sometimes come across yellow sparkly areas like the one directly in your path. Pressing  while over them will direct Atreus to pick up items out of the water; usually just basic crafting materials like Rawhide, but still useful early in the game.
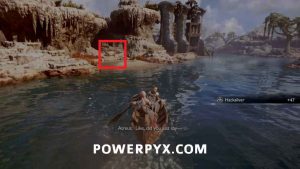
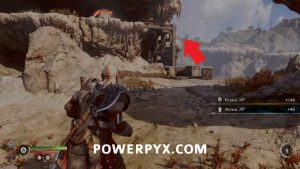
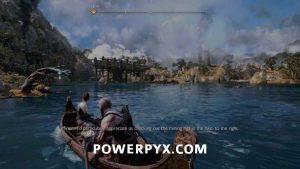
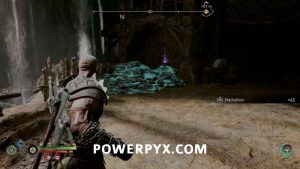
Hug the left side first, and you can find a landing spot where you can pick up a Hacksilver Chest.
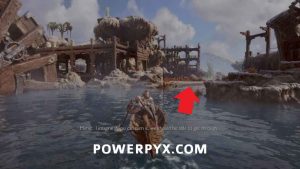
Continue down the river until you reach the spot blocked by the big wooden wheel. You’ll need to hop out on the landing spot to the right so that you can move the wheel.
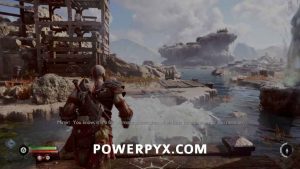
Head closer to the water geyser ahead. You can throw your axe at these to freeze them, allowing you to jump across are solve puzzles as you will find later in this area.
 |
 |
After crossing the geyser, head to the right first. Here you can find your first Nornir chest of the game. Like the prior game, these give items that upgrade Kratos’ Health and Rage, with one more of the items needed for each level. The rewards aren’t set per chest, you always earn one Iddun Apple, then one Horn of Blood Mead, alternating each chest until you’ve earned all upgrades (the final few chests give extra materials). This first chest is a simple one, just throw your axe at each of the stone statues to destroy them and unlock the chest. The first two are easy, they are visible to the left and right of the chest sitting on the rocks.
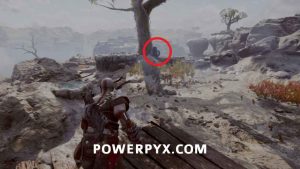
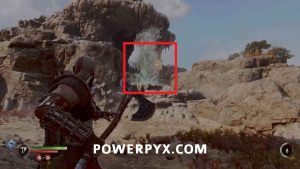
The third one is slightly more hidden. Throw your axe at the nearby geyser to stop it, allowing you to grapple to the wall behind it and reach the higher ledge. Here you can destroy the third statue that is sitting just beside the nearby tree. Once all three are destroyed the chest is unlocked and able to be looted.
 |
 |
On the same raised area you can also grab an Artefact, “Hreidmar’s Brassard”. Artefacts are basically lore collectibles that are needed to be collected for the trophy The Curator  . They don’t serve any other purpose through other than for extra lore and to sell at the shop for extra Hacksilver.
Turn back around from the chest and this time head to the left. You’ll need to climb up the wooden scaffolding to reach the higher area. On top go to the opposite end and interact with the zipline to slide down.
In this area, you’ll have your first encounter with Grim, which are nearly human-sized enemies that typically attack with melee and are able to dodge some of your normal attacks. Keep an eye for the arrows around Kratos which will point to enemies behind, and whether they are going to attack.
Before continuing on the story path, you can head over to the nearby wooden wall and climb up to a higher level for a Materials Chest containing 2 x Forged Iron.
Drop to the lowest level and climb the chain where Atreus should be waiting. Hook your blades to the wheel in the river and pull down to spin it out of the way.
You can then go to the opposite side of the platform and kick off a metal plate, allow you to drop down and get back in the boat.
Continue paddling down the river. When you get close to the bridge blocking the path you can hit  to squeeze through the gap to the other side.
Hug the left side of the river and you can find your first Yggdrasil’s Dew pickup. These give small permanent boosts to your stats when you collect them, and there are usually a few per Realm spread around the areas where you are in the boat. This first one gives +2 to Runic power.
Head directly across the river where you can find another landing spot for the boat.
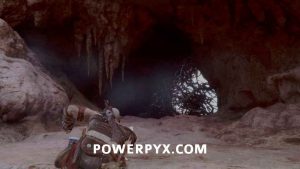
This area isn’t required to progress, but there are a few items to grab. Deal with the first set of enemies that appear, then head up the nearby ledge and destroy the brambles blocking the cave opening.
Head through the gap to the other side. You can run to the end of the wooden bridge to grab a Hacksilver chest, then come back and look at the ledge above. There are a couple more brambles you can destroy, with the one on the right revealing a grapple point.
Continue to the right where you can find a Materials Chest containing 2 x Rawhide. Once you grab that you can drop down the nearby ledge to return to the boat and continue up the river a short distance.
On the right side again there will be another boat landing. You’ll need to traverse this area to deal with the gate blocking your path further up the river.
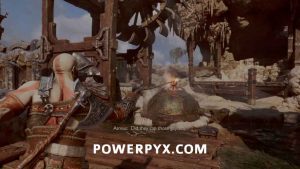
Deal with the first group of enemies that appear, then you can interact with the nearby dome to stop it from capping the geyser under the water wheel.
That won’t be enough to turn the wheel though, so head around to the right where there is a platform you can grapple up to.
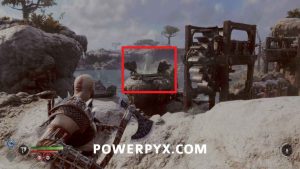
Deal with the Grim that appear, then look towards the water wheel. From this angle, you can throw your axe at the geyser higher on the rock. When frozen, this causes the uncapped geyser to push more water, turning the wheel and lowering the gate. You can then follow the path down back to the boat and continue down the river.
While continuing down the river, watch on the left side for some boards covering an opening. This is a secret side area you can enter for some collectibles, though note that some of the items in this area won’t be available until after the story, so you’ll be coming back here at some point.
After landing the boat head forward to the lower area, and you’ll encounter a whole bunch of Grim. This will also be the first time you can encounter Cursed Grim, which are slightly stronger and can use poisonous ranged attacks. Deal with them and any more that appear so that you can grab the items.
When they are all dealt with you can head back near where you entered, then to the right to find another Nornir chest. This is the first one you can encounter with the spinning wheel unlock method, where you find spots around the area that you throw the axe at to change the symbol to match the three on the chest.
From the boat landing, take an immediate left up the ledge, then walk to the end of the platform to find a Legendary Chest. These chests contain special items such as armor or weapon attachments. Out of this chest you obtain the Deadly Obsidian Handles, useable on your Blades of Chaos.
Turn around and head back to where you climbed up and look to the left on the rocks for the first mechanism for the Nornir Chest. Spin it once to the right for the correct symbol.
Follow the path left of the mechanism to drop to a lower spot. Here you can find your first Lore Marker, which gives the “Unsafe Roads” lore. Lore Markers aren’t required for any trophies, but are counted towards 100% completion under the Lore stat.
Drop down to the lower area opposite the Marker, then look left of the tunnel opening for the second mechanism. Spin it once to the left for the correct symbol.
Climb the ledge to the left, then follow the path forward keeping an eye towards the left of the path. You can spot the final mechanism here, but it is obscured by a geyser. You can freeze the geyser to check the symbol before turning, or just turn it once to the left for the correct symbol. You can then open the Nornir Chest, then return to the boat and continue down the river.
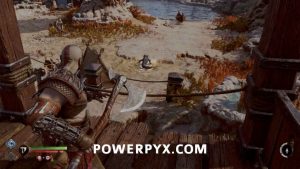
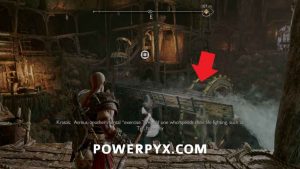
When you reach the big gate blocking your way, continue around to the right side for the boat landing. Just ahead, you can spot your first Ormr. These enemies don’t attack you but drop a bunch of materials when killed. The catch is that you can’t attack them directly from the front, as they will hide whenever you try to do that. To kill this one, climb the wooden platforms just behind, then throw your axe at it.
 |
 |
After picking up your spoils, continue around to the wooden structures. To get past the first one, you need to destroy the part holding up the block with your axe, which allows you to climb over and continue past.
Interact with the chain just ahead to lower the first part of the gate, then jump across to the section on the left. You’ll first need to freeze the geyser in the middle of the structure so you can jump to the other side.
Follow the path around to the left, dealing with the Grim that appear. Now to get up to the higher area, you first need to pull the cap on the geyser to the right.
Next, throw your axe on the geyser you jump over previously. This causes the now uncapped geyser to spin the water wheel, lowering the block over the first geyser. Next, recall your axe and quickly throw it at the spot holding the block up before it moves all the way back up.
With the block dropped to the ground, you can go over and climb on top of it. While on top look to the right and toss your axe at the uncapped geyser to freeze it. This propels the block upward, allowing you to reach the upper level.
On the top level, you can interact with the second chain to completely lower the gate blocking the river. You can also grab a Materials Chest which contains 2 x Forged Iron, along with an Artefact. This Artefact is one of Kvasir’s poems, titled “The Sunrise of Nothing”. Kvasir’s Poems are counted as Artefacts for completion, but have a separate trophy attached to finding all of them, The Librarian  .
.
With everything collected, drop down and head back to the boat, then continue down the river to finally enter Nidavellir.
Explore Nidavellir
After stopping at the dock, head up the slopes towards the central area. If you stick to the left side there are two ledges you can climb up, leading to a Hacksilver Chest along with a Raven that you can spot on the nearby rooftops.
Drop down to the main area where you can find Sindri waiting at a shop. Before speaking with him, you can look beside the statue platform to find the Lore Scroll “Shopping List” sitting on the ground.
Head over and speak with Sindri at the shop. He fits Atreus’ bow with a new string, which changes the arrows into Sonic arrows. This allows you to destroy any of the green glowing stones you see around the area. Aim with  as if you were throwing your axe, then you can hit
  to direct Atreus to shoot at specific spots. If the reticule has the green arrows above and below this means that is an item that can be destroyed with the arrows.
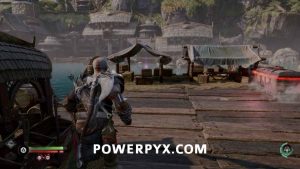
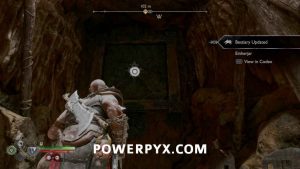
Deal with the enemies that come out of the hole, then you can do any business you need at the shop. Before continuing further, head all the way back near the boat landing. On your way in your might have spotted a spot blocked off, which you can now destroy with the Sonic Arrows. On the other side you can obtain the Kvasir Poem “Large Society Ground Orb, The Performance”, along with 2 x Slag Deposits from the Materials Chest.
 |
 |
Head all the way back up by the shop and climb through the hole you created earlier to reach the next section of Nidavellir. First to grab some extra items, take a hard left and break through the items blocking the lit-up hallway.
When exiting the hallway you can destroy some sound stone on the right to reveal a Hacksilver Chest, then grab the Artefact “Griep’s Firebomb” off the ground.
Grapple up to the spot ahead and continue through the hallway to the other side. You can notice a Legendary Chest up on a ledge, with a small vent on a pillar in front. These vents are used for traversal once you obtain a new item later in the game, so you’ll need to come back to explore any areas where you spot these.
Follow the hill down to get back to where you started. Watch the right side of the path (while moving down the hill) for a cart full of sound stone, then destroy it to continue forward.
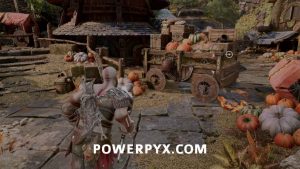
Interact with the cart blocking the path to push it out of the way, then enter through the door ahead.
 |
 |
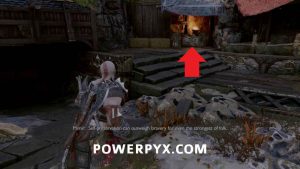
Inside the pub, walk over and speak with the dwarf playing the instrument to the right. He’ll send you out the back of the pub, but before you leave you can interact with him again to start the Favor “In Service of Asgard”.
Boat to Durlin’s office
On the way out Sindri provides you with a compass, which makes locating objectives much easier. You’ll need to open up the map and go through a bit of a tutorial about marking objectives. Continue all the way down the path to where you can find a new Mystic Gateway, along with a boat dock. Hop in the boat and start heading down the river.
Once you reach the open water, you’ll be prompted about the fork in the path. Heading to the right leads to the area where you complete the Favors for this area. You can go there now if you want, or leave it until later. If you’re not going right now, you should make sure to grab the Yggdrasil Dew from the branch in the middle of the area, which gives +2 to Cooldown.
Heading left towards Durlin’s, you can first follow the river down to the right for some optional items. On the right side of the river there is another Yggdrasil Dew, giving +2 to Defence. You can get out on the nearby shore to find a Materials Chest which contains 2 x Forged Iron.
 |
 |
Get back in the boat and head back towards the safety office. Interact with the door to head inside.
Exit Durlin’s office to the port
Once you’re finished speaking with Durlin, head out the marked door to the right to exit the rear of the building.
In the area behind the office, there will be a bunch of Grim hanging around that you need to take out. They’re the same types you ran into before, so just keep moving around the area and taking them out as they appear. If you spot any jumping on the pillars around the area you can direct Atreus to shoot Sonic Arrows at the low section of sound stone. This destroys the pillar and knocks the Grim off, stopping them from shooting projectiles at you from above.
Reach the mine beyond the mountain
Once all the Grim are defeated you can check around the area for items, but the only thing major to grab is a Materials Chest containing 2 x Rawhide that is south of the gate you need to head through to progress.
 |
 |
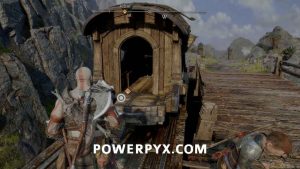
Follow the path up through the gate, and you’ll reach a kart on a track that you need to interact with to progress. Before doing that, you can walk just to the right of the track to a dead end to find a Materials Chest containing 2 x Forged Iron.
 |
 |
Reach the front of the broken train
After exiting the train, follow the path around toward the rocky area. Stick the left to climb up a ledge, then you can drop down into a small dead-end area. Destroy the wooden structure here to pick up the Artefact “Bari’s Grenade”.
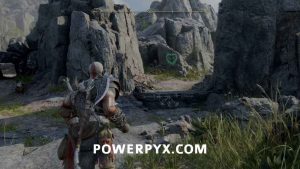
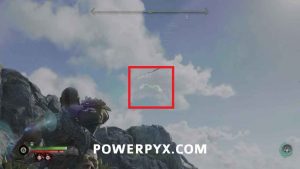
Climb back up and you can spot two paths. One leading to the left that you need to enter to progress, and one leading to the right into a small dead end. If you head into the path on the right you can find a Nornir Chest, but you won’t be able to open this one until later in the game (if you try to destroy the statues they reappear unless they are all destroyed at the same time, which you can’t do with the axe). What you can do though is kill the Raven that is flying around off the edge of the cliff.
 |
 |
Once you’re finished, go back and head through the small opening Atreus should be waiting by.
Dreki
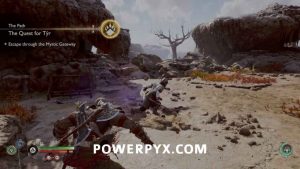
This will be the first of a few times fighting a Dreki during the game. At range, the Dreki will spit at you, and in close range, it will either lunge to bite or swing its tail at you. Some of these can be blocked but it’s easier to simply dodge them all, getting hits in where you can. Utilize your runic attacks and Spartan Rage when you have them to inflict more damage. Halfway through the battle the Dreki will be imbued with lightning and will start doing close-range and long-range unblockable lightning attacks. These are area-of-effect, so you want to get away from the target zone when it starts to wind these up. Other than the new attacks this phase is still the same, so attack when you can. There are multiple health crystals around the arena for you to collect if you need them. Make sure to grab the items it drops when defeated to obtain Flames of Anguish (Blades Light Runic Attack) and a Chaos Flame (Blades Weapon Upgrade).
When you’re ready to continue, head out the gap on the west side of the arena.
The path ahead splits, and you can head either left or right. Heading to the right leads to a dead-end area (you’ll return here later in the story) but if you decide to go over you can grab the Lore Scroll “Dear Overseer” from the ground, along with the Rune Read “The Forge” beside the large locked gate.
 |
 |
Head back and take the left path this time. Keep jumping across the gaps until you reach the end of the path on the lowest level, then climb up to the left. To reach the nearby Materials Chest containing 3 x Forged Iron you need to specifically drop off the ledge on the left, which lets you grapple to the platform with the chest.
Grapple back and climb up towards the train track. Ahead you’ll encounter your first Wretch Nest. These spawn enemies endlessly unless they’re destroyed, so you can either run up to them and attack them directly or hit them with ranged attacks.
Fix the broken train
Once you reach the top, interact with the cart attached to the drain. Kratos will stick his Blades in, then you can press  to cut through.
Atreus hops on to direct, and you’ll need to follow his instructions to place the train back on the track ( 


 ).
).
Ride the train to the mines
When you’re ready to leave the area, interact with the train.
During the ride you’ll start being attacked by enemies through the windows. Use  and
and  to attack them with Kratos,
  any time prompted to have Atreus shoot arrows, and mash
  when a large number of enemies start appearing. When the train crashes, you’ll have one final
  input before stepping back onto solid ground.
Search the mines for Týr
Now in the mine area proper, you’ll need to take out another bunch of Grim before you can continue. This area has a bunch of large stones on the ground which you can throw at enemies. These explode on impact, causing fire effects if they don’t outright kill the enemies.
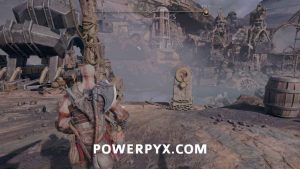
After dealing with all the Grim you can find a chain leading to the lower area to the south, but if you go down there you’ll only be able to grab a Hacksilver Chest and the Artefact”Lofheid’s Wetstone”.
 |
 |
You can also spot a Raven flying around the middle of the area. This is probably the best place to hit it from, but you can see it from most of the spots around the water if you don’t hit it here.
Climb back up and grapple onto the level above to continue through the area. You’ll need to destroy the sound stone blocking the path to continue along the walkway.
Just ahead you’ll see the first instance of the gold stones with the explosive pots sitting on top of them. These gold stones can only be destroyed by explosions created by these pots, so if you see gold rocks but no obvious pots, it normally means they’re hidden and you need to spot them from a different angle.
Continue through the hole behind the left gold rocks, then drop down to the lower level on the left. Just ahead will be the first time you encounter water troughs that you need to interact with to progress. Throwing your axe at the trough freezes the water where your axe is, which is used in a more complex way later. For now, this just allows you to jump across the platform when it lowers.
You’ll notice a Nornir Chest immediately in front of you. This one requires you to light all the braziers, like the one immediately to the left. Aim at them with your Blades using  , then
  to latch on and light it.
For the next two, drop down to the left, where you can also find a Materials Chest containing 3 x Rawhide.
These other two braziers need to be lit in a specific order. You might spot the first one right beside the water wheel, but you need to light that one last (the water will put it out if you light it second). Make sure you have retrieved your axe so that the water wheel has raised the platform in the middle, then grapple across to the other side where you can find the second brazier.
 |
 |
Before returning you can also look to the left of the brazier for the Rune Read “The Pit-Mine”.
Head back to the prior platform and pull out your axe. Throw it at the end of the trough to freeze it again, which stops the water from falling on the brazier. You can then light it, allowing you to open the Nornir Chest.
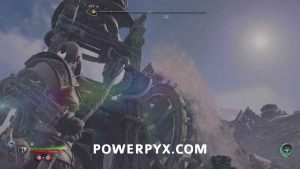 |
 |
Continue along the path to the right of the Nornir chest. When you reach what looks like a dead end, interact with the section of the wall with the climbing paint to boost Atreus up to the next level.
He’ll continue to the left on the higher platforms. Hit  to direct him to flip the switch that he starts waiting near.
This starts the platform just ahead moving up and down, you need to throw your axe at the gear to the right when the platform is flat with the ground, allowing you to jump across.
Jump underneath the first block, then look to the right where you can find a spot to hook your Blades to, pulling the water trough to the opposite side.
Jump underneath the now-raised block and move to the platform on the other side. Throw your axe at the end of the water trough to freeze it, causing the block to lower again, allowing you to grapple on top.
 |
 |
Hop off and interact with the gate once Atreus starts lifting it to move to the other side. Before continuing forward, you can take an immediate right and jump over the water, then continue down the path ahead to reach a Materials Chest containing 2 x Forged Iron.
Climb back up and follow the path to the spot with the cart. Interact with it to move it out of the way.
Some enemies will appear in the area, mainly Grim and Wretches, but also a couple Draugr. This will be the first time you fight them in the game, but they aren’t typically too much trouble. These first few are melee only, so you can treat them in the same way you treat the melee Grim.
After the enemies are dealt with there are still a couple of items you can grab in the area before heading into the mine. Take the path around to the right of the mine entrance (following the tracks that look back to where you just came from). At the dead end, you can blow up the pot on the left to open a path back around to the gates, then pull the attach spot with your Blades to move the water trough in the middle of the area.
 |
 |
Pulling the water causes the large crane in the area to swing toward you. Head back near the gate you came through and grapple up on top of the block being held by the crane.
You can then look towards the middle of the area and throw your axe at the water trough to freeze it, causing the crane to swing around back to the start point.
Drop off the ledge and grapple towards the ground again. Follow the path all the way up to find another of Kvasir’s poems, “Tool and Bang”, along with a Legendary Chest that contains the Blades handles “Pommels of the Undying Spark”.
Take the nearby zipline to get back to the mine entrance, and continue inside. If you notice the blue stone to the right you won’t be able to interact with it yet, you’ll need to come back later in the game to use it.
Keep following the path down into the mine. When you drop through some smaller cave areas you’ll need to destroy some sound stone to reveal a hole you can progress through.
After climbing out of the hole you’ll be in a large circular room, with a large enemy on the other side. This will be your first encounter with a Bergsra Mother. These enemies are kind of like Grim, but much larger, and will also spawn Wretches while they are alive. You can deal with them in a similar way to Grim overall though, watching for if they shoot ranged attacks at you, or dodging their melee attacks.
There are some items around the room you can destroy for some pickups, then when you are ready to progress head to the northeast side of the room and interact with the marked boat to take a short ride through the mines.
After hopping out of the boat you’ll find a shop where you can stop and upgrade your equipment if needed (you should have a Chaos Flame to use to upgrade your Blades), then continue down the path leading further into the mine. To progress, you’ll need to deal with the leading across the water, but first you can continue to the end of the path and destroy the wall by shooting it with a sonic arrow. On the other side you can find the Rune Read “The Vault”.
Now look out across the water towards the water wheel. First to start the water moving, you need to shoot the sound stone blocking the trough. Then with the water running, throw your axe at the trough directly above the lower one leading to the water wheel. If thrown in the correct spot this causes the water to fall to the lower section, turning the water wheel and raising the crane so you can cross to the door ahead.
 |
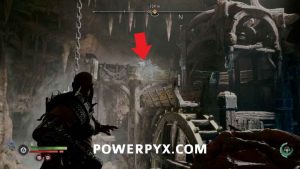 |
Head through the door to find a mostly empty room. You can open the Materials Chest to obtain 3 x Forged Iron, then you can destroy the sound stone blocking the hole in the wall to open a spot to continue through.
 |
 |
Continue following the path ahead, dealing with the handful of Draugr that appear in the next covered area. You need to head left to progress, but you can first move to the right and break through a wall to find the Lore Marker “Cooperation”, then continue back to the left.
You’ll have some more water troughs to deal with in this next area. Note that there is a side area to the right (blocked by some gold rocks with a pot on the other side) but you need to come back through here later on for cleanup later in the game so it’s easiest to just ignore that area for now. For the water puzzle in this area, you need to manipulate the water to get to the other side where the elevator is, then ride it to the top.
First, drop down to the immediate right where you can find a Materials Chest containing 3 x Forged Iron, then climb up the chain just past to reach a higher spot.
Climb up the ledge to the second level up, then look towards the water where you can use your Blades to pull a lever, blocking the water from the end of the trough.
Head back down to the spot leading to the elevator, where you can now see the water going out the left side of the top trough and falling to the lower one on the right. To get across first, throw your axe on the left side of the long trough to turn the water wheel on the left, raising the crane in the middle.
After crossing grab your axe, then through it at the trough to the right to stop the water wheel from turning, causing the elevator to move to the bottom floor. Hop on and grab your axe again to right it up to the top floor.
Before continuing to the door you can grab another Materials Chest. Turn around to face the water troughs and toss your axe at the nearest one again to stop the water, causing the elevator to drop again. As it moves down you can jump on top, grab your axe to raise it again, then jump off to the left to reach the Materials Chest, containing 2 x Slag Deposits.
 |
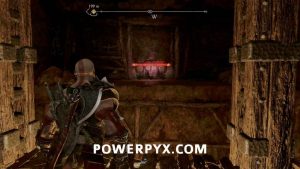 |
Hop back and continue through the next door. There will be a number of Wretches that appear for you to deal with. Once they are gone, head over to the southeast side of the room where there is a corpse stuck in the wall. Interact with it to obtain your first Relic, “Talisman of Meign”. You’ll go through a tutorial about equipping it, then a number of Grim will spawn in the room allowing you to try it out. When they’re all dealt with, continue through the now open hole in the wall where you picked up the Relic.
Follow the path ahead until you reach a gap. Look up above to spot a hanging container full of sound stone. Destroy it to reveal a grapple point, allowing you to cross to the other side.
On the upper level there is a metal plate you can kick on the left, allowing you to return to the lower level again if needed. You can then continue and take the next grapple point across to the left.
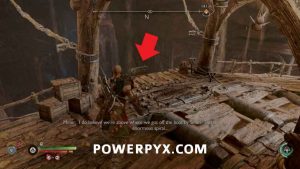 |
 |
Drop down to the left towards the door, but before heading in you can destroy the sound stone to the left to pick up the Artefact “Durinn’s Stone Statue”.
The Hatefu
The Hateful is a Fire Draugr that spawns from a fiery Draugr Hole. There are six of these at different locations, but they all work the same way, with this room in the mines being the first time they can appear. They will do a flurry attack, as well as an unblockable flame attack that creates a wall of fire, so dodge to the side when he does this. Partway through the fight two regular draugrs will spawn, so use this opportunity to use Spartan Fury to kill them quickly and heal off of them. The boss fight itself is just a matter of patience, dodging/blocking when they attack, and getting hits in when they’re vulnerable. Note that you aren’t required to fight them in this area to progress the story, so if you’re getting really stuck you can just reload the game and not enter this area. If you do decide to defeat them here you can pick up the Cursed Empress Handles (Blades Attachment) along with some materials and a Chaos Spark (Weapon Upgrade Shard). Chaos Sparks are 1/6 of a Chaos Flame, so you need to obtain 6 to make a full one (you get one from every Hateful kill, so you’ll eventually get one full Chaos Flame). This will also start the Favor “Born from Fire”, which tracks how many of the Hateful kills you have.
When you defeat The Hateful in this room you can then climb up to the second level where you can open a Legendary Chest for the Fortified Frost Knob (Axe Attachment).
Head back out of the room and grapple back to the central path. Continue to the left where you can find a chain pull. You’ll need to first destroy the sound stone on the lower level blocking the rope, then can raise it and zipline across.
You’ll now have one final water puzzle to reach the final door. First, you want to hop to the left side of the room and interact with the wall, boosting Atreus up so he can move to the other side of the room.
Hop back to the central platform and wait for Atreus to move to the switch. When you tell Atreus to pull it the switch will release a few sound stone chunks down the water trough. On this left section what you need to do is freeze the water right beside the water wheel, then release the stones. When they all hit the frozen spot they’ll get stuck and continue blocking the water, allowing you to remove you axe with the water still being blocked where you want.
The left water wheel raises the second crane ahead, so to reach it you can freeze the water in the trough just to the right for the other water wheel, raising the first crane and allowing you to cross.
Aim back towards where the stones are blocking the water wheel and you can direct Atreus to shoot the stones, releasing the water and moving the crane across to the door.
Before heading in, you can kill the one Raven located within the mines area, sitting against the wall across the room from the door. If you want you can also open a door just past the Raven, which opens a route back near the door where The Hateful is located.
Head through the next door, and look immediately to the right where you can find a Materials Chest containing 2 x Slag Deposits. You can then go across the room and crawl through the hole in the wall.
 |
 |
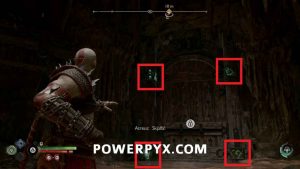
After exiting the hole, you’ll see a large door on the left. To open it, direct Atreus to shoot each of the sound stone block in the corners of the door, then interact with it.
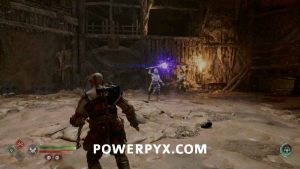
Before you’re able to open the door, some enemies will drop into the room. This is your first encounter with Einherjar. They behave like other human-sized enemies, but their main unique mechanic is the Bifrost attacks you’re told about in a tutorial. When their weapons glow purple a hit will deal Bifrost damage, turning a chunk of your health bar purple. If you’re hit while this purple bar is present it deals a large chunk of damage, so you want to avoid this if possible.
After they’ve been dealt with you can interact with the door again, mashing  to pull it off and trigger a cutscene.
Pursue Tyr
After the scenes are complete you will be temporarily separated from Atreus. Deal with the enemies that appear in the first room, then break through the wall on the southeast side and continue following the linear path.
More Einherjar will try to get in your way as you progress, so deal with them as appropriate. After the second set, you can grapple through the wall above.
There will be a new enemy, an Einherjar Brute. They have more health than the normal enemies and hit a bit harder, but are slower as a tradeoff. Use your shield and try to parry them to deal with them more easily.
Keep following the path after these enemies. As you progress you can spot a rock on the right with a glowing gold spot. These require a later item to deal with when you’re returning to this area, so any time you see these you can ignore them until you are explained how to interact with them later in the story (you use the same item as the vents you could have spotted earlier in the chapter).
Exit the mines with Tyr
After the scene where you reunited with Atreus and Tyr you can continue up the nearby path. Hope on the elevator when Tyr pulls it down, then interact with the crank to exit the mines.
Follow the path ahead until you reach an area where you’re attacked by some Grim. Deal with them, then head to the southeast and interact with the raft to enter. On the raft, you’ll have to press  +
+  , followed by mashing
  to pull your way back to where you first entered Svartalfheim.
Escape through the Mystic Gateway
Follow the path back to the Gateway. There will be one Einherjar enemy that drops in to attack you, but you can quickly dispatch them and continue to exit the area. When you interact with the gate you’ll automatically be selected to return to Sindri’s House.
Interact with the door of the house to enter.
Confer privately with Mimir
In the house you can take a stop at the shop if you need, then when you’re ready to progress head into the room to the right of the fireplace and interact with the barrel to place Mimir down and start a cutscene.
After the scene completes you’ll be outside the house. Walk around to the front to start the next story quest.
This finishes The Quest for Tyr in God of War Ragnarok.
Up Next: Old Friends
For all other quests refer to the God of War Ragnarok Walkthrough.











































Leave a Reply